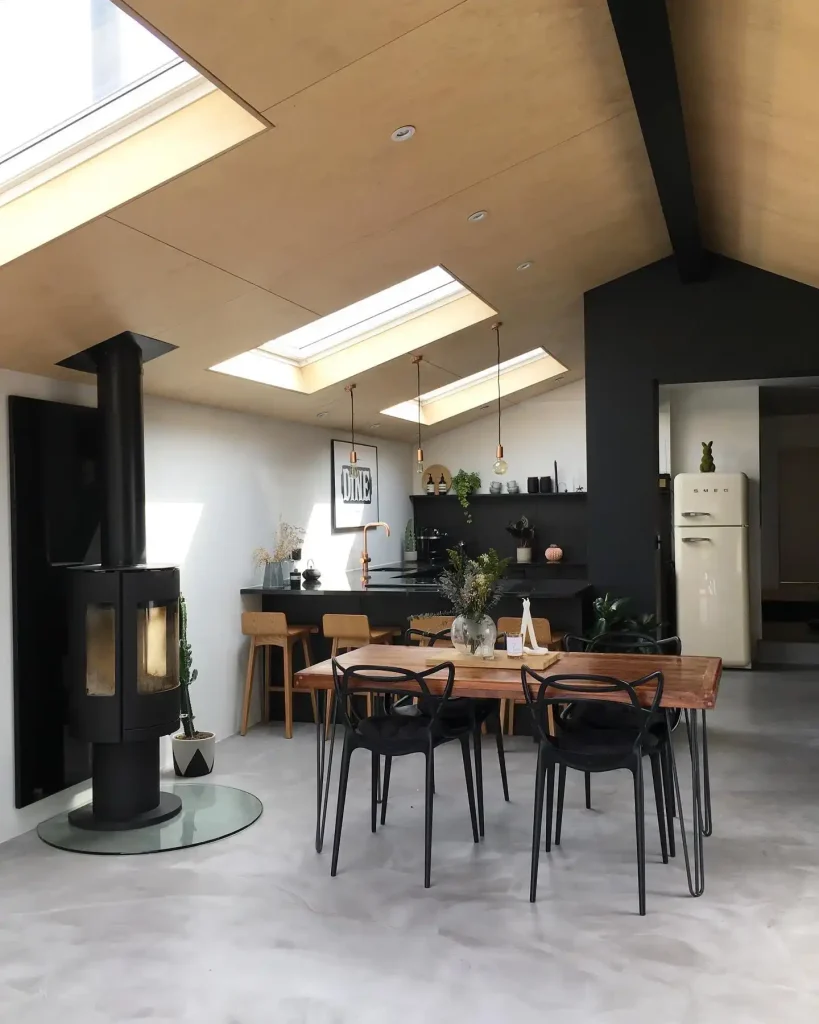
Your ceiling is the most neglected surface in your home. Walls get painted. Floors get new rugs. But the ceiling stays plain white for years while you walk beneath it every day and notice nothing.
The ceiling is actually one of the most impactful surfaces you can improve. A transformed ceiling changes how every room feels from the moment you walk in. And the best news is that extraordinary ceiling transformations cost far less than most people assume.
These 36 cheap DIY ceiling ideas prove that a stunning ceiling is achievable on almost any budget with basic tools and a weekend of work.
1. Paint the Ceiling a Bold Color for Maximum Impact
Painting the ceiling a bold color is the cheapest and most dramatic ceiling transformation available. A $30 tin of ceiling paint in deep navy, forest green, or warm terracotta changes a plain room into a designed space instantly. Nothing else in the home costs so little and delivers so much visual impact.
Most people default to white ceilings without ever considering alternatives. A bold ceiling color creates an enveloping quality that makes rooms feel more intimate, more designed, and more genuinely personal. The room stops feeling generic the moment the ceiling color becomes deliberate.
For a complete range of painted ceiling ideas covering colors, techniques, and design approaches that create beautiful ceiling treatments across every room type and budget, explore these painted ceiling ideas for comprehensive painted ceiling inspiration.
| Bold Ceiling Color | Atmosphere | Best Room | Wall Pairing |
|---|---|---|---|
| Deep navy | Cozy, sophisticated | Bedroom, study | Warm white or cream |
| Forest green | Natural, calm | Living room, dining | Cream or linen |
| Warm terracotta | Mediterranean, warm | Kitchen, living | Sandy white |
| Charcoal grey | Dramatic, modern | Home office, den | Light grey or white |
| Dusty rose | Soft, romantic | Bedroom, nursery | Warm white |
| Sage green | Fresh, botanical | Any room | White or warm grey |
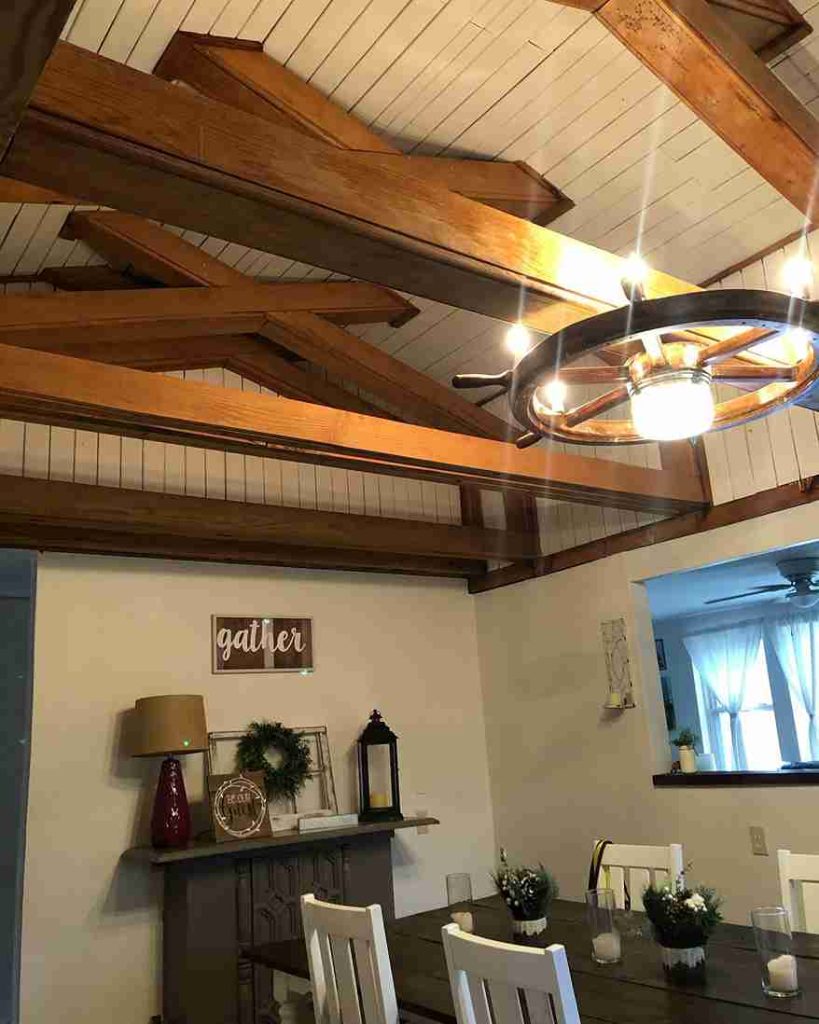
2. Leave Joists Exposed and Paint Them Black
An exposed joist ceiling with everything painted flat black is one of the most popular and most affordable industrial ceiling treatments. Leave the ceiling structure completely as-is. Paint every visible element — joists, pipes, ducts, wires, and structural elements — the same flat black color. The chaos disappears and a deliberately industrial aesthetic appears.
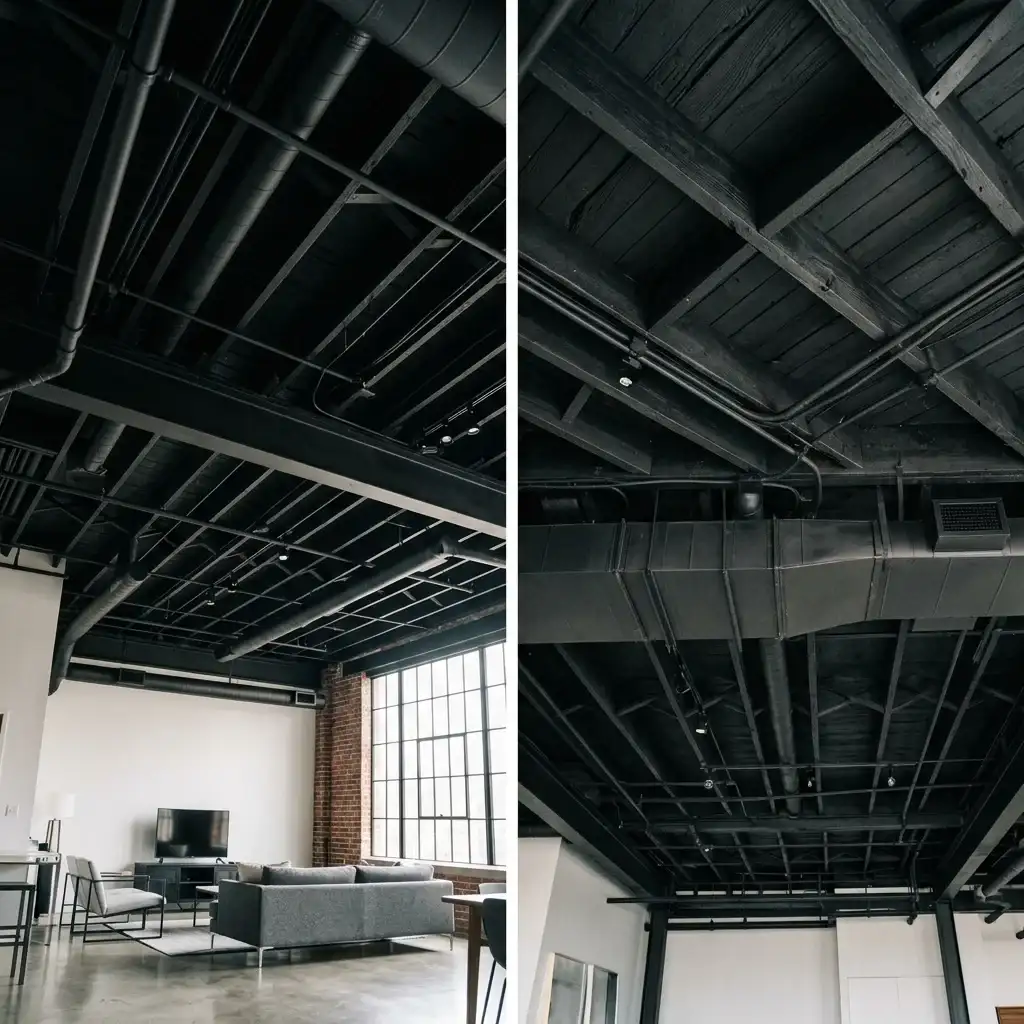
This approach costs only the price of paint — typically $30–$60 for a standard room. No demolition, no new materials, no structural work. The existing ceiling becomes the design feature rather than something to hide. The flat black treatment creates immediate, dramatic visual impact for almost no investment.
For a complete guide to painted exposed ceiling approaches, finishes, and colors that create the most beautiful exposed ceiling results, explore these painted exposed basement ceiling ideas for every approach to transforming an exposed ceiling with paint.
| Exposed Joist Paint Color | Effect | Cost | Best Space |
|---|---|---|---|
| Flat black | Industrial, loft | Very Low | Basement, garage, bar |
| Dark grey | Softer industrial | Very Low | Office, den, living |
| Crisp white | Open, airy, modern | Very Low | Any room |
| Deep navy | Dramatic, rich | Very Low | Bedroom, media room |
3. Install Peel-and-Stick Wood Planks
Peel-and-stick wood plank panels are the easiest and most beginner-friendly ceiling upgrade available. They apply directly to any clean, flat surface with no nails, no tools, and no construction experience. The adhesive backing holds firmly overhead when applied to a clean, properly prepared surface.
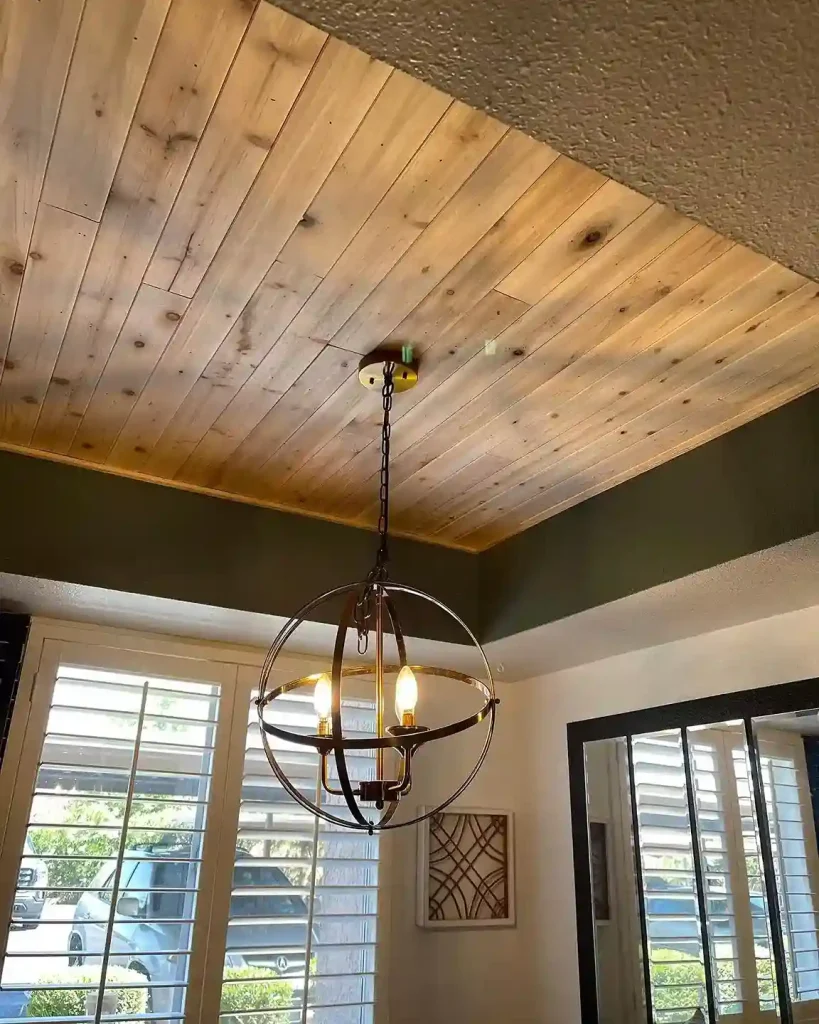
A full bedroom ceiling can be completed in a single afternoon for under $100 in materials. The realistic wood-look finish transforms the ceiling instantly. Peel-and-stick planks are completely renter-friendly — they remove cleanly at the end of a tenancy without damaging the existing surface beneath.
For the complete range of cheap wood ceiling ideas covering every material, installation method, and finish option including peel-and-stick planks and every other affordable wood ceiling approach, explore this comprehensive guide on cheap wood ceiling ideas for the full resource on budget wood ceilings.
4. Hang Fabric From the Ceiling for a Dramatic Tent Effect
Fabric draped from the ceiling creates extraordinary atmosphere for almost zero cost. A full room fabric tent covering costs $20–$60 in basic muslin or lightweight cotton. The draped fabric transforms any room from a plain box into an intimate, tent-like sanctuary.
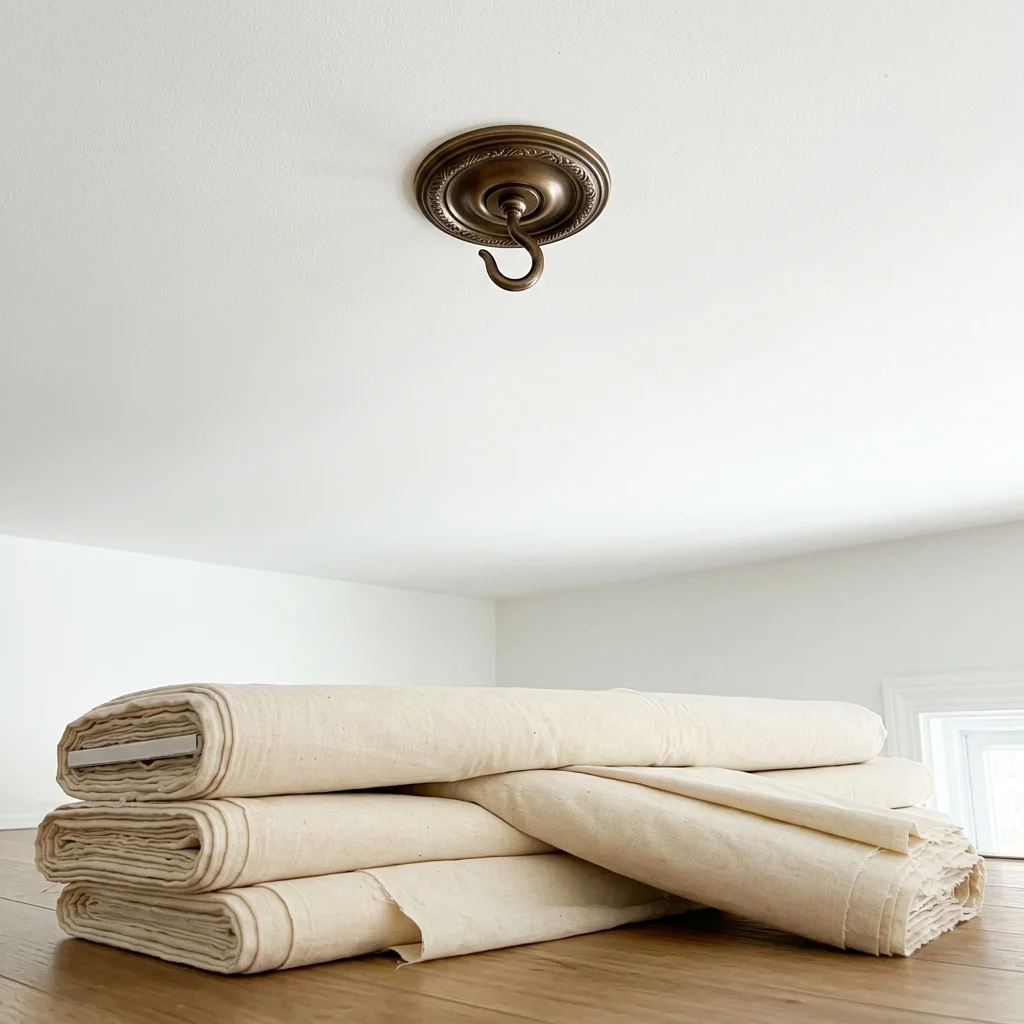
Attach a large ring or medallion at the central ceiling point. Thread multiple fabric lengths through the ring before mounting. Pull each length outward to a hook or curtain rod at the wall perimeter. The gathered center and the falling lengths create the tent effect. Add string lights beneath the fabric for an extraordinary glowing atmosphere after dark.
For complete soft ceiling fabric ideas covering every fabric type, draping method, and room application from bedrooms to nurseries to event spaces, explore these soft ceiling fabric ideas for the complete guide to fabric ceiling transformations.
| Fabric Type | Tent Effect | Cost per Panel | Installation |
|---|---|---|---|
| White muslin | Classic, soft, airy | $5–$10 | Very Easy |
| Cream linen | Warm, elegant | $10–$20 | Easy |
| Sheer voile | Dreamy, cloud-like | $8–$15 | Very Easy |
| Dark canvas | Dramatic, enclosing | $8–$15 | Easy |
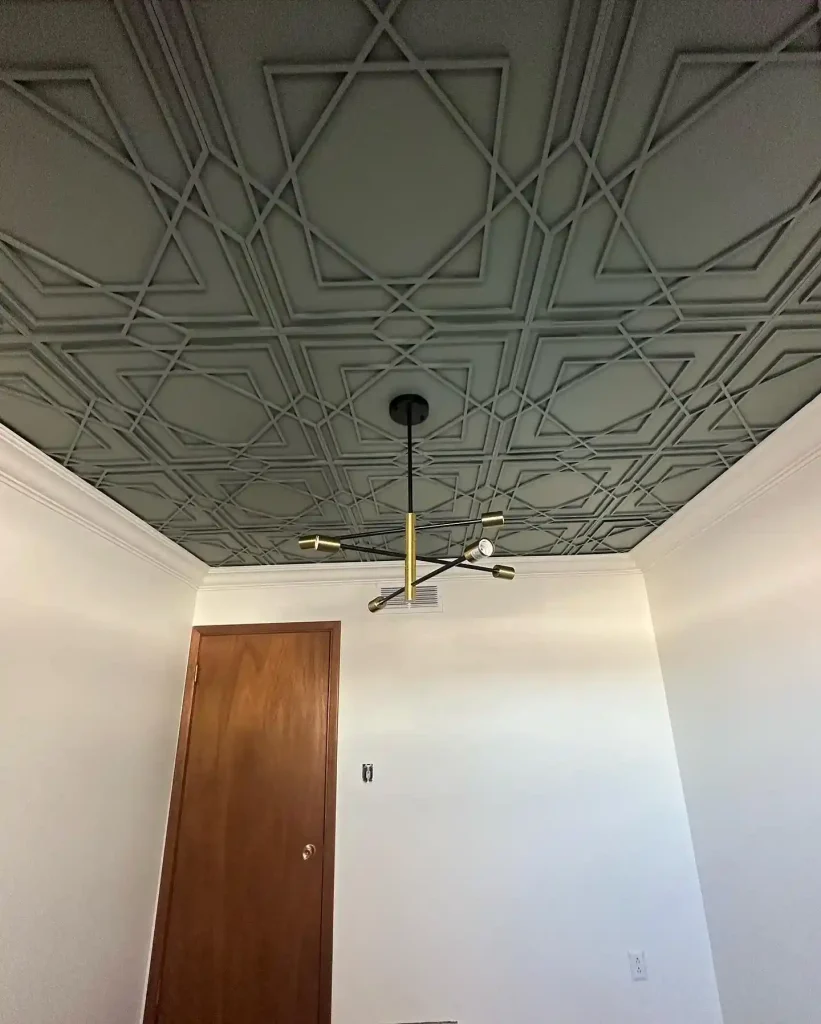
5. Create a Faux Coffered Ceiling With MDF Trim
A faux coffered ceiling uses MDF or pine trim pieces arranged in a rectangular grid pattern on the existing ceiling surface. The trim creates the visual impression of deep structural panels without any actual structural work. Paint everything the same white or cream color for a seamless, built-in result.
The materials for a faux coffered ceiling cost $80–$200 for a standard room. The installation requires only a finish nailer, a miter saw, and construction adhesive. The result looks genuinely architectural and adds significant perceived home value at a fraction of the cost of a real coffered ceiling installation.
- Measure and mark the grid pattern carefully on the ceiling before cutting any trim
- Create evenly sized rectangular panels — 18 to 36 inches wide looks most proportional
- Nail trim to the ceiling drywall with a finish nailer and construction adhesive
- Fill all nail holes and miter joints with paintable caulk before painting
- Paint ceiling, trim, and all grid elements the same color for a seamless built-in result
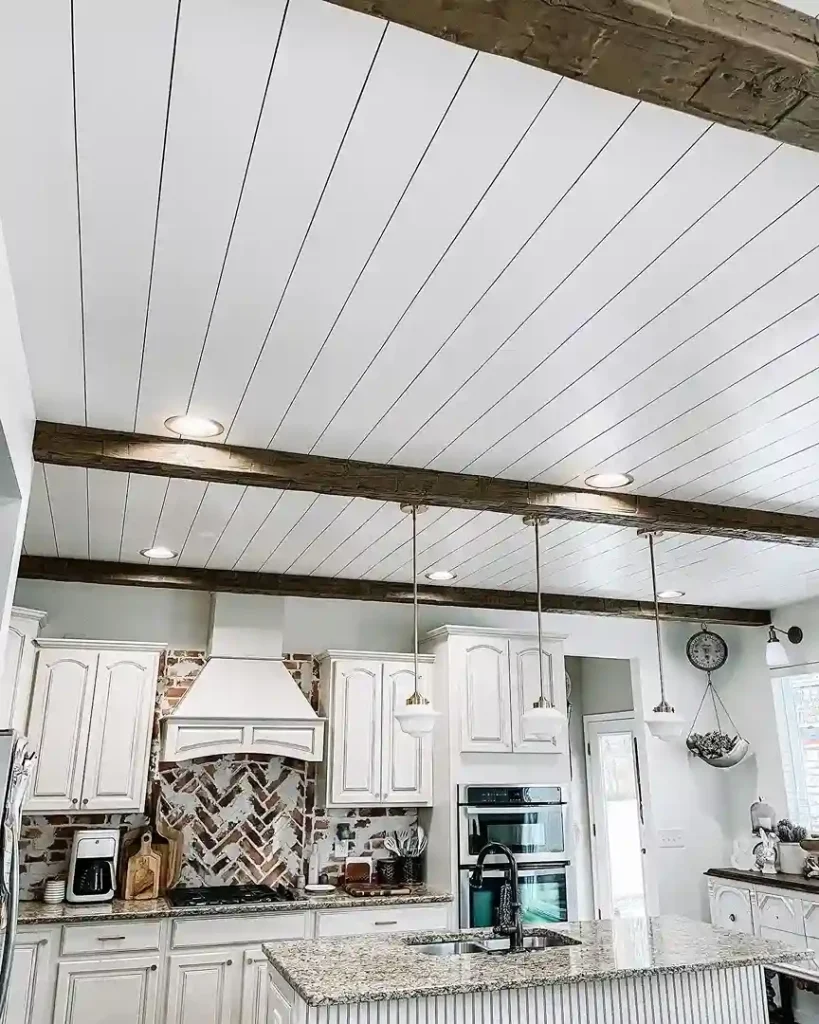
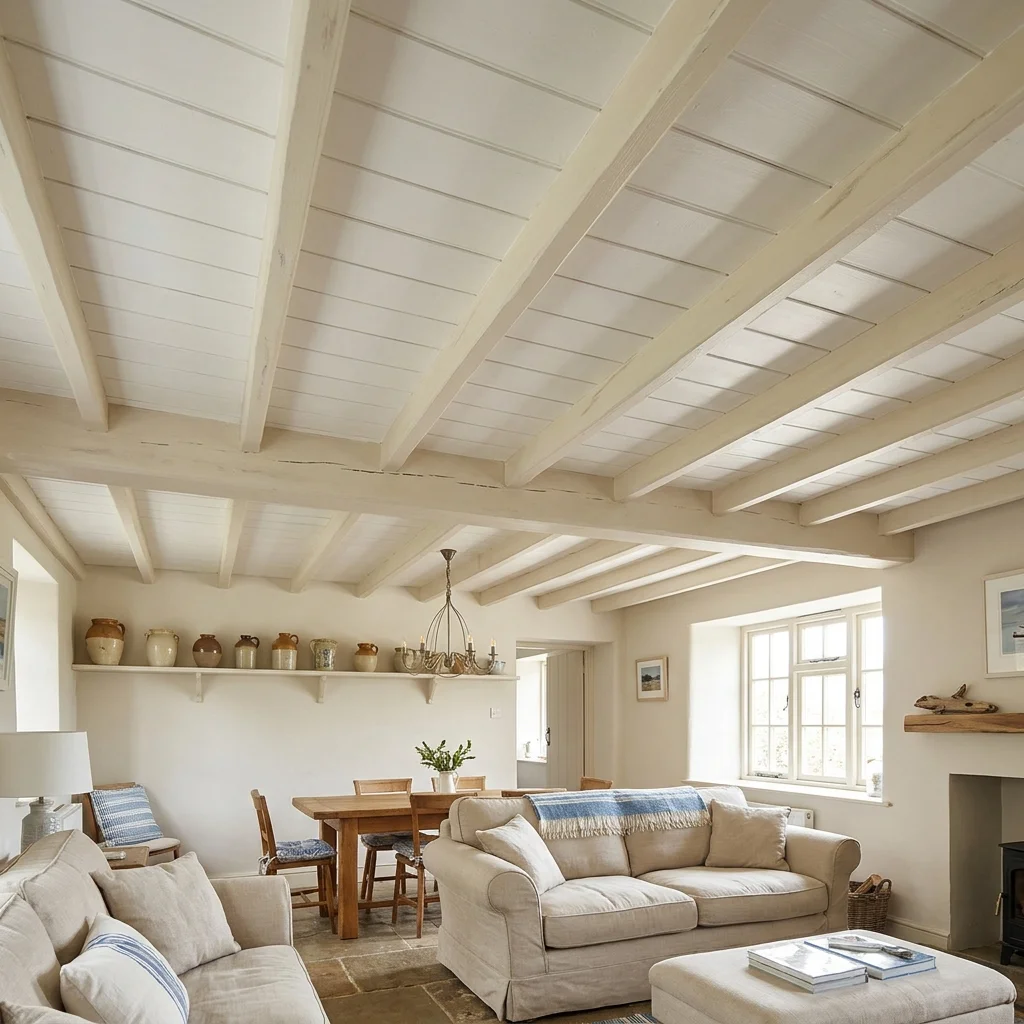
6. Add DIY Faux Wood Beams From Lumber
DIY faux wood beams built from three boards assembled into a hollow U-shape create the appearance of solid structural ceiling beams at a fraction of the cost of real timber. The hollow box beam looks completely convincing from a normal viewing distance in the room.
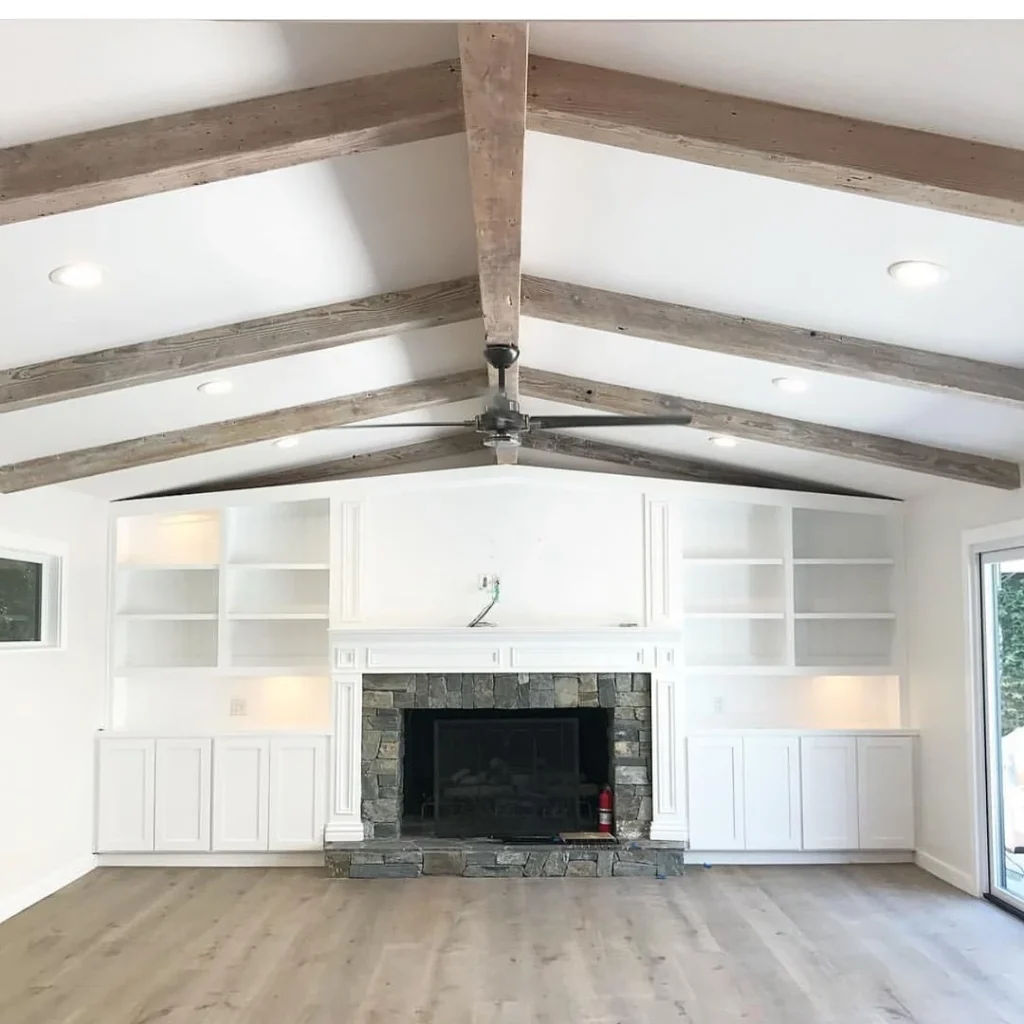
Materials for a full set of five or six box beams cost $150–$300 in lumber and hardware. Install a nailer strip on the ceiling and slide the box beam over it. Paint or stain to suit the room aesthetic. The transformation from a plain ceiling to a beamed ceiling is one of the most dramatic cheap DIY ceiling projects available.
For a complete guide to faux wood beam design, sizing, spacing, finishing, and installation covering every approach to creating beautiful ceiling beams affordably, explore these faux wood beams ceiling ideas for the full faux beam ceiling resource.
| Box Beam Size | Room Ceiling Height | Material Cost per Beam | DIY Time per Beam |
|---|---|---|---|
| 3×3 inches | Under 8 feet | $15–$25 | 1–2 hours |
| 4×4 inches | 8–9 feet | $20–$35 | 1–2 hours |
| 5×5 inches | 9–10 feet | $25–$45 | 2–3 hours |
| 6×6 inches | 10+ feet | $35–$60 | 2–3 hours |
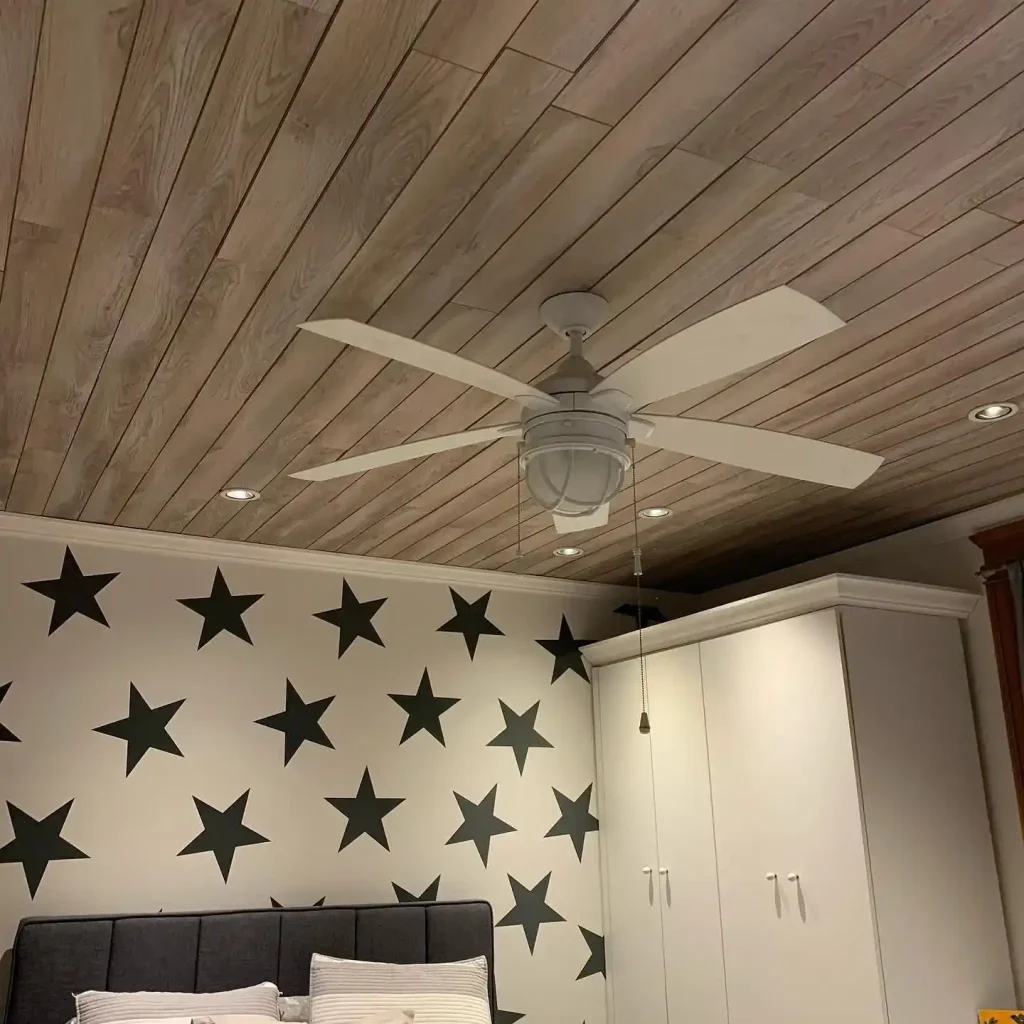
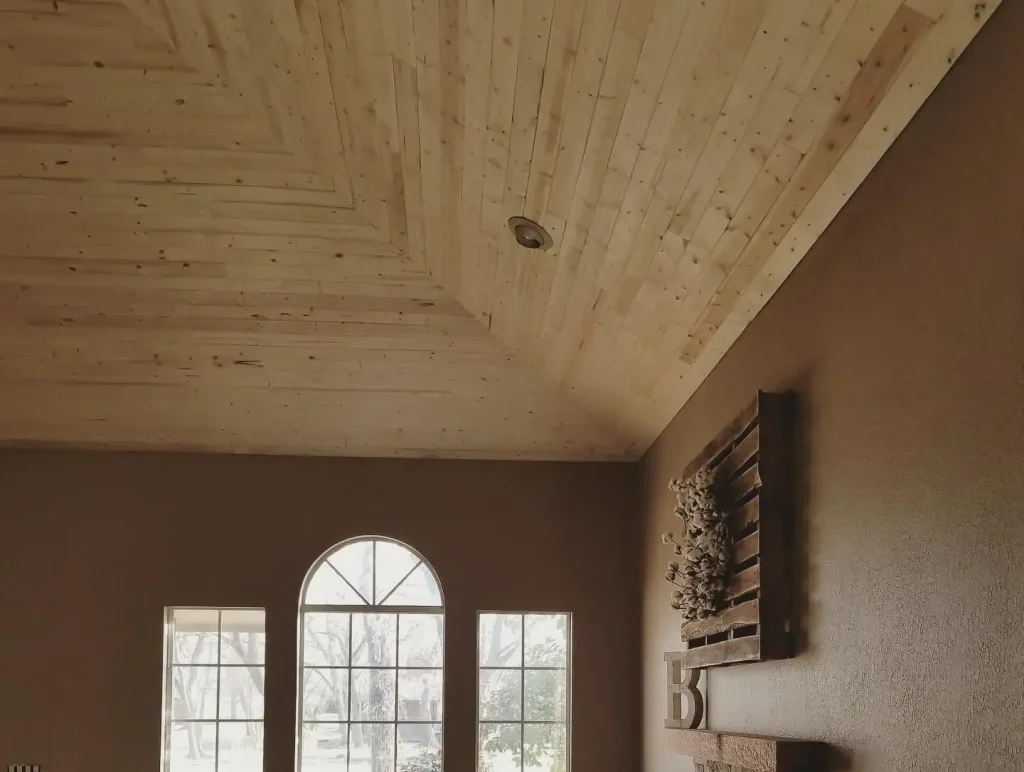
7. Install Shiplap Boards for Farmhouse Character
Shiplap boards on the ceiling create beautiful farmhouse character at modest material cost. Basic pine shiplap from a lumber yard costs $1.50–$3 per square foot. The overlapping board edges create subtle shadow lines that add texture and depth that flat painted ceilings cannot provide.
For a complete shiplap ceiling design guide covering installation techniques, finish options, and design applications across every room type and budget, explore these shiplap ceiling ideas for the comprehensive shiplap ceiling resource from planning through installation.
Painted white, shiplap makes even a low ceiling feel brighter and more finished. Natural wood shiplap adds cabin-like warmth. Whitewashed shiplap creates a coastal atmosphere. Each finish suits a different design direction at the same material cost.
8. Use Plywood Sheets for the Cheapest Wood Coverage
Plywood sheets cover large ceiling areas at the lowest possible material cost per square foot. A 4×8 foot sheet of 1/4-inch plywood costs $15–$25 and covers 32 square feet. A full bedroom ceiling needs seven to ten sheets costing $100–$200 in total — the most affordable wood ceiling option by a significant margin.
Sand all sheet surfaces smooth before installation. Fill any surface voids with wood filler and sand flush. Prime and paint for a beautiful smooth ceiling. Apply stain for a natural wood appearance. Plywood accepts paint, stain, and whitewash equally well and the subtle grain texture adds depth that drywall cannot provide.
| Plywood Grade | Appearance | Cost per Sheet | Best Use |
|---|---|---|---|
| Birch plywood | Fine, even grain | $25–$45 | Visible wood grain finish |
| Pine plywood | Knots, character | $15–$25 | Painted finish |
| OSB (oriented strand board) | Industrial, textured | $10–$18 | Industrial ceiling treatment |
| Underlayment plywood | Smooth, paintable | $20–$35 | Smooth painted ceiling |
9. Create a Stenciled Ceiling Design
Stenciling adds pattern and color to a plain painted ceiling for almost no cost. A stencil costs $10–$20. A small pot of contrasting paint costs $5–$15. The resulting patterned ceiling looks as though a professional decorator created it.
Geometric patterns, botanical designs, and medallion stencils all work beautifully on ceilings. Use a dense foam roller rather than a brush to apply the stencil — the roller deposits paint evenly without pushing it under the stencil edges. Work in small sections, repositioning the stencil carefully at each repeat.
A stenciled border around the ceiling perimeter creates an elegant framing effect at very low cost and effort. A full ceiling stencil pattern creates a wallpaper-like effect overhead. Both approaches transform a plain white ceiling into a genuinely designed surface for under $30 in total materials.
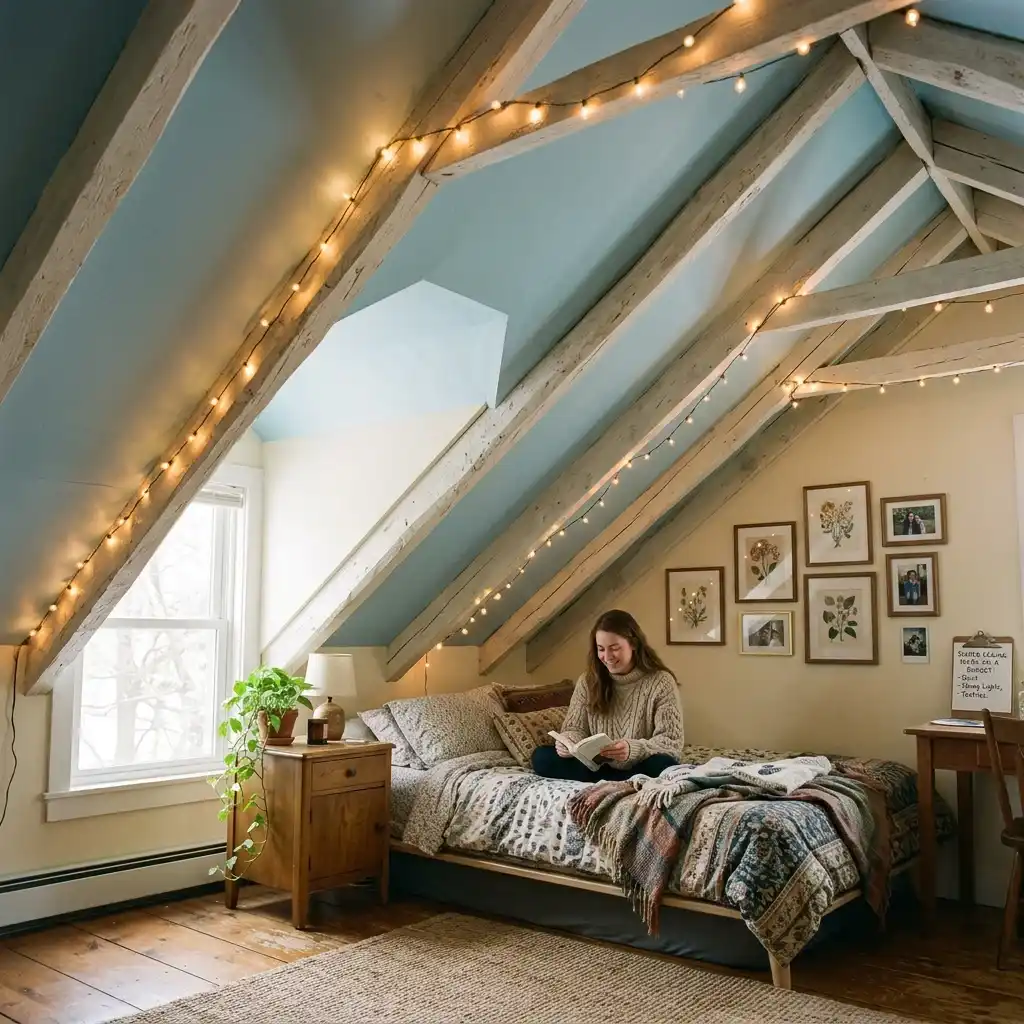
10. Hang String Lights for Instant Atmosphere
String lights are not just for outdoor spaces and Christmas trees. Hung across a ceiling in a grid pattern, from a central point outward, or along exposed beams, they create warm, magical atmosphere at extremely low cost.
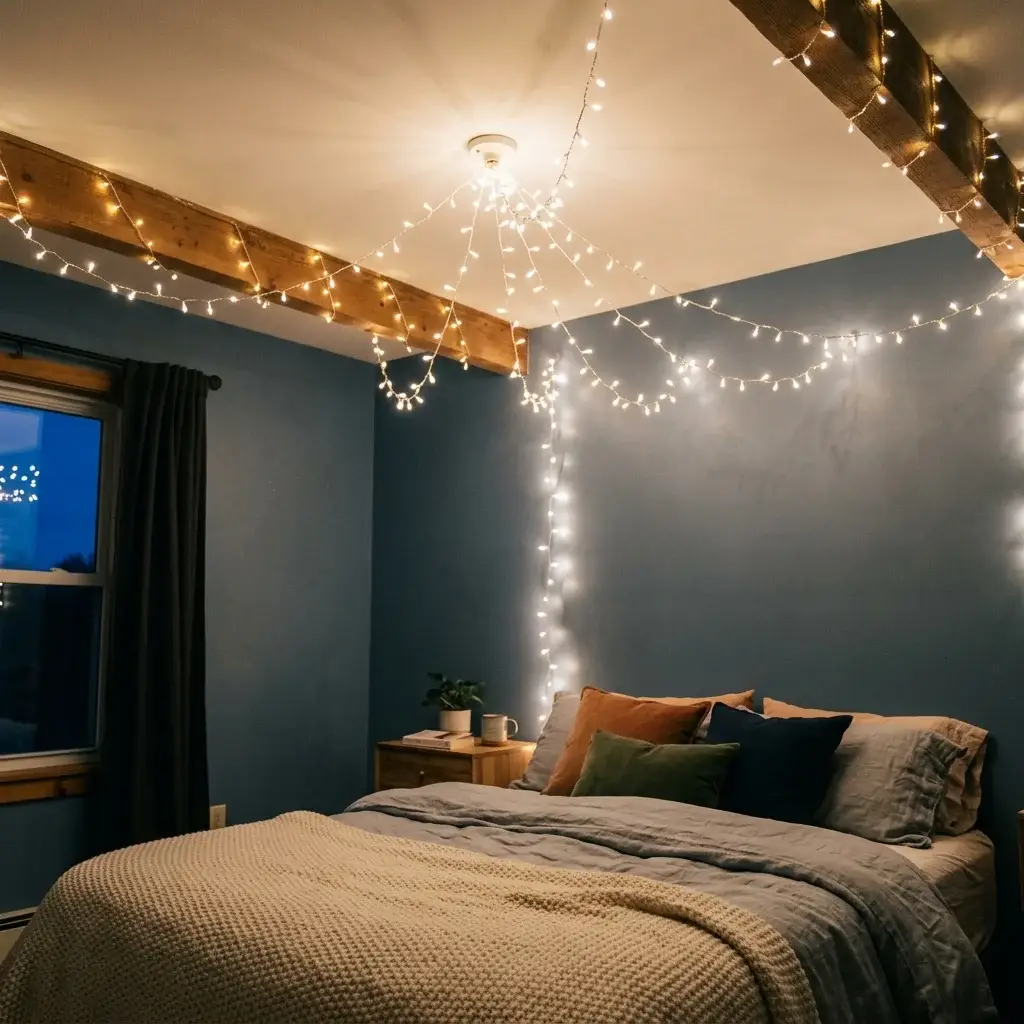
An entire bedroom ceiling covered in warm white string lights costs $20–$50 in lights. Mount cup hooks into ceiling joists — not just drywall — for secure attachment. Run lights back and forth across the ceiling at 12-inch spacing for a full canopy effect. The warm glow transforms any room into an extraordinary evening environment.
- Use warm white bulbs at 2200–2700 Kelvin for the most welcoming, magical glow
- Mount hooks into ceiling joists rather than drywall for secure long-term attachment
- A smart plug with a sunset timer automates the lights completely
- Layer string lights with regular lighting rather than replacing it entirely
- String lights behind a sheer fabric ceiling panel create a glowing fabric ceiling effect
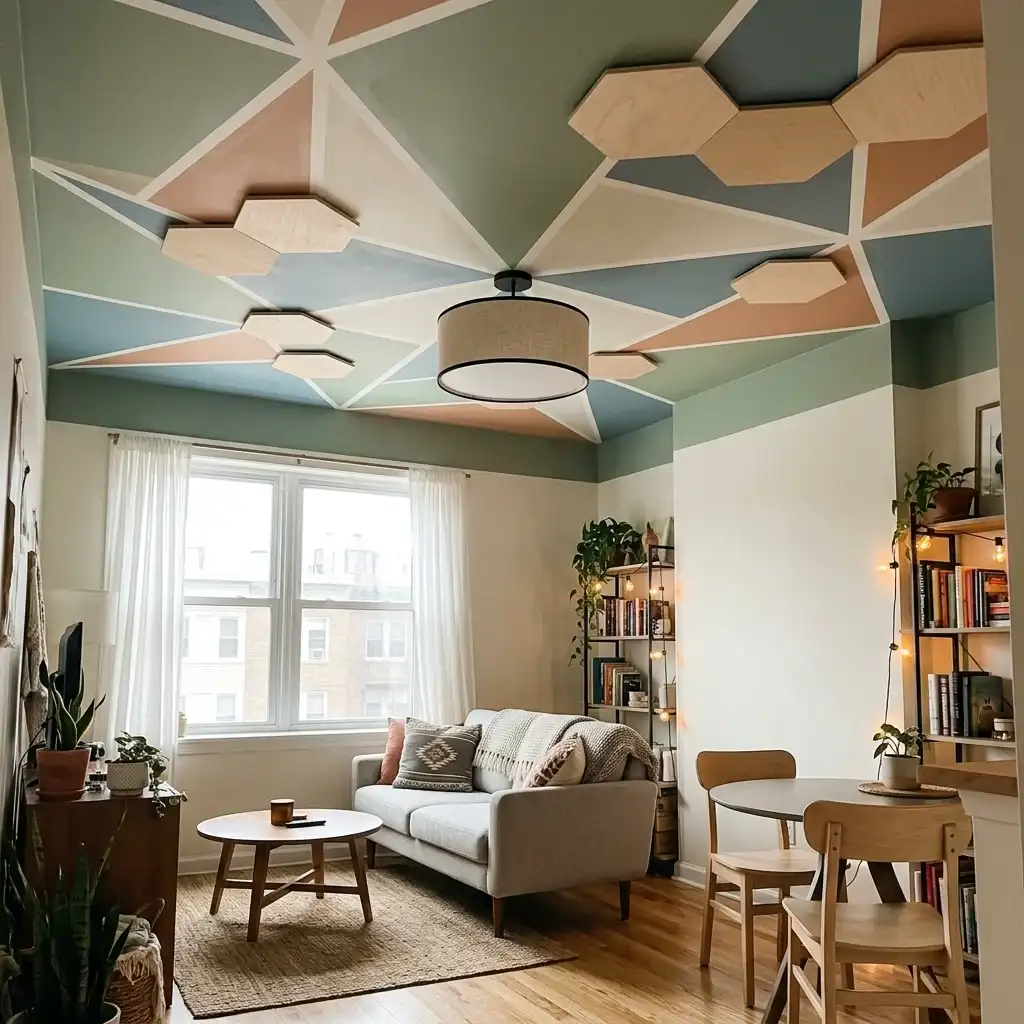
11. Apply Geometric Tape Patterns
Painter’s tape applied in geometric patterns on the ceiling creates the impression of complex decorative ceiling work for almost no cost. Paint sections between the tape lines in contrasting colors. Remove the tape to reveal perfectly crisp lines and a boldly geometric ceiling design.
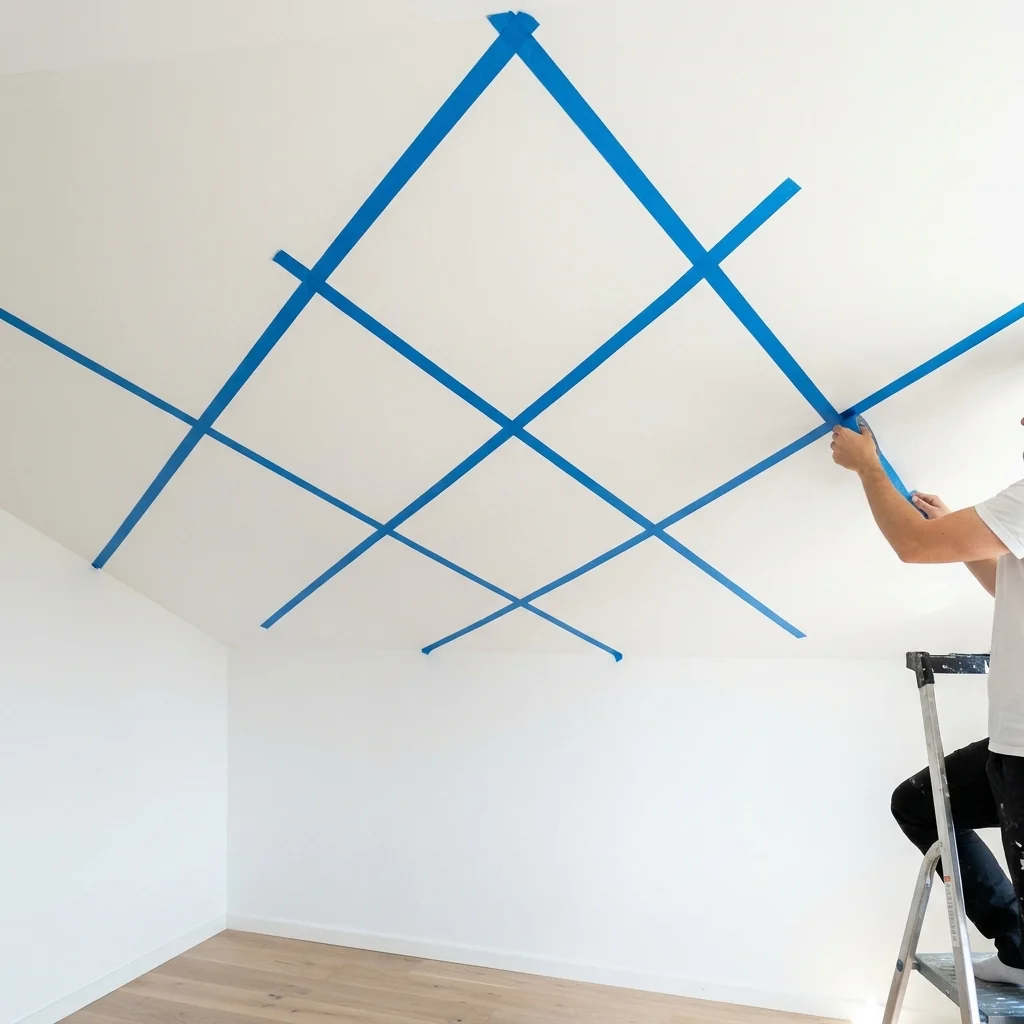
A simple diamond pattern costs nothing beyond the tape and paint. A more complex triangular or hexagonal pattern requires careful measurement and marking but creates an extraordinary visual result. The geometric tape ceiling suits contemporary, bohemian, and Scandinavian interior styles particularly well.
| Geometric Pattern | Complexity | Time Required | Material Cost |
|---|---|---|---|
| Simple stripe | Easy | 2–3 hours | Under $15 |
| Diamond | Moderate | 3–4 hours | Under $20 |
| Herringbone | Moderate | 4–5 hours | Under $20 |
| Complex triangle | Advanced | 5–8 hours | Under $25 |
12. Install a Medallion Around the Light Fixture
A ceiling medallion installed around the light fixture transforms a plain junction box into a genuine decorative architectural feature. Lightweight polystyrene medallions cost $10–$40 at hardware stores. They paint easily and install in minutes with construction adhesive.
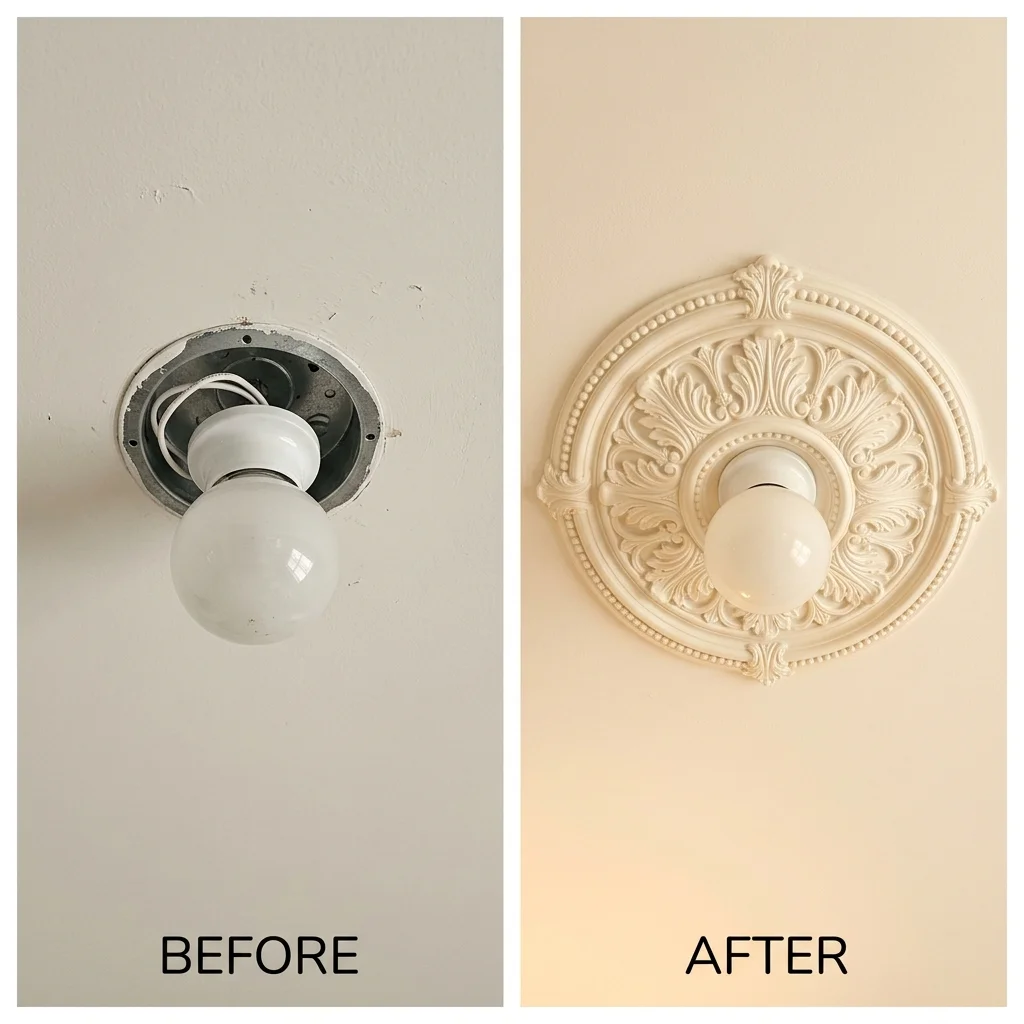
Choose a medallion diameter proportional to the room size. An 8-inch medallion suits a small bedroom fixture. A 24-inch medallion suits a dining room chandelier. A layered double medallion — one smaller inside one larger — creates greater drama for the same installation effort.
For rooms where a plain drywall ceiling meets a simple light fitting, the medallion is the single most impactful and most affordable ceiling upgrade available. The architectural detail it creates makes the ceiling look as though it belongs in a home of significantly higher design quality.
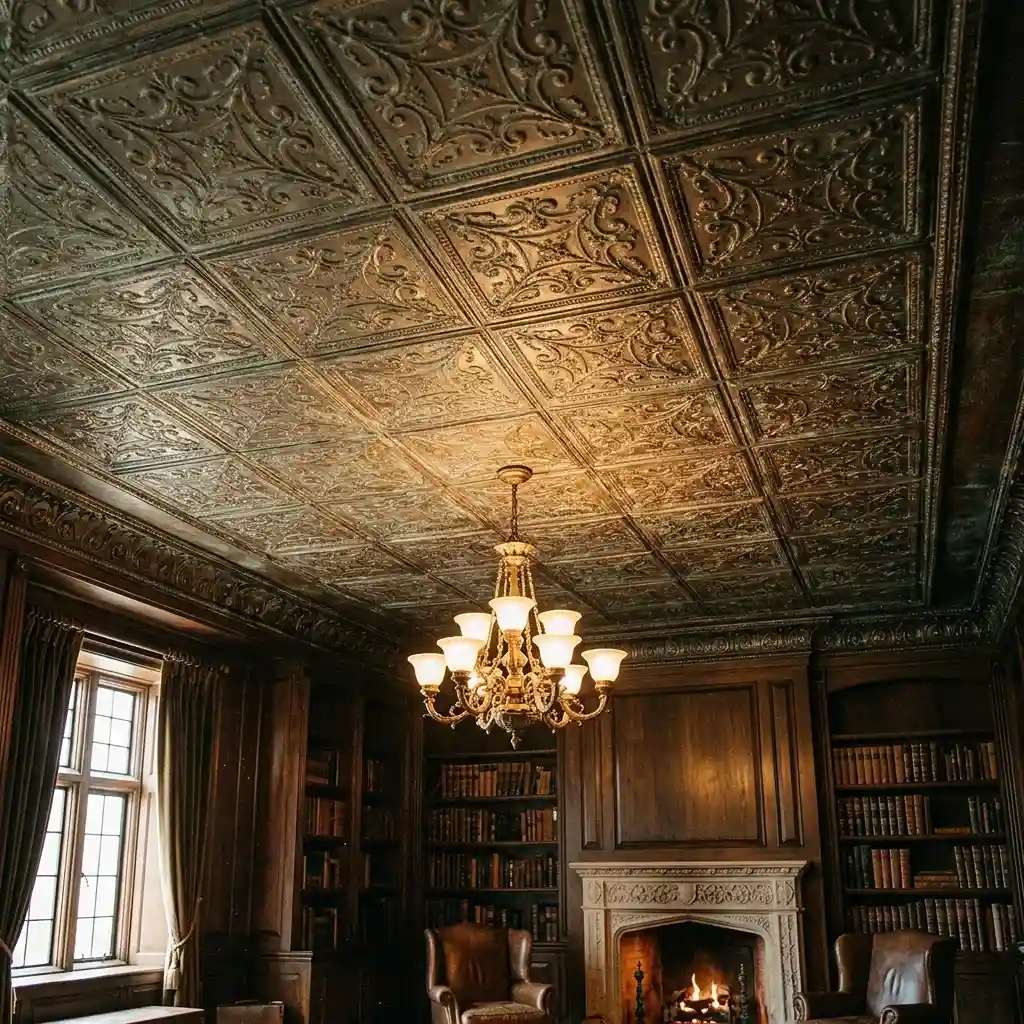
13. Create a Tin Tile Ceiling With Peel-and-Stick Tiles
Peel-and-stick tin-effect tiles create the appearance of a pressed tin ceiling — traditionally an expensive architectural feature — for under $2 per tile. Applied in a grid across the ceiling, they create a richly textured, Victorian-inspired overhead that suits traditional, vintage, and industrial interiors.
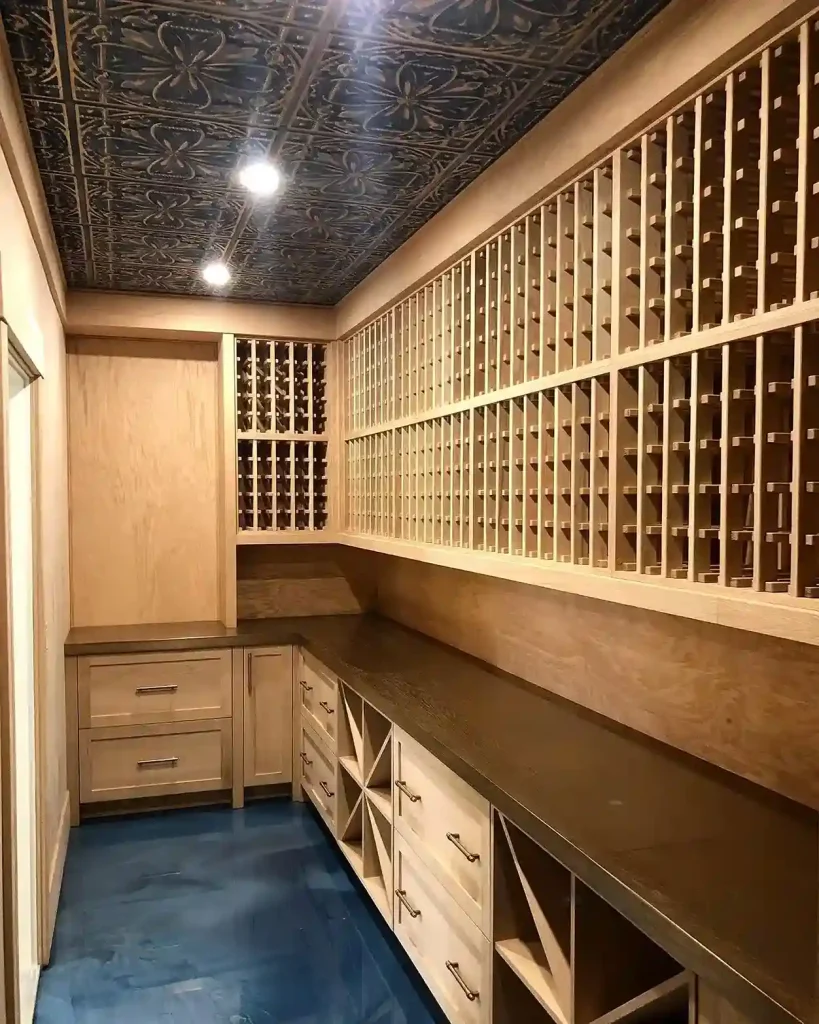
Peel-and-stick tin tiles apply directly to an existing smooth ceiling surface. No adhesive, no nails, no professional help. A full dining room ceiling costs $60–$120 in tiles. Paint the installed tiles in antique white, aged copper, or flat black for different aesthetic results.
For complete ceiling ideas covering every style from rustic wood to industrial tin, explore these exposed basement ceiling ideas for ceiling design inspiration that applies across every room type and aesthetic direction.
| Tin Tile Paint Finish | Aesthetic | Effect | Additional Cost |
|---|---|---|---|
| Antique white | Victorian, classic | Elegant | $10–$20 paint |
| Aged copper | Warm industrial | Rich, dramatic | $10–$20 metallic |
| Flat black | Modern industrial | Bold, graphic | $10–$20 paint |
| Silver metallic | Contemporary | Sleek, bright | $10–$20 metallic |
14. Add a DIY Wood Plank Ceiling to a Home Office
A DIY wood plank ceiling in a home office transforms the work environment completely. The natural warmth overhead makes the space more inspiring, more comfortable, and more genuinely enjoyable to spend time in throughout the working day.
For complete home office design ideas covering every element of creating a productive, inspiring workspace where a DIY wood ceiling contributes significantly to the office’s overall quality and atmosphere, explore this comprehensive guide on home office ideas for everything needed to design an exceptional home office.
A whitewashed plank ceiling above a simple desk and white walls creates a clean, Scandinavian home office aesthetic that keeps the workspace feeling calm and focused. Natural pine planks create a warmer, more creative atmosphere. Both approaches cost under $300 in materials for a standard home office ceiling.
15. Install a Bamboo Panel Ceiling
Bamboo ceiling panels are a sustainable, affordable, and genuinely beautiful ceiling material. Natural golden bamboo adds warmth that suits kitchens, sunrooms, and casual living spaces. Bamboo is lighter than most wood species and installs easily with standard nails or adhesive.

Bamboo panels cost $2–$5 per square foot — comparable to low-cost wood options but with the added benefit of being one of the most sustainable building materials available. The warm golden tone of natural bamboo creates an immediately pleasant ceiling atmosphere in any room.
| Bamboo Panel Type | Color | Cost per sq ft | Best Room |
|---|---|---|---|
| Natural golden | Warm honey | $2–$4 | Kitchen, sunroom, dining |
| Carbonized | Dark brown | $3–$5 | Den, study, bar |
| Woven mat | Textured natural | $2–$4 | Boho, tropical rooms |
| Painted bamboo | Any color | $2–$4 | Any style room |
16. Create a Basement Ceiling With Paint and Lights
A painted basement ceiling with carefully planned lighting creates a genuinely inviting below-grade room. For complete exposed basement ceiling ideas covering every approach to transforming basement ceilings from raw to beautiful with paint and supplementary treatments, explore these exposed basement ceiling ideas for comprehensive basement ceiling transformation guidance.
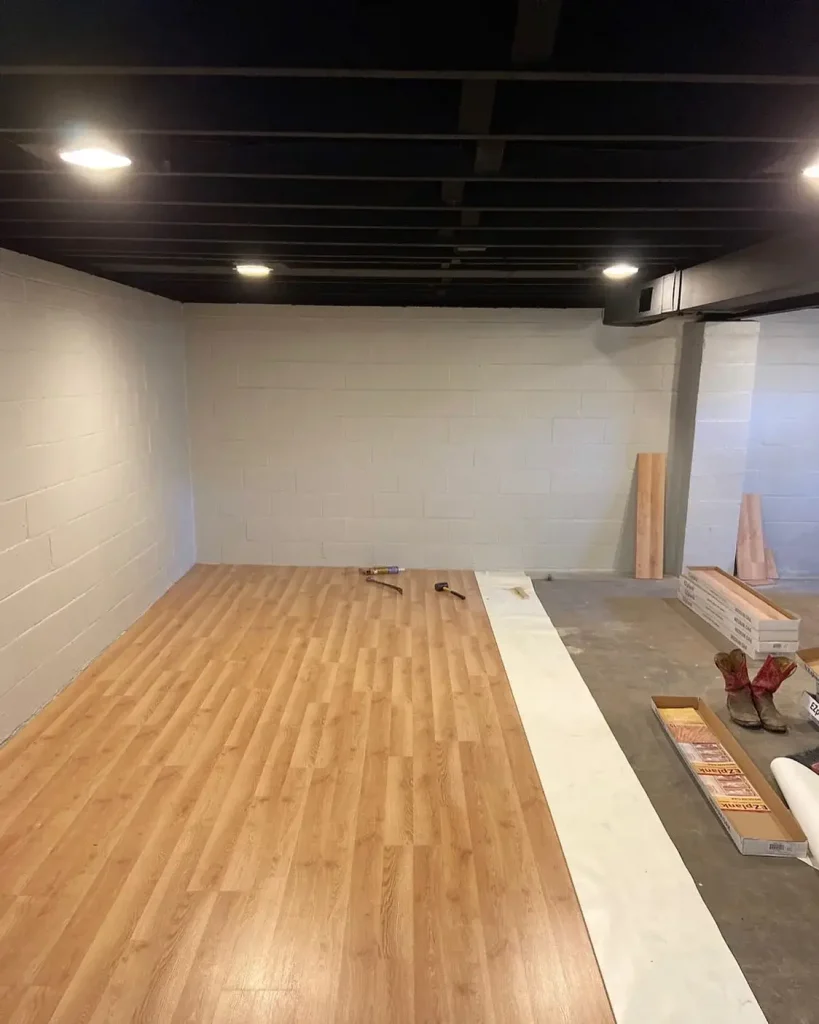
Paint all exposed basement ceiling elements — joists, pipes, ducts, and wires — the same flat color. White creates the brightest basement atmosphere. Black creates the most dramatic. Warm pendant lights hanging at comfortable heights below the painted structure create a warm, layered ceiling treatment that costs almost nothing beyond paint.
17. Hang Macramé for a Bohemian Ceiling Feature
A large macramé panel hung from the ceiling creates a beautiful bohemian ceiling feature at very low cost. Macramé panels in natural cotton rope add texture, warmth, and handcrafted quality that transforms any ceiling into an extraordinary design moment.

Position a single large macramé panel above the bed, above the dining table, or above a reading area. The panel hangs from a wooden dowel suspended from two ceiling hooks. Add dried botanical bundles to the dowel alongside the macramé for an even richer boho ceiling display.
A full macramé ceiling installation with multiple overlapping panels, hanging plants, and woven elements creates one of the most extraordinary and most personal ceiling treatments available — all for under $100 in materials and a few hours of creative effort.
18. Apply Limewash Paint for a Textured Ceiling
Limewash paint creates a beautiful, organic, subtly textured ceiling surface that looks completely different from ordinary flat paint. The patchy, layered quality of limewash creates depth and visual interest that flat paint cannot achieve. The technique is simple and the materials are inexpensive.

Apply limewash paint over the existing ceiling with a wide brush using irregular, overlapping strokes. The uneven application creates the characteristic patchy depth of limewash. Work in sections and vary the stroke direction. The finished ceiling has a beautiful, aged plaster quality that suits cottage, rustic, and Mediterranean interiors.
| Limewash Application | Technique | Drying Time | Cost per Room |
|---|---|---|---|
| Single coat | Light, transparent | 2–4 hours | $20–$40 |
| Double coat | Medium depth | 4–8 hours | $30–$60 |
| Layered colors | Maximum depth | 8–12 hours | $40–$80 |
19. Create a Celestial Ceiling on a Budget
A celestial painted ceiling turns an ordinary room overhead into an extraordinary cosmic environment. For the complete range of celestial ceiling ideas covering paint techniques, star maps, galaxy murals, and every approach to creating a beautiful cosmic ceiling on any budget, explore these celestial ceiling ideas for every affordable celestial ceiling approach.
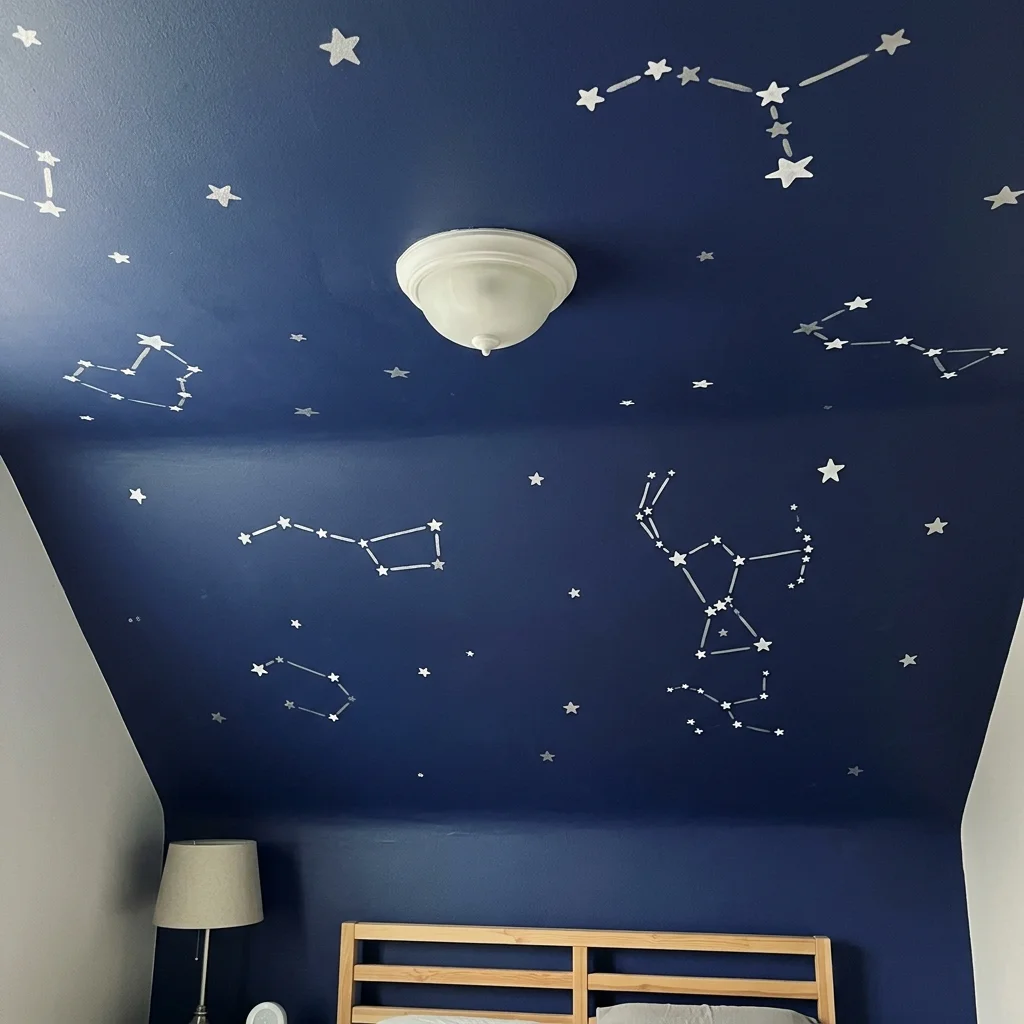
The most budget-friendly celestial ceiling uses flat black or deep navy paint as the base. Dip a toothbrush in white paint and flick it across the ceiling surface to create scattered star effects. Add larger stars with a small round brush. The entire material cost for a star-painted bedroom ceiling is under $40.
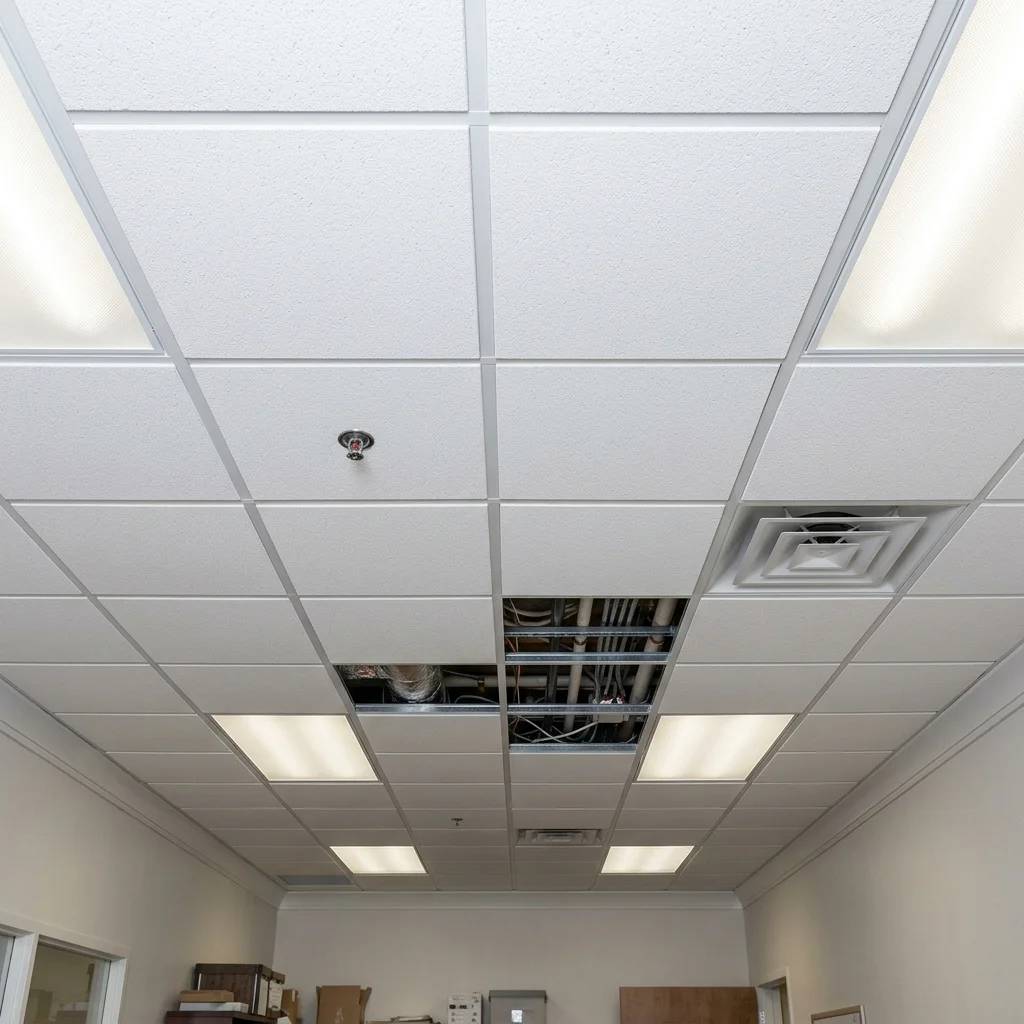
20. Install a Drop Ceiling With Budget Tiles
A drop ceiling with budget acoustic tiles is the most affordable complete ceiling system for rooms with complex utilities above the existing ceiling. The grid system hangs from the existing ceiling structure and individual tiles drop into the grid below. Basic white mineral fiber tiles cost $1–$2 each.
For complete basement ceiling design ideas covering drop ceiling systems, paint approaches, and every other affordable basement ceiling treatment, explore these basement ceiling ideas for comprehensive basement ceiling guidance.
A drop ceiling provides easy access to plumbing, electrical, and HVAC systems above the tiles. The grid framework can be painted to match the tiles for a more seamless appearance. Modern budget drop ceiling tiles look significantly better than older versions and create a genuinely finished ceiling at low cost.
21. Add a Wooden Slat Panel Ceiling
A wooden slat panel ceiling uses narrow wood strips spaced with deliberate gaps between them to create a graphic, contemporary ceiling treatment. The gaps between slats create a striped shadow pattern that changes throughout the day as light moves. The result is dynamic and visually distinctive.
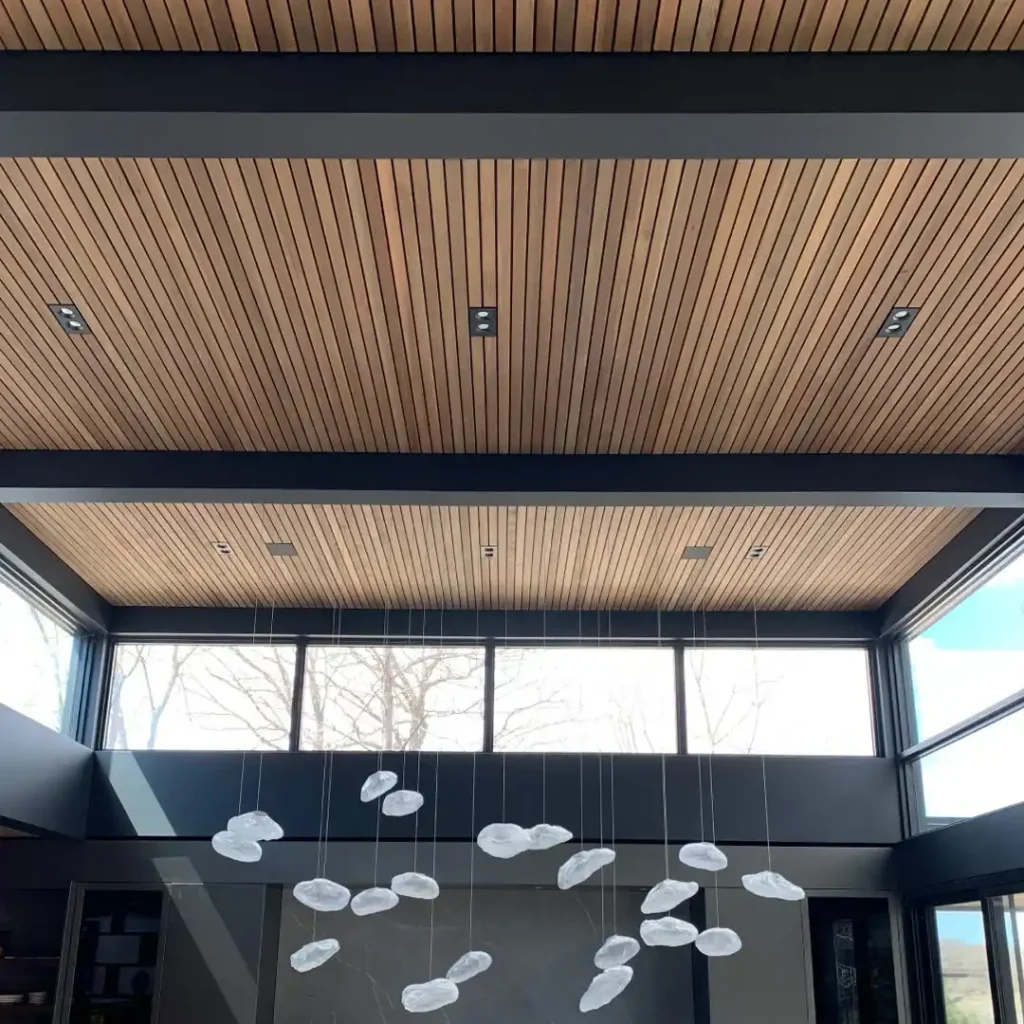
Mount narrow 1×2 or 1×3 boards at regular intervals across the ceiling joists. Standard spacing of 1 inch between slats creates a balanced open and closed ratio. Narrower slats create a more delicate, refined pattern. Wider slats create a bolder, more rustic result.
| Slat Width | Gap Width | Pattern Effect | Material Cost |
|---|---|---|---|
| 1 inch | 1 inch | Delicate, refined | Low |
| 2 inches | 1 inch | Balanced, classic | Low |
| 2 inches | 2 inches | Open, airy | Low |
| 3 inches | 1.5 inches | Bold, substantial | Low-Moderate |
22. Create a DIY Bedroom Ceiling Feature
A DIY bedroom ceiling feature transforms the room’s most overlooked surface into its most distinctive design element.
For complete slanted and standard bedroom ceiling ideas covering every approach to creating beautiful, characterful bedroom ceilings on a budget, explore these slanted ceiling bedroom ideas for comprehensive bedroom ceiling design guidance.
A fabric canopy above the bed. A geometric tape pattern in a contrasting color. A star-painted midnight blue ceiling overhead. A simple shiplap plank ceiling painted white. Each approach costs under $100 in materials and transforms the sleeping environment completely.
23. Stencil a Ceiling Medallion Pattern
A stenciled ceiling medallion creates the appearance of an ornate carved plaster medallion for under $20 in materials. A circular stencil in a medallion pattern, centered above the main light fixture, creates an immediately classical and elegant ceiling detail.
Apply the stencil in a color slightly deeper than the ceiling — the subtle color difference creates the impression of shadow and relief that makes the flat stencil appear dimensional. A cream stencil on a white ceiling. A warm white stencil on a cream ceiling. The subtle contrast reads as relief carving from any normal viewing distance.
24. Install a Craft Room Ceiling on a Budget
A DIY ceiling in a craft room creates an inspiring overhead environment that makes creative work more enjoyable. For complete craft room storage and design ideas that pair with a beautiful DIY ceiling to create the most inspiring and organized creative workspace possible, explore these craft room storage ideas for comprehensive craft room design guidance.
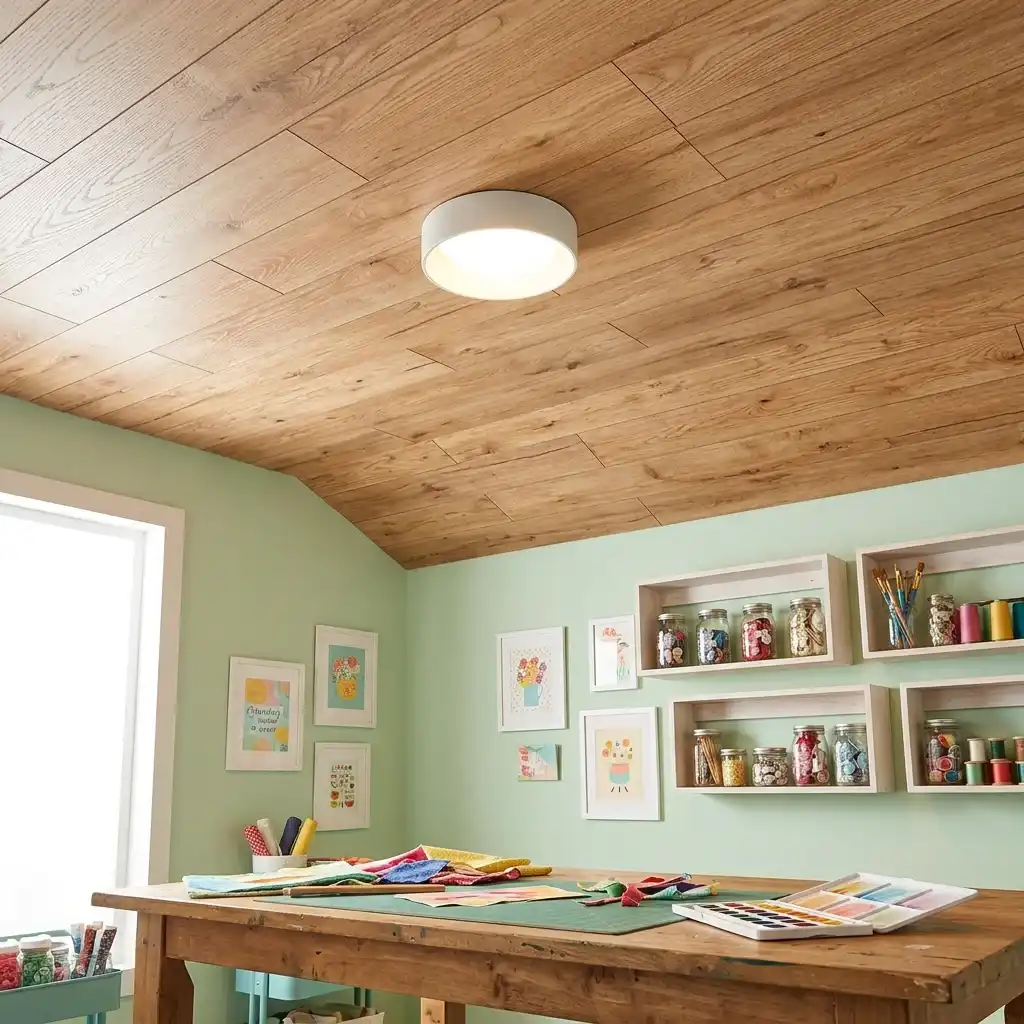
A peel-and-stick wood plank ceiling in a craft room costs under $100 in materials and takes a single afternoon to install. The warm wood overhead transforms the workspace from a plain room into a genuinely inspiring creative studio that makes every crafting session feel special.
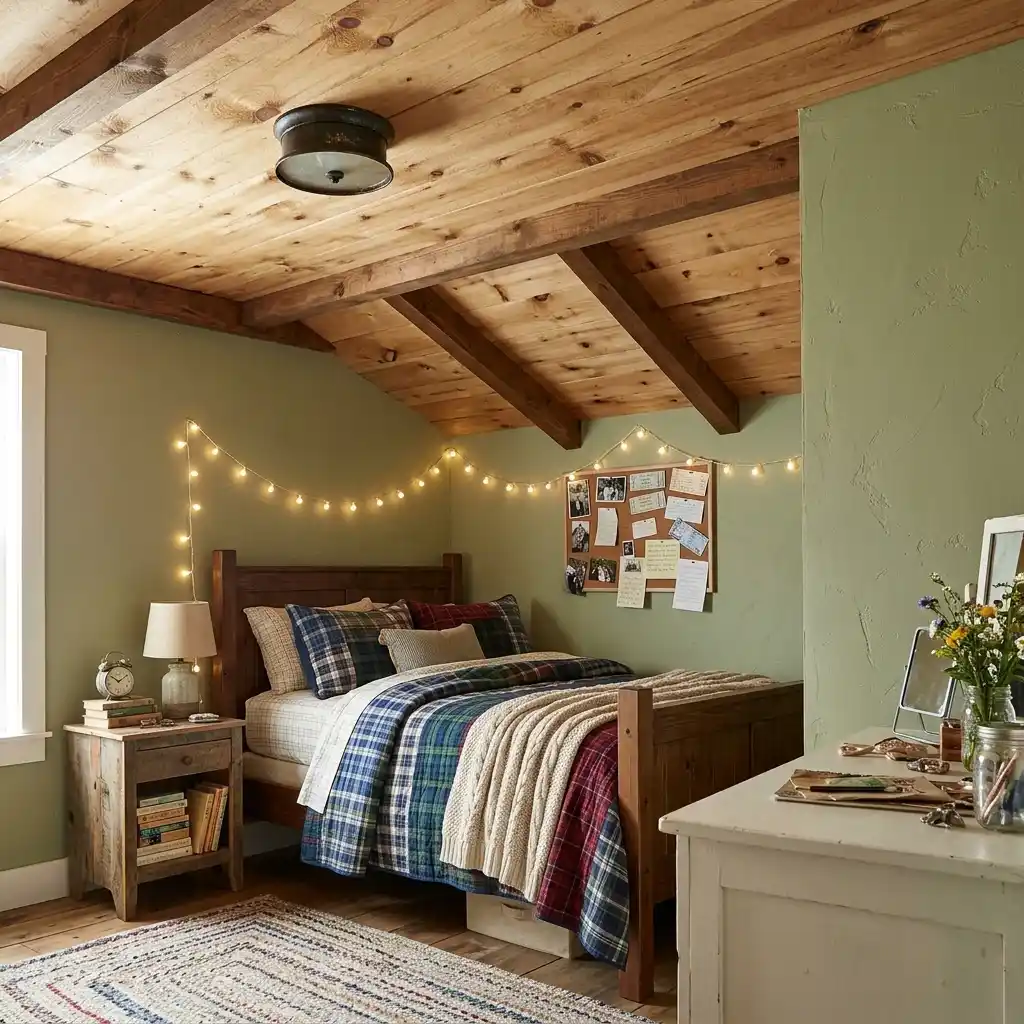
25. Create a Warm Rustic Ceiling With Reclaimed Wood
Reclaimed wood — old fence boards, barn wood, or salvaged flooring — creates the most characterful and most affordable rustic ceiling possible. Free or nearly free materials produce a ceiling that looks like a high-end architectural installation.
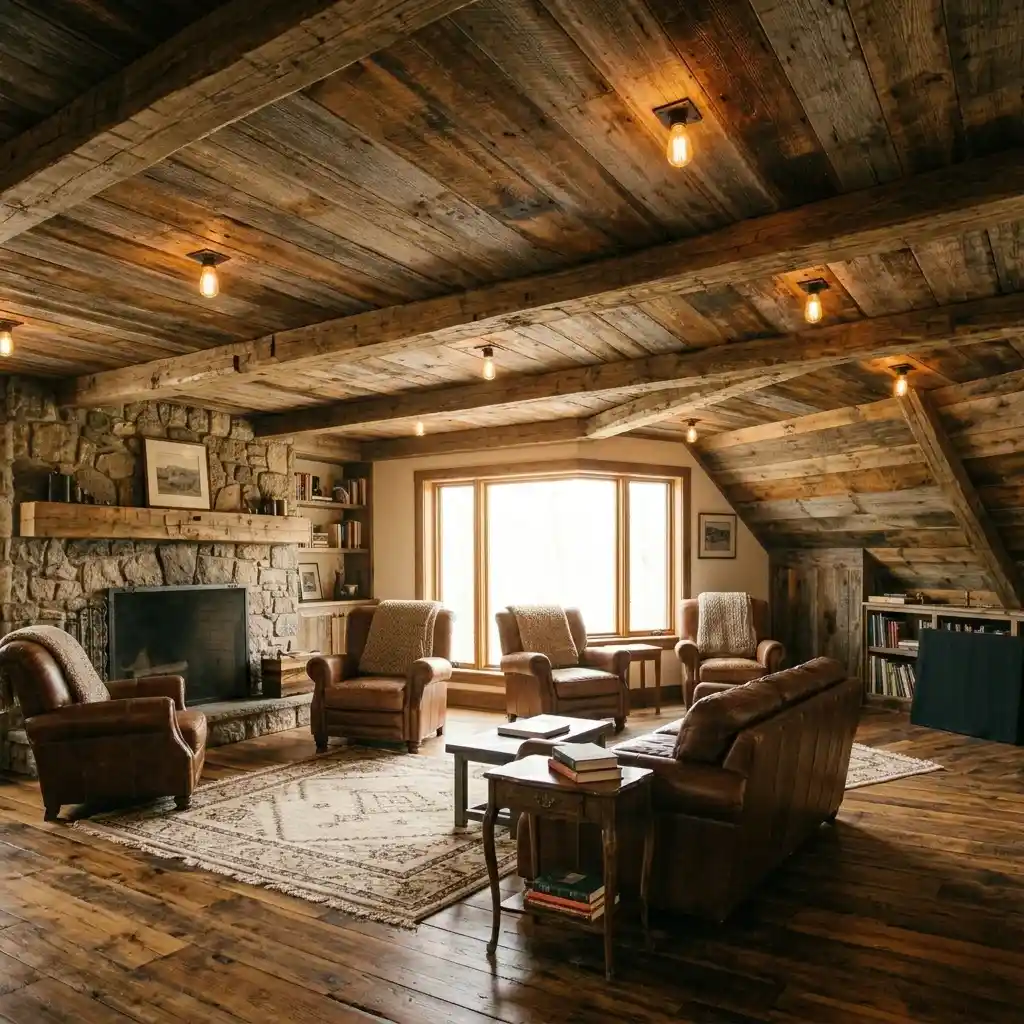
For complete warm rustic home decor inspiration covering natural materials, warm colors, and cozy atmospheric elements including reclaimed wood ceiling approaches that create beautiful rustic interiors, explore these warm rustic living room ideas for the complete rustic design vocabulary that applies to any room ceiling.
Source reclaimed wood from demolition sites, salvage yards, and online marketplaces. Inspect every board carefully. Remove all old nails. Sand smooth. Seal thoroughly before installation. The result is a ceiling of extraordinary character that new materials simply cannot replicate at any price.
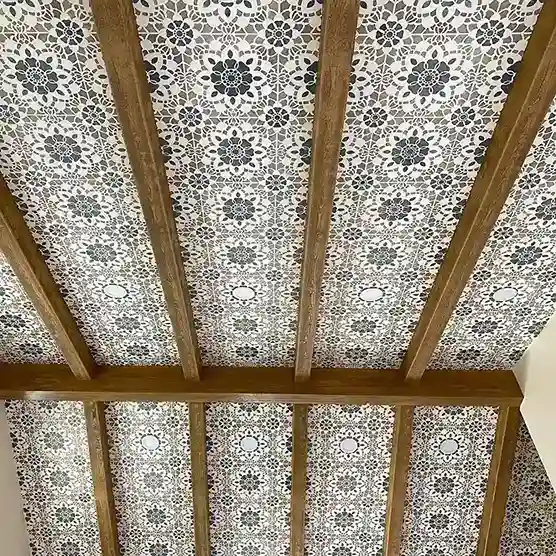
26. Add a Vintage Ceiling Tile Treatment
A vintage-inspired ceiling tile treatment uses pressed-pattern tiles in an antique or Victorian-influenced design to create a characterful, historically inspired overhead surface. For complete vintage craft room and home decor ideas that inform a beautifully vintage ceiling treatment approach, explore these vintage craft room ideas for the vintage aesthetic philosophy that suits a vintage ceiling tile treatment beautifully.
Painted in antique white or aged copper, vintage-style tiles create an extraordinary period atmosphere in any room. The embossed surface catches light differently throughout the day and creates a living, changing ceiling that flat painted surfaces never achieve.
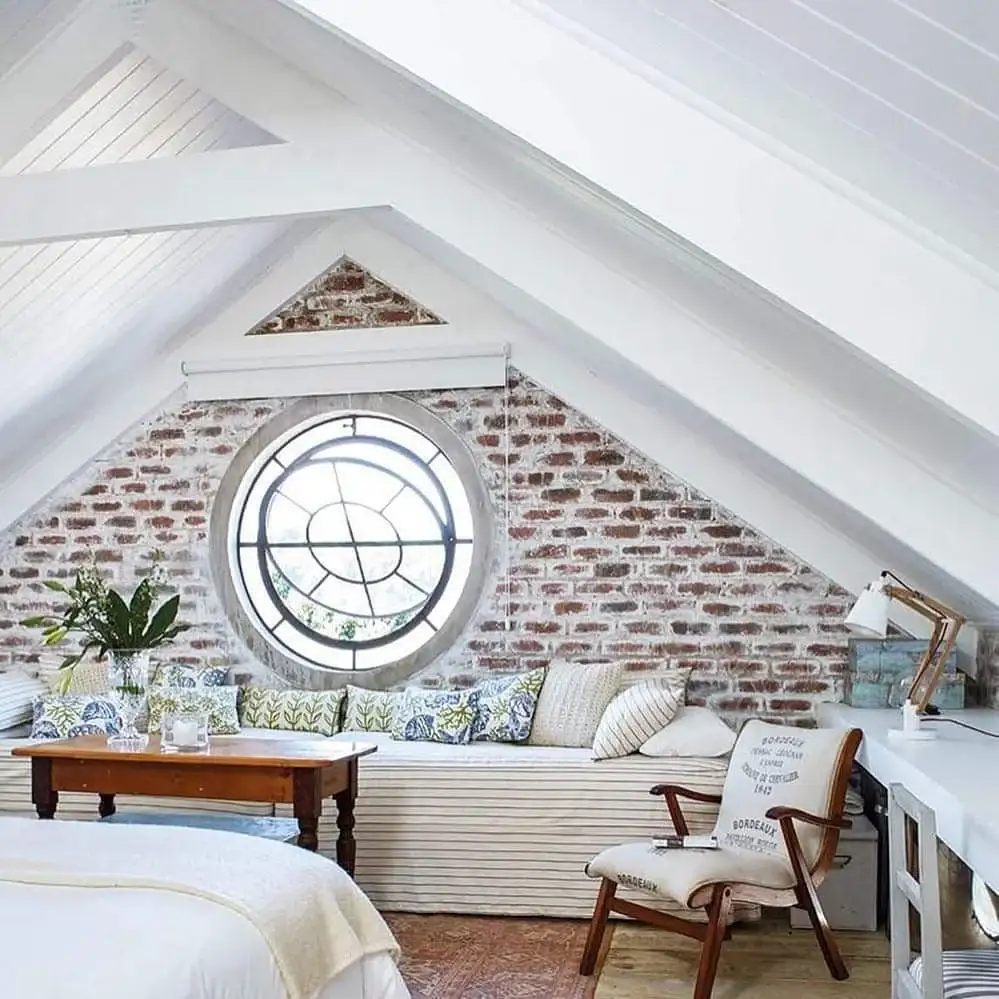
27. Install a Sloped Ceiling Treatment on a Budget
A sloped ceiling offers unique opportunities for beautiful low-cost treatments. The angled surface creates natural character that a flat ceiling lacks. For complete sloped ceiling design ideas covering every approach to transforming an angled ceiling into a beautiful architectural feature, explore these sloped ceiling ideas for comprehensive sloped ceiling design guidance.
White painted shiplap following the slope angle. A bold paint color on the sloped section contrasting with lighter surrounding walls. Fabric draped along the slope for a cozy tent effect. Each approach costs under $100 and transforms the sloped ceiling from an architectural challenge into the room’s most distinctive design feature.
28. Create a DIY Laundry Room Ceiling Upgrade
A finished ceiling in a laundry room transforms the most utilitarian space in the home into something genuinely pleasant. For complete laundry room design ideas where a DIY ceiling treatment and cohesive design approach create a space that feels genuinely attractive and well-finished, explore these laundry room ideas for comprehensive laundry room design guidance.
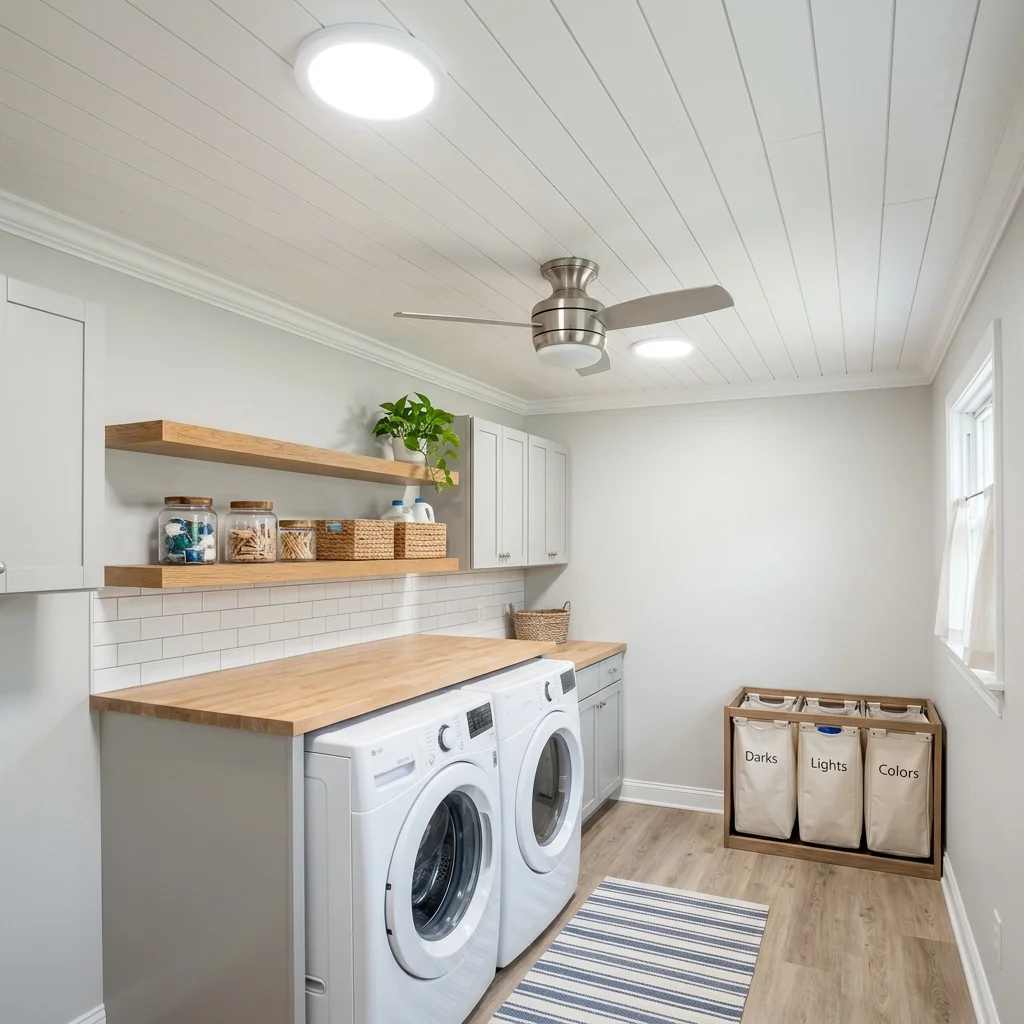
White painted shiplap in a laundry room ceiling costs under $200 in materials and makes the space feel brighter, cleaner, and more intentionally designed. The wood texture provides acoustic softening that reduces the machine noise that bounces off hard drywall surfaces.
29. Use Fabric Wallpaper on the Ceiling
Fabric-backed wallpaper applied to the ceiling creates a textile ceiling surface that adds extraordinary pattern, color, and texture overhead. Many standard wallpapers apply to ceiling surfaces equally as well as to walls.
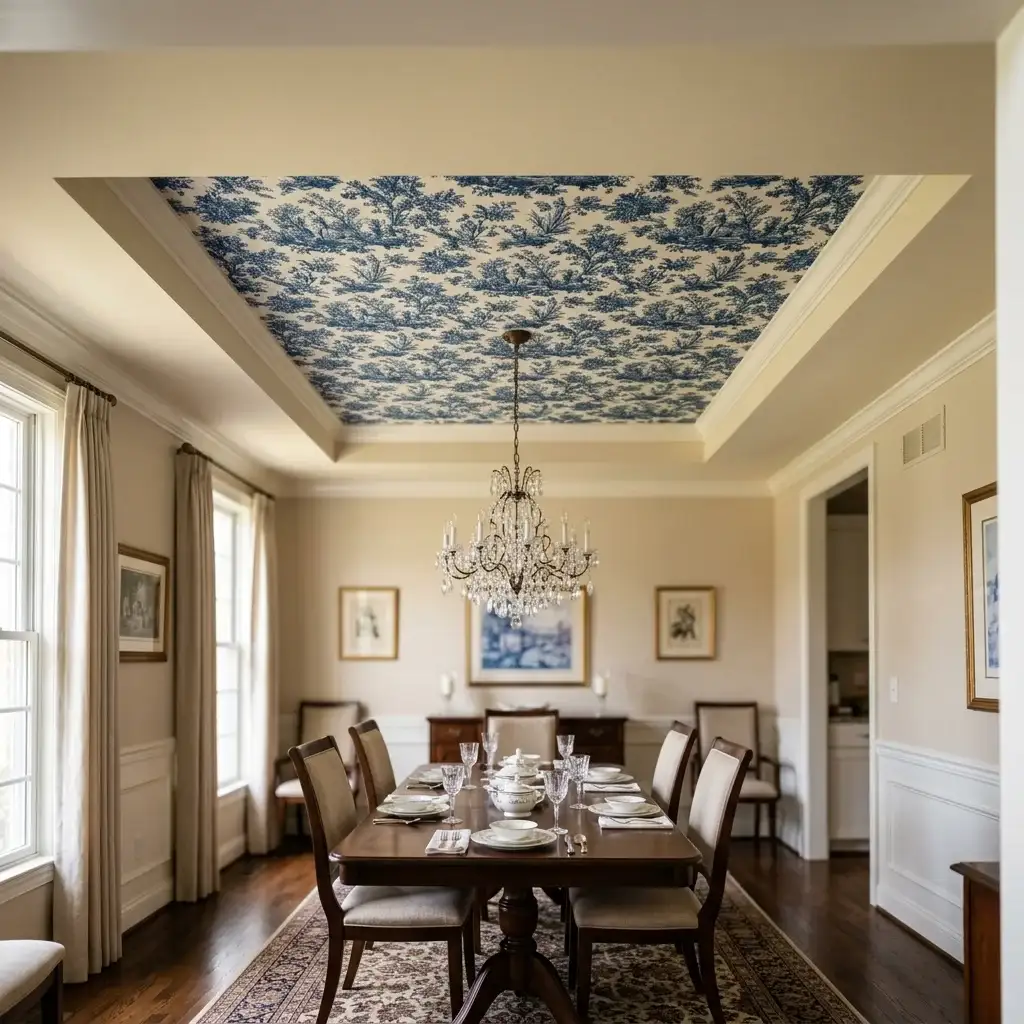
Choose a bold botanical, geometric, or toile pattern. Position the ceiling wallpaper above the main seating or dining area for a defined feature section rather than covering the entire ceiling. A wallpapered ceiling section framed by plain painted ceiling around it looks extremely intentional and designed.
| Wallpaper Style | Ceiling Effect | Best Room | Cost per Roll |
|---|---|---|---|
| Large botanical | Lush, tropical | Dining room, bedroom | $20–$60 |
| Geometric | Bold, graphic | Living room, office | $20–$50 |
| Toile de Jouy | French country | Bedroom, sitting room | $25–$70 |
| Celestial / stars | Dreamy, whimsical | Nursery, bedroom | $20–$50 |
30. Create a DIY Cubicle or Office Ceiling Panel
A decorative ceiling panel above a home office cubicle area defines the workspace visually and creates a more focused, intentional work environment. For complete cubicle and home office decoration ideas including ceiling and overhead treatments that create a more personalized and productive workspace, explore these cubicle decor ideas for workspace decoration guidance.
A simple acoustic fabric panel — a wooden frame filled with dense acoustic foam wrapped in fabric — mounted above the desk reduces echo and personalizes the workspace ceiling at very low cost. The panel improves both the acoustic performance and the visual experience of the work zone simultaneously.
31. Install a Boys Bedroom Ceiling Feature
A creative ceiling feature in a boys bedroom creates an adventurous, exciting overhead environment that makes the bedroom feel genuinely special. For complete boys bedroom design ideas where ceiling treatments create the most adventurous and characterful bedroom atmosphere, explore these boys bedroom ideas for comprehensive boys bedroom design guidance.
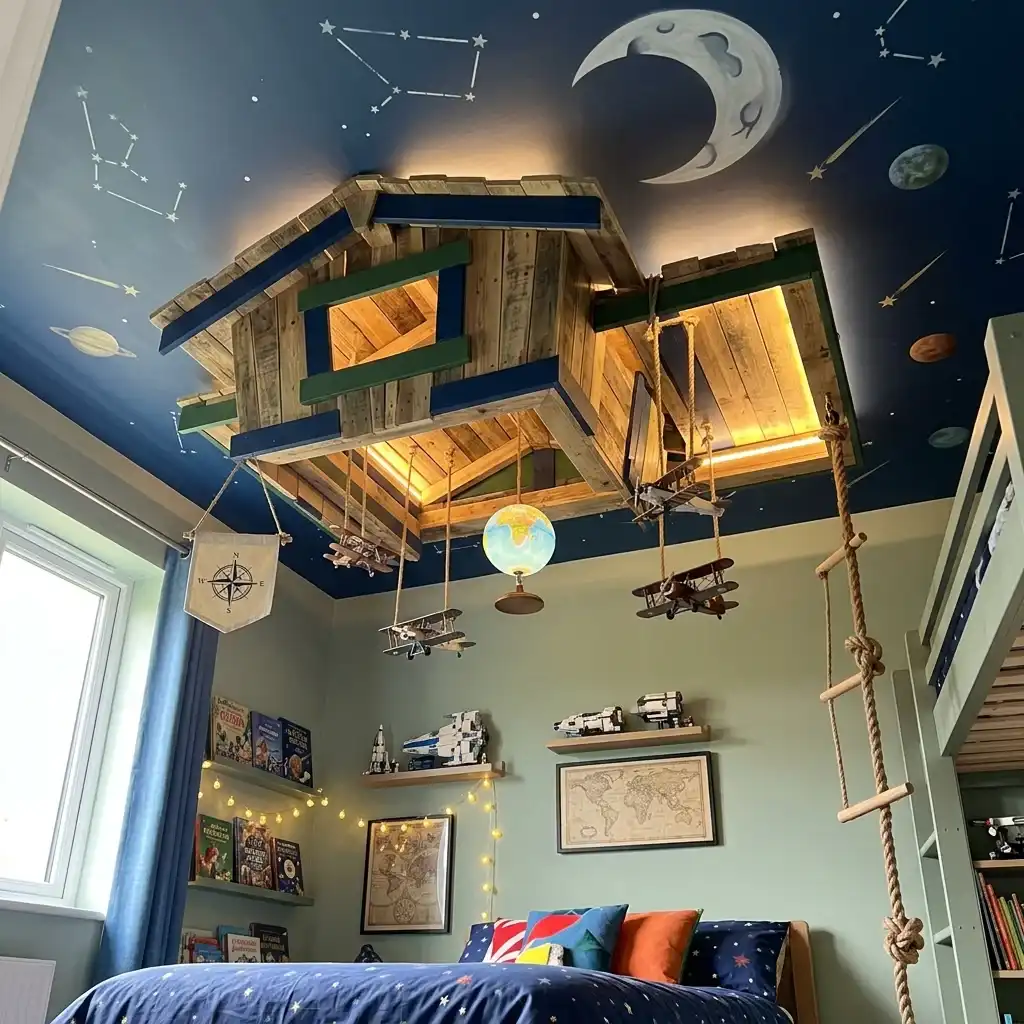
A dark navy painted ceiling with glow-in-the-dark star stickers. A map-patterned ceiling wallpaper. Shiplap planks painted white above an adventurous room theme. A string light canopy creating a glowing overhead. Each approach costs under $100 and creates a bedroom ceiling that a boy genuinely loves.
32. Create a Ceiling Feature for a Small Apartment
A ceiling treatment in a small apartment transforms the most visible surface in a compact home for very little cost. For complete small apartment design ideas where a DIY ceiling treatment creates warmth and character in a compact home where the ceiling is visible from nearly every position, explore these small apartment ideas for comprehensive approaches to making every surface including the ceiling work beautifully in a small apartment.
Light-colored shiplap or whitewashed planks reflect available light downward and prevent the compact space from feeling more enclosed. String lights create a magical evening atmosphere. A bold painted color on the ceiling adds the design personality that a small apartment’s limited wall space cannot provide.
33. Add a Wood Ceiling to a Country Teen Bedroom
A wood plank ceiling in a country-style teen bedroom creates the warm, natural character that defines the country aesthetic at very low material cost. For complete country teen bedroom design ideas where a DIY wood ceiling creates a beautiful, warm room that teenagers love, explore these country teen bedroom ideas for comprehensive country bedroom design guidance.
White shiplap above pale sage green walls creates the classic country bedroom ceiling combination for under $200 in materials for a standard bedroom. The warmth and character of the shiplap ceiling makes the room feel genuinely different from any generic painted bedroom.
34. Install a Cottage-Style Ceiling
A cottage-style ceiling uses beadboard, white shiplap, or soft-painted exposed beams to create a warm, charming overhead that suits English cottage, farmhouse, and coastal interior styles. For complete English cottage bedroom and home decor ideas that create the most beautifully charming cottage ceilings in any room, explore these English cottage bedroom ideas for the complete cottage design aesthetic.
White beadboard panels on the ceiling cost $15–$25 per 4×8 sheet and install easily with construction adhesive and finish nails. A standard bedroom ceiling needs six to eight sheets. The beadboard creates immediate cottage character and a clean, finished appearance at a very accessible material cost.
35. Maintain a DIY Ceiling for Long-Term Beauty
A properly maintained DIY ceiling looks beautiful for years. Paint ceilings need repainting every five to seven years. Wood ceilings need refinishing every five to ten years depending on the finish used. Fabric ceiling panels should be replaced every three to five years.
Inspect the ceiling annually for any areas where the treatment has worn, separated, or developed water damage. Address small problem areas immediately before they spread. A minor touch-up costs very little. Neglected areas that spread require complete section replacement at significantly greater cost and effort.
| Ceiling Treatment | Maintenance Frequency | Task | Cost |
|---|---|---|---|
| Painted ceiling | Every 5–7 years | Full repaint | $30–$80 |
| Wood planks | Every 5–10 years | Re-stain or seal | $30–$80 |
| Fabric ceiling | Every 3–5 years | Replace panels | $20–$80 |
| Peel-and-stick | Every 5–8 years | Replace damaged sections | $10–$30 |
| Stenciled ceiling | Every 5–7 years | Repaint base and re-stencil | $20–$40 |
36. Plan the Complete DIY Ceiling Project Before Starting
Every successful cheap DIY ceiling project begins with thorough planning. Jumping into installation without a clear plan wastes time, wastes materials, and produces inferior results. A few hours of planning saves days of frustration and hundreds of dollars in correction costs.
Measure the ceiling area accurately. Choose the treatment that suits the budget, the aesthetic, and the skill level honestly. Calculate material quantities with a 10 percent waste allowance. Gather all tools before starting day one. Mark all joist positions before any installation begins. The complete planning process takes two to four hours. The installation that follows runs smoothly.
The cheap DIY ceiling you build over a weekend transforms your home for years. The ceiling that was a blank, overlooked surface becomes the room’s most distinctive feature. The investment is modest. The impact is extraordinary. And the satisfaction of creating something genuinely beautiful with your own hands and a minimal budget is one of the most rewarding experiences home improvement offers.
| Planning Step | Time | Why Essential | Cost of Skipping |
|---|---|---|---|
| Accurate measurement | 30 minutes | Correct material quantity | Wrong material amount |
| Material and tool list | 30 minutes | Complete preparation | Mid-project delays |
| Joist marking | 30–60 minutes | Secure fastening | Boards may fall |
| Test section | 1–2 hours | Confirm process | Poor whole-ceiling result |
| Full installation plan | 1–2 hours | Efficient execution | Wasted time and material |
Frequently Asked Questions (FAQs)
Q1: What is the absolute cheapest DIY ceiling upgrade?
Painting the existing ceiling a bold color is the cheapest upgrade at $20–$40 for a full room. Painting exposed ceiling elements — joists, pipes, and ducts — flat black costs the same and creates an industrial loft aesthetic instantly. Both approaches require only a roller, a brush, and a tin of ceiling paint.
Q2: Which cheap DIY ceiling ideas are best for renters?
Peel-and-stick wood planks, fabric draping from ceiling hooks, string lights mounted on cup hooks, and ceiling medallions applied with removable adhesive all work beautifully for renters. All remove cleanly without damage to the original surface. Fabric and string lights require only small cup hooks that fill with a tiny dab of spackle at move-out.
Q3: Can a complete beginner tackle a DIY ceiling project?
Yes. Painting, fabric draping, stenciling, peel-and-stick planks, and string light installation all require no prior DIY experience and no special tools beyond basic household items. Shiplap and plywood installations require a circular saw and a nail gun — both widely available to rent — and beginner-level carpentry skills that most people develop quickly during the project itself.
Q4: How long does a cheap DIY ceiling project take?
A painted ceiling takes a single day including drying time. A stenciled ceiling takes a weekend. Peel-and-stick planks cover a standard bedroom ceiling in an afternoon. Shiplap nail-up installation takes a full weekend for a standard room. Faux beam installation takes a weekend. Most cheap DIY ceiling projects are genuinely achievable in a single weekend even for first-time builders.
Q5: How do I choose which DIY ceiling idea suits my room?
Consider three factors: the room’s purpose, the existing aesthetic, and the available budget. A bedroom benefits from warmth and cosiness — wood planks, fabric canopies, and painted dark ceilings. A home office benefits from character and inspiration — shiplap or natural wood planks. A basement benefits from a dramatic painted exposed treatment or a clean drop ceiling. Match the ceiling treatment to how the room is used and how it should feel.
Conclusion
A beautiful ceiling is not a luxury available only to homeowners with large renovation budgets. Every idea in this guide is achievable for under $200 in materials — most for under $100. The ceiling above you is waiting to become the most interesting surface in the room. All it requires is the decision to try.
Choose one idea that resonates with your room, your style, and your weekend availability. Start this weekend. The ceiling you transform becomes one of the most satisfying and most talked-about improvements in your home — a daily reminder that extraordinary results are possible on a genuinely modest budget.