Your craft supplies are everywhere. Fabric stacks on the chair. Ribbon tangles in a drawer. Paint bottles roll across the desk. Scissors disappear daily. You spend more time searching for supplies than actually creating anything.
A disorganized craft room does not just look chaotic. It kills your creative energy before a single project begins.
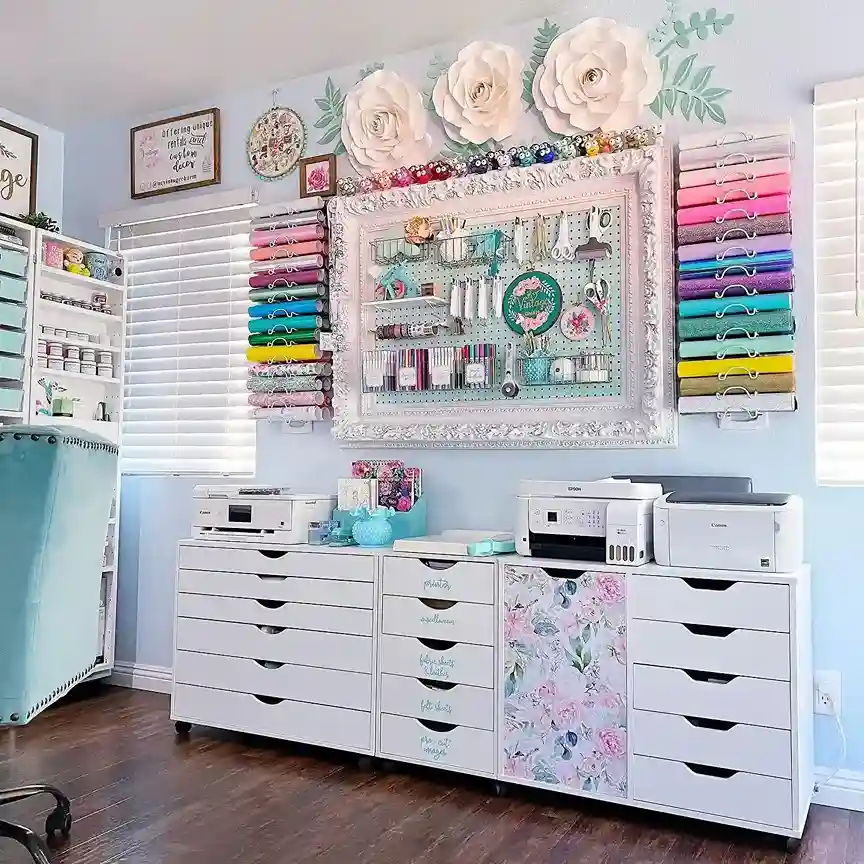
Great craft room storage is not about buying expensive organizers or redesigning the entire room. It is about matching the right storage solution to each type of supply so everything has a permanent, logical home you can find in seconds.
source: @ocvintagecharm
This guide gives you 30 brilliant craft room storage ideas that will transform your creative space from chaotic to calm and from frustrating to genuinely inspiring. Your best creative work is waiting on the other side of a properly organized room.
source: @sarahrenaeclark
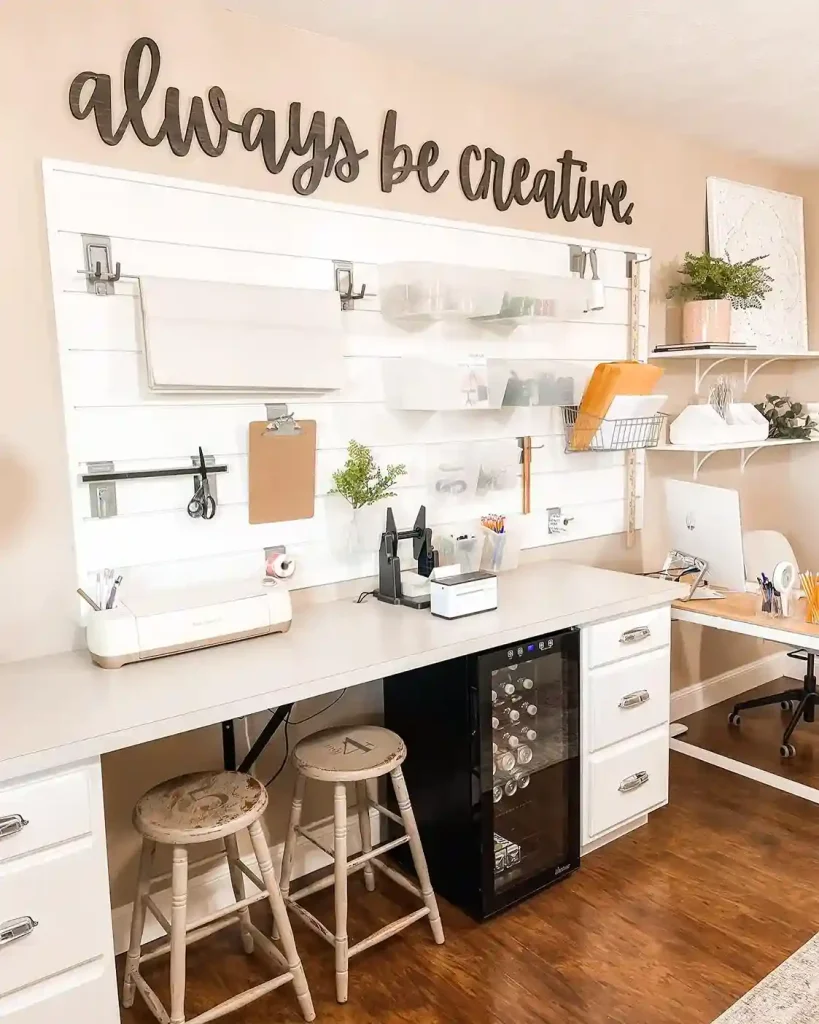
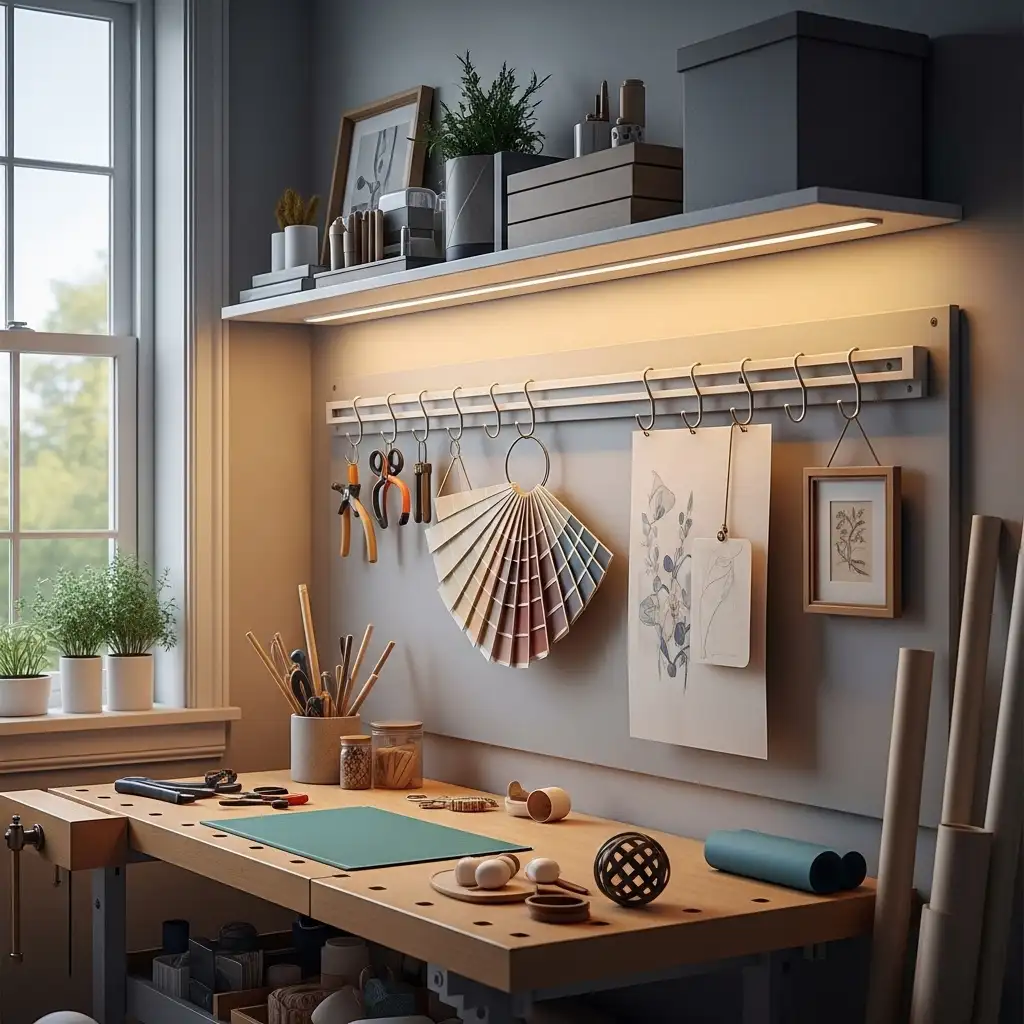
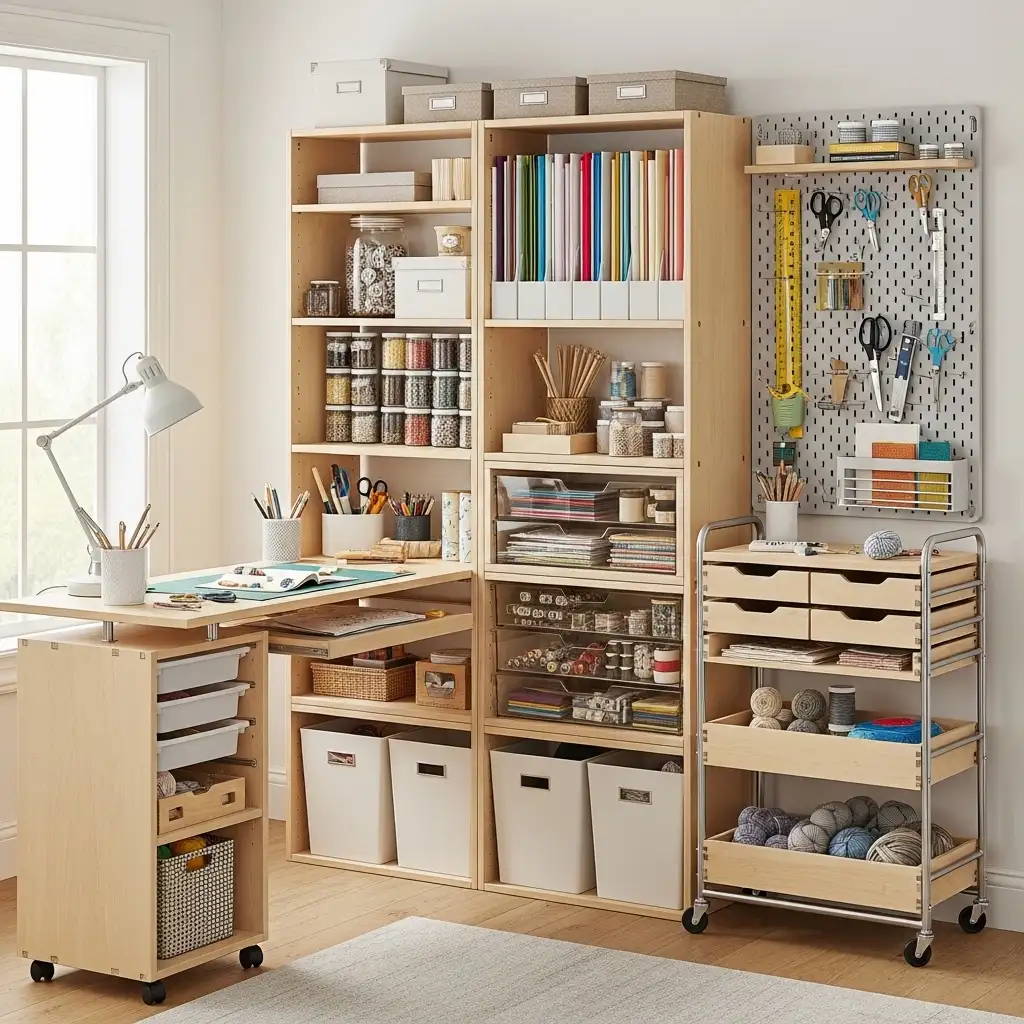
Idea 1: Use a Pegboard Wall for Fully Flexible Tool Storage
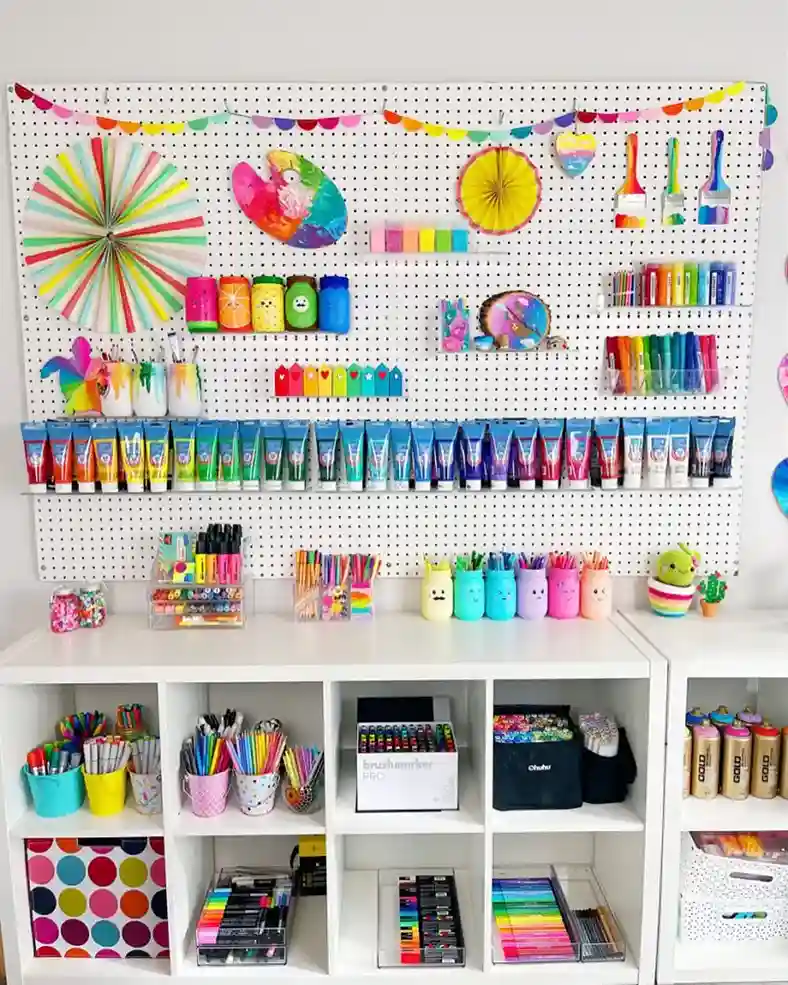
A pegboard wall is the single most versatile and most impactful storage upgrade available in any craft room. It gives you a completely customizable wall of visible, accessible storage that can be rearranged instantly as your needs change. Nothing sits in a drawer forgotten when it is on the pegboard in plain sight.
source: @colormadehappy
Mount a pegboard on your primary craft room wall using appropriate wall fixings that leave a small gap between the board and the wall surface. This gap allows the hooks to fit properly. Paint the pegboard in a color that suits your room palette for a polished, intentional look. Add a variety of hooks, small shelves, bins, and clip holders in whatever configuration suits your current supplies.
Rearrange whenever your projects or needs change without touching the wall. For a complete gallery of vintage craft room storage ideas using pegboards and other beautiful organizational solutions, our detailed guide on vintage craft room ideas covers the full aesthetic and functional approach to creating a craft room that is as beautiful as it is organized.
| Pegboard Accessory | What to Store |
| S-hooks | Scissors, rulers, and small tools |
| Small shelf inserts | Jars of pins, small containers |
| Wire basket holders | Fabric scraps, paper pads |
| Wooden dowel rod insert | Washi tape rolls in a row |
| Clip holders | Patterns, templates, and notes |
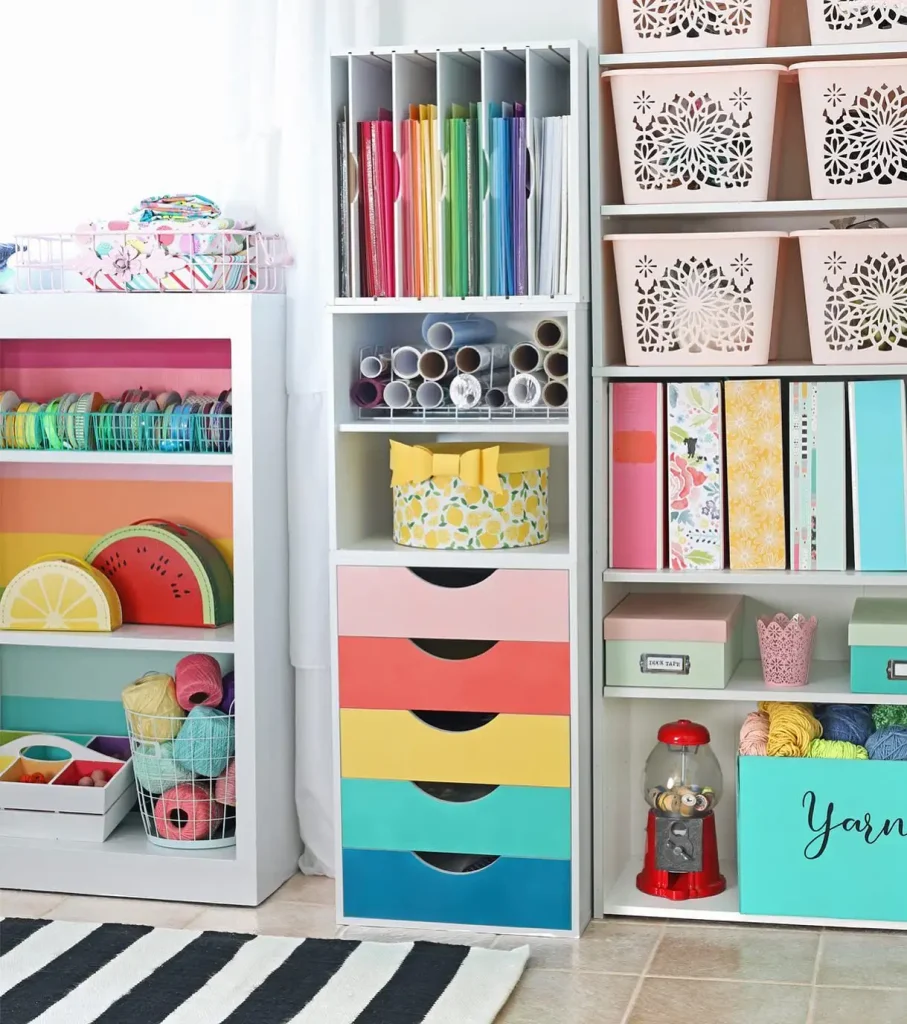
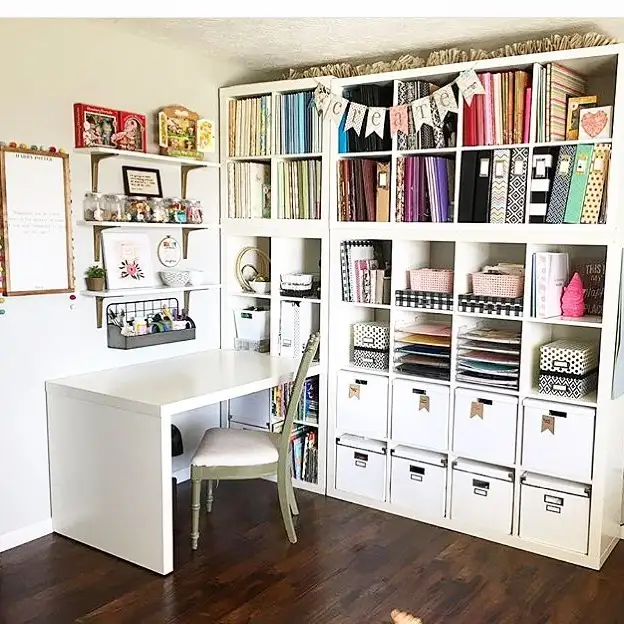
Idea 2: Install Floor-to-Ceiling Open Shelving
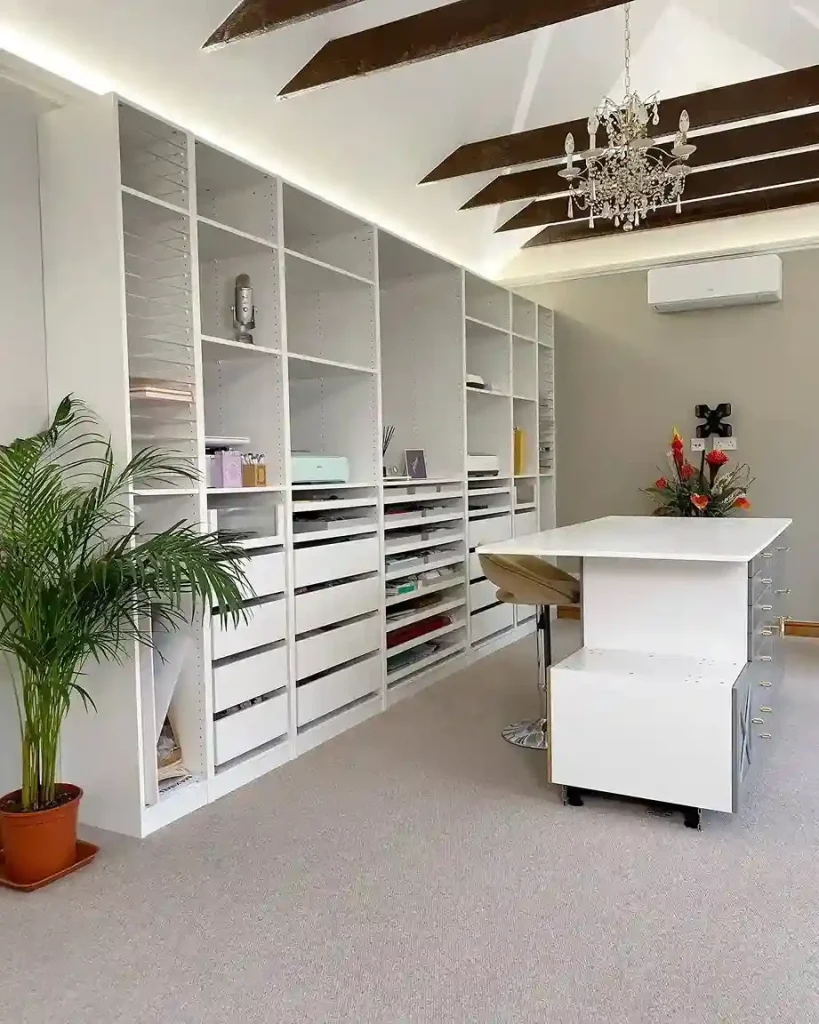
Floor-to-ceiling open shelving maximizes every inch of vertical wall space in the craft room. It gives you an enormous amount of visible, accessible storage without taking a single square foot of floor space. The upper shelves hold rarely used supplies and backup stock. The middle shelves store frequently used items at eye level. The lower shelves hold heavier bins and baskets.
source: @rabia.khans
Use adjustable shelf brackets so every shelf height can be customized to the specific supplies stored there. Consistent storage containers across all shelves create a beautiful, cohesive look that makes even a fully loaded shelf wall look organized and intentional rather than cluttered. Label everything clearly so every supply has a known home that the whole household can respect and maintain.
| Shelf Zone | Best Storage Use |
| Top shelves near ceiling | Backup stock and rarely used supplies |
| Upper-middle shelves | Seasonal supplies and project materials |
| Eye-level middle shelves | Most-used supplies, easy daily access |
| Lower shelves | Heavy bins, large fabric rolls, baskets |
| Bottom shelf at floor level | Oversized items and portfolio storage |
Idea 3: Use Glass Jars for Visible Small Supply Storage
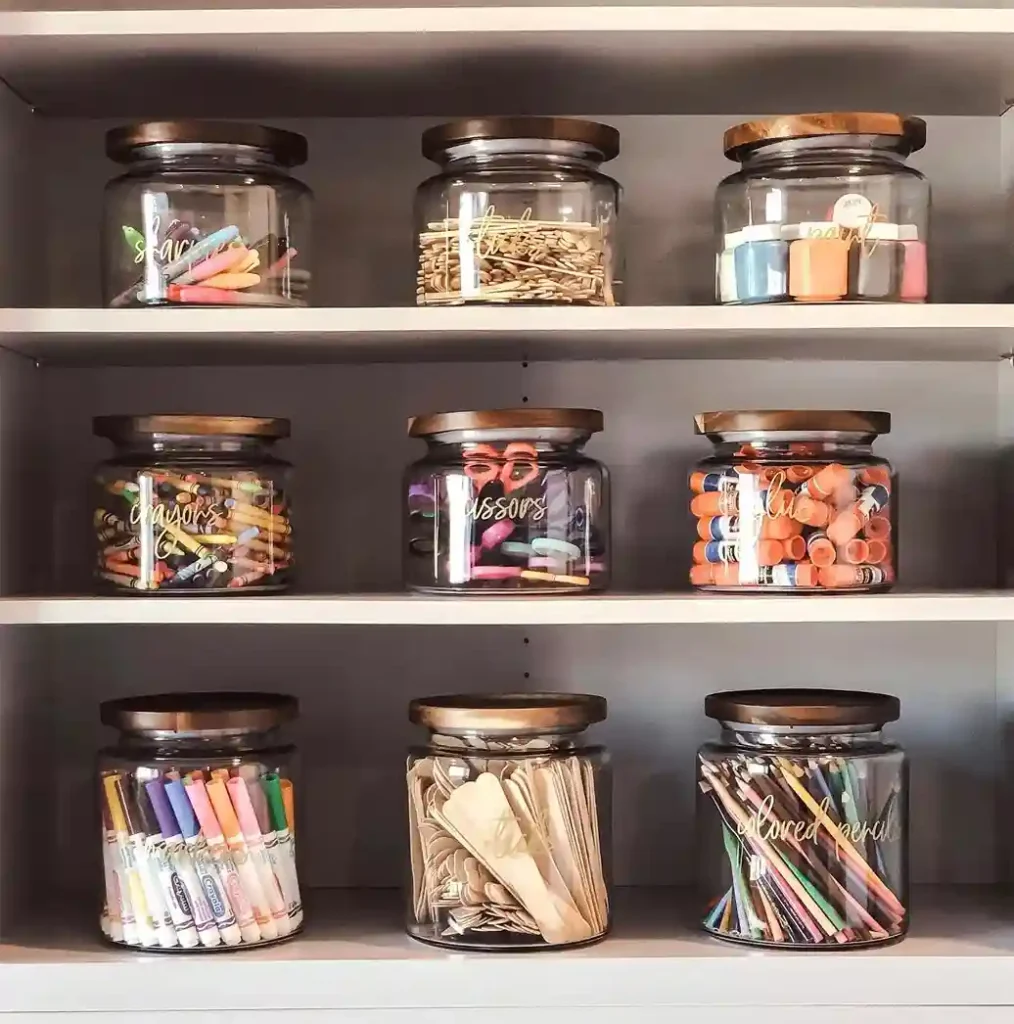
Glass jars are the most beautiful and most practical solution for storing small craft supplies. They keep contents visible, contained, and protected from dust. A shelf of matching glass jars filled with buttons, beads, sequins, and ribbon ends looks stunning and makes finding the exact supply you need completely effortless.
source: @azhouseoforder
Collect Mason jars, recycled food jars, and apothecary-style glass bottles in a range of sizes. Fill each one with a single category of supply. Label the lid or the front of each jar with a small handwritten or printed tag. Group jars by category on shelves. Vary the heights and widths for visual interest. The glass jar system is inexpensive, scalable, and genuinely one of the most satisfying organizational systems available in any creative space.
| Jar Size | Best Supply to Store |
| Large wide-mouth jar | Yarn balls, ribbon, fabric scraps |
| Medium mason jar | Buttons, beads, sequins, clips |
| Small apothecary bottle | Pins, needles, small gems |
| Vintage milk bottle | Paintbrushes, pens, scissors |
| Lidded candy jar | Washi tape, stickers, stamps |
Idea 4: Add a Rolling Cart for Mobile Supply Storage
A rolling cart gives you flexible, mobile storage that moves to wherever you are working. It can hold your current project supplies and be pushed aside when not needed. It can serve as a temporary extension of your work surface. It fits in narrow gaps beside furniture that fixed storage cannot reach.
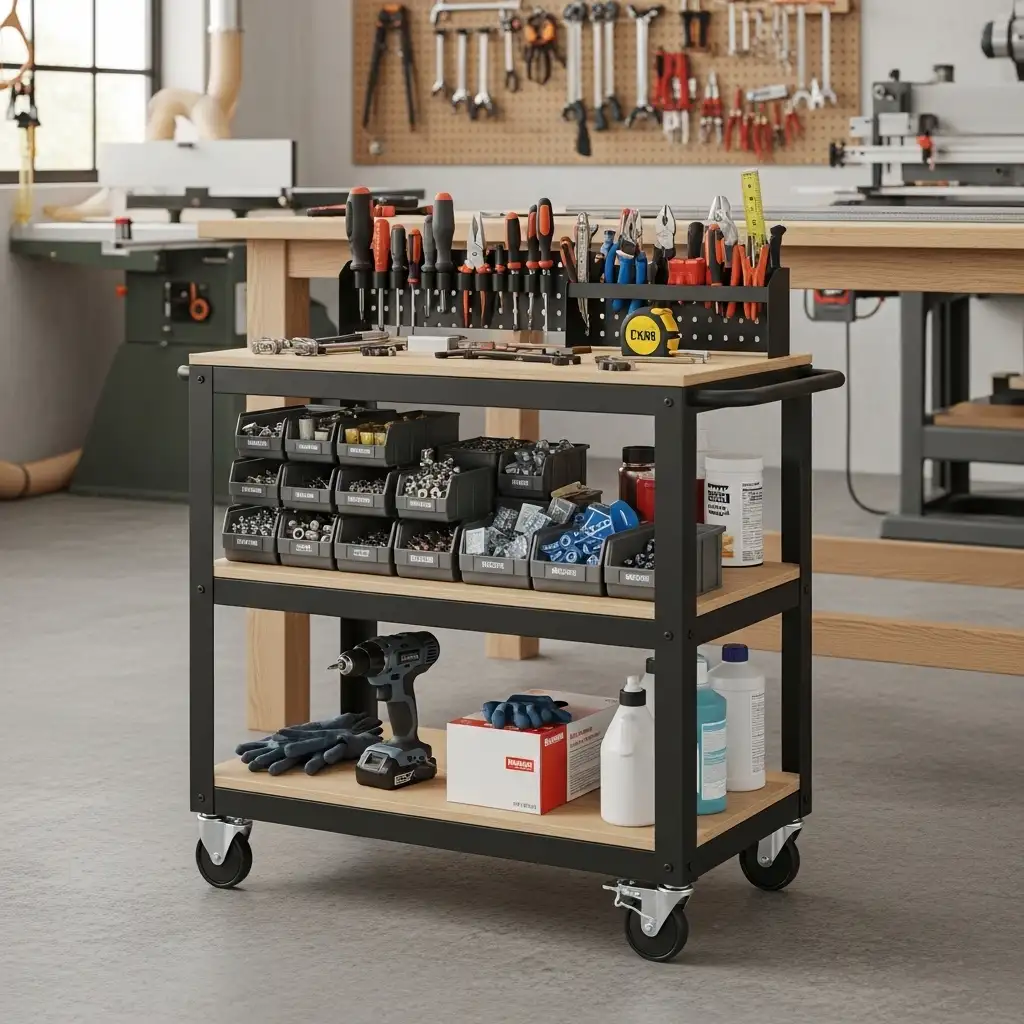
A three-tier rolling cart with wire baskets suits a craft room beautifully. Use the top tier for current project tools. The middle tier for the project’s materials. The bottom tier for reference books or backup supplies. At the end of a craft session, everything rolls back to its corner without unpacking and repacking every item.
The same mobile storage philosophy that makes rolling carts so effective in craft rooms is equally powerful in hobby room design of all kinds, from photography studios to model building spaces where flexible, project-specific storage makes the creative process significantly more fluid.
| Rolling Cart Tier | What to Store |
| Top tier | Current project tools and scissors |
| Middle tier | Project materials and supplies |
| Bottom tier | Reference books or backup stock |
| Side hooks on cart | Rulers, templates, bag clips |
| Cart top surface | Work overflow and staging area |
Idea 5: Store Fabric with a Dedicated Fabric Organization System
Fabric is one of the most challenging craft supplies to store well. It is bulky, it comes in awkward lengths, and it has an unfortunate tendency to unravel and tangle with neighboring pieces. A proper fabric organization system solves all of these problems simultaneously and makes selecting the right fabric for any project quick and genuinely enjoyable.
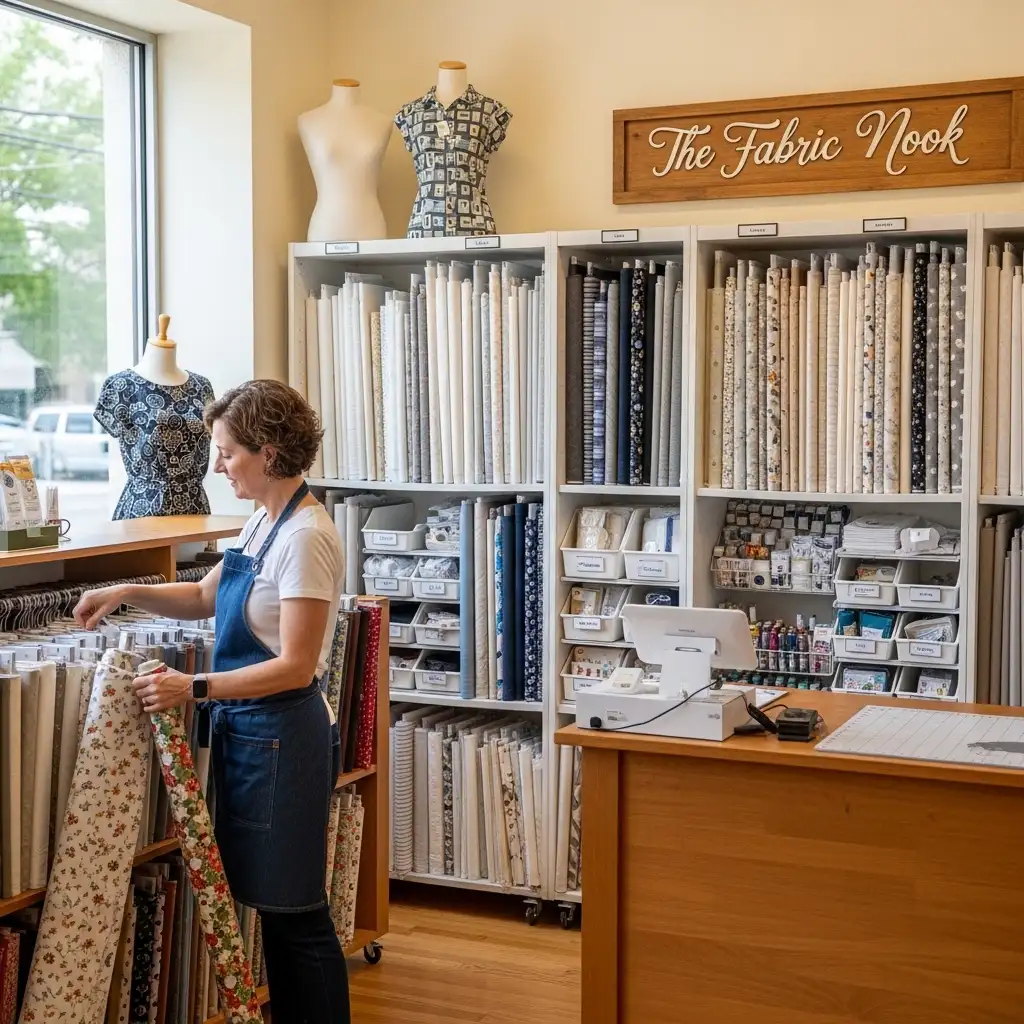
Fold fabric pieces neatly around pieces of cardboard cut to a consistent size, just like fabric is displayed in fabric stores. Stand the wrapped pieces upright in a deep bin or drawer, organized by color. This method keeps every piece visible, prevents unraveling, and allows you to flip through the collection like pages in a book to find exactly the color or pattern you need. Store larger fabric lengths rolled around a cardboard tube and labeled at the end.
| Fabric Storage Method | Best For |
| Wrapped on cardboard inserts | Fat quarters and cut pieces by color |
| Rolled on cardboard tubes | Larger yardage cuts |
| Clear labeled bins by color | Sorted collection easy to browse |
| Hanging fabric on dowel | Display and access for frequent use |
| Vacuum bags for bulk | Seasonal and backup fabric compressed |
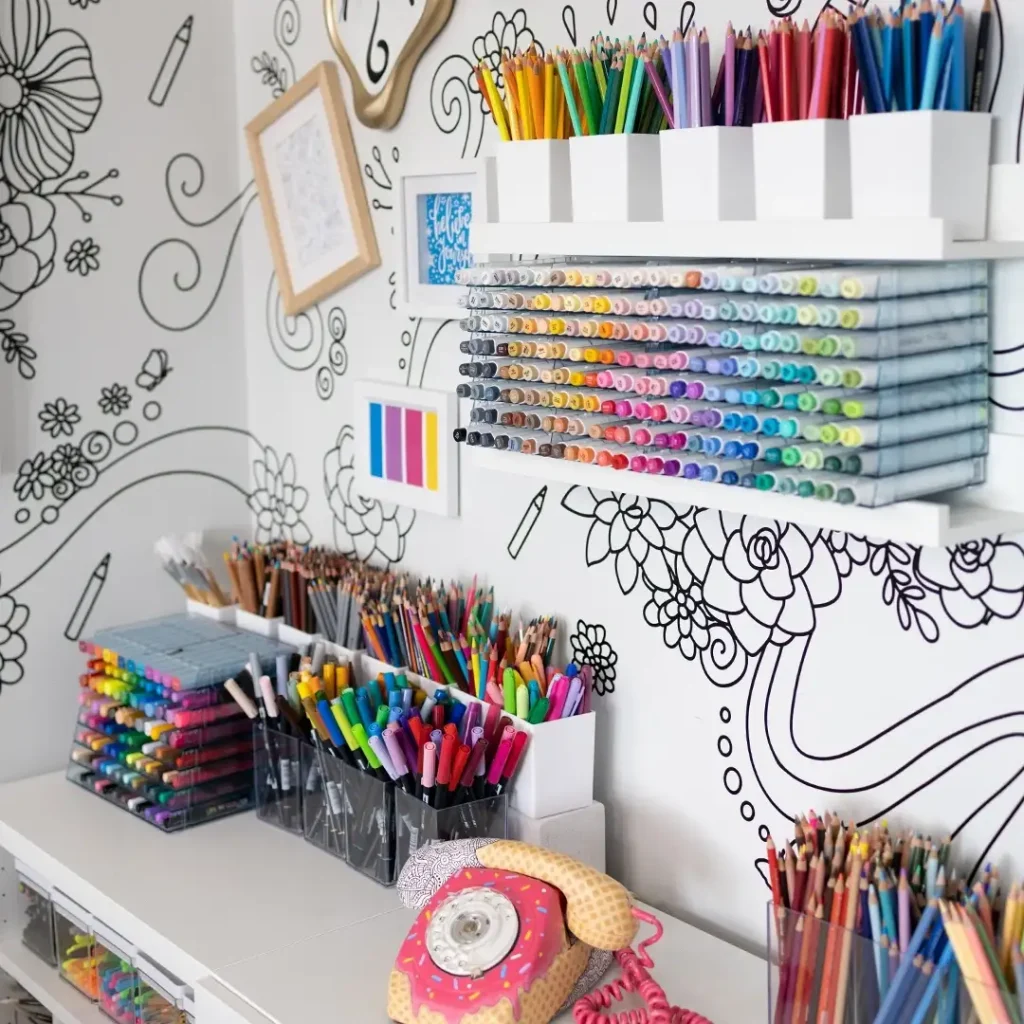
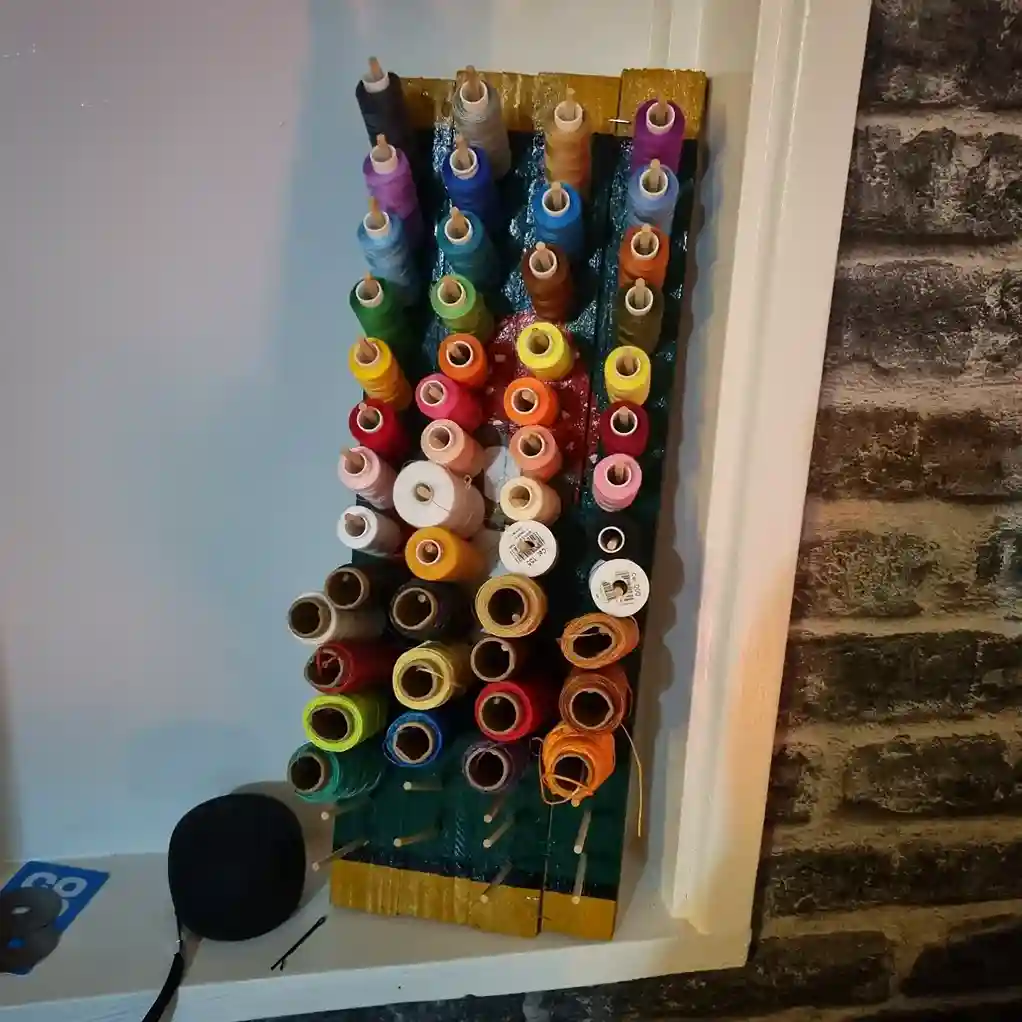
Idea 6: Mount a Thread and Spool Display Wall
Thread spools are beautiful objects in their own right. When displayed on a wall-mounted spool rack, your thread collection becomes a stunning, colorful feature that also functions as perfectly organized, instantly accessible storage. A rainbow-organized thread wall is one of the most photographed and most beloved craft room storage features available.
source: @gallymuse
Build or buy a simple wooden board with rows of dowel pegs or cup hooks spaced to hold standard thread spools. Mount it on the wall at a comfortable reaching height. Organize thread in a rainbow gradient from warm reds through oranges, yellows, greens, blues, and purples to achieve the most beautiful display effect. This converts the most frequently needed supply in a sewing or embroidery craft room from a tangled drawer into a wall of organized color.
| Thread Display Style | How to Create It |
| Wooden board with dowel pegs | Thread spools hang on individual pegs |
| Horizontal wooden rod rows | Thread slides onto rods by color group |
| Shadow box frame display | Curated color selection behind glass |
| Pegboard with small hooks | Flexible position for different spool sizes |
| Rainbow gradient organization | Colors flow warm to cool left to right |
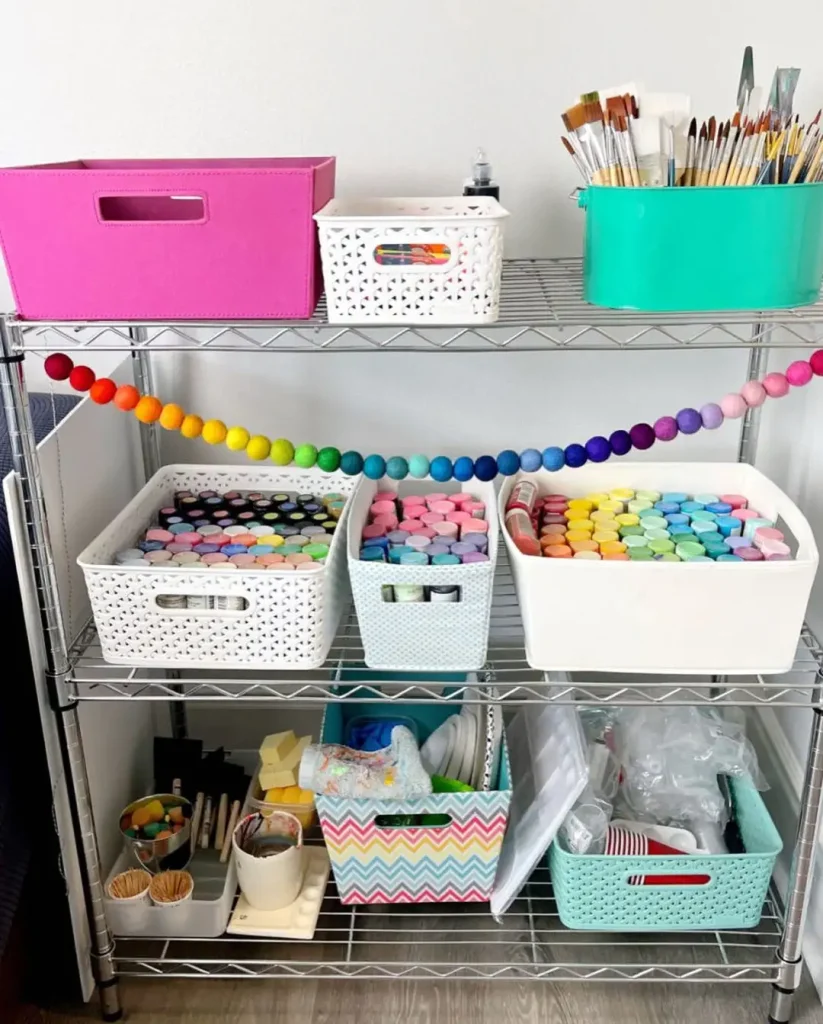
Idea 7: Use Labeled Bins and Baskets Throughout
Labeled bins and baskets are the backbone of any well-organized craft room. They contain supplies that would otherwise scatter across surfaces, they make the room look tidier even when fully packed with materials, and they allow every family member or studio visitor to find and return supplies correctly without any guidance.
source: @visionandhammer
Use the same basket style and color throughout the craft room for a cohesive, polished look. Wicker baskets add natural warmth to a rustic or vintage craft room. Fabric bins in neutral tones suit contemporary spaces. Wire baskets suit industrial or farmhouse aesthetics. Label every basket with a clear, readable label on the front. Print labels on a label maker for the most professional finish.
This consistent labeling system is the same organizing principle that makes laundry room organization so effective. When every container is labeled, the system maintains itself because everyone always knows exactly where each item belongs.
| Basket or Bin Style | Best Craft Room Aesthetic |
| Wicker basket | Vintage, rustic, and farmhouse rooms |
| Fabric bin with label | Contemporary and clean modern spaces |
| Wire mesh basket | Industrial farmhouse and open shelving |
| Canvas tote bin | Soft, casual, and budget-friendly |
| Clear plastic bin with lid | Maximum visibility, dustproof storage |
Idea 8: Create a Dedicated Paper and Cardstock Storage System
Paper and cardstock are the most awkward supplies to store well. They are flat and heavy, they damage easily when bent or crushed, and they need to be stored vertically to remain accessible without removing everything above them. A purpose-built paper storage system solves all of these problems elegantly.
source: @smartfundiy
Use a vertical paper sorter with individual labeled slots for each paper color or type. Tall magazine files or standing dividers in a deep drawer keep paper sheets upright and accessible without bending. A dedicated paper drawer unit with full-extension drawers allows flat paper to be stored horizontally in color-organized layers. Store specialty paper, vellum, and premium cardstock in labeled clear file folders within a hanging file system for maximum protection against damage.
| Paper Storage Solution | What It Stores Best |
| Vertical slot sorter | Standard cardstock by color |
| Magazine files standing upright | A4 and letter paper sheets |
| Full-extension flat drawer | Mixed paper types in organized layers |
| Labeled clear file folders | Specialty and premium paper protected |
| Wall-mounted paper roll holder | Continuous roll for large projects |
Idea 9: Organize Paint with a Dedicated Paint Storage System
Paint bottles and tubes are among the most disorganized craft supplies in any creative space. They get knocked over, the lids get mixed up, and finding a specific color means rummaging through a pile of identical-looking bottles. A dedicated paint storage system keeps every bottle visible, upright, and organized by color for fast selection.
Mount tiered spice-rack style shelving specifically for paint bottles on the wall above the craft table. This positions every bottle at an angle that keeps it visible and prevents rolling. Organize by color family from warm to cool for the most intuitive retrieval. Use a rotating lazy Susan turntable on the desk for the most frequently used paint colors. Store specialty paints like metallics and mediums in a separate labeled section to prevent confusion with standard craft paints.
| Paint Storage Method | Best Application |
| Tiered wall-mounted rack | All bottles visible at an angle |
| Rotating lazy Susan | Frequent-use colors on desk surface |
| Color-organized grouping | Warm to cool for intuitive finding |
| Separate metallic section | Specialty paints in own labeled zone |
| Labeled acrylic tray | Current project colors together |
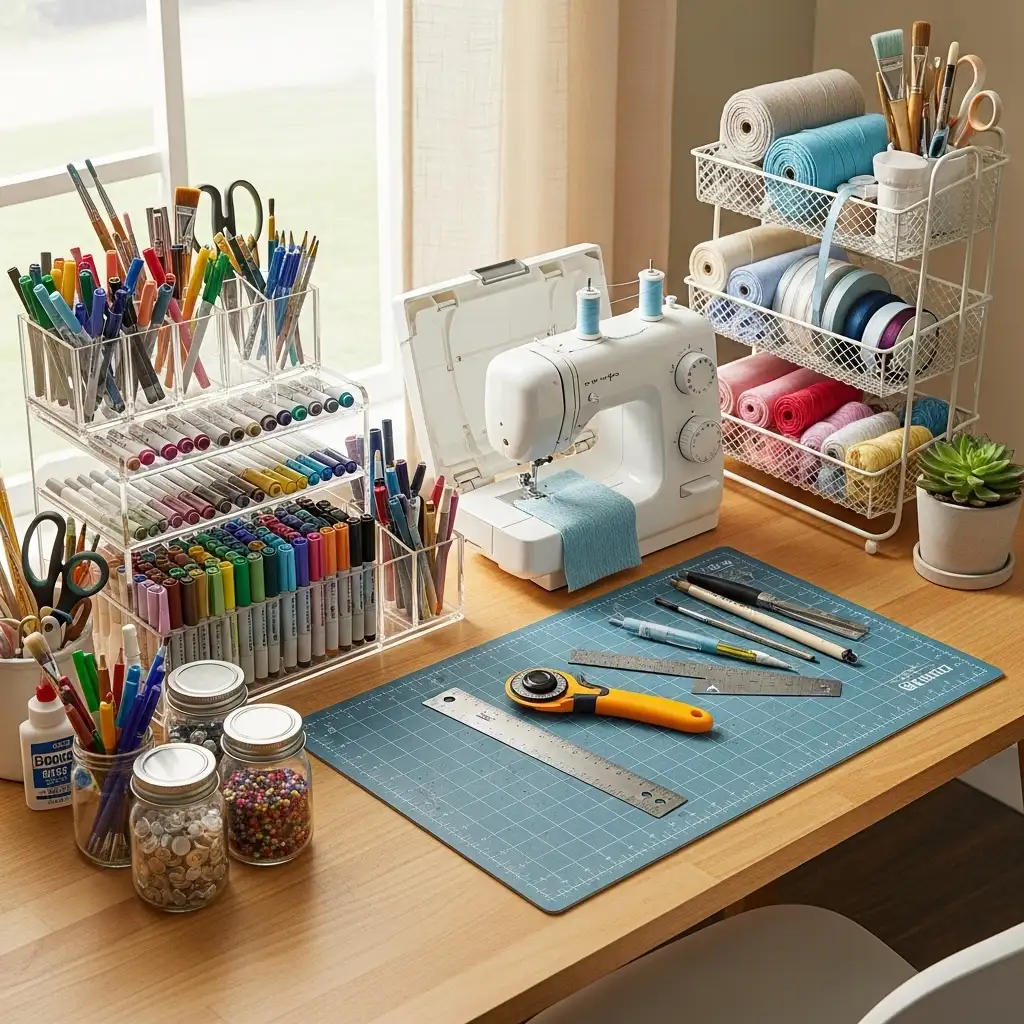
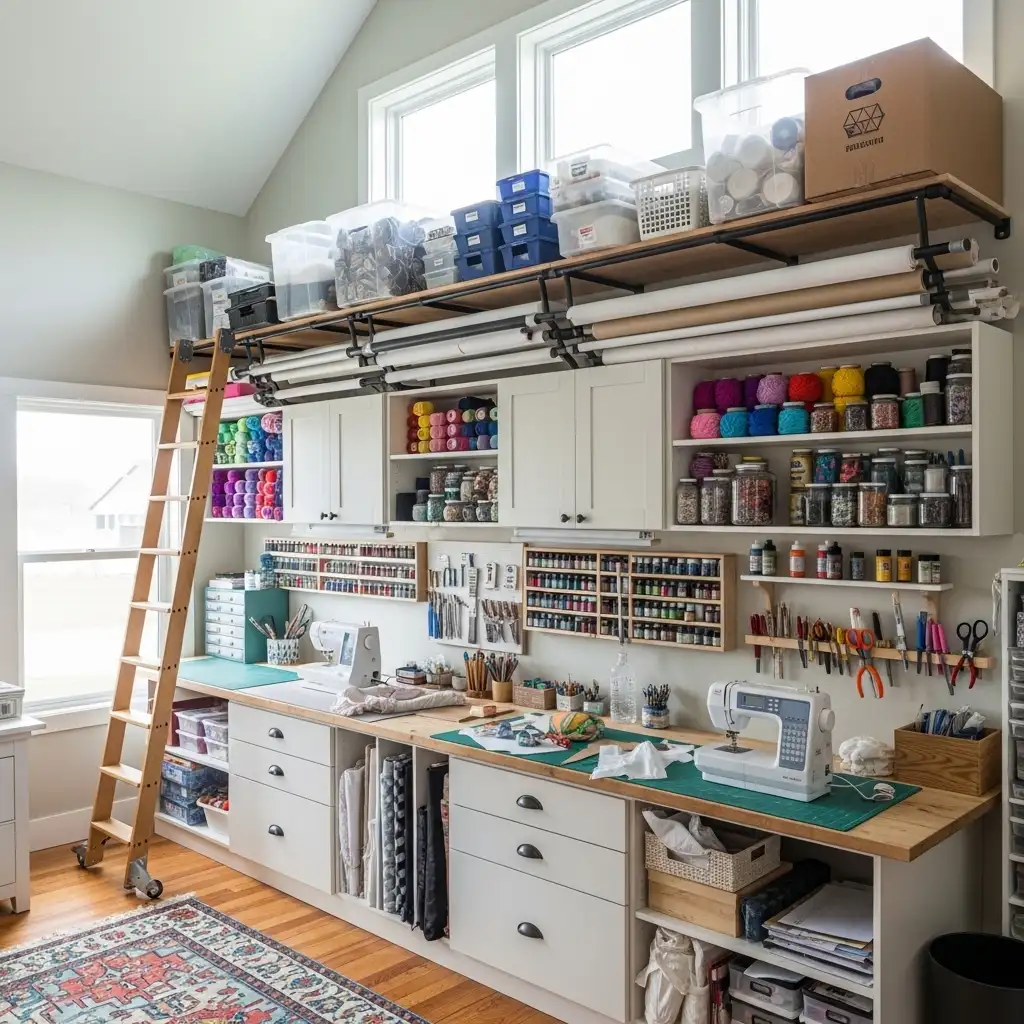
Idea 10: Install a Cutting Table with Storage Underneath
A cutting table with storage integrated beneath is one of the most functional pieces of furniture a craft room can have. The standing-height table eliminates back strain during long cutting sessions while the storage beneath holds large cutting mats, fabric rolls, rulers, and bulky tools that do not fit neatly on shelves.
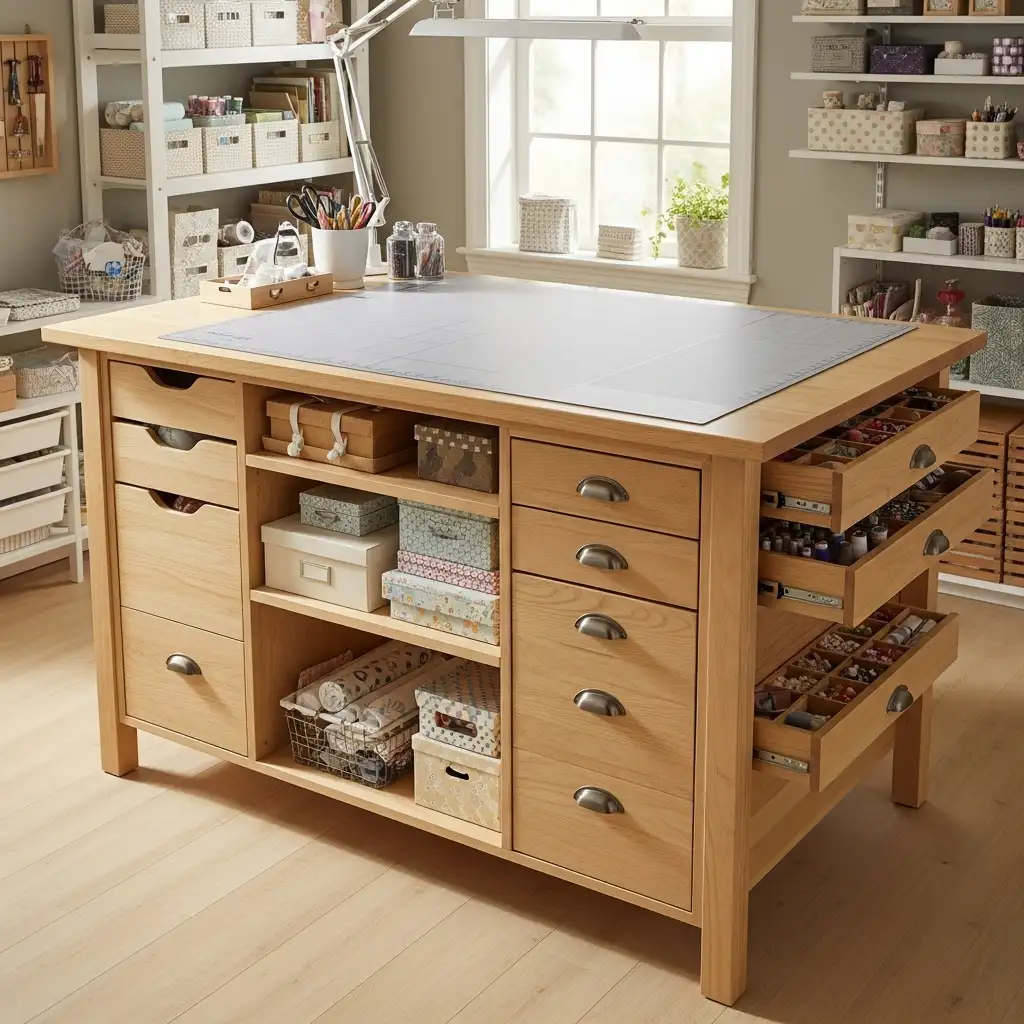
Build or buy a cutting table with deep drawers or open shelving below the work surface. Use one deep drawer for large cutting mats stored flat. Another drawer for rotary cutters, seam rippers, and cutting tools. Open lower shelves suit fabric bins and large supply boxes. The table surface itself should be smooth, large, and marked with a grid for accurate cutting. A cutting table transforms the most messy and most frequently used craft task into an organized, efficient, and enjoyable process.
| Cutting Table Storage Zone | What to Store There |
| Deep flat top drawer | Large cutting mats stored flat |
| Tool drawer | Rotary cutters, scissors, seam rippers |
| Open lower shelves | Fabric bins and large supply boxes |
| Side hooks on table legs | Frequently grabbed small tools |
| Table surface grid markings | Accurate cutting without separate ruler |
Idea 11: Use a Pegboard Inside Cabinet Doors
The inside surfaces of craft room cabinet doors are almost always completely wasted space. Adding pegboard, hooks, or organizer panels to the inside of cabinet doors transforms these forgotten surfaces into highly useful storage for lightweight tools and small supplies.
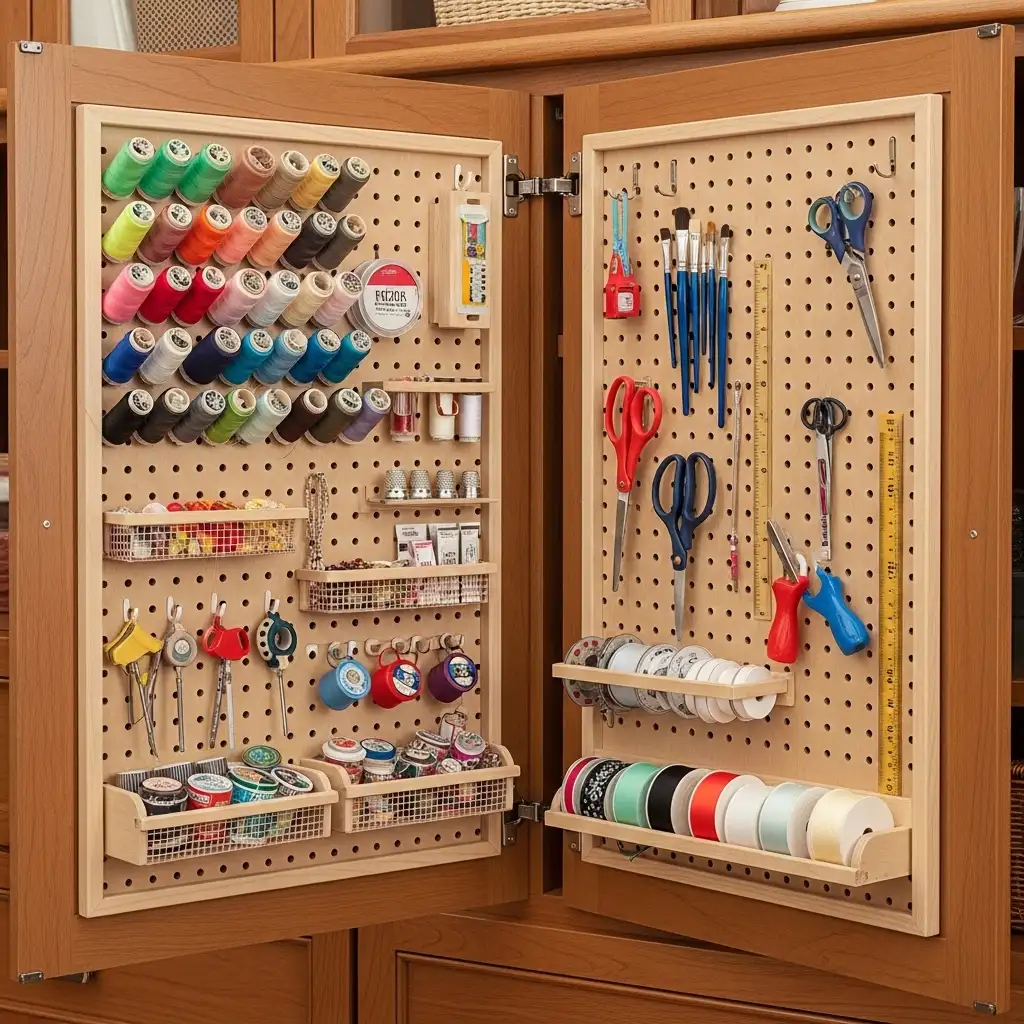
Measure the inside door panel carefully and cut pegboard to fit within the door frame. Attach it with small standoff spacers so hooks have room to fit. Add hooks for scissors, rulers, and measuring tapes. Add a small wire rack for spice-jar sized containers of supplies. This door-mounted storage approach mirrors the same thinking that makes kitchen corner cabinet organization so effective. Every previously unused surface becomes a storage opportunity, and the most frequently grabbed tools end up closest to the work surface where they are needed most.
| Inside Door Storage Type | What to Hang |
| Pegboard with S-hooks | Scissors, rulers, measuring tape |
| Wire magazine rack | Pattern envelopes and reference sheets |
| Small cup hooks | Thread bobbins and small tools |
| Adhesive small bins | Pins, clips, and erasers |
| Magnetic strip | Metal tools and small scissors |
Idea 12: Create a Ribbon and Trim Organization Station
Ribbon and decorative trim are beautiful but notoriously difficult to store without tangling. The solution is a dedicated ribbon station that keeps every roll visible, accessible, and completely tangle-free. When ribbon storage works properly, cutting a length takes five seconds rather than five minutes of frustrating untangling.
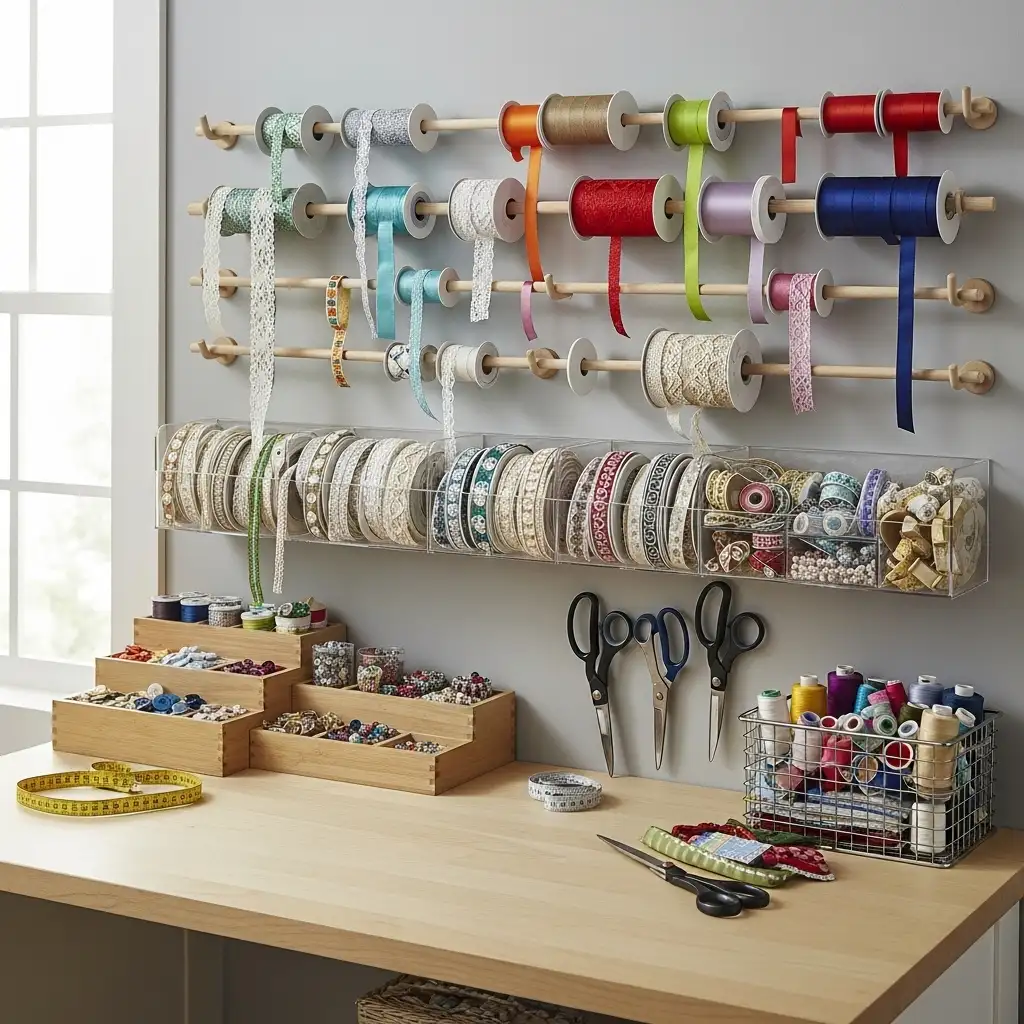
Mount a horizontal dowel rod on the wall and thread ribbon spools directly onto it. The ribbon hangs freely and can be cut directly from the spool without removing it. Alternatively, use a curtain rod mounted inside a cabinet with ribbon spools hung by their holes. A tiered tension rod system inside a drawer keeps smaller ribbon and trim rolls neatly separated and accessible. Organize all ribbon by color family for a beautiful display that also makes color-matching fast and intuitive.
| Ribbon Storage Method | Best For |
| Horizontal wall dowel with spools | Large ribbon collection on display |
| Curtain rod inside cabinet | Hidden but accessible spool storage |
| Drawer tension rod dividers | Smaller rolls and trim pieces |
| Individual ziplock bags labeled | Small ribbon remnants by color |
| Clear box with dividers | Ribbon sorted in stackable system |
Idea 13: Use IKEA Products to Build a Budget Craft Storage System
IKEA products offer some of the most versatile and most affordable craft room storage solutions available. The KALLAX shelving unit, the ALEX drawer unit, and the SKADIS pegboard are particularly well suited to craft room organization and can be combined into a complete, cohesive storage system at a fraction of custom cabinetry cost.

source: @d.i.y.holic
Use a horizontal KALLAX as a cutting bench base with a custom work surface on top. Fill the KALLAX cubbies with matching DRONA boxes for sorted supply storage. Mount a SKADIS pegboard on the wall above for tool storage. Add an ALEX drawer unit beside the table for small supply organization. The IKEA system is modular, affordable, and infinitely expandable as your craft supply collection grows. For a complete guide to building organized, functional, and attractive storage systems using IKEA products, our detailed resource on IKEA mudroom ideas shows exactly how to combine IKEA pieces into cohesive, high-performing storage systems across every room in the home.
| IKEA Product | Craft Room Use |
| KALLAX shelving unit | Cubby storage or cutting bench base |
| DRONA fabric boxes | Hidden sorted storage in KALLAX |
| SKADIS pegboard | Flexible tool and supply wall storage |
| ALEX drawer unit | Small supply organization beside table |
| RÅSKOG rolling cart | Mobile current project supply station |
Idea 14: Organize Stamps and Dies with a Dedicated System
Rubber stamps and die cut sets are expensive, fragile, and notoriously difficult to organize. Without a proper storage system, finding the right stamp means searching through unmarked cases for minutes at a time. A dedicated stamp and die storage system makes every piece findable in seconds.
source: @_thepinklemon
Store rubber stamps upright in a card index file box, stamped directly onto an index card so you can see the impression without removing the stamp. Keep clear photopolymer stamps in labeled CD jewel cases stacked vertically in a drawer. Store die cut sets in labeled envelopes or in purpose-built die storage magnetic albums. Arrange all stamp and die storage alphabetically or by category theme for the most logical retrieval system. Photograph your full collection and keep a printed or digital catalog for quick project planning reference.
| Stamp or Die Type | Best Storage Solution |
| Rubber stamps | Card index box, impression on card |
| Clear photopolymer stamps | Labeled CD jewel cases stacked |
| Die cut sets | Magnetic storage album or labeled envelopes |
| Large foam stamps | Standing in deep bin with tabs |
| Embossing folders | Labeled hanging file folders |
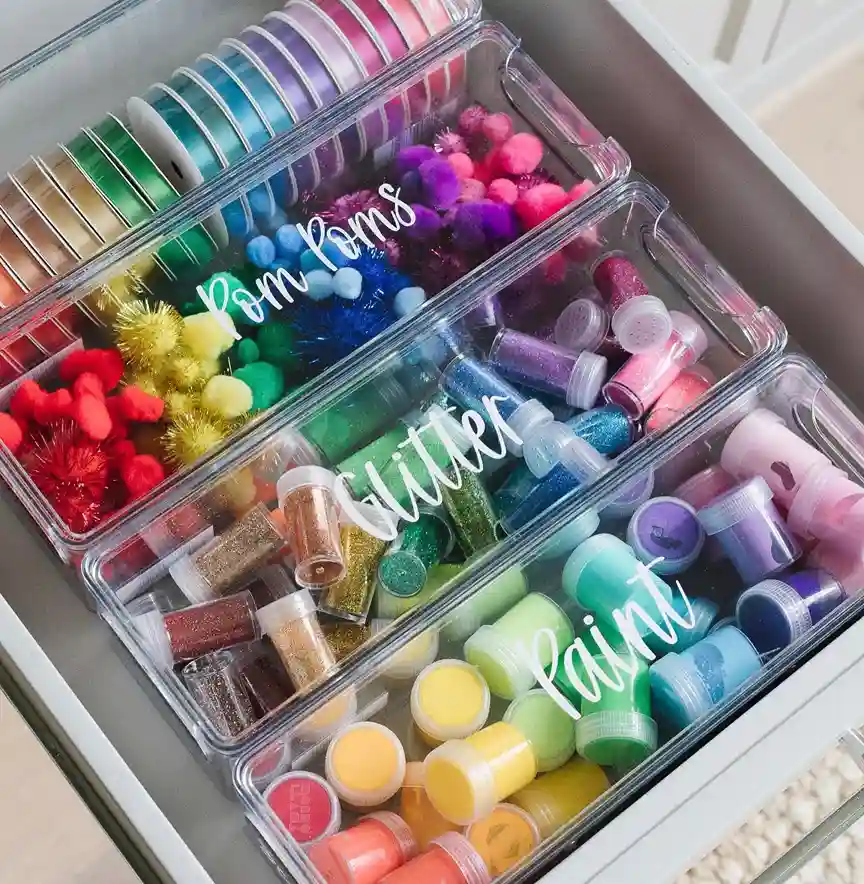
Idea 15: Add a Dedicated Embellishment Organization System
Embellishments including brads, rhinestones, pearls, flowers, buttons, and charms are tiny, numerous, and absolutely essential to paper crafting and card making. Without organization they become an unusable mixed jumble. A proper embellishment system makes every type instantly visible and individually accessible.
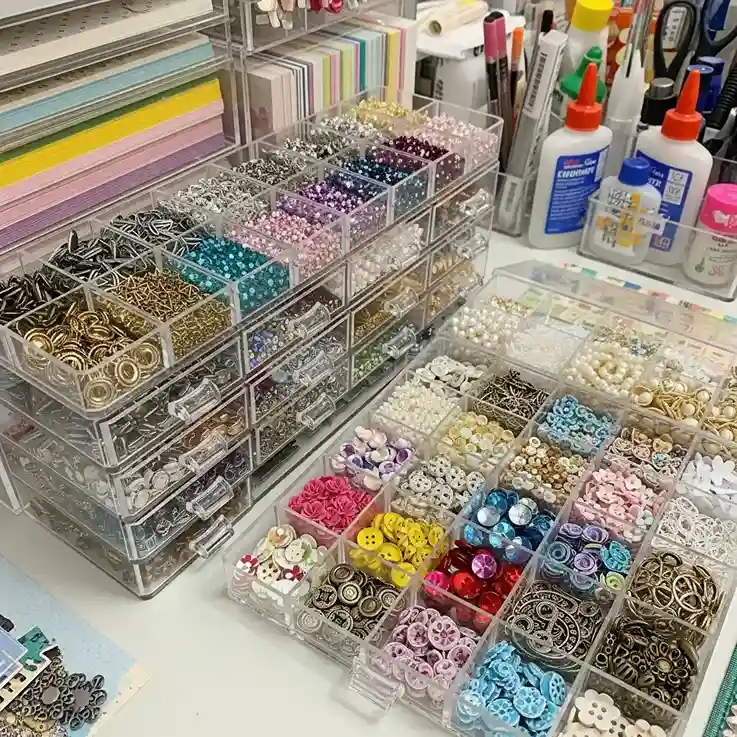
Use a multi-drawer bead storage chest with small individual drawers for each type of embellishment. Label every drawer clearly on the front. Sort by type first and then by color within each type. A rotating turntable with multiple small compartments keeps frequently used embellishments accessible on the desk surface. Store larger collections of buttons and brads in small glass jars arranged on a shelf by color for a beautiful display that is also completely functional.
| Embellishment Category | Storage Solution |
| Rhinestones and gems | Multi-drawer bead chest by color |
| Brads and eyelets | Small labeled compartment drawer |
| Fabric flowers and die cuts | Shallow lidded boxes by type |
| Pearls and beads | Small glass jars by color on shelf |
| Charms and metal pieces | Ziplock bags in labeled binder pockets |
Idea 16: Store Washi Tape on a Display Stand or Dowel
Washi tape collections grow fast. What starts as a few rolls quickly becomes dozens of patterns and colors that need a proper display system. The best washi tape storage makes every roll visible so you can immediately select the perfect pattern for any project without handling every roll individually.
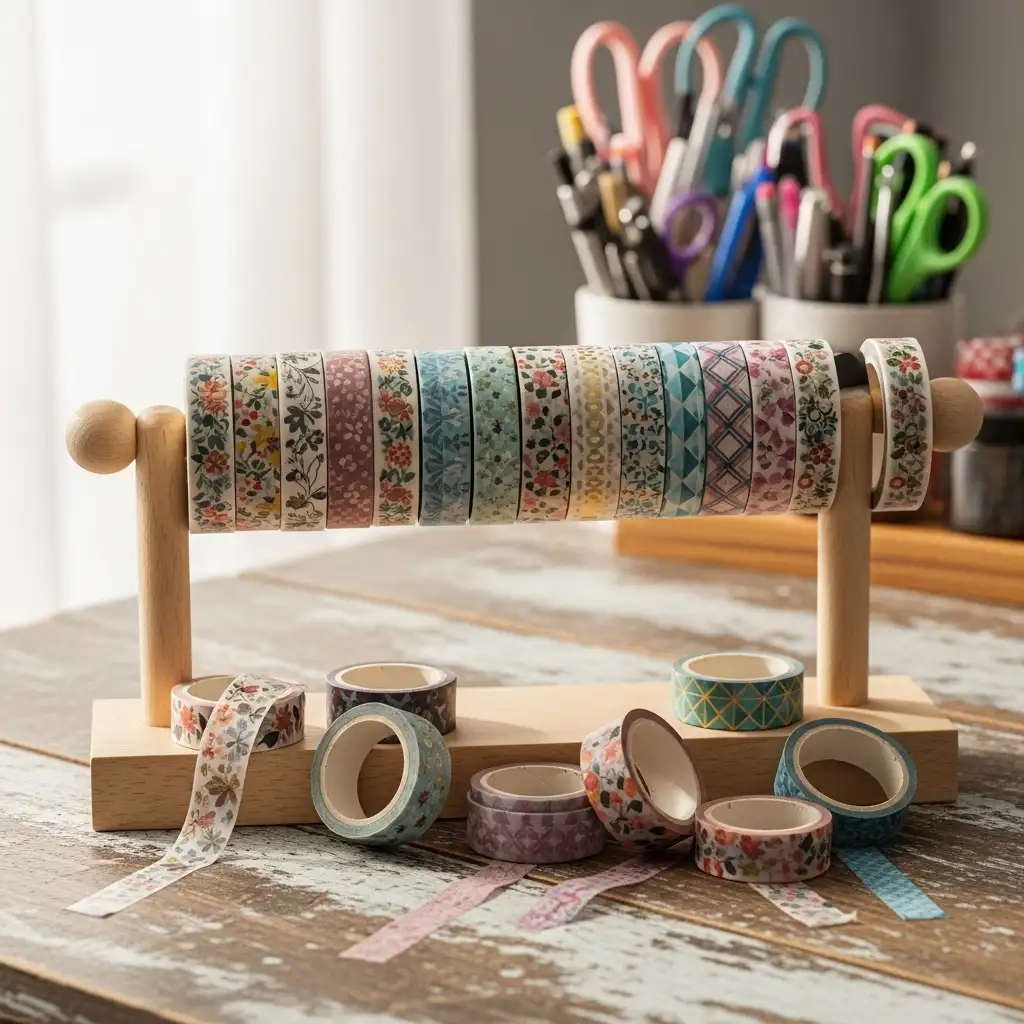
Mount a horizontal wooden dowel rod between two wall-mounted supports at desk height. Slide washi tape rolls onto the dowel so they hang freely and can be pulled down individually for use. Organize by color for the most beautiful display effect. A tiered acrylic washi tape holder on the desk surface suits smaller collections. A pegboard hook with a small horizontal rod extension also works perfectly.
Washi tape displayed attractively on the wall becomes a decorative feature in its own right, much like the ribbon displays and organized color arrangements that define the most beautiful vintage craft room aesthetic.
| Washi Tape Display | Collection Size Suited |
| Horizontal wall dowel | Large collection, full display |
| Tiered acrylic desk holder | Medium collection, desk access |
| Pegboard rod extension | Moderate collection, flexible |
| Clear round storage box | Small collection, portable |
| Divided drawer organizer | Hidden but organized collection |
Idea 17: Use a Vintage Armoire or Wardrobe for Hidden Craft Storage
A vintage armoire or wardrobe is one of the most beautiful and most capacious craft storage solutions available. Its large interior holds an extraordinary amount of supplies completely out of sight behind closed doors. The exterior appearance suits any room aesthetic from rustic to contemporary depending on the finish chosen.
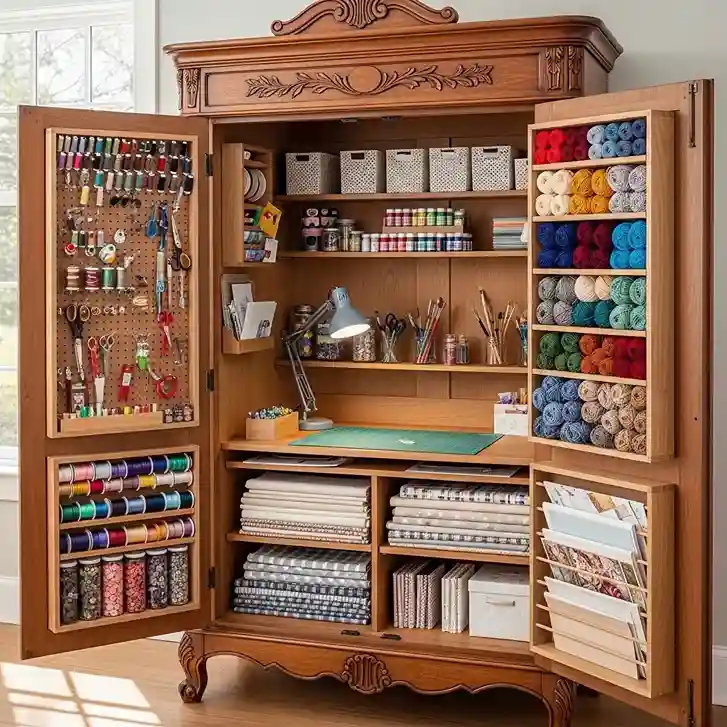
Remove unnecessary interior fittings and install custom shelving, hooks, and small drawer units inside the armoire to suit your specific craft supply categories. The inside of each door can hold a pegboard, hooks, or small racks for additional storage. When the doors are open during a craft session, everything is accessible. When closed, the entire craft supply collection disappears behind the beautiful exterior. A vintage or chalk-painted armoire particularly suits farmhouse and vintage-style craft rooms.
| Armoire Interior Zone | What to Store |
| Top shelf | Rarely used supplies and seasonal items |
| Upper middle shelves | Paper collections and fabric stacks |
| Eye-level shelves | Most-used supplies in labeled bins |
| Lower shelves | Heavy items and large supply boxes |
| Inside door hooks | Small tools, scissors, measuring tape |
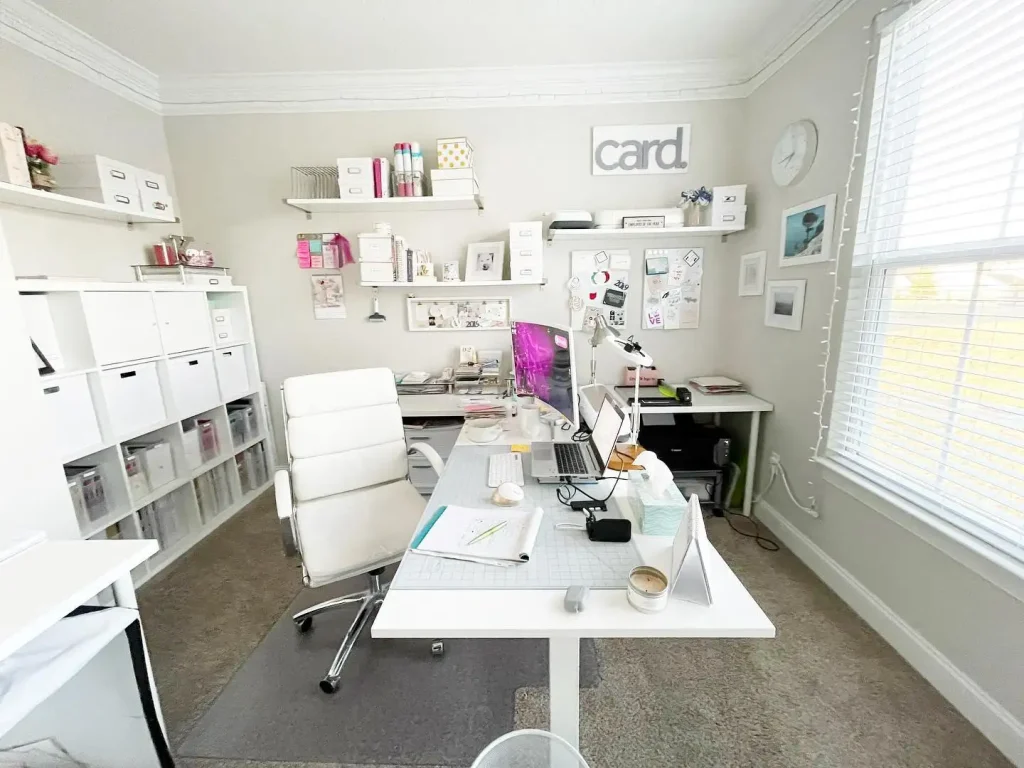
Idea 18: Organize Your Craft Table Surface for Daily Efficiency
The craft table surface is your primary creative workspace. Keeping it clear, organized, and ready for immediate use dramatically improves both the quality and the enjoyment of every craft session. A cluttered desk does not just look messy. It actively prevents focused creative work.
Keep only the supplies you use in every session permanently on the desk surface. Everything else goes into storage. Use a small tray or turntable to contain the essentials: scissors, tape, a pen, and a glue stick. Position your most frequently used tools within arm’s reach without having to stand.
A well-organized desk surface is exactly the same kind of intentional daily workspace that makes cubicle decor and workspace organization so valuable in professional settings. When your immediate work surface is clear and organized, your thinking becomes clearer and your creative output improves significantly.
| Desk Surface Item | Why It Belongs There |
| Small tray of daily essentials | Scissors, tape, pen, glue stick |
| Current project materials only | No other supplies compete for attention |
| One small plant or candle | Visual pleasure, not functional clutter |
| Task lamp positioned correctly | Light exactly where the work happens |
| Nothing else | Clear space is productive creative space |
Idea 19: Use Vertical Dividers for Baking Sheet Style Flat Storage
Large flat items like cutting boards, foam sheets, large cardstock pads, art canvases, and cork boards are notoriously difficult to store in standard shelving without creating an unstable, falling pile. Vertical dividers store every flat item upright like records in a crate, making each piece individually accessible without disturbing the others.
source: @thecraftpatch
Build or buy a vertical divider storage unit from wood or metal. Space the dividers to accommodate the widths of your largest flat items while keeping narrower items supported upright. Place this unit in a deep lower cabinet or on the floor beside the craft table. Label the front of each section with the category of item it holds. The same vertical divider principle that organizes flat items in kitchens works identically well in craft rooms for any flat, awkward-to-stack supply.
| Vertical Divider Section | What Goes Upright There |
| Wide sections | Large art canvases and foam boards |
| Medium sections | Cardstock pads and large cutting mats |
| Narrow sections | Individual cardstock sheets by color |
| Short sections | Small cutting mats and board pieces |
| Labeled front of each slot | Instant identification without pulling out |
Idea 20: Create a Beautiful Inspiration Board Storage System
A large inspiration and design board in the craft room serves as both creative fuel and practical storage. Fabric swatches, color samples, project sketches, magazine cutouts, and current project reference images can all be pinned to the board where they remain visible throughout the project rather than getting lost in a folder or buried in a notebook.
Cover a large section of wall above the desk with corkboard panels for maximum pinning surface. A linen or burlap-covered frame creates a beautiful version of the same idea. A large magnetic whiteboard allows non-pinnable materials to be displayed with small magnets.
Change the content of the board with each new project. What was a pure inspiration tool becomes a practical project management system that keeps the current creative vision always visible. The same principle of keeping current work visible and immediately referenceable applies equally in hobby room design where design walls, reference boards, and display systems keep the creative vision continuously accessible during active project work.
| Inspiration Board Type | Best Use |
| Full wall corkboard | Maximum pinning for large collections |
| Linen-covered frame board | Beautiful and portable inspiration display |
| Magnetic whiteboard | Non-pin materials and sketch notes |
| Grid wire panel | Clips and hung small items |
| Rotating content per project | Always reflects current creative focus |
Idea 21: Store Yarn with a Beautiful Open Display System
Yarn storage is one of the most visually enjoyable craft storage challenges because yarn is inherently beautiful. The rich colors, varied textures, and pleasing shapes of yarn skeins and balls make them as decorative as they are functional. The best yarn storage displays the collection openly so both the visual pleasure and the practical accessibility are maximized simultaneously.
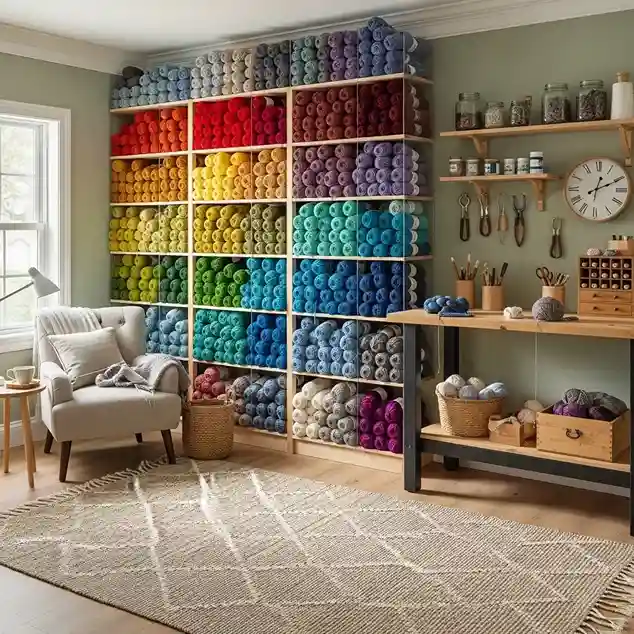
Wall-mounted cubby shelves with individual openings perfectly sized for yarn skeins create a stunning color display that also functions as perfectly organized storage. Each skein sits in its own cubby, visible and accessible without disturbing neighboring skeins. Large wicker or wire baskets on open shelves hold yarn balls beautifully. A yarn bowl on the craft table keeps the active project yarn from rolling and tangling during work. Organize all displayed yarn in a rainbow gradient for maximum visual impact.
| Yarn Storage Method | Visual and Practical Benefit |
| Wall-mounted cubby shelves | Each skein visible in individual opening |
| Large wicker baskets on shelves | Natural texture, yarn displayed openly |
| Rainbow gradient organization | Beautiful display, intuitive color selection |
| Yarn bowl on work surface | Active yarn tangle-free during use |
| Ziplock bags per project | Project yarn kept together and labeled |
Idea 22: Use Drawer Organizer Inserts for Small Tools
Craft room drawers have a powerful tendency to become chaotic, mixed-up, and genuinely frustrating collections of everything and nothing. A drawer organizer insert system transforms a chaotic drawer into a perfectly organized, instantly navigable storage zone where every tool sits in its own designated space.
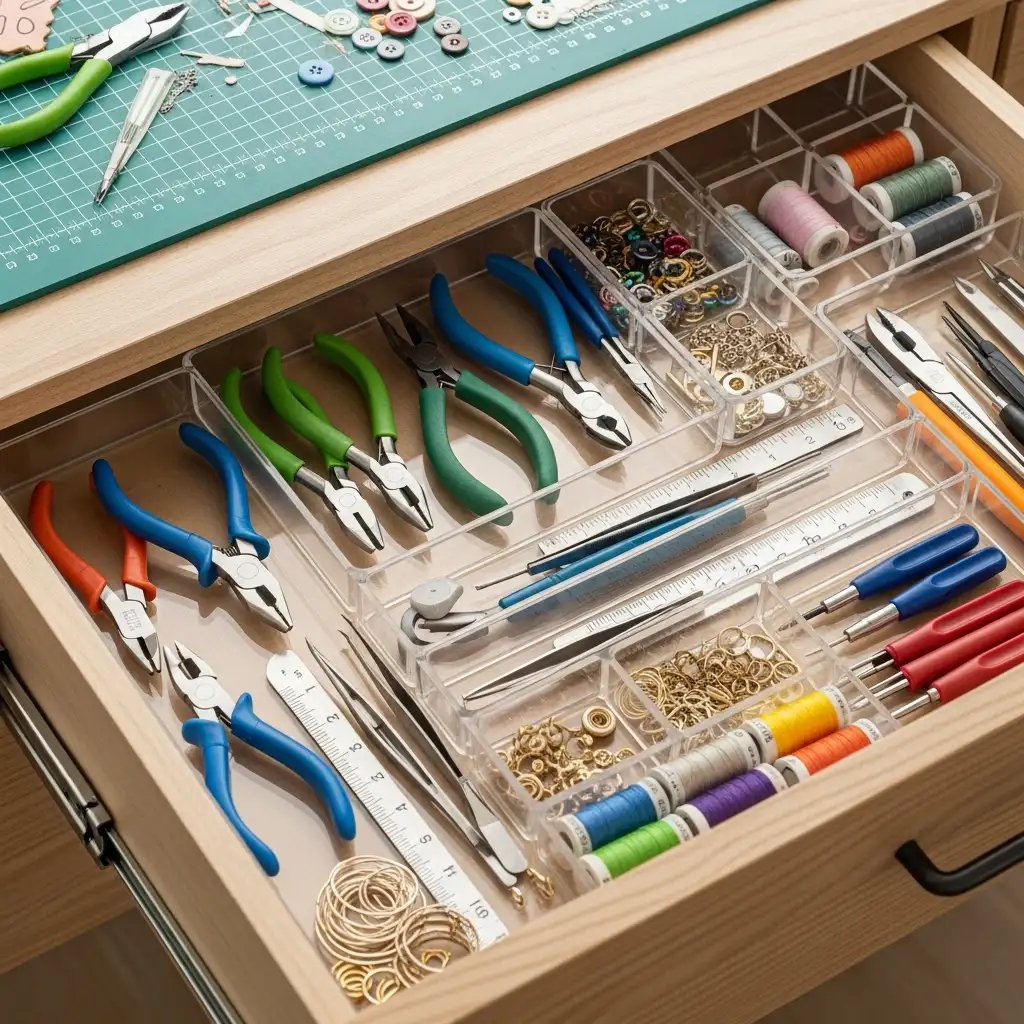
Use adjustable drawer dividers to create custom compartments sized exactly to the tools stored in each drawer. Dedicate one drawer entirely to cutting tools: scissors of various sizes, rotary cutters, and craft knives each in their own section.
Dedicate another drawer to adhesives: various glues, tape runners, and foam squares. A third drawer for measuring and marking tools. Label the outside of each drawer with its contents category. Drawer organization is the unglamorous backbone of a truly functional craft room.
| Drawer Category | Tools to Store Inside |
| Cutting tools drawer | Scissors, rotary cutters, craft knives |
| Adhesives drawer | Glues, tape runners, foam squares |
| Measuring and marking drawer | Rulers, bone folders, markers |
| Finishing tools drawer | Brushes, brayers, embossing tools |
| Miscellaneous tools drawer | Awls, eyelet setters, tweezers |
Idea 23: Add Wall-Mounted Magazine Files for Pattern and Book Storage
Craft patterns, instruction booklets, technique guides, and magazine tearsheets accumulate quickly in any active craft room. Without a proper system, they form a chaotic pile on the desk or disappear into unmarked folders never to be found again. Wall-mounted magazine files create vertical, labeled storage for every paper-based reference resource in the room.
source: @thecraftpatch
Mount a row of matching magazine files on the wall beside the desk at a comfortable reading height. Label each file clearly by category: knitting patterns, sewing patterns, embroidery designs, card making ideas, and so on. Stand patterns and booklets upright inside each file in the relevant category. The magazine files make every reference immediately findable without searching.
This simple wall-mounted reference system reflects the same organizing logic used in well-designed rustic living room shelving and display systems where books, references, and collections are displayed thoughtfully for both beauty and immediate practical use.
| Magazine File Label | Content to Store Inside |
| Knitting and crochet patterns | All yarn craft patterns and charts |
| Sewing patterns | Paper pattern envelopes and instructions |
| Paper craft and card ideas | Technique sheets and inspiration tearsheets |
| Project ideas and mood boards | Future project concepts and references |
| Instruction manuals | Tool and machine instruction booklets |
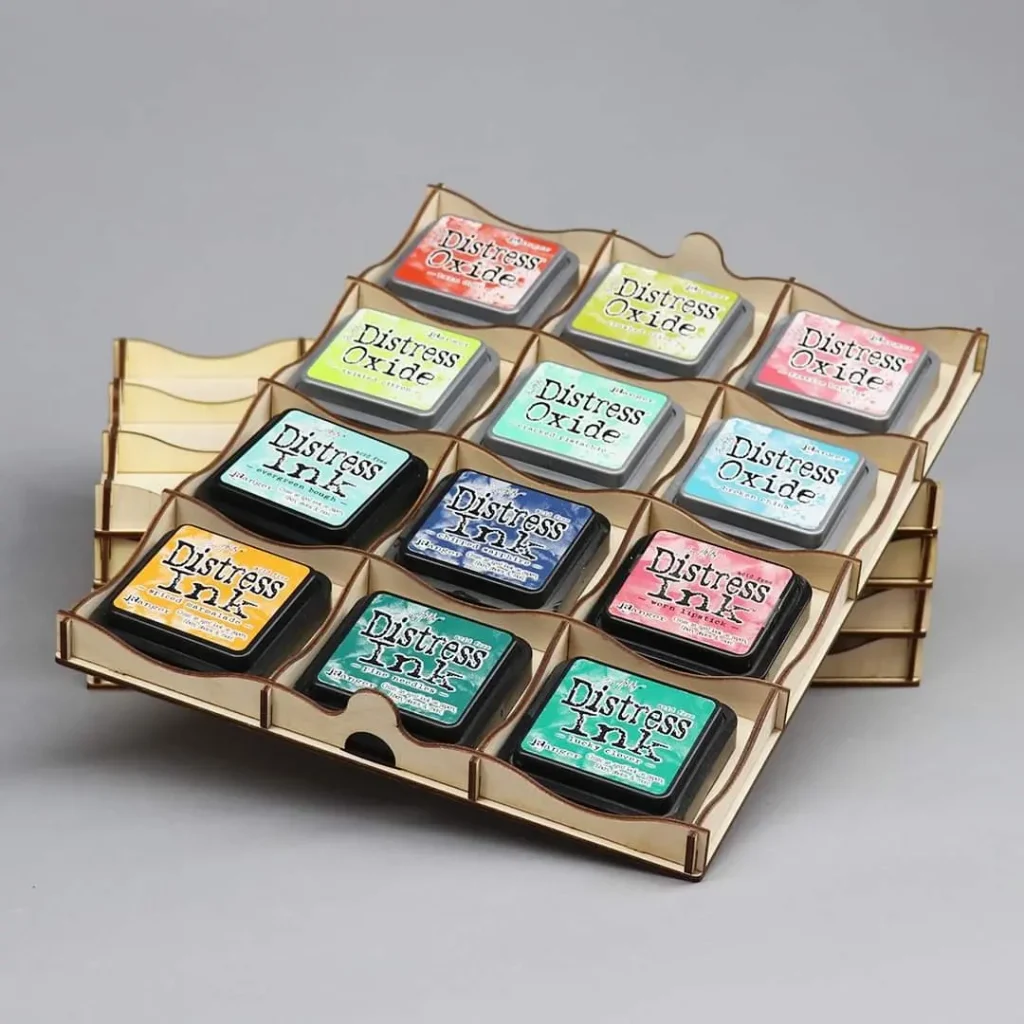
Idea 24: Create a Dedicated Ink Pad Storage Station
Ink pads are among the most important and most frequently used tools in paper crafting and card making. They need to be stored flat to prevent the ink from pooling at one end of the pad, they need to stay closed to prevent drying, and they need to be organized by color family so the right color can be found instantly during a project.
source: @bestcraftorganizer
Store all ink pads in a shallow tiered riser system that displays them at an angle with the color label facing upward. This allows you to read every color at a glance without picking anything up. Organize by color family around the color wheel. Keep a separate section for distressing inks, embossing inks, and specialty inks that are used differently from standard dye and pigment inks. Label every section of the storage system clearly for logical organization that works even mid-project when your hands are inky.
| Ink Pad Category | Storage Position |
| Standard dye inks by color family | Tiered riser, label facing up |
| Pigment inks | Separate tiered section beside dye inks |
| Embossing inks | Small labeled section, used differently |
| Distressing inks | Own section, often used together |
| Specialty and metallic inks | Labeled section, rarely used |
Idea 25: Use Tension Rods Inside Drawers as Dividers
Tension rods are one of the most affordable, most versatile, and most underused drawer organization tools available. A standard curtain tension rod placed across a drawer creates an instant divider that requires no drilling, no adhesive, and no tools. Multiple rods in one drawer create a fully customized compartment system in seconds.
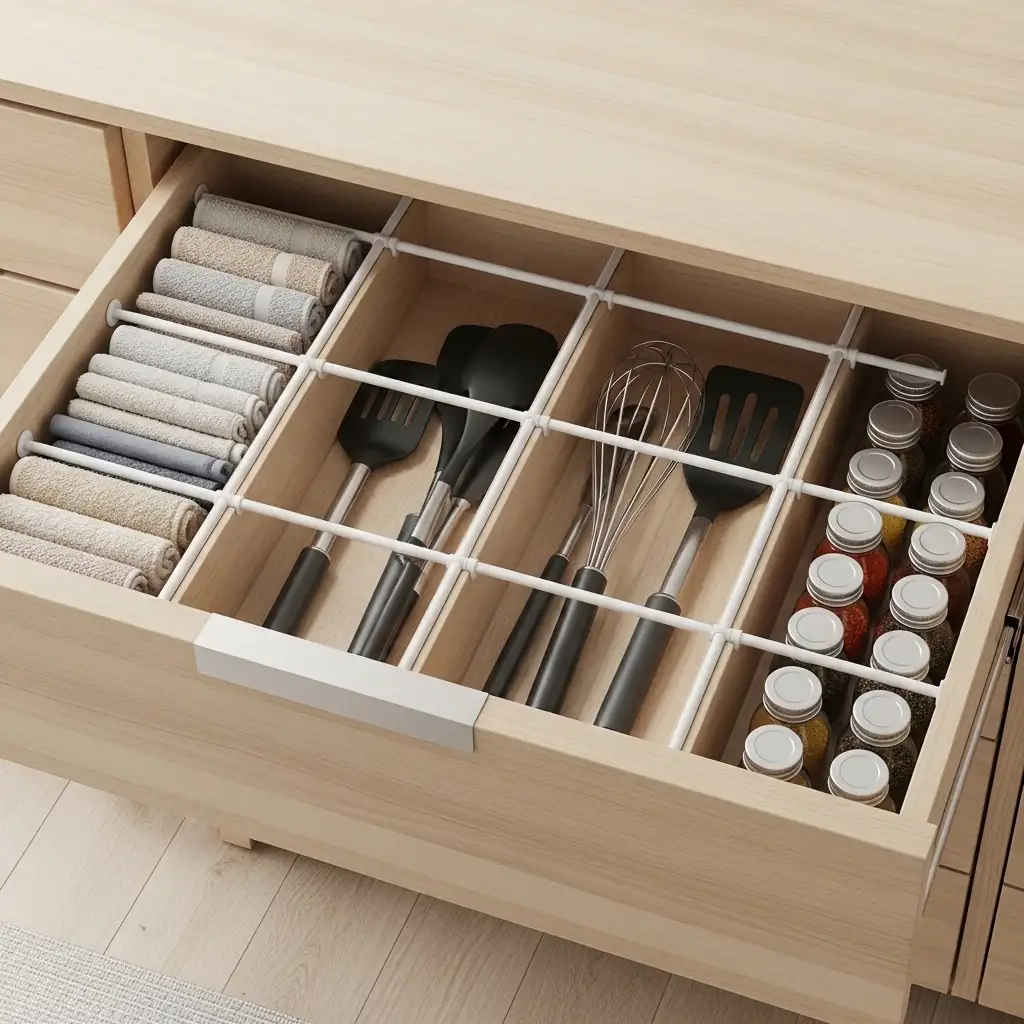
Place two or three tension rods across a deep drawer to create three or four sections. Use the sections for ribbon rolls, washi tape, or paper roll storage. In a shallow drawer, tension rods hold bottles of glue or paint upright and separated. Combine tension rods with the naturally organized sections they create for a free, instantly adjustable, and completely removable drawer organization solution that requires zero investment beyond a few rods from the hardware store.
| Tension Rod Application | What It Organizes |
| Two rods across deep drawer | Three sections for rolls and spools |
| Multiple rods shallow drawer | Upright bottle and paint storage |
| Rods creating narrow slots | Flat ruler and template storage |
| Single rod as barrier | Separates tool types in one drawer |
| Adjustable position anytime | Reorganize without tools as needs change |
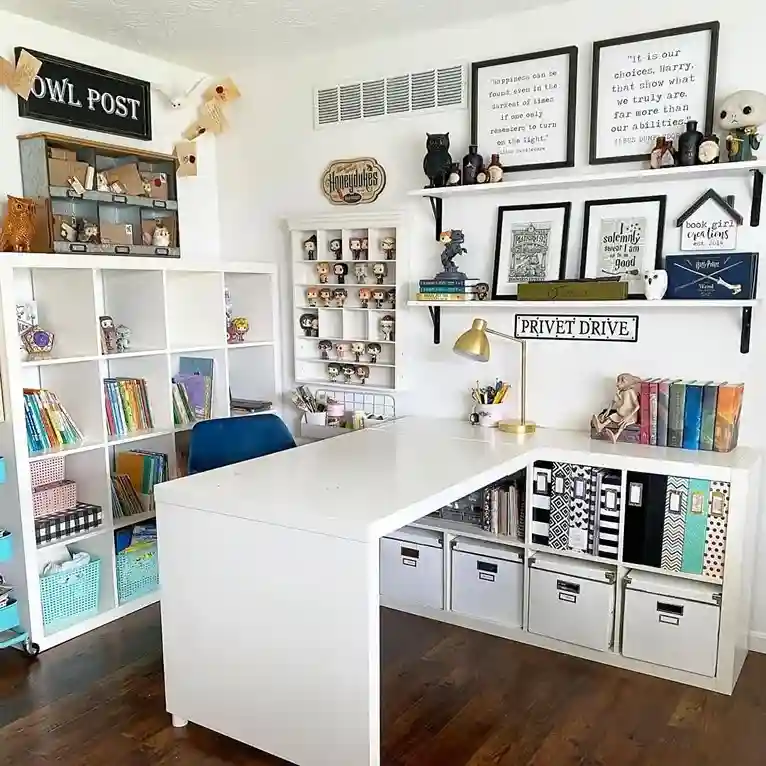
Idea 26: Store Large Supplies in a Dedicated Floor Cabinet
Some craft supplies are simply too large, too heavy, or too numerous for shelving or drawer storage. A dedicated floor-standing cabinet provides the bulk storage capacity needed for large fabric rolls, extensive paper collections, major tool sets, and seasonal project supplies that would overwhelm smaller storage systems.
source: @bookgirlcreations
Choose a tall floor cabinet with adjustable interior shelving to accommodate the specific heights and volumes of your largest supplies. Use the cabinet for supplies that are used less frequently but still need to remain accessible within the craft room. A painted vintage cabinet suits rustic and farmhouse craft rooms beautifully.
A clean white flat-pack cabinet suits contemporary spaces. The floor cabinet principle of providing large-scale hidden storage for bulky supplies works equally well in boys bedroom storage design and any other room where managing a large and varied collection of items in a small space is the primary organizational challenge.
| Floor Cabinet Zone | What to Store |
| Top shelves | Backup and rarely used large supplies |
| Middle shelves | Large paper pads and fabric rolls |
| Lower shelves | Heavy tools and large equipment |
| Full-height hanging section | Long items and banners |
| Door-mounted organizer | Frequently grabbed items on door back |
Idea 27: Create a Project Bag System for Works in Progress
One of the most important storage challenges in any active craft room is managing multiple works-in-progress simultaneously. A project that is paused mid-way through needs to be stored with all its materials, patterns, and notes together so it can be picked up and continued seamlessly at any time without a time-consuming reassembly search.
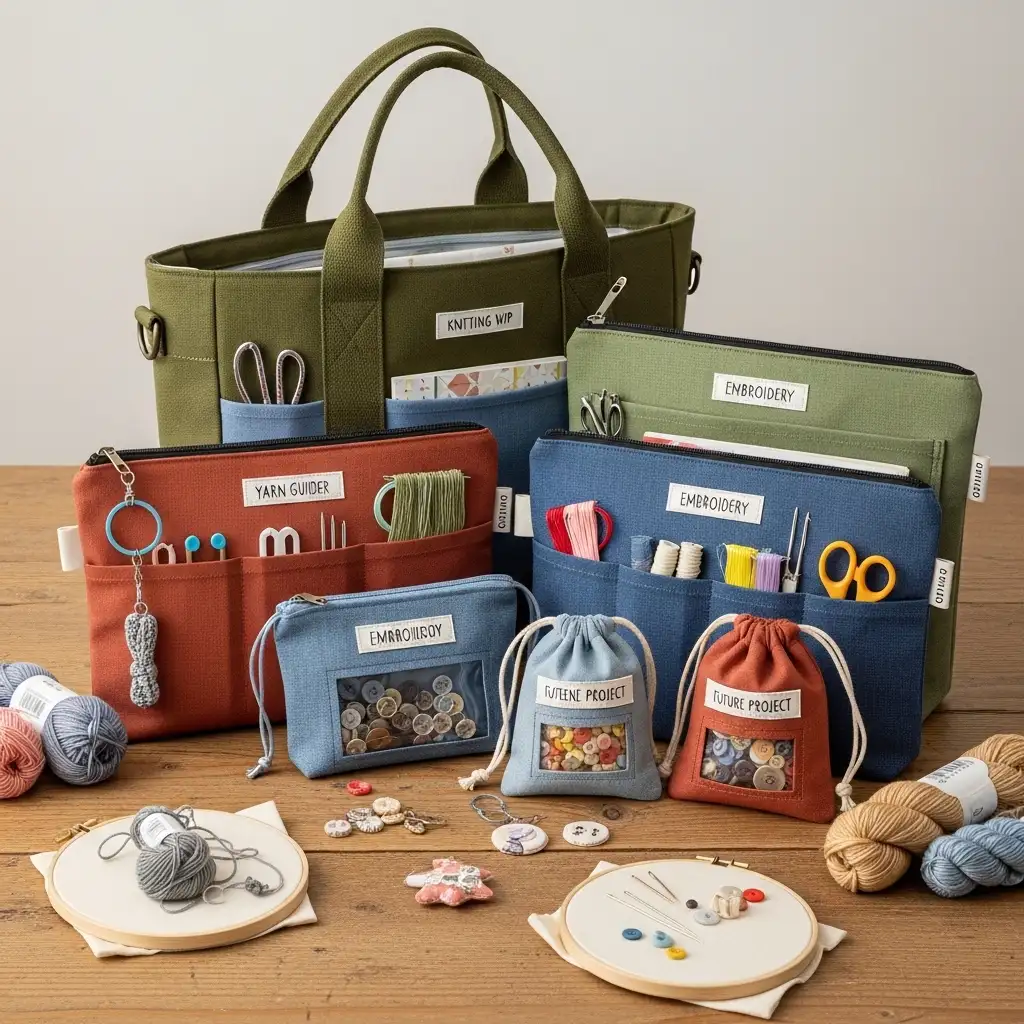
Dedicate a labeled tote bag or zip pouch to each active project. Place all project materials, the printed or copied pattern, any specialty tools needed, and handwritten notes about progress into the bag. Hang finished project bags from a row of hooks on the wall. Store paused project bags in a dedicated basket or shelf section labeled as works in progress. When you sit down to continue a project, the bag contains everything needed to resume immediately without a single item missing.
| Project Bag Contents | Why Each Item Is Included |
| Current project materials | No hunting for fabric, yarn, or paper |
| Printed or copied pattern | Original stays safe, copy in use |
| Specialty tools for this project | Right tools ready without searching |
| Progress notes and measurements | Picks up exactly where left off |
| Label on outside with project name | Correct bag found in seconds |
Idea 28: Use Ceiling Height with Overhead Storage
The ceiling zone of a craft room is almost universally wasted space. Shelving and storage typically stops at a height that is comfortably reachable without a step stool, leaving the upper portion of the room completely unused. Using overhead ceiling-height storage for rarely needed or seasonal supplies significantly increases the total storage capacity of the room.
Install shelving all the way from the top of your existing storage units to the ceiling. Use attractive labeled boxes and bins to contain seasonal supplies, backup stock, and rarely needed specialty tools at this height. A small folding step stool kept tucked beside the storage unit makes access safe and easy when needed. This use of the full vertical space in the craft room mirrors the same ceiling-height thinking that makes shiplap ceiling installations and other full-height architectural treatments so effective. Every inch of vertical space in a room has potential that most people ignore.
| Overhead Storage Zone | What to Store Up High |
| Above wardrobe or armoire | Seasonal supplies and extra stock |
| Ceiling-height shelving extension | Labeled boxes rarely accessed |
| Above kitchen-style upper cabinets | Large foam boards and canvases |
| High wall-mounted hooks | Hanging projects and large tools |
| Loft space if available | Archive and long-term backup storage |
Idea 29: Add Beautiful Lighting to Your Storage Areas
Lighting in the craft room is critical for both practical and aesthetic reasons. Poor lighting makes detailed work difficult, causes eye strain, and makes the colors of fabrics, paints, and papers appear inaccurate. Good lighting makes every craft task easier, more accurate, and more enjoyable. It also makes storage areas visible and inviting rather than dark and forgotten.
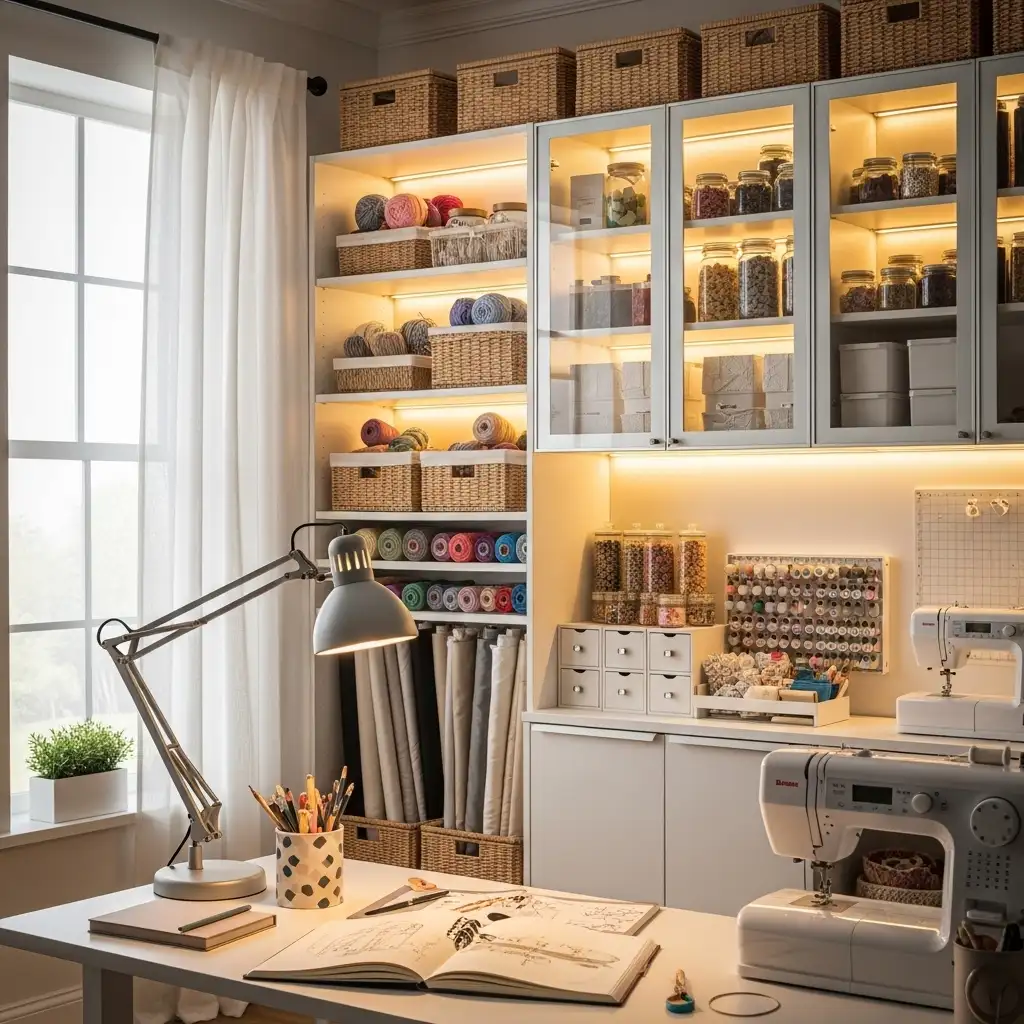
Install LED strip lighting under every shelf to illuminate the storage below. This makes every container visible without squinting into shadows and makes the whole room feel premium and well-designed. Use daylight-balanced bulbs at 5000K for color-critical work at the main craft table. Add a warm-toned lamp in the relaxation corner of the room for planning and reading sessions.
The right lighting transforms the functional storage areas of the craft room into a space that is a genuine pleasure to work in. The same layered lighting philosophy that makes warm rustic living rooms feel so deeply welcoming works beautifully in craft rooms too. Multiple warm and functional light sources create depth, comfort, and a space that invites creativity.
| Lighting Type | Where to Install It |
| LED strip under shelves | Below every shelf for even illumination |
| Daylight bulbs at 5000K | Main task light at craft table |
| Warm table lamp | Reading and planning relaxation corner |
| Overhead dimmable light | General ambient room illumination |
| Spot light on display area | Highlights beautiful storage displays |
Idea 30: Build a Complete Craft Room Storage System That Grows With You
The most important craft room storage principle of all is that the system should grow and evolve with you as your skills, hobbies, and supply collections develop over time. A rigid, fixed storage system that cannot adapt becomes a constraint rather than a support. The best craft room storage is modular, flexible, and built to accommodate the inevitable expansion of a creative practice.
Start with the most pressing storage needs and address them with quality, expandable solutions. Add pegboard that can accept new accessories. Install shelving with adjustable brackets that can be reconfigured. Choose drawer units that can stand alongside additional units as needed.
Label everything consistently from the beginning so the system scales without chaos. Review and reorganize the entire room annually. Donate, sell, or discard supplies that are no longer used. Add new storage solutions only when a genuine need exists rather than in anticipation of supplies that may never arrive.
The craft room storage system that serves you best is the one that matches your actual creative life today while remaining ready to grow with you. For complete inspiration on creating a beautiful, organized, and personally meaningful creative space, visit our full resource on hobby room design ideas which covers every aspect of designing a room that supports and inspires the full range of creative pursuits at every level.
| Flexible System Feature | Why It Matters Long Term |
| Modular shelving with brackets | Reconfigure as supplies change |
| Pegboard with moveable hooks | Instantly adapt to new tools |
| Expandable drawer systems | Add units as collection grows |
| Consistent labeling from start | Scales without chaos |
| Annual review and declutter | System stays current and effective |
Frequently Asked Questions About Craft Room Storage
Q1: How do I organize a small craft room with limited space?
Small craft rooms require vertical thinking above everything else. Install shelving all the way to the ceiling on every available wall. Use wall-mounted storage including pegboards, hooks, and mounted magazine files to keep the floor completely clear. Choose a multifunctional cutting table with storage integrated beneath the work surface. Use a rolling cart that can be pushed aside when not in use. Mount a fold-down wall desk if a dedicated craft table takes too much floor space. Adopt consistent labeled containers throughout so every supply has a permanent home that maximizes density without creating chaos. A small craft room organized vertically and consistently can hold a surprisingly large and well-managed supply collection.
Q2: What is the best way to organize craft supplies by type?
Organize craft supplies by function and frequency of use rather than by material type alone. Keep everything you use in every single craft session permanently on or beside the desk. Keep supplies used in specific projects types in dedicated labeled zones on shelving. Keep backup stock and seasonal supplies in the highest and least accessible storage zones. Within each category, organize by color for the most visually intuitive system. Use separate labeled containers for every distinct supply category and never allow categories to mix. A system based on how you actually work is always more effective than a theoretically perfect system that does not reflect your real creative practice.
Q3: What containers work best for craft room storage?
Glass jars are ideal for small supplies like buttons, beads, and pins because they keep contents visible and accessible. Clear plastic bins with lids suit medium supplies and keep dust off while maintaining visibility. Wicker or fabric labeled baskets suit larger supplies like fabric, yarn, and paper pads on open shelving. Multi-drawer cabinets suit very small items like brads, rhinestones, and embellishments that need individual compartments. The overriding principle is that the right container makes the contents immediately identifiable from the outside and immediately accessible from the front. Anything that requires emptying to find what is needed is not the right container for that supply.
Q4: How do I maintain a craft room organization system long term?
The key to maintaining a craft room organization system long term is the one-in-one-out rule for supplies and the everything-back-in-its-place rule at the end of every craft session. Take five minutes at the end of every crafting session to return every item to its labeled home. Schedule a quarterly review of the entire room to reorganize any categories that have outgrown their containers and declutter any supplies that are no longer being used. Donate unused supplies regularly so storage does not gradually fill with things that serve no current purpose. A system maintained in small daily increments never requires the overwhelming full-room reorganization that results from months of gradual disorder.
Q5: How can I make craft room storage look beautiful as well as functional?
Beautiful craft room storage uses consistent containers, visible color organization, and intentional display to turn the organizational system itself into a decorative feature. Display thread on a color-organized spool wall rather than hiding it in a drawer. Fill glass jars with colorful buttons and beads and arrange them on shelves. Organize yarn by color gradient in open cubby shelves. Use matching baskets and bins throughout rather than a collection of mismatched containers. Add plants, a small lamp, and a few meaningful decorative objects between storage zones. Paint the pegboard and shelving in a color that suits the room. When storage is this carefully considered, the organized craft room is genuinely beautiful to spend time in even before a single creative project begins.
Conclusion
A beautifully organized craft room is not a luxury. It is the foundation of your most creative and most productive work. When every supply has a permanent, logical, clearly labeled home, the time and energy you once spent searching and sorting becomes time spent actually creating. The 30 storage ideas in this guide give you a complete toolkit for transforming any craft room from chaotic to calm, from frustrating to genuinely inspiring. Start with the storage challenge that frustrates you most right now. Solve that one problem first. Build from there with consistent containers, thoughtful labeling, and a flexible system that grows with you.
For more inspiration across your home, explore our guides on wood burning stove living room design for creating the warmest and most characterful living room focal point, dark brown couch living room ideas for complete living room styling advice, and Mexican home decor ideas for bringing bold, beautiful color and handcrafted warmth into every room in your home. HomeFixTrends is here to inspire and guide every step of your home transformation journey.