Does your kitchen island looks plain, boxy, and completely unfinished? It sits in the middle of your kitchen like a forgotten piece of furniture rather than the stunning centerpiece it should be? Every time you walk in you notice what is missing but cannot quite identify what would fix it?
The answer is trim. The right trim detail transforms a plain kitchen island into a furniture-quality focal point.
These 29 kitchen island trim ideas will give you exactly the inspiration you need to make your island the most beautiful element in your entire kitchen.
1. Shaker Panel Trim for a Clean, Timeless Look
Shaker panel trim is the most popular and most versatile kitchen island trim choice available. The simple recessed panel detail adds architectural interest without feeling overly ornate. It suits farmhouse, traditional, transitional, and even modern kitchen styles beautifully.
Apply MDF shaker panels directly to the flat sides of a standard cabinet-base island. Paint in the same color as the island cabinetry for a seamless built-in look. Or paint in a contrasting color to make the trim detail pop visually.
| Shaker Trim Finish | Kitchen Style |
|---|---|
| All white painted | Classic, farmhouse, cottage |
| Dark navy or green | Bold, modern farmhouse |
| Two-tone contrasting | Contemporary, designer look |
| Natural wood stained | Warm, Scandinavian, organic |
2. Board and Batten Trim for Farmhouse Charm
Board and batten trim on a kitchen island creates an instantly recognizable farmhouse character. Vertical boards with thin batten strips layered on top add texture and architectural weight. This trim style makes an island look genuinely custom-built rather than a standard cabinet purchase.

The vertical lines of board and batten visually elongate the island and make it feel taller. Paint in soft white, warm cream, or a deep accent color for maximum visual impact. This is an affordable DIY trim upgrade that delivers genuinely impressive results.
| Board and Batten Color | Visual Effect |
|---|---|
| Crisp white | Bright, farmhouse classic |
| Warm cream | Soft, cottage warmth |
| Deep navy | Bold, sophisticated statement |
| Sage green | Botanical, calm, trending |
3. Beadboard Panels for Cottage and Victorian Character
Beadboard panel trim is a classic cottage and Victorian kitchen detail that adds texture and period character. The thin vertical grooves catch light beautifully throughout the day. It creates a furniture-like quality that immediately elevates any plain island.

Install beadboard panels on all visible island sides for a comprehensive treatment. Or use on the end panels only as a subtle accent detail. Paint in the same finish as the surrounding cabinetry for the most cohesive appearance. Find beadboard inspiration from our full guide at vintage cottage decor for styling ideas that complement beadboard island trim beautifully.
| Beadboard Trim Application | Effect |
|---|---|
| All sides of island | Full cottage character |
| End panels only | Subtle accent detail |
| Painted matching cabinet | Seamless, built-in look |
| Painted contrasting color | Bold decorative feature |
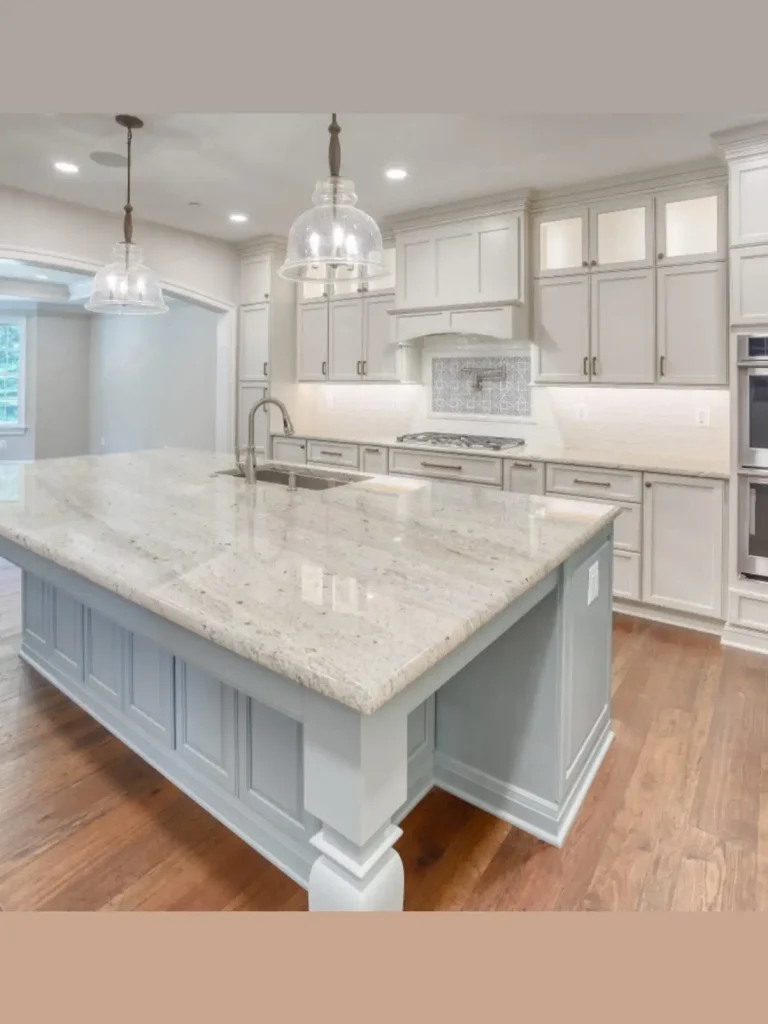
4. Furniture Legs for a Freestanding Island Look
Adding furniture-style legs to a kitchen island transforms it from a built-in cabinet into a piece of furniture that looks collected and characterful. Turned legs, tapered legs, or chunky square legs all create very different aesthetic results. This single addition is the most transformative visual upgrade for any plain boxy island.

Purchase pre-made furniture legs from a hardware or home store and attach to the island corners with appropriate mounting hardware. Choose a leg style that matches the overall kitchen design — turned legs for traditional kitchens, tapered legs for mid-century or Scandinavian styles, square chunky legs for farmhouse spaces.
| Island Leg Style | Kitchen Aesthetic |
|---|---|
| Turned decorative legs | Traditional, French country |
| Tapered hairpin legs | Mid-century, Scandinavian |
| Chunky square legs | Farmhouse, rustic |
| Cabriole curved legs | French, romantic, elegant |
5. Crown Molding Along the Island Top Edge
Crown molding applied along the top edge of a kitchen island where the countertop meets the cabinet body adds an architectural finishing detail that most islands completely lack. This small addition makes the transition from cabinet to countertop look intentional and refined. It is one of the easiest and most affordable island trim upgrades available.

Choose a crown molding profile that matches or complements the crown molding used on the upper kitchen cabinets. Paint to match the island cabinetry for a seamless look or paint a contrasting color for a deliberate design detail. Even a simple cove molding profile at this junction makes a significant visual improvement.
| Crown Molding Profile | Best Kitchen Style |
|---|---|
| Simple cove molding | Modern, clean kitchens |
| Classic ogee profile | Traditional, formal kitchens |
| Dentil molding detail | Victorian, grand kitchens |
| Double stacked molding | Elaborate, custom look |
6. Reclaimed Wood Planks for Rustic Character
Applying reclaimed wood planks to the sides of a kitchen island adds extraordinary warmth, texture, and character. The varied tones, nail holes, and natural imperfections of reclaimed wood make every island treatment completely unique. This upgrade suits farmhouse, rustic, and eclectic kitchen styles particularly well.

Source reclaimed wood from salvage yards, specialty online suppliers, or repurpose old wooden pallets for a budget-friendly version. Seal thoroughly to protect against kitchen moisture and general wear. The contrast of rough reclaimed wood against smooth countertop surfaces is visually striking and deeply characterful. Find complementary wood element ideas from DIY cheap wood ceiling for extending the reclaimed wood theme throughout your kitchen.
| Reclaimed Wood Tone | Island Character |
|---|---|
| Weathered grey | Coastal, industrial farmhouse |
| Warm honey brown | Rustic, traditional cottage |
| Dark charred black | Modern rustic, dramatic |
| Mixed tones natural | Organic, collected, authentic |
7. Shiplap Cladding for a Modern Farmhouse Island
Shiplap cladding on a kitchen island is one of the most sought-after modern farmhouse design details. Horizontal shiplap boards run across the island sides creating clean, linear texture. This treatment looks equally beautiful painted white or stained in a natural wood tone.
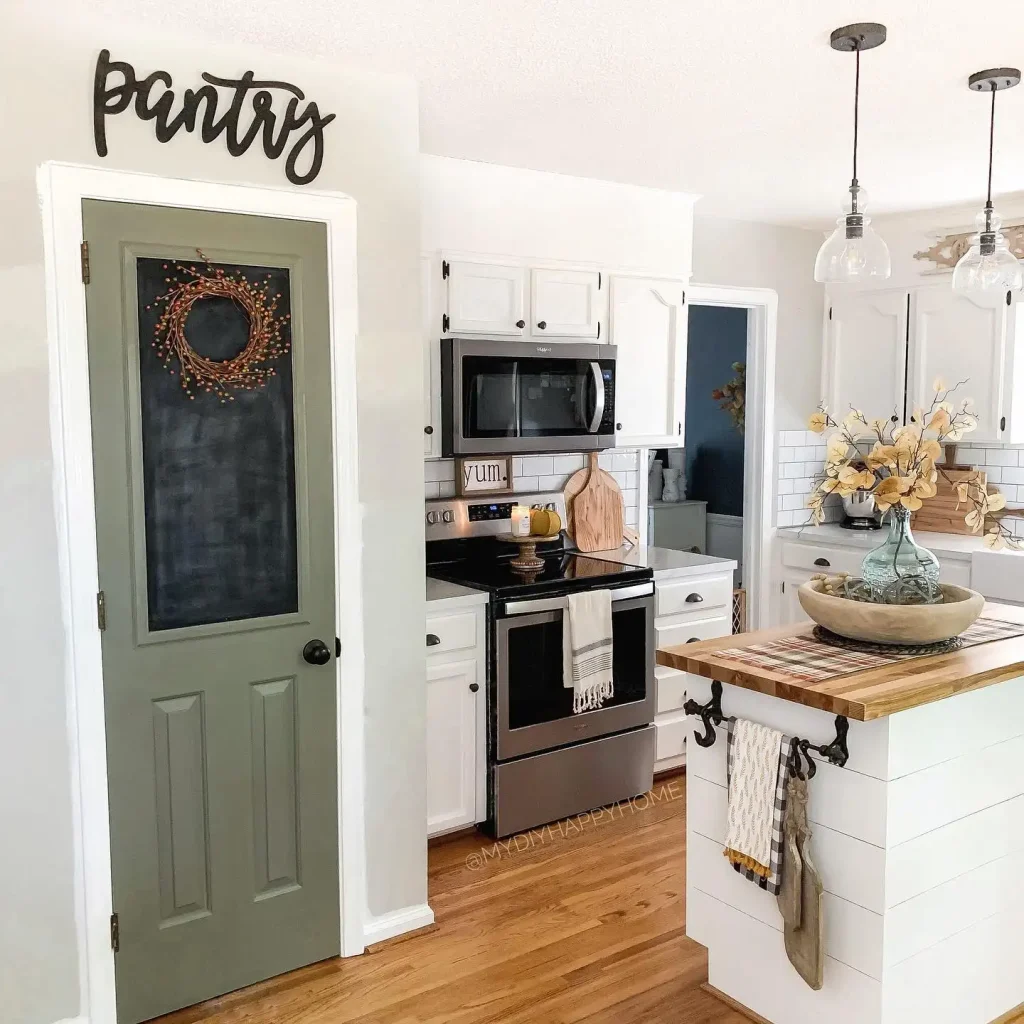
The horizontal lines of shiplap make a smaller island appear wider and more substantial. Apply full shiplap to all sides for maximum impact or use on the primary visible end panels only. The gaps between shiplap boards create pleasing shadow lines that add depth throughout the day as light changes.
| Shiplap Island Finish | Kitchen Vibe |
|---|---|
| White painted | Classic farmhouse, fresh |
| Grey stained | Coastal, relaxed |
| Natural wood stain | Warm, organic farmhouse |
| Dark stained | Moody, sophisticated |
8. Fluted Panel Trim for a High-End Designer Look
Fluted panel trim is one of the most popular premium kitchen design trends right now. The vertical channel grooves create a textural, almost sculptural surface that looks extraordinarily high-end. This trim detail appears in the most expensive designer kitchens and is now achievable as a DIY upgrade.

Purchase MDF or solid wood fluted panels and apply directly to island sides. The fluted texture catches light differently throughout the day creating beautiful visual movement. Paint in the same color as the island for a sophisticated tonal effect or in a bold contrasting color for maximum impact.
| Fluted Panel Color | Design Statement |
|---|---|
| All-over deep green | Luxurious, botanical, trending |
| Warm white | Elegant, refined, timeless |
| Matte black | Dramatic, contemporary bold |
| Warm terracotta | Earthy, Mediterranean warmth |
9. Wainscoting Panel Trim for Traditional Elegance
Wainscoting-style raised panel trim applied to kitchen island sides creates a formal, traditional look with genuine architectural depth. Raised panels have a three-dimensional quality that flat panels cannot replicate. This trim detail suits traditional, colonial, and formal kitchen styles beautifully.
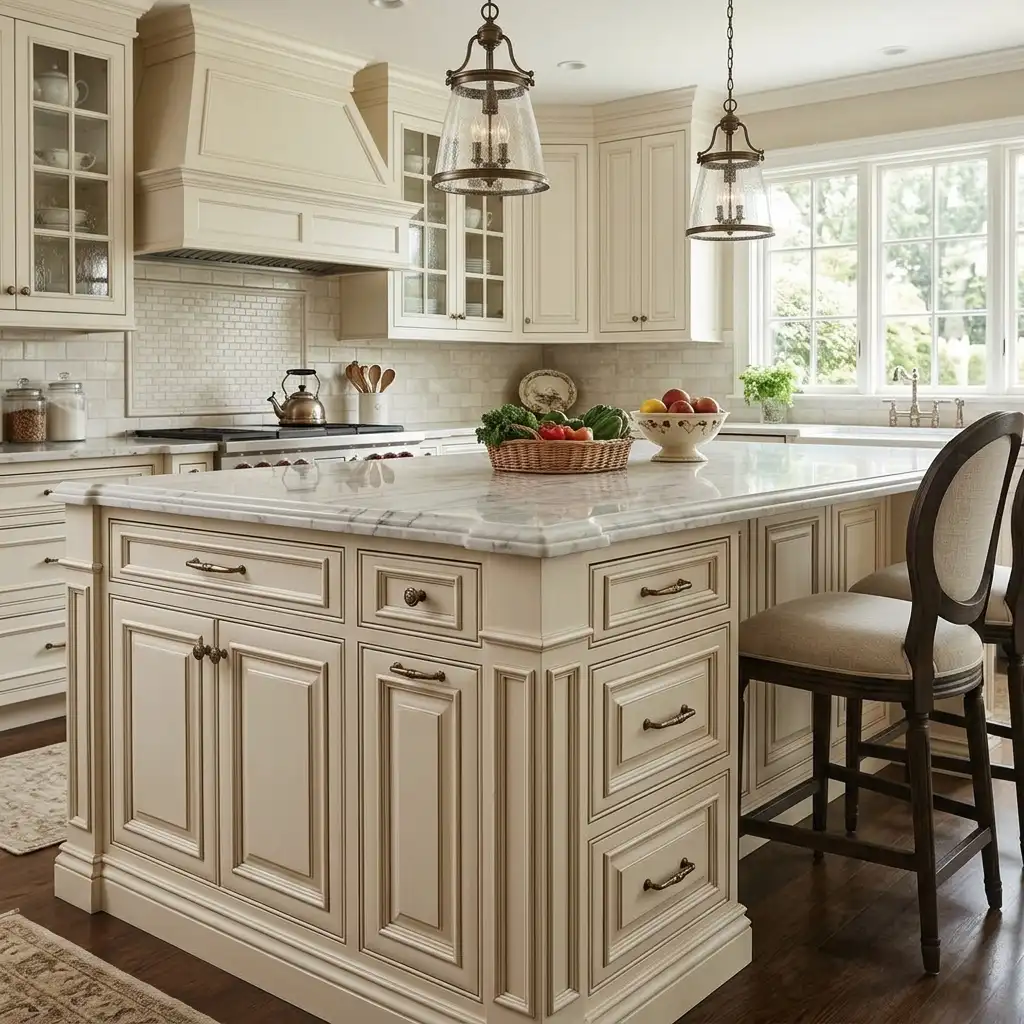
The shadow lines created by raised panel edges add visual complexity without color contrast. Paint in the same finish as the island cabinetry for the most cohesive appearance. A classic oil-rubbed bronze hardware finish complements traditional wainscoting trim island perfectly.
| Raised Panel Trim Style | Period Character |
|---|---|
| Simple single raised panel | Clean traditional, versatile |
| Double raised panel | More formal, elaborate |
| Colonial flat panel | Transitional, less heavy |
| Victorian ornate panel | Period-specific, dramatic |
10. Corbels for Architectural Drama and Support
Decorative corbels mounted beneath an island countertop overhang add both practical support and striking architectural character. They create a furniture-like, artisan quality that completely transforms the feeling of a kitchen island. Corbels suit farmhouse, traditional, French country, and cottage kitchen styles especially well.

Choose corbels in a size proportionate to the island overhang they support. Oversized corbels make a dramatic statement while smaller corbels add subtle refinement. Paint to match the island cabinetry or stain in natural wood for a warm contrasting accent detail. Explore French country decor ideas for complete styling inspiration for a corbel-detailed island in a French country kitchen.
| Corbel Style | Kitchen Style Match |
|---|---|
| Simple bracket corbel | Transitional, modern farmhouse |
| Ornate carved corbel | Traditional, French country |
| Chunky rustic corbel | Farmhouse, cottage |
| Scrollwork corbel | Victorian, formal traditional |
11. Stacked Molding Detail for a Custom Look
Stacking two or three different molding profiles together creates a richly detailed trim effect that looks genuinely custom-designed. This layered molding approach appears in the most expensive custom kitchen installations and is achievable as a DIY project with basic woodworking skills. The result looks far more elaborate than the individual components suggest.
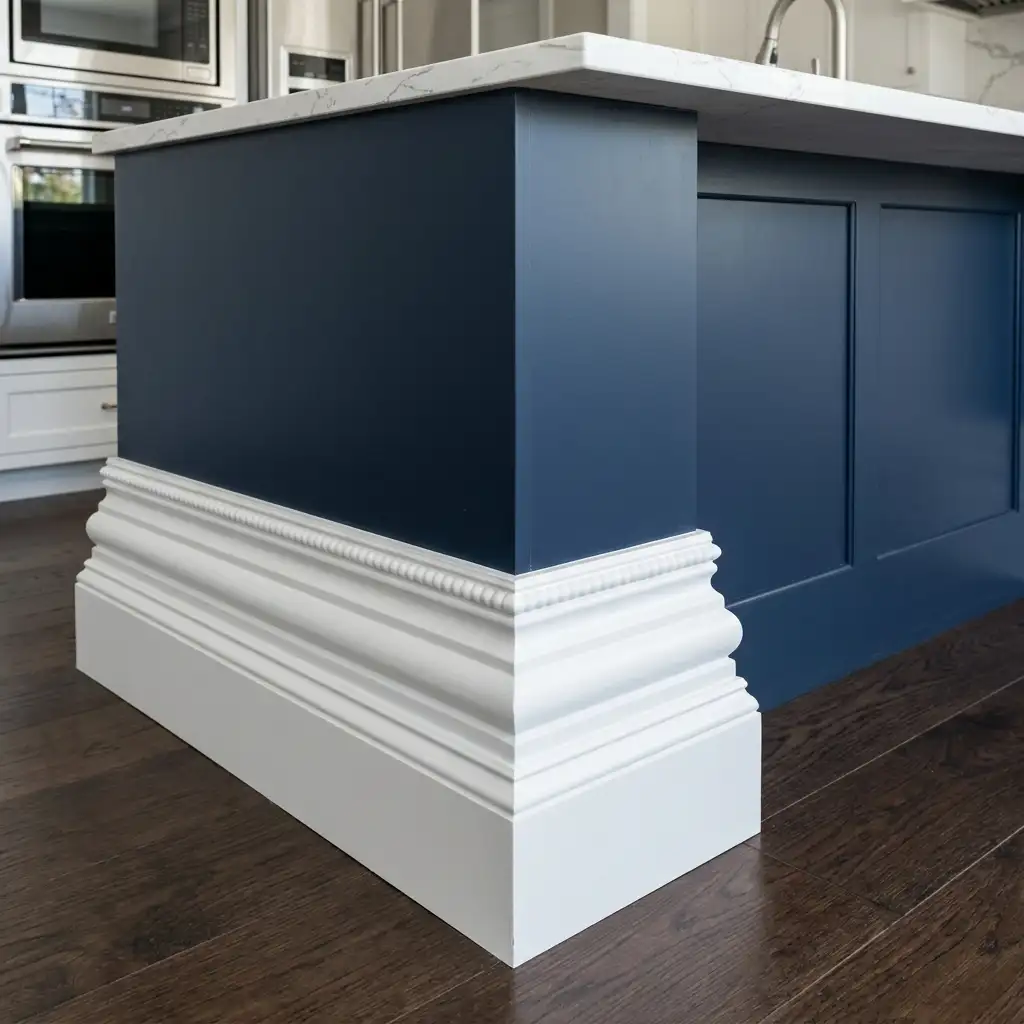
Combine a base molding, a flat strip, and a crown molding stacked together for a comprehensive furniture-quality trim detail. Paint the entire stacked assembly in the same color as the island cabinetry for a seamless effect. The three-dimensional depth created by stacked molding adds visual complexity that single-profile molding cannot achieve.
| Stacked Molding Combination | Complexity Level |
|---|---|
| Cove plus flat strip | Simple, effective |
| Base plus chair rail | Traditional, balanced |
| Crown plus ogee | Elaborate, formal |
| Three profile stack | Maximum custom appearance |
12. Metal Strapping or Nail Head Trim
Decorative metal strapping or nail head trim applied to kitchen island panels creates an industrial or rustic-industrial character. Black iron strapping across wood or painted panels references furniture and barn door hardware aesthetics. This trim approach suits industrial, urban farmhouse, and eclectic kitchen styles particularly well.
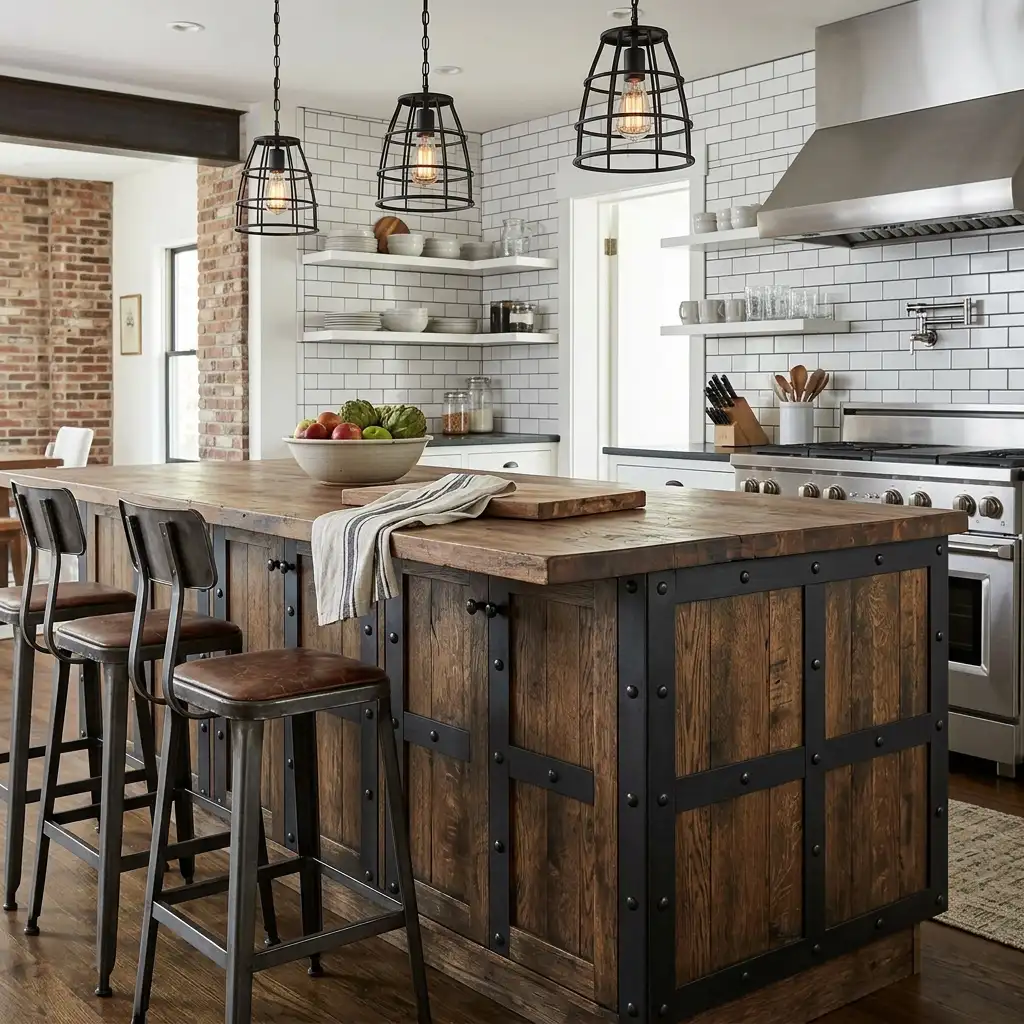
Apply decorative metal corner straps to the corners of the island for a barrel or chest-like furniture effect. Nail head trim pressed into upholstered or fabric-covered island panels creates a completely unique, tactile detail. Metal trim elements are available from hardware stores and online furniture trim suppliers in many different finishes.
| Metal Trim Style | Design Character |
|---|---|
| Black iron corner straps | Industrial, rustic, bold |
| Brass nail head trim | Warm, luxurious, upholstered feel |
| Copper bracket detail | Warm, artisan, eclectic |
| Stainless steel strip | Modern, minimal, contemporary |
13. Tile Cladding on Island Sides
Applying tile to the sides of a kitchen island creates an extraordinary textural and decorative feature. Zellige tiles, encaustic tiles, brick veneer tiles, or classic subway tiles each create completely different island characters. This upgrade is particularly impactful on the primary visible face of the island.
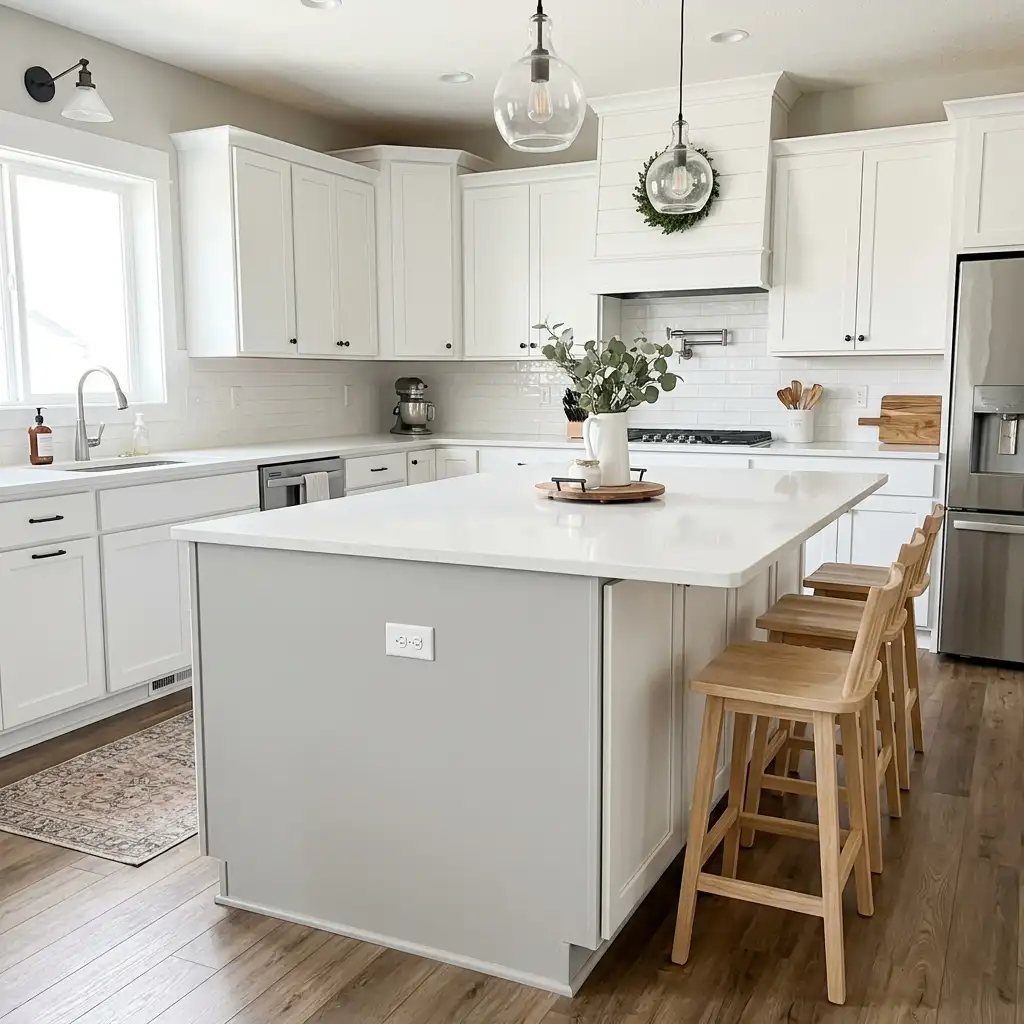
Tile cladding on an island is easiest applied to one prominent face panel rather than all sides for a feature accent approach. Choose tiles that coordinate with the kitchen backsplash for a cohesive overall kitchen design. Grout color has a significant impact on the finished look — a contrasting dark grout with white tiles creates graphic definition while matching grout creates a more seamless surface.
| Island Tile Style | Design Personality |
|---|---|
| Zellige handmade tiles | Artisan, Moroccan, luxurious |
| Classic white subway tile | Timeless, clean, versatile |
| Encaustic geometric tiles | Colorful, bold, bespoke |
| Brick veneer tiles | Rustic, industrial, warm |
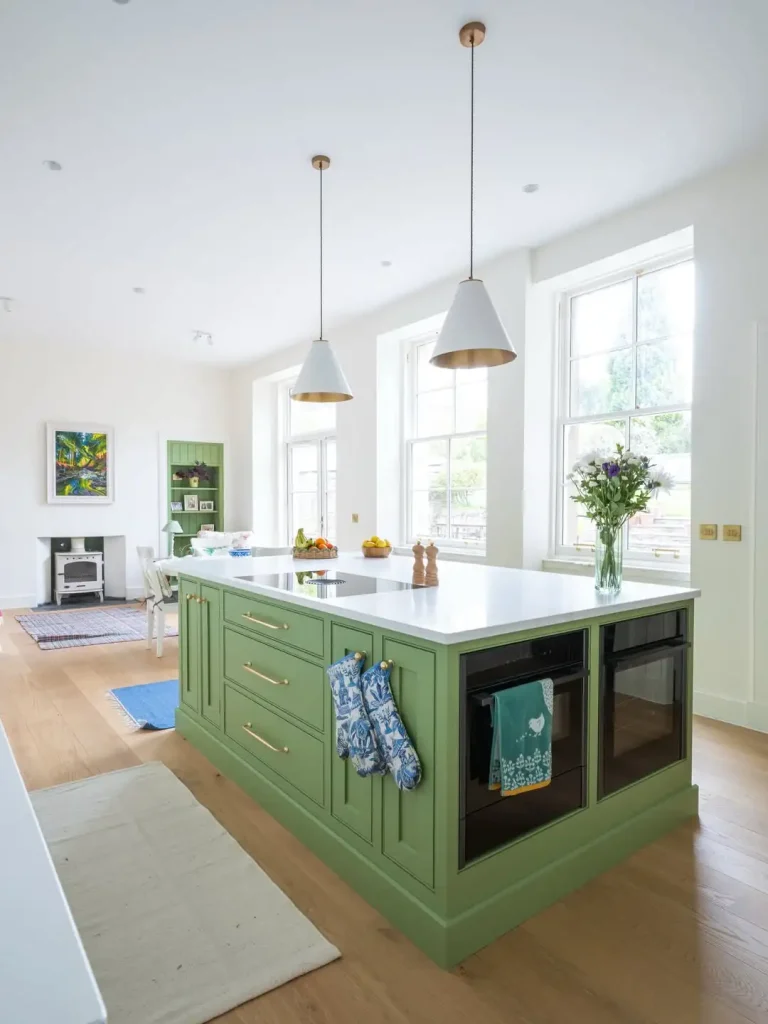
14. Painted Accent Color on the Island Only
One of the most popular and most effective kitchen island trim strategies is simply painting the island in a completely different color from the surrounding cabinetry. This color contrast immediately makes the island read as a furniture piece rather than a built-in cabinet. The contrast draws the eye to the island and makes it the clear focal point of the kitchen.
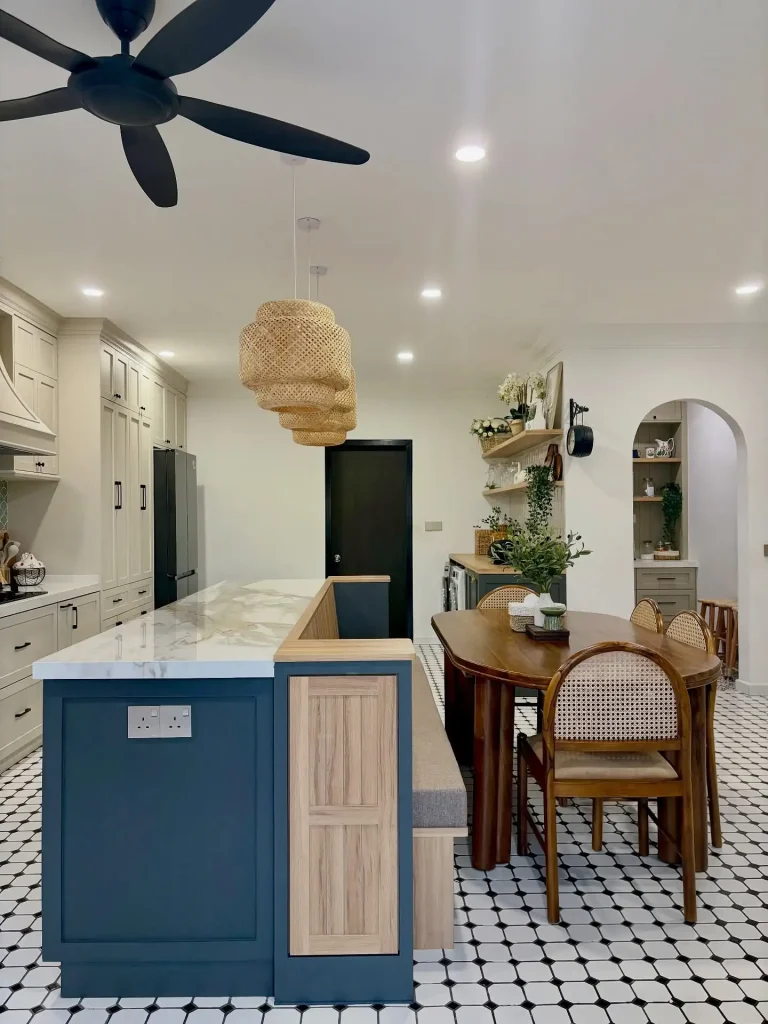
This approach requires no physical trim addition — the paint color itself functions as the decorative detail. Choose an island color that complements the surrounding cabinet color in the same tonal family or use a bold contrasting color for maximum impact. Deep navy, forest green, warm terracotta, and charcoal are the most popular kitchen island accent colors. Get complete kitchen color strategy inspiration from kitchen counter decor ideas for styling the countertop alongside your newly colored island.
| Island Accent Color | Surrounding Cabinet Color |
|---|---|
| Deep navy island | White or cream cabinets |
| Forest green island | White or light grey cabinets |
| Warm terracotta island | White or cream cabinets |
| Charcoal grey island | White upper, matching lower |
15. Rope or Woven Detail Trim for Coastal Style
Rope or woven trim elements applied to kitchen island panels create a textural, coastal character that is genuinely distinctive. Thick natural rope glued in geometric patterns or applied as a decorative border creates a handmade, artisan quality. This highly unusual trim approach creates a kitchen island unlike anything seen in a standard showroom.
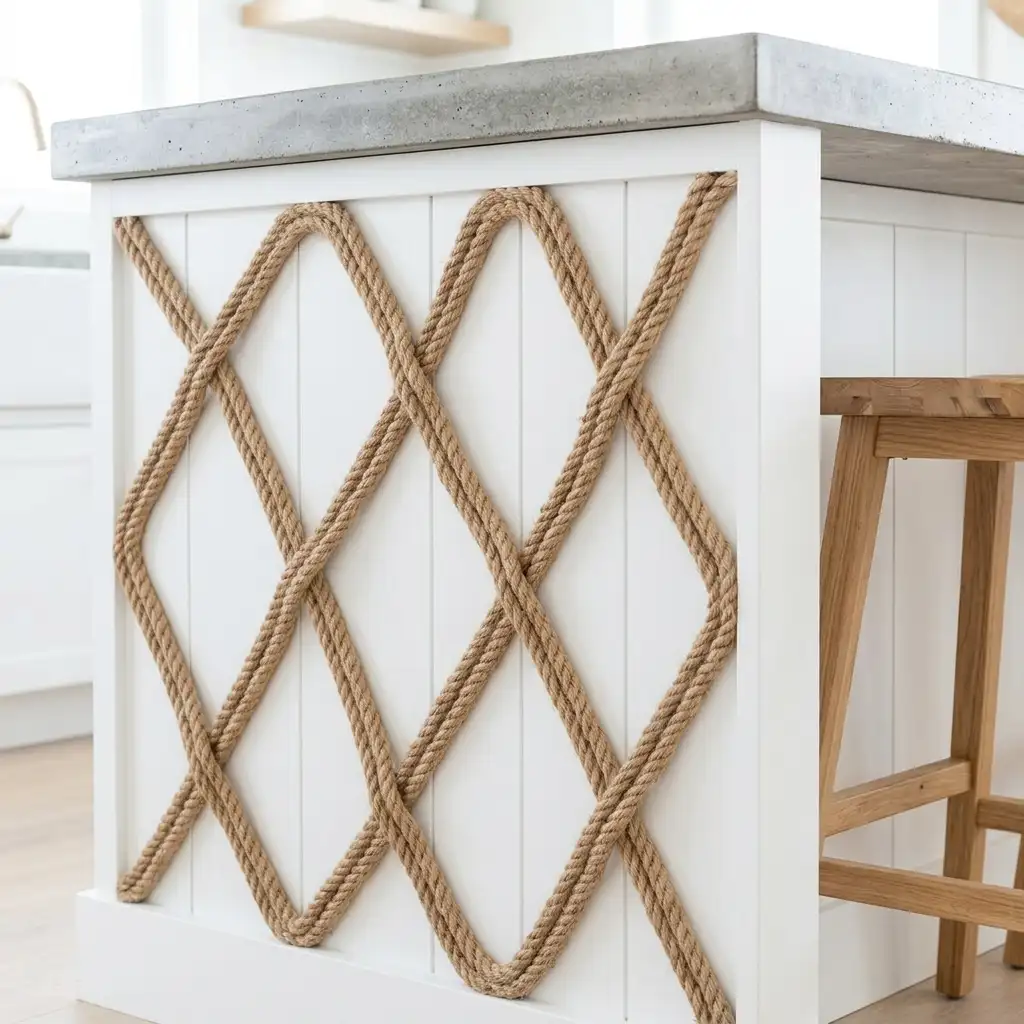
Attach thick jute or sisal rope in horizontal bands or geometric patterns using construction adhesive. Seal with a clear matte varnish to protect against kitchen moisture and wear. This trim approach pairs beautifully with whitewashed wood, navy cabinetry, and a coastal or nautical kitchen aesthetic throughout.
| Rope Trim Application | Coastal Design Element |
|---|---|
| Horizontal bands only | Subtle, refined coastal |
| Full woven panel | Dramatic, textural statement |
| Corner wrap detail | Accent, furniture-like finish |
| Geometric border pattern | Artisan, handmade character |
16. Bookcase-Style End Panel With Display Shelves
Converting one end panel of a kitchen island into an open bookcase-style display shelf creates both visual interest and practical display storage. Small open shelves on the island end hold cookbooks, small plants, decorative objects, and everyday kitchen items. This detail makes the island feel like genuine furniture rather than a cabinet installation.
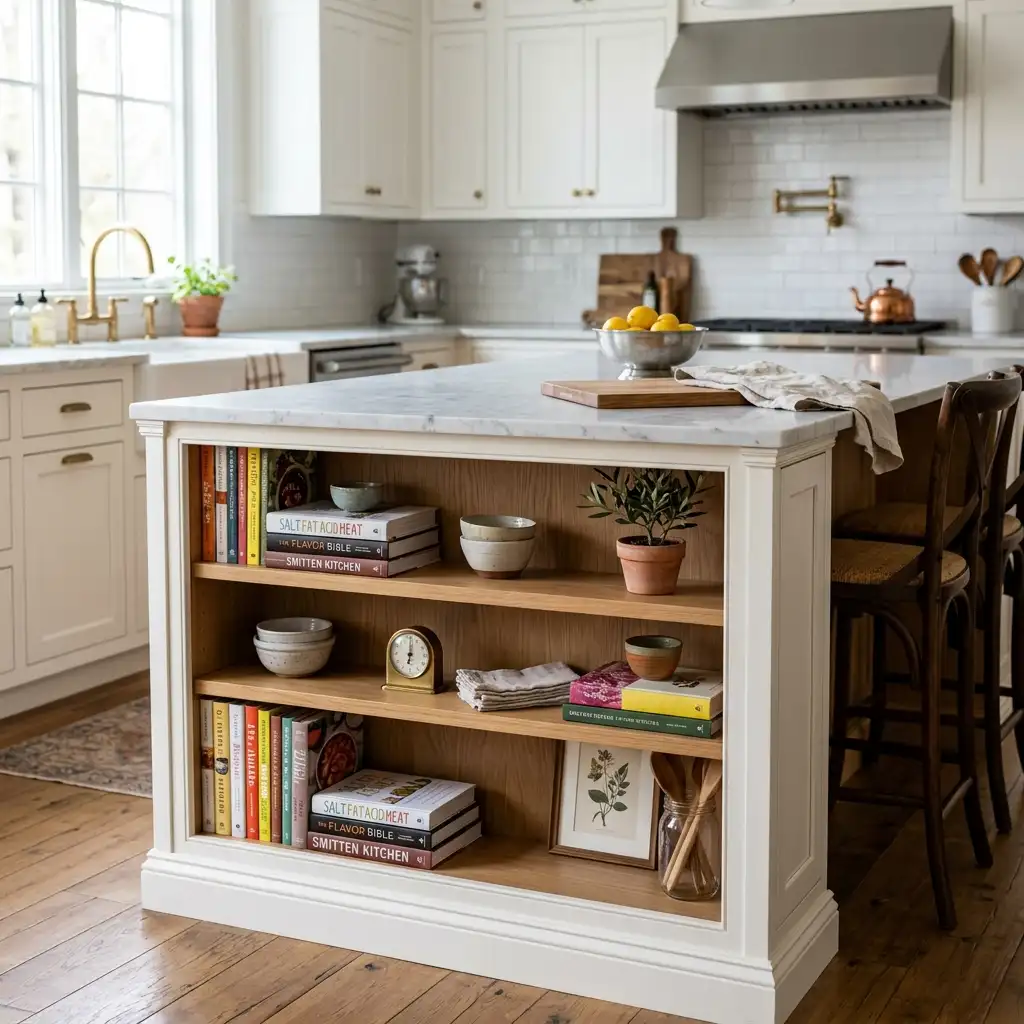
Install two or three open shelves on the end panel using simple wooden shelf brackets. Style with a mix of cookbooks, small plants, and a few decorative objects for a natural, lived-in look. This shelving detail is especially beautiful in farmhouse and transitional kitchens where the open display adds warmth and personality.
| Island End Shelf Style | Display Use |
|---|---|
| Cookbook display shelves | Kitchen literature, plants |
| Wine bottle storage | Entertaining, bar function |
| Basket and bin shelves | Organized practical storage |
| Decorative object display | Character, personality |
17. Shiplap Wrapped Island With Contrasting Countertop
A shiplap-wrapped island with a dramatically contrasting countertop creates one of the most photographed and most celebrated farmhouse kitchen island combinations. Whitewashed or natural wood shiplap island sides paired with a dark butcher block countertop creates beautiful material contrast. The result reads as genuinely designer-quality at an accessible DIY cost.

Install horizontal shiplap boards on all four island sides and apply a countertop in a materially contrasting finish. Butcher block with white shiplap, black granite with grey shiplap, or marble with natural wood shiplap all create beautiful contrasting material combinations. The countertop material choice matters as much as the trim choice in creating a successful contrasting island combination.
| Shiplap Island + Countertop | Contrast Character |
|---|---|
| White shiplap + butcher block | Warm, farmhouse perfect |
| Grey shiplap + white quartz | Clean, modern farmhouse |
| Natural wood shiplap + black granite | Bold, dramatic contrast |
| Dark shiplap + white marble | Sophisticated, designer quality |
18. Geometric Trim Pattern for a Graphic Statement
Applying geometric trim strips in a pattern across island panel faces creates a bold, graphic, and genuinely original kitchen island treatment. Diamond grid patterns, herringbone arrangements, or linear geometric frameworks all create visual interest beyond standard flat or standard panel trim. This approach suits contemporary and eclectic kitchen styles particularly well.
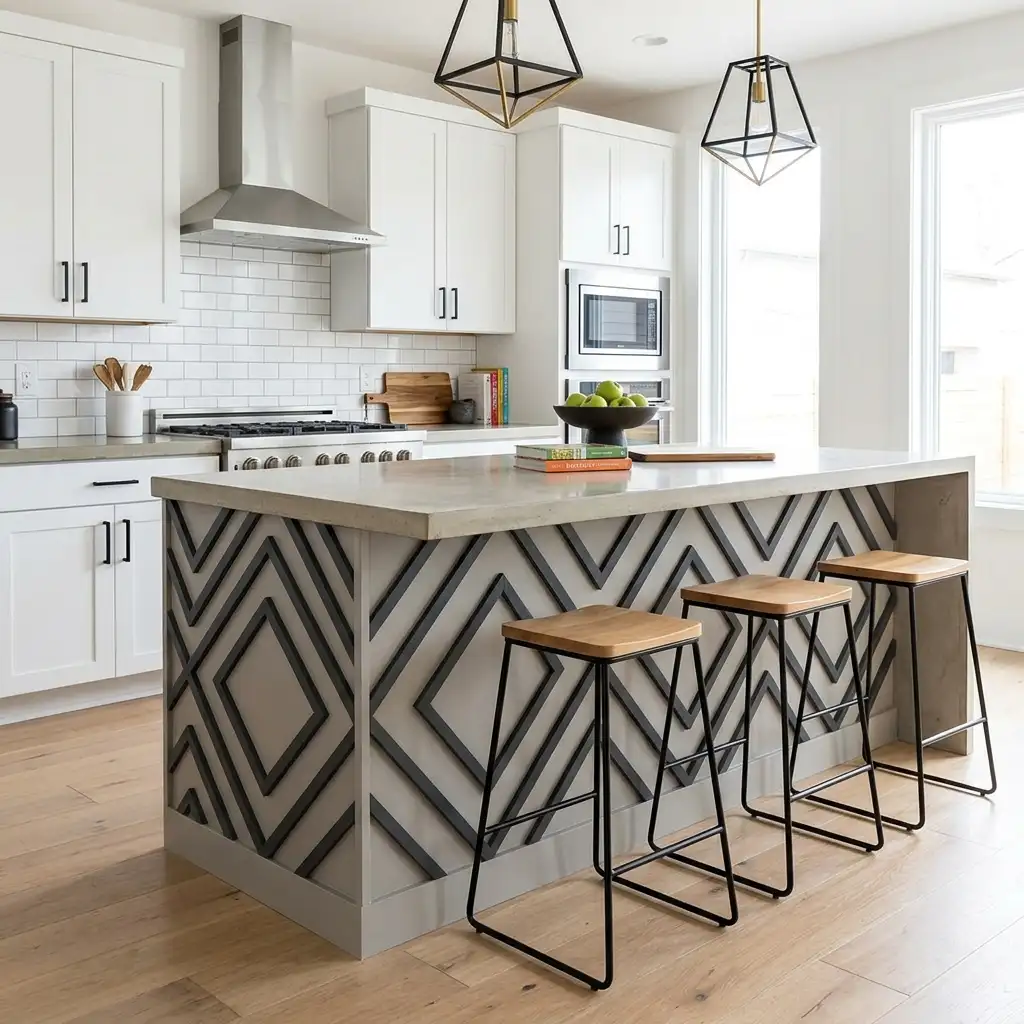
Use thin MDF strips, wood molding strips, or decorative trim tape to create the geometric pattern. Apply in a consistent arrangement across all visible island panels. Paint the geometric trim strips in a contrasting color from the island face for a truly graphic, design-forward result.
| Geometric Trim Pattern | Design Style |
|---|---|
| Diamond grid pattern | Contemporary, design-forward |
| Herringbone arrangement | Artisan, distinctive |
| Linear horizontal strips | Modern, clean, graphic |
| X-pattern grid | Traditional meets modern |
19. Carved Wood Detail Panels for Luxury Appeal
Carved wood panel inserts on kitchen island faces create an extraordinarily high-end, artisan appearance. Pre-carved decorative wood panel inserts are available from woodworking suppliers and can be applied directly to flat island panels. This detail immediately elevates the perceived quality and value of the entire kitchen.

Choose carved panel designs that complement the overall kitchen aesthetic — floral or leaf patterns for traditional and French country kitchens, geometric patterns for transitional or contemporary spaces. Paint carved panels in the same finish as the surrounding island for a tonal, sophisticated effect. Or use natural wood carvings as a contrasting warm accent against a painted island.
| Carved Panel Design | Kitchen Style Match |
|---|---|
| Floral and botanical | Traditional, French country |
| Geometric lattice | Transitional, Moorish influence |
| Classic rope and bead | Colonial, formal traditional |
| Simple leaf motif | Organic, cottage, Arts and Crafts |
20. Chalk Paint Treatment for a Shabby Chic Island
A chalk paint treatment on a kitchen island creates a beautiful distressed, shabby chic finish that suits cottage, vintage, and romantic kitchen aesthetics. Chalk paint adheres to almost any surface without primer and creates a soft, matte, slightly powdery finish. Deliberate distressing at edges reveals the wood beneath for an authentically aged appearance.
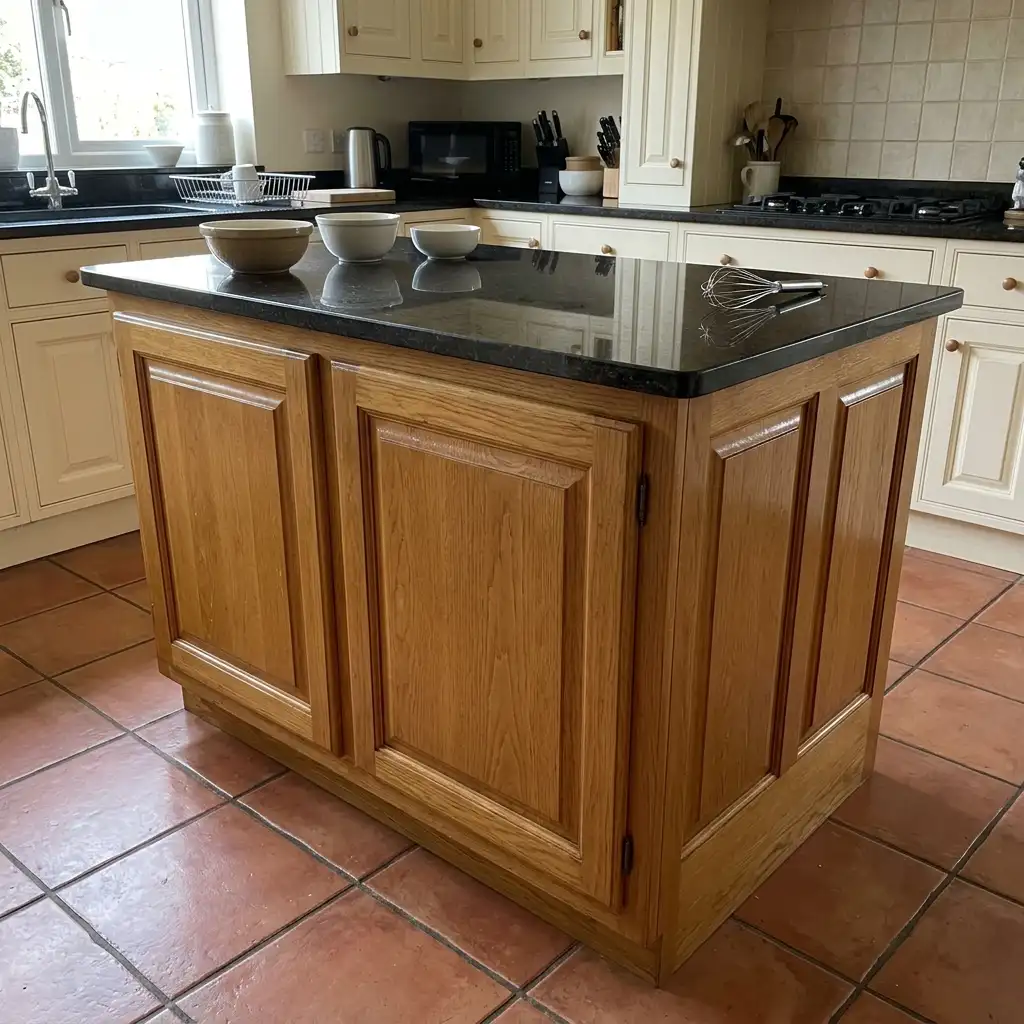
Apply two coats of chalk paint in your chosen color and allow to dry completely. Sand lightly at edges and corners to reveal the raw wood or previous paint layer beneath. Seal with clear furniture wax or a matte varnish to protect the painted surface from kitchen wear and moisture damage.
| Chalk Paint Island Color | Shabby Chic Character |
|---|---|
| Soft duck egg blue | Romantic, vintage, popular |
| Warm cream | Classic, gentle, cottage |
| Muted sage green | Fresh, botanical, organic |
| Aged grey white | Distressed, authentic, aged |
21. Shaker Panel With Inset Hardware Upgrade
Upgrading the hardware on a shaker panel island dramatically enhances the overall quality and visual impact of the trim detail. Hardware choice — the pull, knob, or handle — communicates the quality and style of the island more powerfully than almost any other detail. Even a basic shaker island with premium hardware looks genuinely expensive.
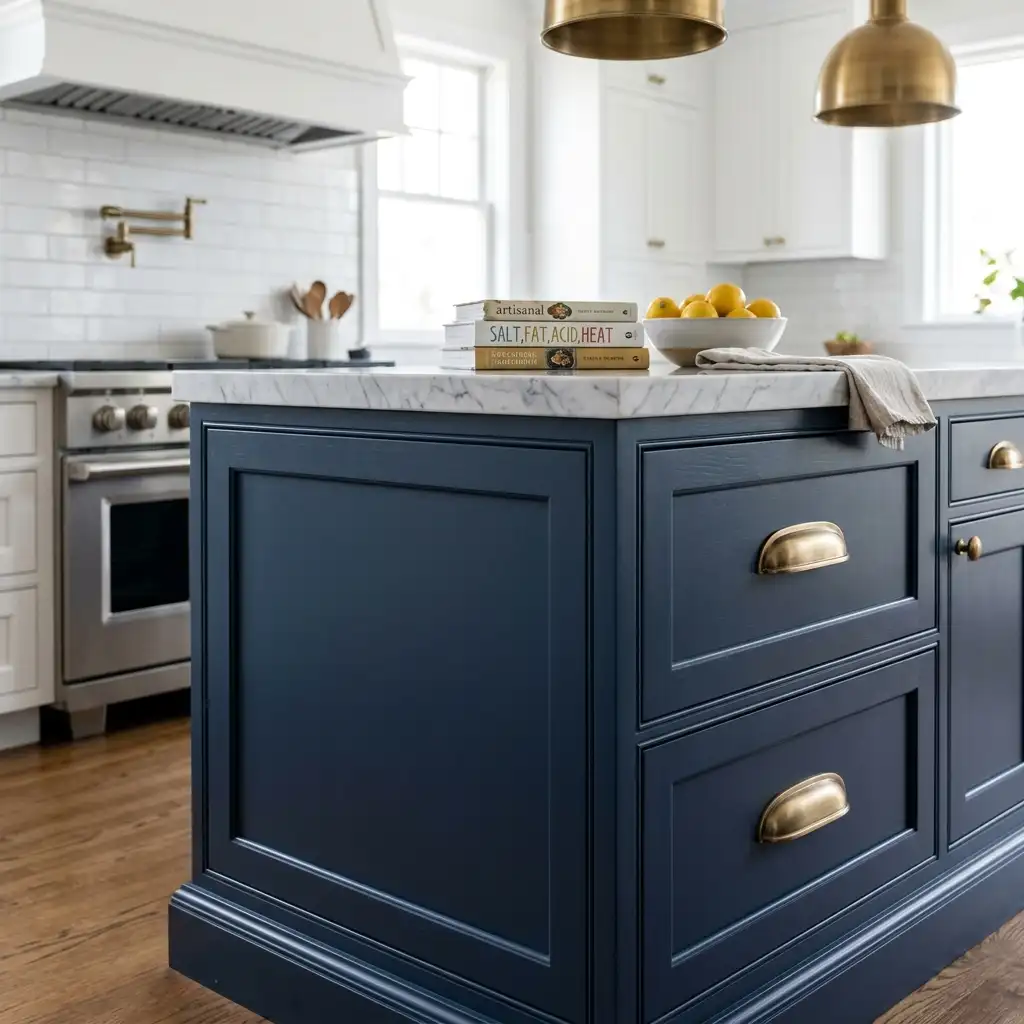
Replace standard hardware with statement pulls in aged brass, matte black, or brushed nickel depending on your kitchen aesthetic. Bin pulls, cup pulls, and simple bar handles are the most classically appropriate hardware choices for shaker-style islands. The consistency of hardware finish across the entire kitchen is as important as the individual hardware style chosen.
| Hardware Upgrade Finish | Island Style Enhancement |
|---|---|
| Aged brass pulls | Warm, traditional, luxurious |
| Matte black bin pulls | Modern farmhouse, bold |
| Brushed nickel bar | Contemporary, clean |
| Antique bronze cup pulls | Traditional, rich, period |
22. Two-Tone Painted Island Base and Upper Detail
A two-tone paint treatment on the island — with the lower two-thirds in a bold color and the upper trim or panel detail in a lighter contrasting tone — creates a visually sophisticated and custom-looking result. This approach mimics traditional furniture detailing where bases and upper sections were often painted differently. It adds visual depth without any additional physical trim components.
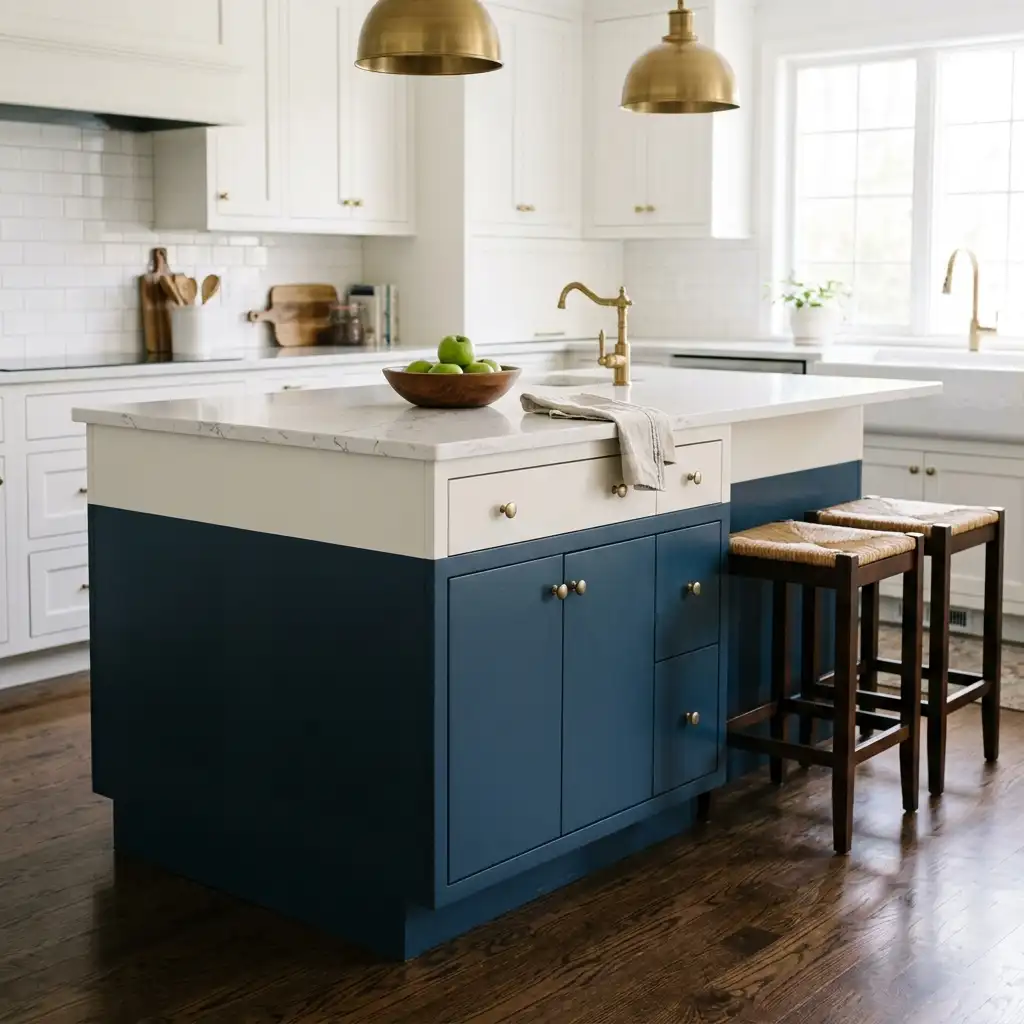
The lower painted section grounds the island visually while the lighter upper section or trim detail draws the eye upward toward the countertop. This technique works particularly well on islands with existing panel molding already in place where the two zones are naturally defined by the molding line.
23. Integrated Drawer Face Trim Alignment
Ensuring the trim detail on island drawer and door faces aligns perfectly across the entire island creates a precision-crafted, custom-built appearance. Misaligned trim between doors and drawers instantly communicates poor quality construction. Careful alignment attention during installation is one of the most important and most overlooked aspects of beautiful kitchen island trim work.
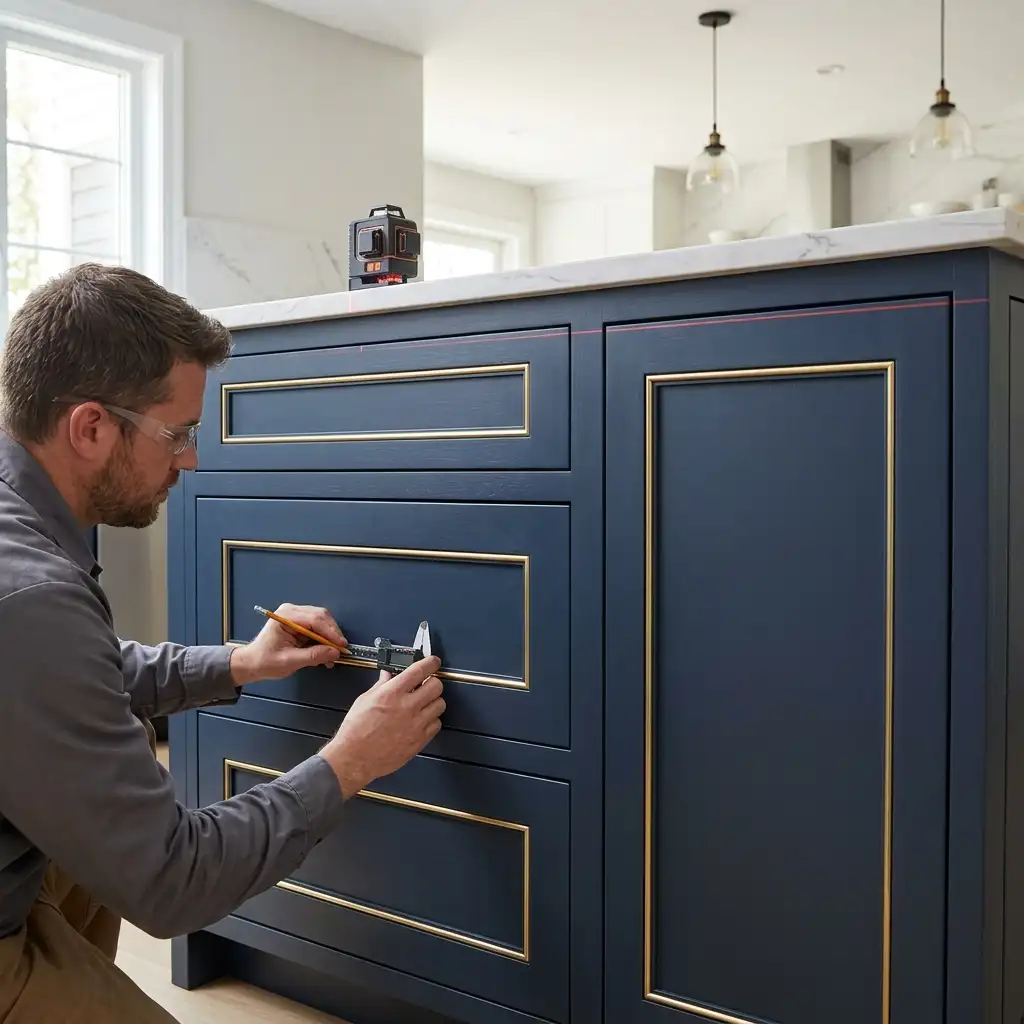
Use a spirit level throughout the trim installation process to ensure perfectly horizontal and vertical alignment at every stage. Plan the trim layout across all island faces before beginning installation so that drawer and door transitions are accounted for. This level of precision separates a truly professional-looking trim installation from an obviously DIY result.
24. Panelled Waterfall Island Trim Treatment
A waterfall island has the countertop material continuing vertically down one or both island ends to the floor. Applying decorative trim to the non-waterfall sides of a waterfall island creates a beautiful contrast between the sleek countertop material and the more decorative trim treatment. This combination looks extraordinarily high-end and architecturally considered.

Choose a trim treatment that contrasts with the countertop material — shaker panel trim with a marble waterfall, shiplap with a butcher block waterfall, or fluted panels with a quartz waterfall all create beautiful material conversations. The waterfall end remains completely untrimmed to showcase the countertop material’s natural beauty while the other sides receive full trim treatment.
| Waterfall + Trim Combination | Design Quality |
|---|---|
| Marble waterfall + shaker panels | Luxury, formal, magazine-worthy |
| Butcher block waterfall + shiplap | Warm farmhouse, natural |
| Quartz waterfall + fluted panels | Contemporary luxury, premium |
| Granite waterfall + reclaimed wood | Rustic-modern, distinctive |
25. Apron Front Detail on the Primary Island Face
An apron-front style trim detail on the primary visible face of the island references the beloved apron-front sink aesthetic and creates a similarly charming, furniture-like appearance. This arched or rectangular recessed panel detail centered on the main island face creates an immediate focal point. It suits farmhouse, cottage, and traditional kitchen island designs beautifully.

Create the apron-front effect using a large recessed MDF panel with either a flat rectangular profile or a gently arched top edge. Center it on the most visible island face panel for maximum visual impact. Paint in the same color as the island cabinetry for a seamless look or in a contrasting tone for a deliberate decorative statement.
| Apron Front Profile | Kitchen Style |
|---|---|
| Rectangular flat panel | Clean farmhouse, transitional |
| Arched top panel | Romantic, French country |
| Beaded edge apron | Cottage, detailed farmhouse |
| Simple shadow line | Minimal, modern farmhouse |
26. Wallpaper Wrapped Island Panel
Applying wallpaper to the sides of a kitchen island creates an extraordinarily decorative and genuinely unexpected design detail. A patterned wallpaper panel on the primary island face adds color, pattern, and personality in a completely unexpected location. This bold treatment suits eclectic, maximalist, and personality-forward kitchen designs particularly well.
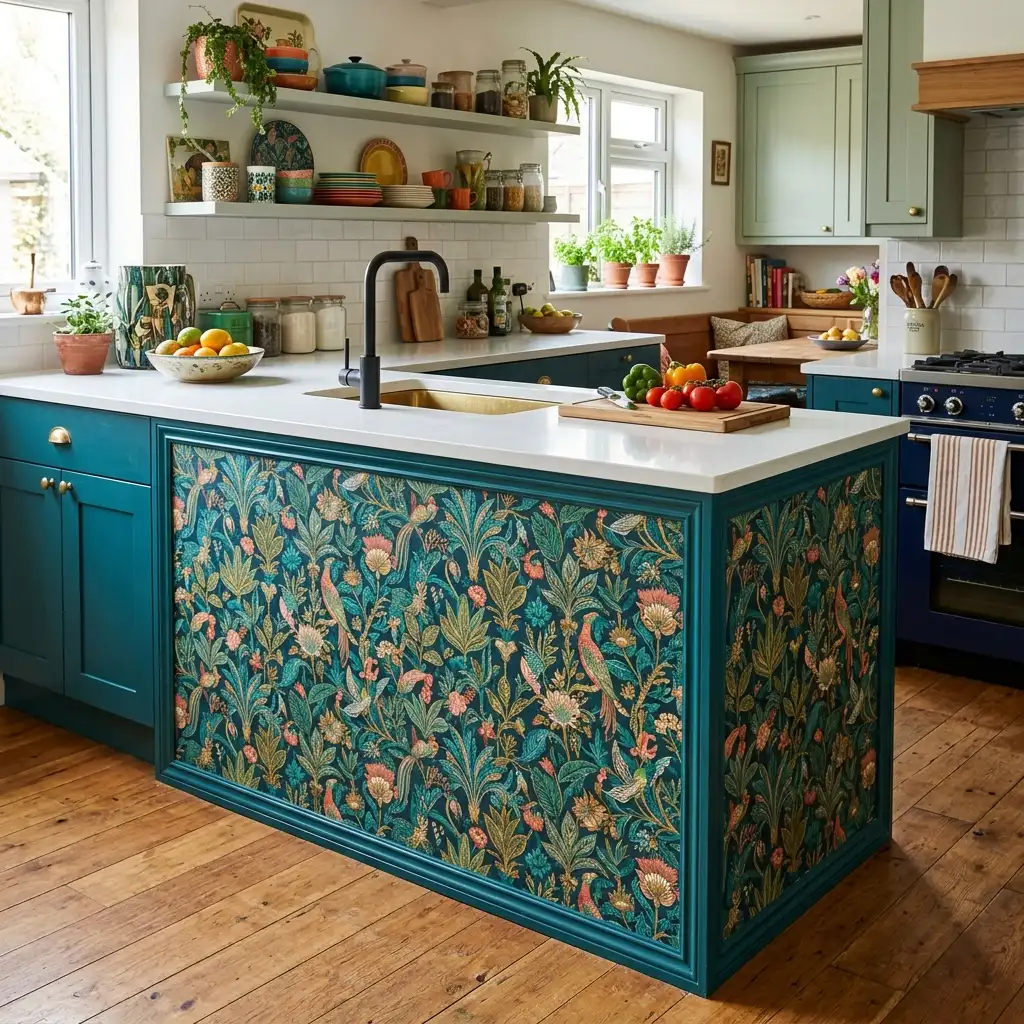
Choose a durable, wipeable vinyl wallpaper for an application that will withstand kitchen conditions over time. Apply to the primary visible end panel only for a subtle statement or to all island sides for full decorative commitment. A botanical print, a geometric pattern, or a classic damask all create beautiful island wallpaper panel effects.
| Wallpaper Panel Pattern | Design Personality |
|---|---|
| Botanical floral | Romantic, eclectic, lush |
| Geometric repeat | Modern, graphic, bold |
| Classic damask | Traditional, formal, elegant |
| Chinoiserie design | Eclectic, maximalist, luxurious |
27. Open Slot Storage as Decorative Island Trim
Incorporating open storage slots into one end panel of a kitchen island adds both practical function and beautiful visual character. The grid of angled bottle slots creates a geometric, artisan pattern that is visually interesting as well as genuinely useful. This detail suits kitchen islands in entertaining-focused homes particularly well.

Build storage insert designed to fit within the island end panel space. Choose a wood finish that complements the island cabinetry. The combination of visible bottles with the geometric slot framework creates a beautiful and highly practical kitchen island feature that contributes significantly to the island’s overall character.
28. Toe Kick Detail in a Contrasting Material
The toe kick — the recessed strip at the base of the island between the floor and the cabinet body — is another frequently overlooked trim opportunity. Upgrading the toe kick from standard painted MDF to a contrasting material creates a beautifully detailed island base that looks genuinely custom. Most people never think about the toe kick but notice its improvement immediately once it is upgraded.
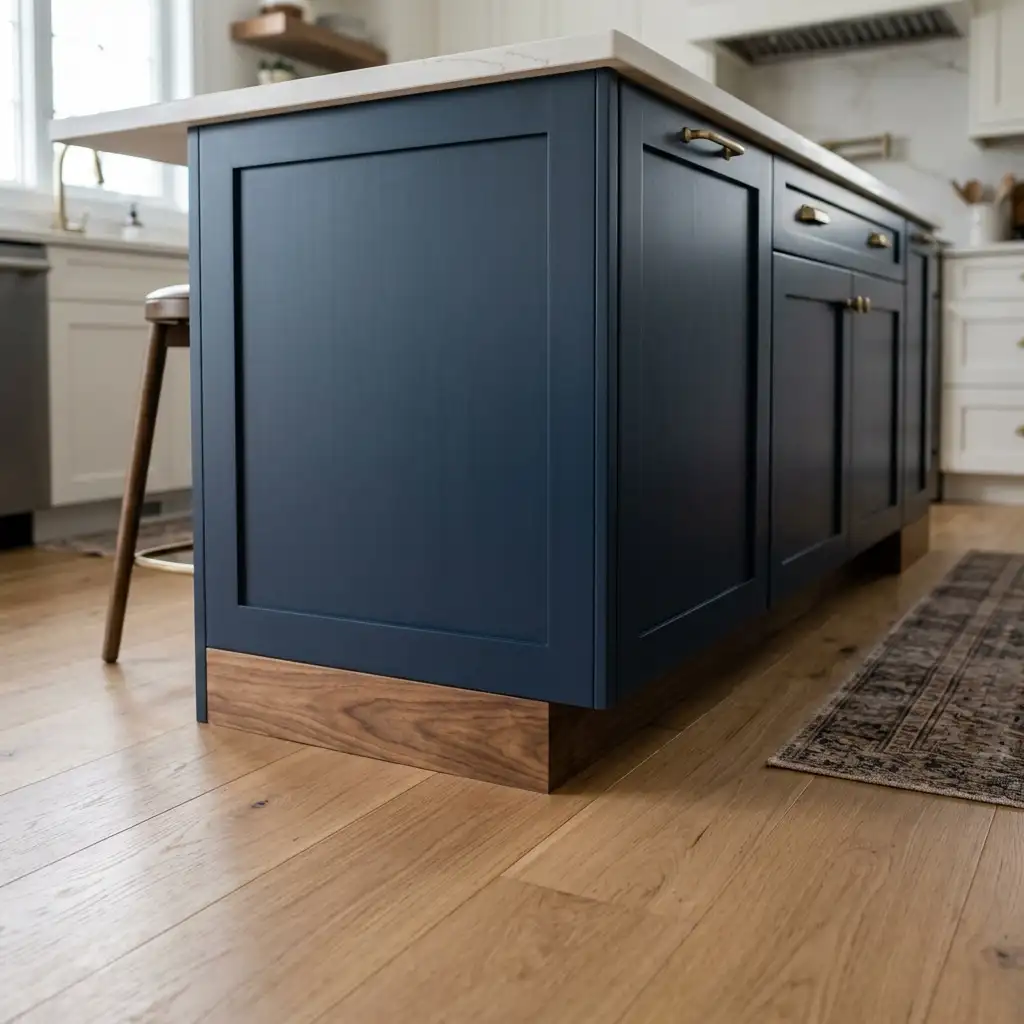
Apply dark hardwood veneer, black painted metal, mosaic tile, or a contrasting paint color to the island toe kick. A dark toe kick makes the island appear to float above the floor. A tile toe kick matches the kitchen floor for a seamless, considered transition between floor and island base.
| Toe Kick Treatment | Visual Effect |
|---|---|
| Matte black painted | Island appears to float |
| Dark hardwood veneer | Warm, furniture-quality finish |
| Matching floor tile | Seamless, cohesive transition |
| Contrasting color | Design detail, deliberate accent |
29. Full Craftsman-Style Island Treatment
A comprehensive Craftsman-style island treatment combines multiple trim elements into one cohesive, deeply characterful whole. This approach uses horizontal banding, simple bracket supports, and panel detailing together to create the mission-style, Arts and Crafts character that defines the Craftsman aesthetic. The result is one of the most impressively detailed and most admired kitchen island trim treatments available.

Combine horizontal banding strips at one-third and two-thirds island height, simple square bracket supports beneath the countertop overhang, and flat panel detailing between the banding strips. Paint in a rich, deep tone — dark olive, warm charcoal, or deep navy — for the most authentic Craftsman island appearance. This comprehensive treatment transforms even a basic cabinet island into something genuinely extraordinary.
Explore coffee table decor ideas for styling the adjacent living and dining areas to complement a Craftsman-style island focal point beautifully.
| Craftsman Island Element | Trim Component |
|---|---|
| Horizontal banding strips | At 1/3 and 2/3 height |
| Square bracket supports | Below countertop overhang |
| Flat panel detail | Between banding strips |
| Deep rich paint color | Unifies entire treatment |
Frequently Asked Questions
What is the best trim for a kitchen island?
The best trim for a kitchen island depends on your kitchen style. Shaker panels are the most versatile and suit almost every kitchen style from farmhouse to contemporary. Fluted panels are the most current and high-end trending choice. Beadboard suits cottage and Victorian kitchens while board and batten is perfect for farmhouse aesthetics. Start with your kitchen style and choose the trim that extends that character to the island.
How do I add trim to an existing kitchen island?
Most kitchen island trim upgrades involve applying MDF or solid wood panels, molding strips, or decorative elements directly to the existing flat cabinet sides using construction adhesive and finish nails. Clean the island surface thoroughly, measure carefully, cut trim components to size, apply adhesive, secure with a nail gun, fill nail holes, caulk all joins, and paint. The process is achievable as a weekend DIY project for most homeowners with basic tools.
How much does it cost to add trim to a kitchen island?
Kitchen island trim upgrades range from $50 to $100 for a simple paint and hardware upgrade to $200 to $500 for a DIY shaker panel or beadboard treatment including materials. Professional installation of more elaborate trim details including custom millwork can cost $500 to $2,000 or more. The DIY approach delivers the most impressive cost-to-impact ratio for most kitchen island trim projects.
What is the most popular kitchen island trim style right now?
Fluted panel trim is currently the most popular kitchen island trim trend in contemporary interior design. Deep-colored shaker panel islands in navy, forest green, and charcoal are also extremely popular. The two-tone island — different color from surrounding cabinetry — continues to grow in popularity as the most accessible way to make an island look designer-quality without physical trim installation.
Can I add trim to a kitchen island myself?
Yes. Most kitchen island trim projects are suitable DIY upgrades for homeowners with basic tools and moderate confidence. Shaker panels, beadboard, shiplap, board and batten, and furniture legs are all manageable weekend DIY projects. More complex trim like stacked molding profiles, corbels, and decorative carved panels require slightly more woodworking skill but are still achievable without professional help for most confident DIYers.
Conclusion
Your kitchen island deserves better than bare, flat cabinet sides that contribute nothing to the overall design of the kitchen. The right trim detail transforms a functional box into a genuine furniture-quality centerpiece that elevates the entire room. Every one of these 29 ideas is achievable at multiple budget levels from a simple paint upgrade to a comprehensive custom millwork treatment.
Start with the trim style that most excites you and best suits your existing kitchen aesthetic. Even one well-chosen trim upgrade applied carefully makes a dramatic, immediately visible difference. Your kitchen island is about to become the most beautiful element in your entire kitchen — and it all starts with a little bit of trim.