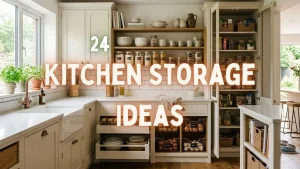
A small kitchen feels chaotic. Counters disappear under clutter. Cabinets overflow with things you cannot find. Cooking becomes frustrating instead of enjoyable.
The problem is not the size of your kitchen. It is the lack of a system. The right organization strategy transforms even the tiniest kitchen into a functional, genuinely enjoyable space.
These 21 ideas cover the whole kitchen. The pantry, the drawers, the under-sink cabinet, the refrigerator, and the walls. Some take an afternoon. Some take fifteen minutes. All of them work in a real small kitchen.
1. Start With a Full Kitchen Audit
Before buying a single organizer, take everything out. Every cabinet, every drawer, every shelf. Lay it all on the floor or a table and see what you actually own.

The kitchen shows what the end result looks like after an audit. Wooden floating shelves holding only what is used. A hanging rail above the sink with dishware. Labeled jars on the counter holding dry goods. Nothing extra. Nothing duplicated. Every item earned its spot.
What the audit reveals:
- Expired food you forgot about
- Duplicate tools you never use
- Appliances that seemed useful but never come out of the cabinet
- Things that belong in another room entirely
Categorize what remains into groups. Cooking tools together. Baking supplies together. Pantry items by type. Those groups become the foundation of every other organization decision in the kitchen.
The audit alone solves about 30 percent of the problem before you buy anything.
2. Clear the Countertops Completely

Cluttered counters make any kitchen feel smaller. Clear surfaces create breathing room and make cooking easier. Only items used every single day belong on the counter.

The kitchen in this image by drivenbydecor proves what “clear countertops” actually looks like. The island top holds only a serving tray with a vase of white flowers and a small candle. Everything else is stored. The deep drawer holds organized glass containers that would otherwise live on the counter.
What stays on the counter:
- Coffee maker
- Toaster
- Knife block (or better, a magnetic strip on the wall)
What moves into a cabinet:
- Blender
- Food processor
- Stand mixer
- Instant Pot
- Anything used less than once a week
One decorative item is fine. A small plant or a pretty bowl. Everything else finds a home behind a cabinet door.
3. Install Open Shelving for Frequently Used Items
Open shelving in a small kitchen serves two purposes simultaneously. It creates accessible storage and displays beautiful items as decor. The right open shelf makes a small kitchen feel larger, not smaller.
Mount one or two shelves on the wall above the counter or beside the window. Use them for everyday dishes, glasses, and beautiful pantry jars. Everything on open shelves stays visible and accessible without opening any cabinet door.

For IKEA kitchen ideas and shelving approaches that maximize storage in a small kitchen beautifully, explore these IKEA kitchen ideas for affordable solutions that transform small kitchen storage completely.
4. Use Vertical Space With Tall Cabinet Storage
Most small kitchens waste the top third of every cabinet. Items pile at eye level and the upper space stays empty. Going vertical solves this immediately.

The homefulness_uk‘s cabinet proves how much fits when you use the full depth and height. A wire spice rack mounted on the inside of the cabinet door holds three tiers of labeled spice jars. The main shelf holds labeled clear containers of dry goods and oil bottles. Every inch is used.
Add a second shelf inside tall cabinets using a simple shelf riser or a freestanding shelf insert. This instantly doubles the usable storage inside any existing cabinet. The cost is minimal — shelf risers cost $10–$20 each.
5. Organize the Pantry With Clear Containers
Unclear packaging creates visual chaos in any pantry. Decanting dry goods into clear containers transforms how organized the pantry looks and functions. You see exactly what you have and how much is left.

The pantry proves the standard. Clear glass jars with wood lids on the door racks, all labeled on the front with the spice name. Clear acrylic canisters on the shelves holding pasta, rice, and dry goods, all labeled the same way.
What makes this system work:
- Uniform shape. Square or rectangular containers use space more efficiently than round ones. No wasted gaps.
- Consistent labels. Every container labeled the same way on the front. A $15 label maker produces clean results in minutes.
- Frequency hierarchy. Daily staples at eye level. Weekly items above and below. Rarely used items on the highest or lowest shelves.
Cost: A full set of clear pantry containers runs $60 to $200 depending on size and quantity. Label makers run $15 to $30.
For complete kitchen corner cabinet organization ideas that maximize every inch of pantry and cabinet storage in a small kitchen, explore these kitchen corner cabinet ideas for smart solutions that eliminate the most wasted space in any kitchen.
6. Maximize Under-Sink Cabinet Space

Under the sink is the hardest spot in a small kitchen because the pipes eat the middle and everything ends up in a jumbled pile. This setup uses clear stackable drawers with handwritten labels on the front, so dishwasher tablets, sponges, and tea towels each have a home.
A caddy on the left keeps brushes and scrubbers upright instead of lying on the shelf. A labeled jar of baking soda sits in reach, and bottles hang from a small rack. Nothing is hidden, so nothing gets forgotten
Clear drawers plus front labels mean you can see and grab what you need without pulling everything out.
7. Install a Magnetic Knife Strip
A knife block sits on the counter and consumes valuable workspace. A wall-mounted magnetic knife strip holds knives safely and visibly without using a single inch of counter space.

The knife strip by tamami_k is mounted on a grey subway tile backsplash. It holds four knives, kitchen shears, and a digital timer. Stainless steel cookware sits on the counter below, but the knives are not adding to the clutter because they live on the wall.
Why this works:
- Knives stay sharper because they do not rattle against other utensils
- The strip holds knives, scissors, small metal tools, and even metal spice tins
- Prep area becomes more functional because knives are within reach
- Counter stays clear
Cost: A quality magnetic knife strip runs $15 to $50. Installation is two screws into a stud or drywall anchors.
8. Use Door-Mounted Organizers Throughout
The back of every cabinet door is usable storage space. Most kitchens never use it. Door-mounted organizers add significant storage capacity without using any additional cabinet space.

The pantry door uses wire racks across the full door. One shelf holds labeled bins for dog food, snacks, and refills. Below that, jars of pantry items. Every inch of the door is working.
Where to add door organizers:
- Pantry door: over-door rack for spice jars and small cans
- Under-sink door: wire rack for cleaning supplies
- Pot cabinet door: lid rack for pot and pan lids
- Any cabinet door: adhesive hooks for measuring tools and bags
9. Create a Dedicated Spice Organization System

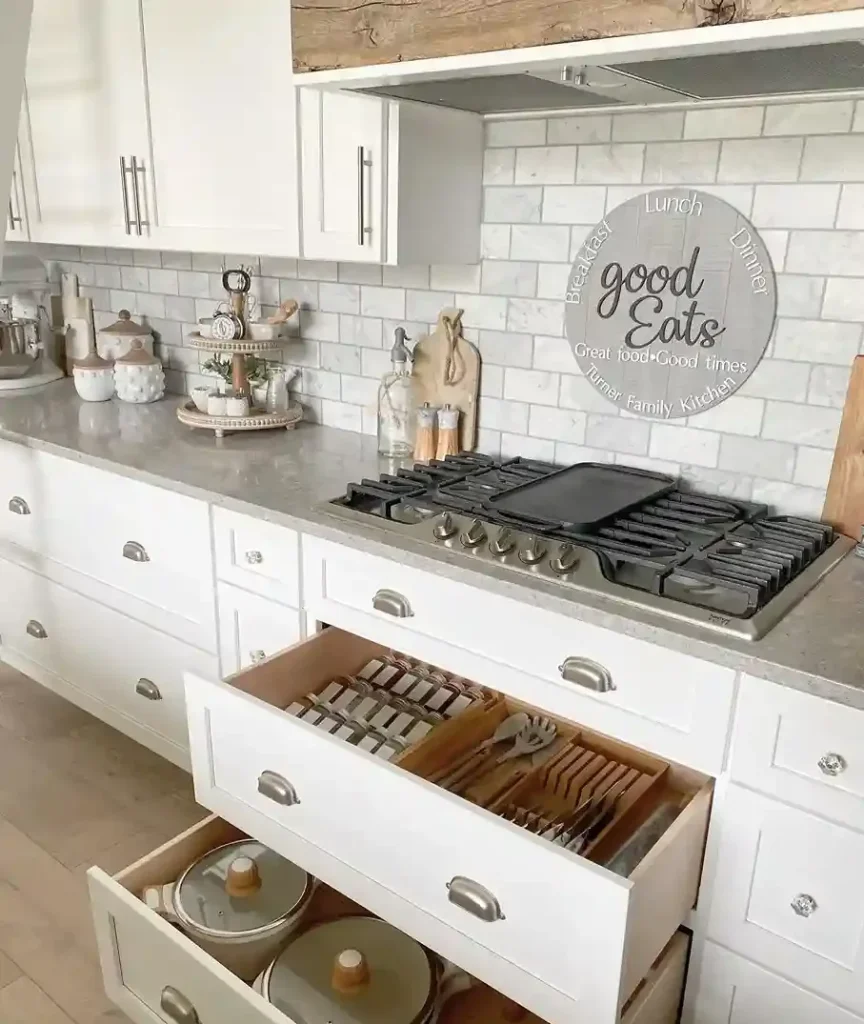
A drawer of loose spice jars is the classic small kitchen problem. Jars of every size and shape get pushed around until labels face away and duplicates build up in the back.
The fix is not more space, it is a flat layout. Lay every jar on its side in a single layer, sorted A to Z, or use a tiered insert so the back row is raised. Group by cuisine if you cook that way, and pull duplicates to the front so they get used first.
| The pile drawer | The working drawer |
|---|---|
| Labels face away and get lost in the mix. | Every jar lies flat, label facing up. |
| Duplicates hide in the back row. | Sorted A to Z or by cuisine. |
| You buy what you already own. | One glance tells you what is low. |
10. Hang Pots and Pans to Free Cabinet Space
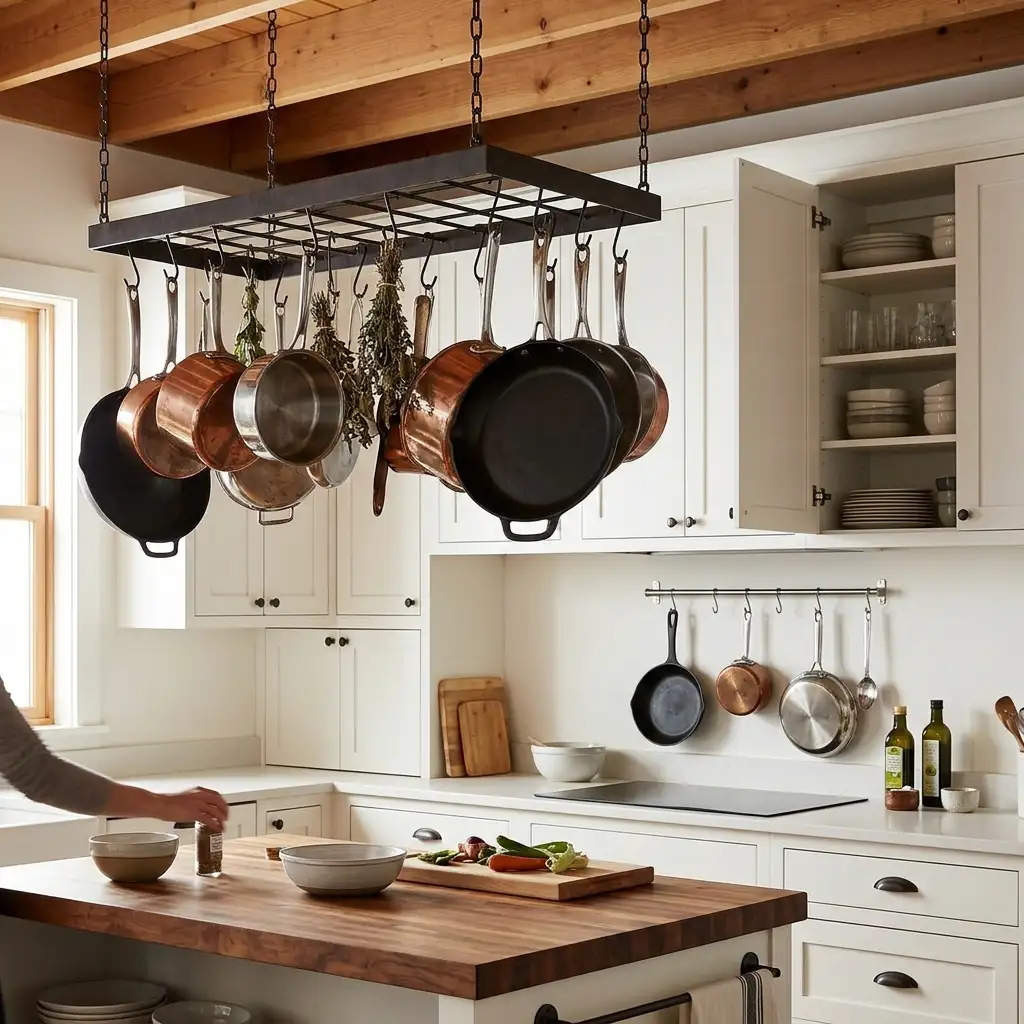
In a small kitchen, ceiling height is free storage. This setup hangs a black metal rack from the beams and hooks every pan, pot, and skimmer where you can see them.
A rail on the wall below holds a smaller pan, a copper pot, and a ladle, which keeps the sink area open. Cabinet interiors stay lighter for dishes, glasses, and bowls. Dried herbs hang from the same rack so they are reachable while you cook and out of the way the rest of the time.
1. Find the joists or beams first. Pots are heavy.
2. Leave at least 30 inches of clearance below the rack.
3. Keep the rack clear of the stove hood and any open flame.
11. Use a Rolling Kitchen Cart for Flexible Storage

A rolling kitchen cart adds counter space, storage, and flexibility that no fixed furniture can provide. The illustration shows exactly why. The same cart works three ways in one kitchen.
In the first panel, the cart rolls beside the prep area. The butcher block top becomes extra workspace for chopping vegetables and the lower shelf holds mixing bowls and a food processor.
In the second panel, the cart rolls against a wall. It becomes a minibar with a wine rack on top, glassware on the middle shelf, and cookbooks below.
In the third panel, the cart moves completely out of the way when the kitchen needs open floor space for a dinner party or a delivery drop.
What to look for in a rolling cart:
- Butcher block or stainless steel top for a real work surface
- Side hooks for hanging towels and utensils
- At least two shelves below for storage
- Locking casters so it does not roll while you are chopping
12. Organize Drawers With Expandable Dividers
An unorganized drawer becomes a junk drawer within a month. Every drawer without a system fills with random items. Expandable dividers create dedicated zones for every category of tool.

The kitchen here is what a fully organized drawer system looks like. Three drawers on the left open to reveal utensils, hand towels, and clear plastic storage containers, each in its own zone. The narrow pull-out on the right holds labeled spice jars standing upright. The pull-out beside it holds foil and wraps vertically.
How to set up each drawer:
- Leave one zone empty. You will need it within a week.
- Measure the drawer before buying dividers. Expandable bamboo or plastic dividers adjust to fit almost any width.
- Assign one zone per category. A zone for spoons, a zone for measuring tools, a zone for peelers.
- Group by frequency of use, not by type. The tools you reach for most often go closest to the front.
13. Install Pull-Out Shelves Inside Lower Cabinets
Lower cabinets are notoriously difficult to organize. Items at the back become permanently inaccessible. Pull-out shelves solve this completely. Every item slides forward into easy reach regardless of how far back it was stored.

The pantry pull-out shelves at every level. The narrow pull-out holds cans, condiments, and boxes on four tiers. Behind it, wider shelves hold more cans, jars, and packaged food. Below, deep drawers hold more pantry goods. Nothing is more than one pull away from the front.
What to know before buying:
- Measure the interior width of each cabinet before ordering
- Soft-close pull-out shelves cost more but feel significantly better in daily use
- The most accessible shelf should hold daily-use pots and pans
- The deepest tier is fine for appliances used once a week
- Pull-out shelves in a corner base cabinet solve the notoriously awkward corner storage problem
Cost: Pull-out shelf inserts run $30 to $80 each depending on size. A cabinet with two pull-out shelves stores significantly more than the same cabinet without them because every inch is genuinely reachable.
14. Create a Breakfast Station to Organize Morning Essentials
A dedicated breakfast station consolidates everything needed for the morning routine into one organized zone. The coffee maker, mugs, coffee, sugar, and spoons all live in one defined area. Morning routine becomes effortless and the rest of the kitchen stays clear.
Designate one section of counter and one adjacent cabinet as the exclusive breakfast station. Keep only breakfast-related items in this zone. A small tray corrals the coffee station accessories neatly. A shelf above holds mugs within easy reach.

The breakfast station principle extends to other meal routines. A dedicated lunch prep zone, a designated baking area, or a cocktail station each reduce daily kitchen chaos. Zones replace searching with knowing exactly where everything lives.
15. Use the Refrigerator Top and Sides for Storage
The refrigerator exterior is unused storage space in most small kitchens. Magnetic organizers mount on the refrigerator side and hold spice tins, a notepad, and small tools. The refrigerator top holds small appliances used less frequently.

A magnetic paper towel holder mounted on the refrigerator side frees a cabinet shelf. Magnetic knife holders, magnetic spice racks, and magnetic message boards all mount to refrigerator sides without any drilling or wall damage.
The refrigerator top suits a bread box, a fruit bowl, or a small appliance used once or twice weekly. Keep the top organized and intentional — a cluttered refrigerator top makes the kitchen feel disorganized even when everything else is tidy.
16. Label Everything for a Maintained System
An organized kitchen without labels gradually returns to chaos. Labels are the maintenance system that keeps organization working long-term. When every item has a clearly labeled home, returning it to the right place requires no thought or decision.

Use a label maker for the most consistent, professional-looking results. Adhesive label makers cost $15–$30 and produce clean labels quickly. Label every container, every drawer zone, every shelf section, and every cabinet.
| Labeling Location | Label Type | Benefit |
|---|---|---|
| Pantry containers | Front-facing labels | Instant content identification |
| Spice jar tops | Top labels | Readable in pull-out drawer |
| Drawer zones | Small adhesive labels | Zone maintenance |
| Shelf edges | Clip-on or adhesive | Category identification |
| Freezer bags | Masking tape and marker | Date and content tracking |
17. Organize the Refrigerator Interior
A disorganized refrigerator wastes food and wastes time. Food expires at the back of a cluttered fridge. Searching for ingredients mid-cooking breaks your flow. An organized refrigerator matters as much as any other kitchen system.

The refrigerator above is sorted by category. Clear bins on the shelves hold produce, leftovers, and dairy. Matching labeled containers line the shelves for meal prep. The door shelves use small baskets to contain condiments, juice boxes, and small jars. Every level is visible at a glance.
How to set up your fridge:
- Top shelf: ready-to-eat items like leftovers and drinks
- Middle shelves: dairy, eggs, and proteins
- Bottom shelf: raw meat in a separate bin to prevent drips
- Crisper drawers: produce, separated by type (fruit vs vegetables)
- Door shelves: condiments, dressings, and small items in baskets
The FIFO rule: First In, First Out. New items go to the back. Older items move to the front. Food waste drops dramatically when this habit is consistent.
18. Create More Storage With a Small Kitchen Island

A kitchen island adds counter space, storage, and a social surface to even a small kitchen. The island above is a good model for a compact space. Green painted base with a butcher block top.
Two deep drawers for storage. An open lower shelf holding stacked bowls and cookbooks. Two wooden barstools on one side for casual seating.
What to look for in a small kitchen island:
- Butcher block top for a dedicated chopping surface
- At least two drawers for tools and small items
- An open lower shelf for larger items like bowls and appliances
- Casters if you want flexibility to move it
- A breakfast bar overhang on one side if you want seating
Where it fits: Even a 6 to 8 square foot island fits in most kitchens with a walkway on at least one side. You need 36 inches of clearance between the island and any wall or cabinet for comfortable movement.
For small living room with dining area ideas that incorporate a kitchen island as the primary dining surface in an open-plan small home, explore these small living room with dining area ideas for layout strategies that maximize the kitchen island as a multi-functional centerpiece.
19. Organize the Small Kitchen for a Studio Apartment
A studio apartment kitchen presents unique organization challenges. The kitchen, living area, and dining zone all share the same compact space. Organization must work harder in a studio kitchen than in any other setting.

Wall-mounted shelving above the kitchen area provides storage without consuming any floor space. A fold-down wall table serves as both a kitchen prep surface and a dining table. Every piece of kitchen furniture must serve multiple purposes simultaneously.
For complete studio apartment ideas including kitchen organization strategies that maximize every square foot of a compact combined living and kitchen space, explore these small studio apartment ideas for comprehensive approaches to living beautifully in the smallest possible footprint.
20. Style the Organized Kitchen to Feel Intentional
An organized kitchen that also looks beautiful is dramatically more motivating to maintain. When the kitchen looks good, you naturally want to keep it looking good. Aesthetics support function rather than competing with it.

Coordinate storage containers throughout the kitchen. Matching pantry jars, uniform spice containers, and consistent basket and bin colors create visual cohesion. The kitchen feels designed rather than merely organized.
Add one or two decorative touches that suit your style. A small potted herb on the windowsill. A beautiful ceramic bowl holding fruit. A vintage print on the wall. Small beautiful details make the organized kitchen genuinely enjoyable to spend time in.
For vintage craft room and kitchen organization ideas that combine beautiful styling with genuinely functional storage systems, explore these vintage craft room ideas for the aesthetic approach to organized spaces that look as beautiful as they function.
21. Maintain the System With a Weekly Reset

The hardest part of small kitchen organization is not the initial setup. It is maintaining the system over months. A weekly reset habit is the single most important ongoing practice for a permanently organized kitchen.
The shelf holds cookbooks and a wire basket. The rail below holds five mugs in a neat row. The spice rack holds labeled jars. The counter holds only the appliances used daily: microwave, toaster, blender, knife block, bread box. Everything else is stored.
Nothing is cluttered. Nothing is out of place. That is the result of a system that gets maintained, not a one-time cleaning.
The weekly reset, in fifteen minutes:
- Return items to their homes. Five minutes. Every item that drifted during the week goes back where it belongs.
- Wipe all surfaces. Five minutes. Counters, shelf edges, and appliance fronts.
- Check the pantry and rotate. Three minutes. Move older items forward. Discard anything expired.
- Refrigerator FIFO rotation. Three minutes. Same principle. Older food to the front.
- Review one problem area. One minute. Pick the drawer or shelf that has drifted the most this week and reset it fully.
Every three to six months, review the entire system. Some solutions stop working as routines and needs change. Add new solutions where they are needed. Remove anything that has become an obstacle. An organization system that evolves with your life stays useful indefinitely.
Frequently Asked Questions (FAQs)
Q1: What is the most important first step in organizing a small kitchen?
Decluttering is always the first step. Remove everything from every cabinet and drawer. Throw away expired food. Donate duplicate tools and appliances you rarely use. A small kitchen organized around fewer items always works better than one where every inch is crammed with things you do not need. The audit and declutter alone solve the majority of small kitchen organization problems before you buy a single organizer.
Q2: How do I create more storage in a kitchen with no extra space?
Use every vertical surface. Walls, door backs, refrigerator sides, and the space above cabinets all count. Install pull-out shelves inside lower cabinets to access the full depth of the storage you already have. Add a magnetic knife strip, a wall-mounted spice rack, and over-door organizers. These additions create significant storage within the same footprint without any structural changes.
Q3: What are the best storage containers for a small kitchen pantry?
Uniform square or rectangular clear containers are the best choice. Square containers use space more efficiently than round ones. There are no wasted gaps between jars. Clear containers allow immediate visual identification of contents. Airtight seals keep dry goods fresh longer. Buying all containers from the same product line creates visual cohesion that makes the pantry look organized rather than chaotic.
Conclusion
A small kitchen organized with intention works better than a large kitchen organized without one. Every idea in this guide is designed to make your specific space, however small, genuinely functional and enjoyable to cook in.
Start with the declutter. Establish the zones. Build the system one solution at a time. The kitchen you create changes your daily relationship with cooking, cleaning, and time in the home. Meals become easier. Mornings become calmer. Cooking becomes something you actually look forward to.
The kitchen you deserve is exactly the kitchen you can create, regardless of its size.