Your master bathroom should be the most beautiful room in the house.
It is where the day begins and where it ends.
But most master baths feel functional at best. Cold tile, builder-grade fixtures, and zero personality make the room feel like an afterthought.
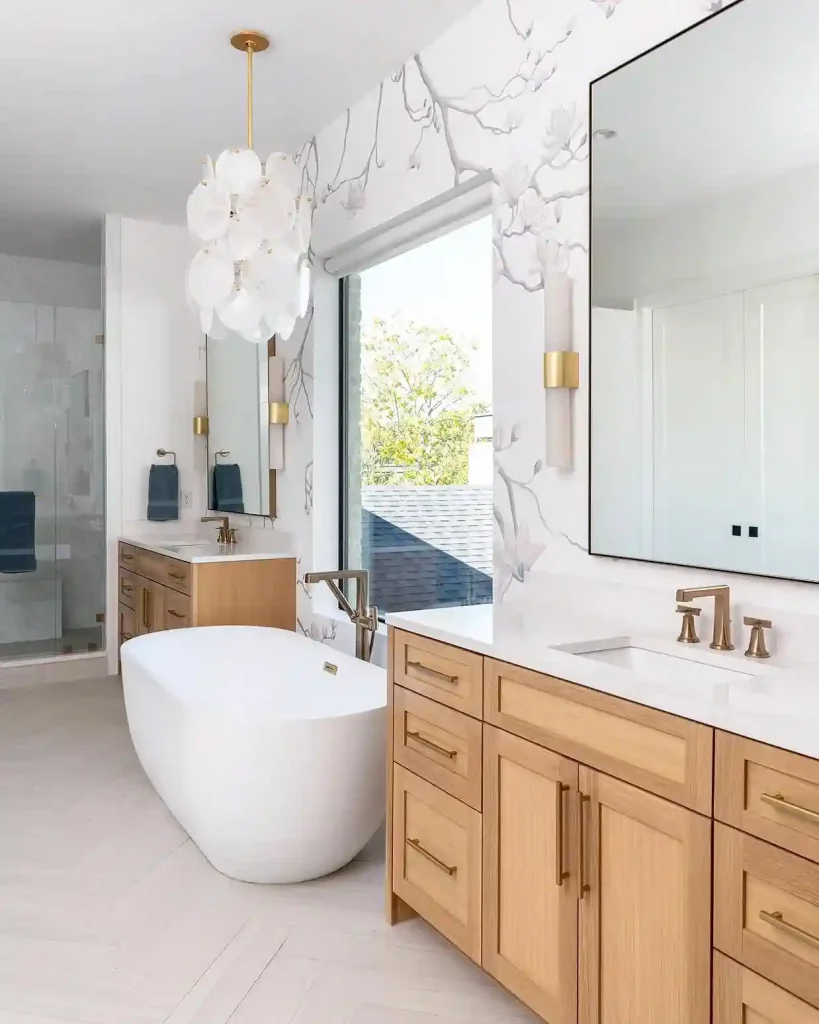
These 33 ideas cover every element of master bath design, from layout and materials to lighting, storage, and the finishing details that separate a bathroom from a retreat.
1. Start With a Master Bath That Works for Two
A master bath serves two people at the same time. The bathroom has to accommodate simultaneous morning routines without conflict.
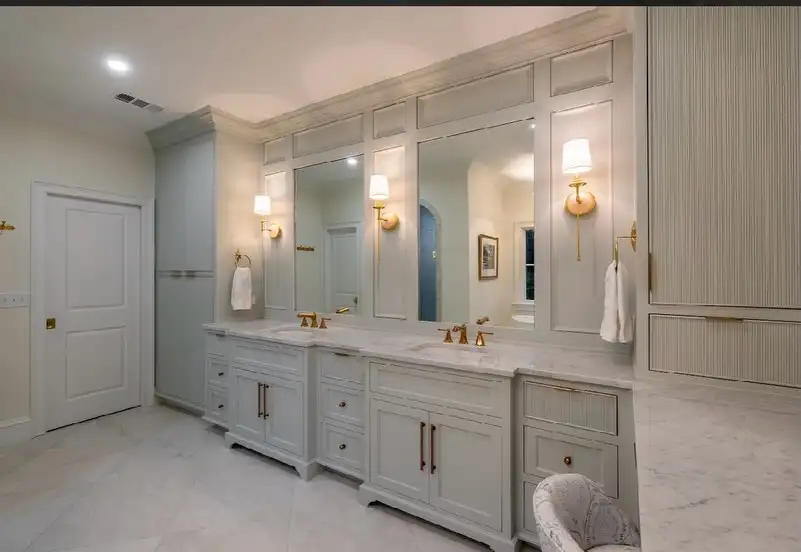
The bathroom in this photo handles the two-person problem well. A long double vanity runs the full wall with two sinks spaced well apart.
Mirrored medicine cabinets above the counter give each person their own storage. Brass sconces between the mirrors provide separate lighting zones. Marble floors unify the room.
| Layout Type | Minimum Width | Best For | Key Feature |
|---|---|---|---|
| Single vanity | 5 feet | Solo use or tight space | Maximizes other features |
| Double vanity | 7–8 feet | Couples | Two sinks side by side |
| Separated stations | 10+ feet | Ultimate luxury | Each person has own area |
| Jack-and-Jill | 8–10 feet | Shared access | Two separate entries |
2. Install a Freestanding Tub as the Centerpiece
A freestanding tub is the most dramatic and most desirable master bath feature. Positioned as the room’s visual centerpiece, it creates an immediate luxury hotel quality that no other element achieves as powerfully.

A floating wood vanity and a freestanding tub can share a wall when the plumbing is planned together. This setup mounts the vanity to the wall with no legs, so the floor runs clean underneath.
The tub sits beside it in a soft stone finish, with a floor mounted brass filler on the wall side.
A slab of blue gray marble runs the full height behind both, which ties the sink zone and the tub zone into one surface. A backlit round mirror floats on the marble and gives the wall a focal point.
📌 Good To Know
A floating vanity needs blocking inside the wall before the drywall goes up. If you are retrofitting one, open the wall and add framing first, or the cabinet will pull loose over time.
3. Design Curbless Shower in a Sloped Attic Bathroom
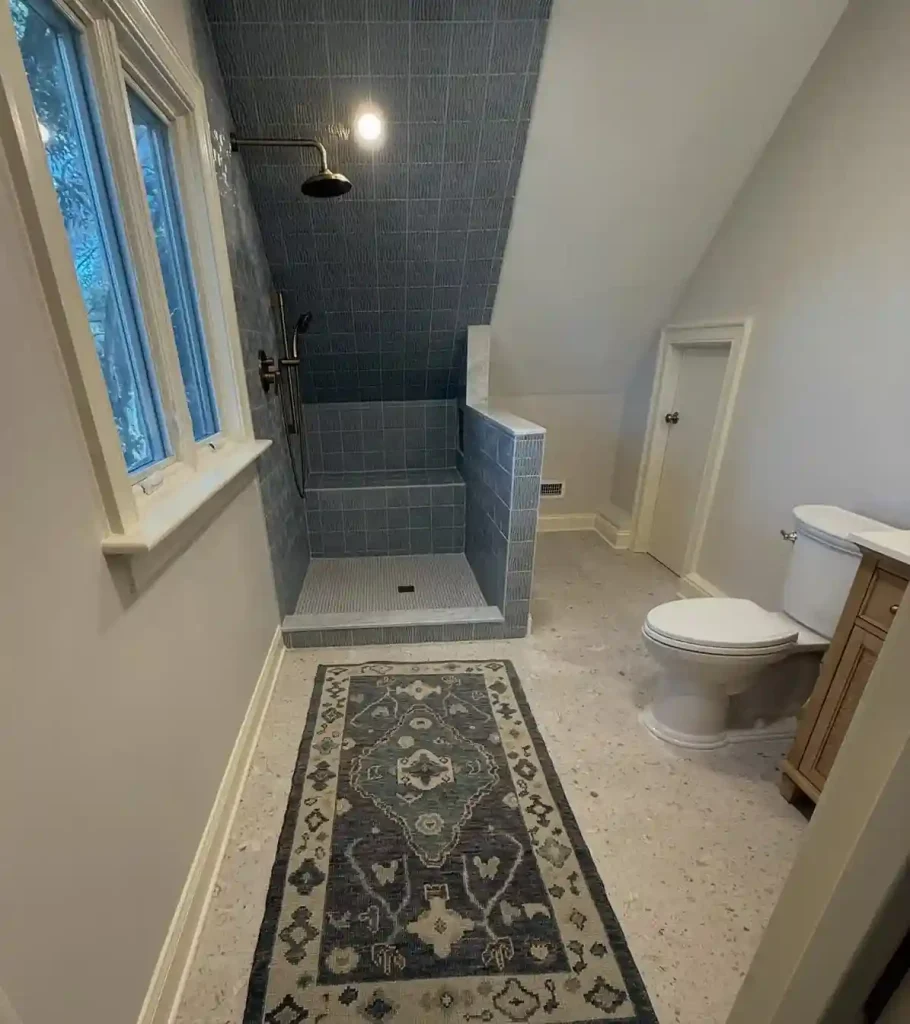
A shower tucked under a sloped ceiling needs different planning than a shower on a flat ceiling.
This one runs the tile all the way up the slope, which turns the angled surface into the shower surround instead of leaving it as raw drywall.
A marble threshold separates the wet zone from the floor, and a tiled bench sits at the far end.
The spray pattern comes from a brass rain shower head, and a window on the left brings daylight into the shower without the need for an added fixture. A patterned runner on the floor warms up the terrazzo tile.
⚠️ Watch Out
A shower under a sloped ceiling needs extra waterproofing at the corner where the slope meets the wall. That junction moves slightly with the seasons, and a rigid tile joint there will crack if it is not sealed properly.
4. Add Long Wood Vanity With Reeded Front Cabinets

A long single run of wood cabinetry gives a master bath the feel of a hotel bathroom, especially when the front detail is doing real work.
This vanity uses reeded panel fronts on the upper drawers and flat panel doors below, all in the same warm oak finish.
Brass pulls and a marble counter sit on top, and two arched mirrors with black frames hang above. The tall cabinet on the right reaches the ceiling for linens.
A gray tile floor in large squares grounds the whole wall, and a runner with a fine diamond pattern softens the middle of the room.
5. Install Radiant Heat Underlayment and Tile Layout
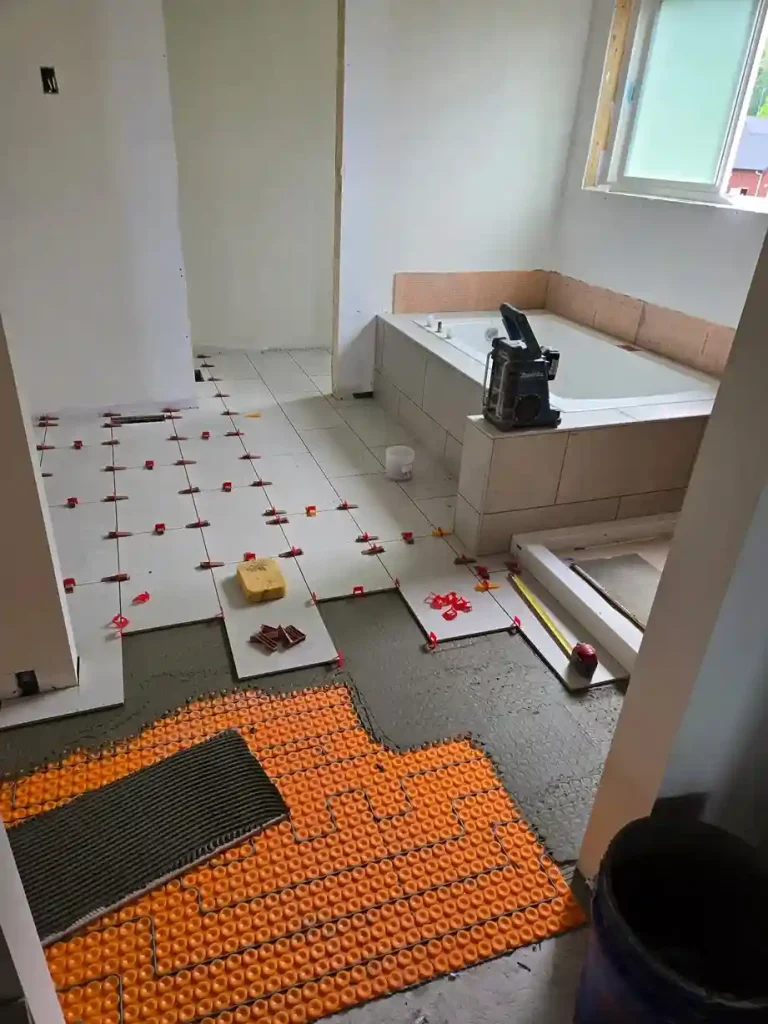
The stage that decides how a bathroom floor performs for the next twenty years happens before a single tile goes down.
This photo shows the underlayment and heating mat stage, with an orange membrane snapped together across the subfloor, a red leveling clip system holding the tile edges flat, and tile already set in the back half.
A tub surround sits framed in cement board to the right. Getting the mat flat, the joints tight, and the subfloor level at this stage is what prevents cracked tile and cold floors later.
6. Use Freestanding Tub Against a Textured Feature Wall
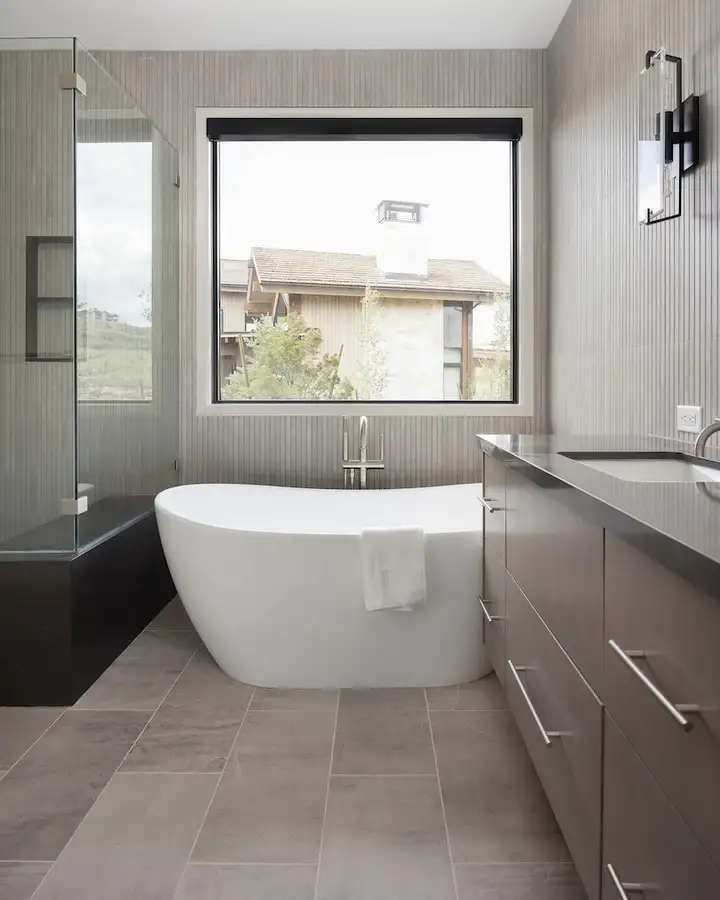
A tall window over the tub is the reason this wall works, and the tile choice supports it.
This bathroom uses vertical fluted tile in warm grey on the feature wall, with a black framed window centered above the tub. The tub is an asymmetric freestanding shape in matte white, and the filler comes up from the floor on a slim brushed steel stem.
A glass shower enclosure sits to the left, with a dark stone bench and shelves built into it. A black frame sconce hangs on the right wall and keeps the lighting consistent with the window trim.
7. Create Black and White Clawfoot Bath With Hex Tile
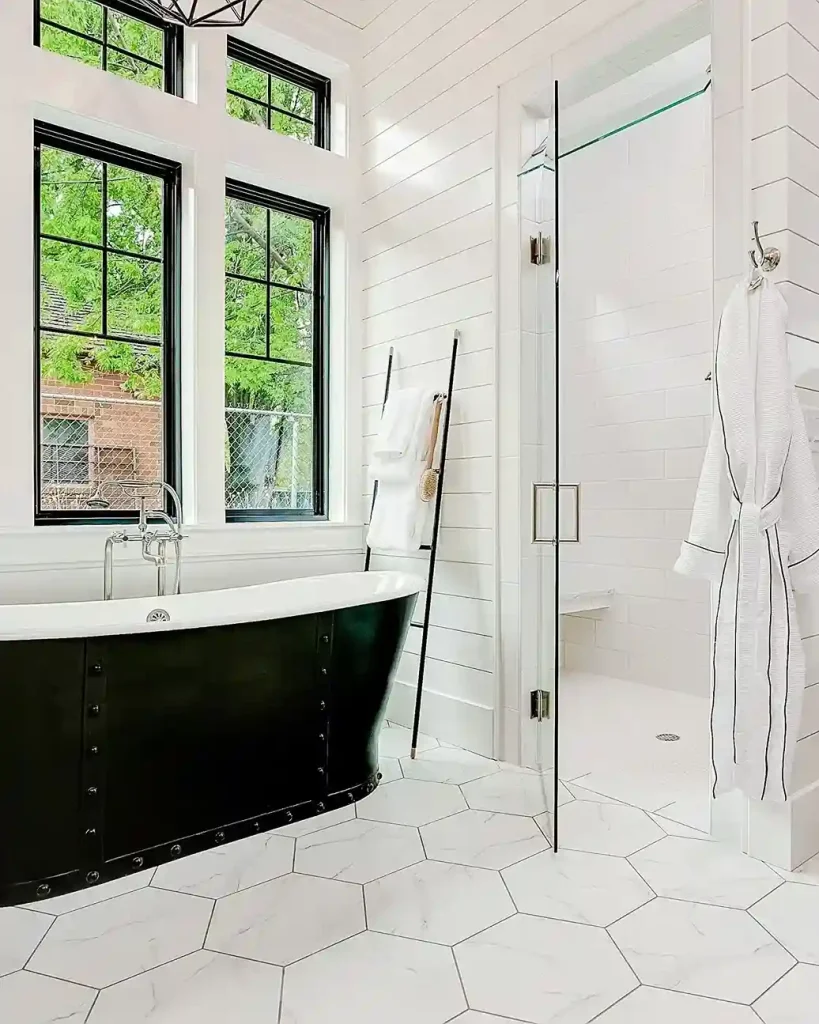
A clawfoot tub reads different depending on the color, and a black exterior makes it the strong element in the room.
This bathroom places a black clawfoot tub under two tall windows with black frames, and runs a herringbone white tile wall behind the shower. The floor uses a white marble hexagon tile, and a black ladder towel stand holds a stack of towels and a wooden brush.
A robe hangs on a hook to the right, and a marble hex pattern carries into the shower floor so the two zones match.
See bathroom curtain ideas resource for styling and design approaches that create the complete spa atmosphere throughout the master bath.
8. Choose a Stunning Statement Mirror
A statement mirror above the vanity is one of the least expensive and most impactful upgrades available.

This bathroom uses two tall arched mirrors with decorative frames above a mint green vanity. The mirrors are proportional to each sink. A crystal chandelier hangs from the center of the ceiling. Wire baskets on the counter hold toiletries. Wainscoting and beadboard behind the vanity provide texture.
Choose a mirror slightly narrower than the vanity for balanced proportion. An arched mirror adds romantic elegance. A rectangular mirror with a bold frame suits contemporary aesthetics. A backlit mirror adds practical illumination.
Antiqued or vintage mirrors add character to traditional or glamorous baths. A frameless mirror creates maximum reflection in minimalist spaces.
9. Install Herringbone Marble Floor

A herringbone marble floor is one of the few surfaces that reads as both classic and modern at the same time, which is why it works in a master bath.
This bathroom pairs it with a freestanding white tub on the left and a walk-in shower on the right, both framed by a matching marble header. The shower wall is a soft blue-green marble in a running bond pattern, which keeps the room from becoming all white.
A pink slipcovered chair sits in the middle and gives the room a single warm note. A brass picture light above the mirror matches the drawer pulls on the vanity.
10. Add a Fireplace to the Master Bath
A fireplace in the master bathroom is the ultimate luxury statement. The combination of warm fire and a deep soaking tub creates an extraordinary sensory experience.

The bathroom in this photo uses a wide electric fireplace insert set into a travertine feature wall. A floating wood shelf above the fire holds candles and small vessels. A white freestanding tub sits in front. A bench beside the tub holds a wine glass and an open book. The full effect is genuinely restorative.
Position the fireplace on the wall facing the soaking tub for the most dramatic placement. The fire is visible while bathing. The warmth radiates toward the tub. An electric fireplace insert suits most master bath applications without any venting requirement.
Explore fireplace hearth ideas for surround materials, mantle styling, and complete fireplace design approaches.
11. Design a Master Bath With Exposed Ceiling Beams
Exposed ceiling beams in a master bath add warmth and character that flat drywall cannot match. The combination of natural wood overhead, stone or tile surfaces below, and warm light creates a genuine spa atmosphere.
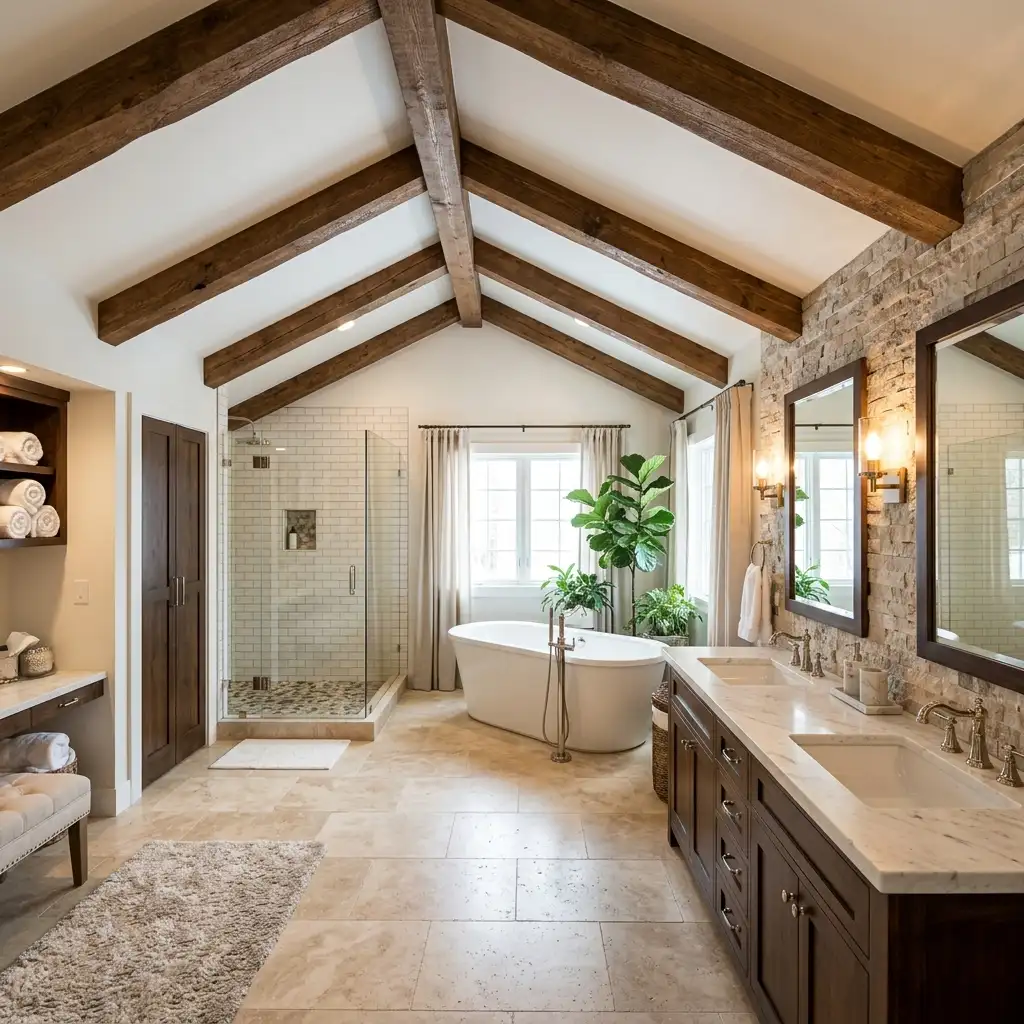
The bathroom in this photo shows the effect fully realized. Heavy reclaimed wood beams cross a vaulted ceiling. A stone accent wall sits behind the vanity. The dark wood vanity has a marble top. A freestanding tub sits in the center under a window. A tiled shower runs along the left wall.
Use moisture-resistant sealant on all wood elements in a master bath. Bathroom humidity requires a durable finish that prevents moisture absorption. A properly sealed wood beam lasts for decades without warping or deterioration.
Moisture-rated finishes that work well on bathroom beams:
- Marine-grade polyurethane with UV inhibitors
- Epoxy-based sealers rated for high humidity
- Penetrating oil finishes reapplied annually
- Conversion varnish for maximum moisture resistance
Try faux wood beams ceiling ideas for every approach to creating a beautiful beamed ceiling in a master bath setting.
12. Choose Marble Shower With Brass Fixtures and a Bench

A large format marble shower reads clean and expensive, and brass hardware warms it up.
This shower is fully tiled in white marble with heavy grey veining, floor to ceiling, with a hinged glass door and brass hinges. Inside, a round rain head and a handheld shower on a slide bar give you options for washing. A built-in marble bench sits at the back, and a small niche holds shampoo out of sight.
The floor is a white marble hexagon mosaic, which gives grip underfoot and keeps the marble theme going. A freestanding tub sits just outside the glass.
📌 Good To Know
A shower floor needs smaller tile than the walls for grip and for the slope to the drain. Large format tile on a shower floor is a slip risk and does not drain well.
13. Add Floating Vanity With Marble Wall and Brass Hardware

A floating vanity works best when the wall behind it is doing something worth looking at.
This bathroom runs book-matched marble slab from floor to ceiling, and hangs the vanity off the wall with no legs. The cabinet fronts are cream with brass pulls and wall mounted brass faucets, which keeps the counter visually clear.
A large rectangular mirror with a crown molding frame sits above, and a single potted plant adds a small living element. To the right, a wall of brass towel bars holds folded towels. A neutral runner on the marble floor softens the space.
14. Install a Shiplap or Wood Panel Accent Wall
A shiplap or wood panel accent wall in the master bath adds warmth and texture that tile and painted drywall cannot provide. The wood paneling creates a distinctive architectural feature that makes the bath feel genuinely designed.
See shiplap ceiling ideas for comprehensive shiplap design guidance that applies to master bathroom wall treatments.

The bathroom in this photo uses warm wood cabinetry throughout. White shiplap covers the walls. A glass-enclosed shower with marble-look tile runs the full back wall. A cedar-lined sauna is visible through a glass door on the right. The shiplap and wood tones work together to soften the marble and glass.
Use moisture-resistant paint and a properly sealed finish on any wood paneling in a bathroom. The humidity of a daily-use master bath requires a durable, water-resistant surface treatment.
Where a wood accent wall works best:
- Behind the vanity as a backdrop
- On the wall facing the soaking tub
- Inside the water closet for warmth
- Along the shower’s exterior wall (not inside the wet zone
15. Create a His-and-Hers Vanity Setup
His-and-hers vanities create dedicated personal zones within the master bath. Each person gets their own sink, mirror, lighting, and storage. The dedicated zones eliminate morning conflict entirely.

The bathroom in this photo leans toward a rustic vintage aesthetic rather than a separated-station layout. Distressed wood cabinets, a bronze clawfoot tub, and a wood-plank accent wall create a collected, characterful feel.
The style shows how a his-and-hers setup can be unified by an aesthetic direction rather than separated by function.
16. Use a Painted Ceiling for a Dramatic Effect
A boldly painted ceiling in the master bath creates one of the most intimate and dramatic bathroom atmospheres possible. Deep navy, forest green, or warm charcoal on the ceiling creates an enveloping quality that makes the space feel genuinely private.
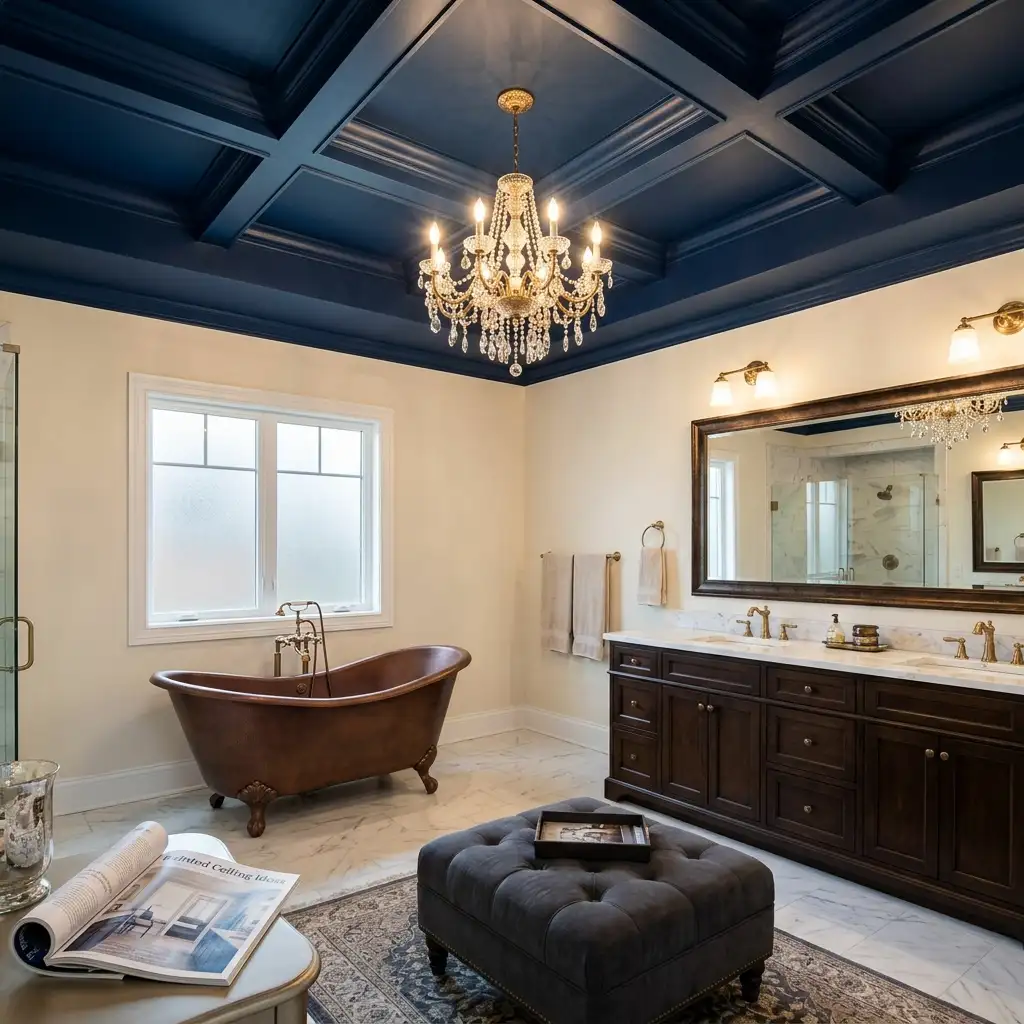
Look painted ceiling ideas for ceiling color inspiration that pairs naturally with master bath design decisions.
The bathroom in this photo uses a deep navy coffered ceiling as the defining feature. A crystal chandelier hangs from the center. Below, a bronze clawfoot tub sits on marble floors. A dark wood vanity with a marble top runs along the right wall.
A dark painted ceiling suits master baths with natural stone floors and warm metallic fixtures. The dark ceiling draws the eye upward and creates architectural drama that flat white ceilings never achieve.
Painted ceiling colors that work in a master bath:
- Deep navy for a sophisticated, cozy feel
- Forest green for a natural, calm retreat
- Warm charcoal for a modern, dramatic look
- Muted terracotta for a Mediterranean feel
- Black for maximum drama with marble or stone surfaces
17. Try Wood Vanity With a Metal Frame and a Vessel Sink
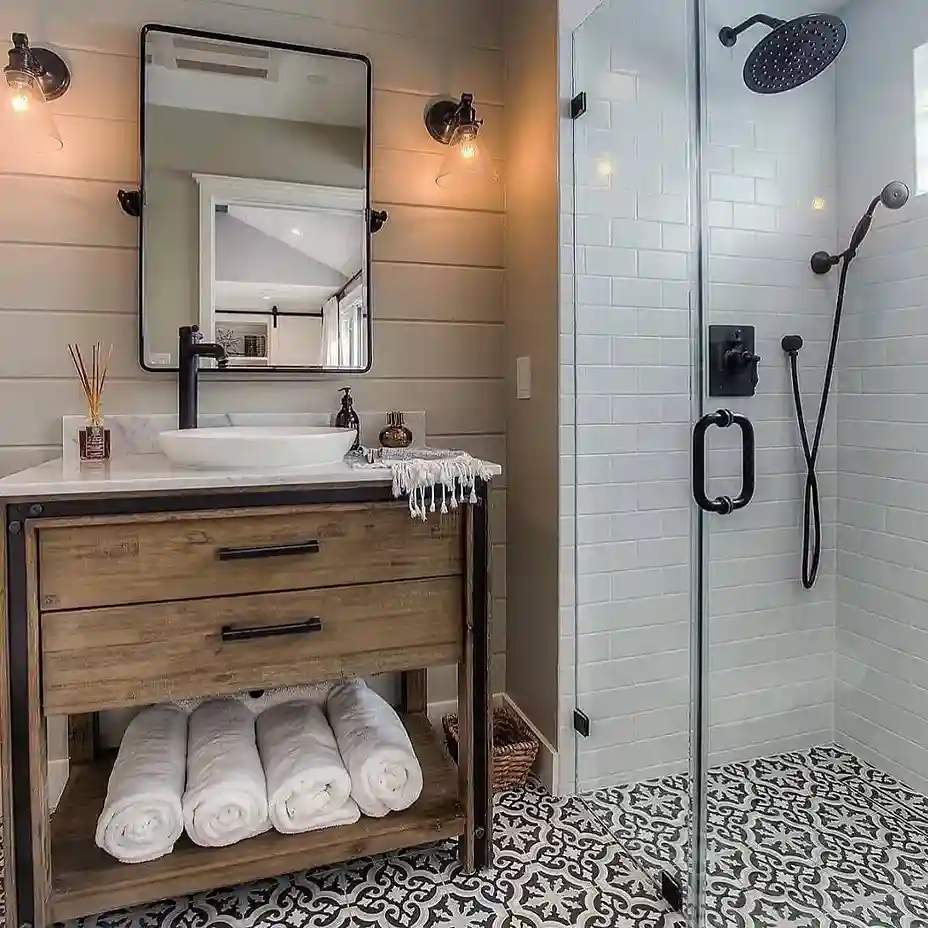
A wood vanity wrapped in a black metal frame gives a farmhouse bathroom a more industrial edge.
This setup uses a single vessel sink on a marble counter, with a tall black faucet that stands above the basin.
A black framed mirror sits flat on the shiplap wall, and black sconces with clear glass shades light each side. Below the counter, an open shelf holds rolled white towels within easy reach.
The shower on the right uses white subway tile with black fixtures and a black framed glass door, and the floor is a patterned encaustic tile that ties the room together.
18. Install a Heated Towel Rail

A heated towel rail is one of the most appreciated small luxuries in a master bath, and it installs without any plumbing. This one is a chrome ladder style unit mounted on white subway tile, with a single white towel warming on the middle bar.
A glass shower door sits to the left, and the shower itself uses white tile with a light beige porcelain floor. The vanity on the right is white with a white top and a chrome faucet, and a small potted plant on the corner adds a living element. The floor tiles are a warm beige that ties the whole room to the subway tile wall.
19. Try White Subway Shower

A shower can carry a lot of pattern if the pattern sits on one wall and the rest stays calm. This shower runs white subway tile on three walls and a full height geometric marble mosaic on the fourth, in a starburst and diamond pattern.
The fixtures are brushed gold, including a slide bar handheld shower, a round control valve, and a corner shelf with a marble top. The mosaic band runs behind the handheld so it becomes the focal point of the shower rather than just a decorative strip.
A small mirrored panel above the shower reflects the light and makes the space feel taller.
20. Create Full Marble Master Bath

A marble slab bath with a curbless shower and a freestanding tub reads as a full spa, and it works because the material is consistent from floor to ceiling.
This bathroom runs marble slabs on the vanity wall and inside the shower, a freestanding tub in front of a window with sheer curtains, and a curbless glass shower with a marble bench and a dark mosaic floor inside.
The vanity is a thick marble slab with open lower shelves holding rolled towels, and a single potted plant sits on top. The floor is a warm travertine, and the contrast between the warm floor and the cool marble walls keeps the room from feeling cold.
💡 Quick Tip
If you use marble on a shower floor, choose a honed finish rather than polished. Honed marble has more grip when wet and shows less water spotting.
21. Design a Master Bath for a Small Space
A small master bath still deserves a luxurious, thoughtful design. The principles are the same, beautiful materials, excellent lighting, quality fixtures applied with greater restraint to a smaller footprint.
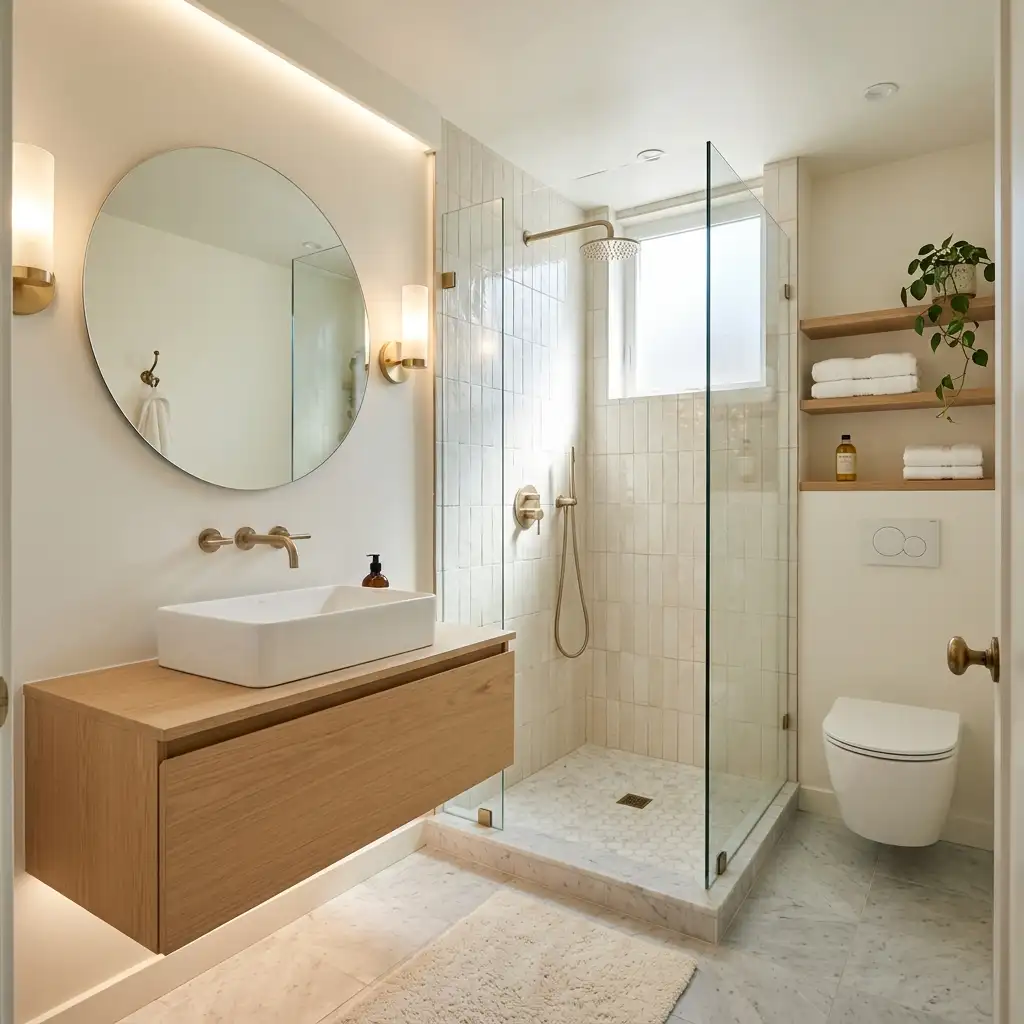
The bathroom in this photo proves how much fits in a compact space. A floating wood vanity with a vessel sink. A round mirror on the wall. A glass-enclosed shower with a marble hex floor. A wall-hung toilet floating beneath wood shelves. Open wood shelves hold folded towels and a plant.
A wall-hung vanity preserves floor visibility and makes the room feel larger. A large mirror spanning the wall above the vanity doubles the apparent size. A walk-in shower with no door eliminates the visual interruption of a glass enclosure.
22. Add a Double-Sided Fireplace Between Bedroom and Bath
A double-sided fireplace shared between the master bedroom and master bath creates a luxury feature that enhances both rooms at once. The fire is visible from the bedroom and from the bath, providing warmth, light, and atmosphere in both spaces from a single installation.

The setup in this photo uses a see-through gas fireplace set into a stone column. On the bedroom side, a linen-upholstered bed with layered bedding and soft rugs. On the bath side, a freestanding tub with a view of the fire through the glass.
Explore these wood burning stove living room ideas for design approaches that apply directly to a shared fireplace installation between a master bedroom and master bath.
The double-sided fireplace requires professional installation. Gas line connection, proper venting, and structural framing all require licensed contractors. The investment is significant, but the daily luxury and the home value impact justify it.
23. Install a Sloped Ceiling in the Master Bath
A sloped or vaulted ceiling in the master bath creates visual drama. The rising ceiling above the soaking tub or shower zone creates a sense of grandeur and openness that flat ceilings never achieve. The height makes the room feel significantly more spacious than the floor dimensions suggest.
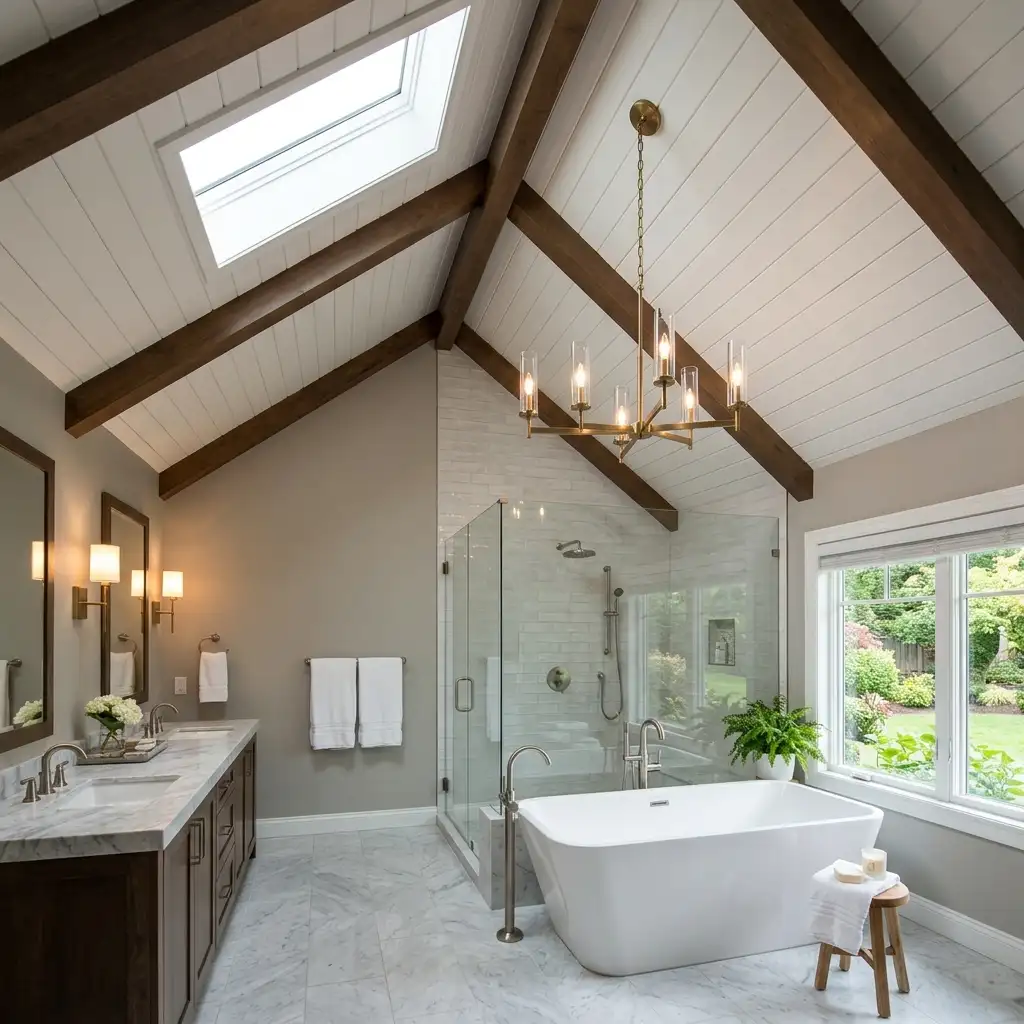
The bathroom in this photo uses a vaulted shiplap ceiling with exposed wood trusses. A skylight cuts through the left side. A brass chandelier hangs from the ridge. Below, a freestanding tub, a long marble vanity, and a marble floor. The vaulted ceiling is the defining feature.
A vaulted ceiling above the soaking tub is one of the most photographed luxury master bath features. The tub already creates a ceremonial quality. The dramatic ceiling above it amplifies that quality exponentially.
24. Choose Matte Black Fixtures for a Modern Look
Matte black fixtures create one of the most striking and most contemporary master bath aesthetics. The dark, non-reflective finish stands in bold contrast to white, grey, and natural stone surfaces.

Every fixture in the same matte black finish creates visual cohesion. Matte black suits modern farmhouse, industrial, contemporary, and Scandinavian master bath styles most naturally. It also creates beautiful contrast in more traditional spaces.
Matte black fixtures that should match:
- Wall-mount faucets and sink drains
- Shower controls and showerheads
- Towel bars and towel rings
- Toilet paper holders
- Cabinet hardware and door pulls
25. Use Wallpaper in the Master Bath
Wallpaper in a master bath adds pattern and personality to what is often a tile-heavy, pattern-light room. A botanical print, a geometric pattern, or a marble-effect wallpaper on one feature wall creates an immediate design statement.

Use bathroom-rated wallpaper specifically formulated for humid environments. Standard wallpaper deteriorates rapidly in bathroom conditions. Vinyl-coated or solid vinyl bathroom wallpapers resist humidity, steam, and moisture for years without peeling.
Apply wallpaper to the wall opposite the main mirror. It reflects into the mirror and visually doubles in presence. A wallpapered wall reflected in a large vanity mirror appears as though the entire room has that wallpaper.
26. Add a Master Bath Window Above the Shower
A window above or within the shower creates a connection to natural light and outdoor views that makes the shower experience genuinely special. The natural light changes the entire character of the space from enclosed and artificial to open and luminous.
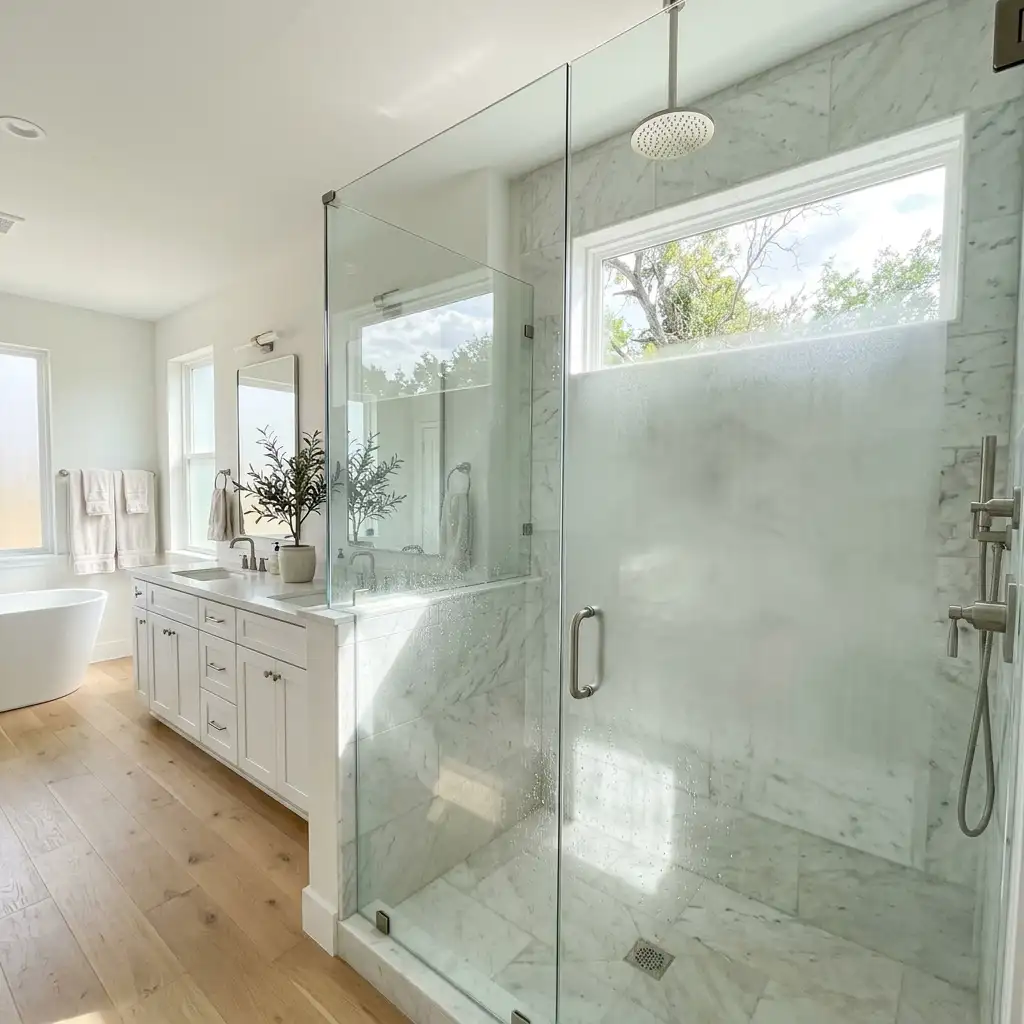
Use frosted, obscure, or patterned glass for a shower window to maintain privacy while capturing natural light. A fixed glass panel requires no hardware seals that could deteriorate. An operable window must have a waterproof casing and hardware that resists constant humidity.
A garden window above an outdoor-facing shower creates the ultimate indoor-outdoor master bath experience.
27. Create a Master Bath With a Vintage or Antique Aesthetic
A vintage master bath uses antique mirrors, clawfoot tubs, traditional hardware, and antique-finish fixtures to create a deeply personal bathing environment. The bath feels collected over time rather than designed in a single moment.

Elements that create the vintage bath look:
- A clawfoot tub with polished brass or nickel hardware
- A repurposed antique dresser as the vanity
- Hexagonal or penny tile floors
- Beadboard or shiplap wall paneling
- Antique mirrors with ornate frames
- Traditional faucets with cross handles
These elements create a master bath that feels as though it has always existed, rich with history and personal character.
28. Design the Master Bath for Accessibility and Aging-in-Place
A master bath designed for long-term accessibility serves every household member better while also accommodating future needs as occupants age. Curbless showers, grab bars, wider doorways, and thoughtful fixture placement create a bath that works beautifully for everyone.

A curbless walk-in shower with a built-in bench serves active users beautifully and provides essential accessibility features for users with mobility limitations. Grab bars installed during initial construction cost very little — retrofitting them into tile walls costs significantly more and is less structurally reliable.
| Accessibility Feature | Benefit | Cost to Install | Installation Time |
|---|---|---|---|
| Curbless shower | Universal access | Low (design choice) | During initial construction |
| Grab bars in shower | Safety and support | $50–$200 each | 1–2 hours |
| Wider doorway (36 inches) | Wheelchair accessible | Moderate | During renovation |
| Comfort height toilet | Easier sit-stand | $200–$600 | 2–3 hours |
| Lever faucet handles | Easy operation | $50–$300 | 1–2 hours |
29. Add a Master Bath in a Studio or Small Home
A master bath in a compact home or studio apartment requires the same luxury principles applied within a very tight footprint. Every material, fixture, and design decision must deliver maximum beauty per square inch.
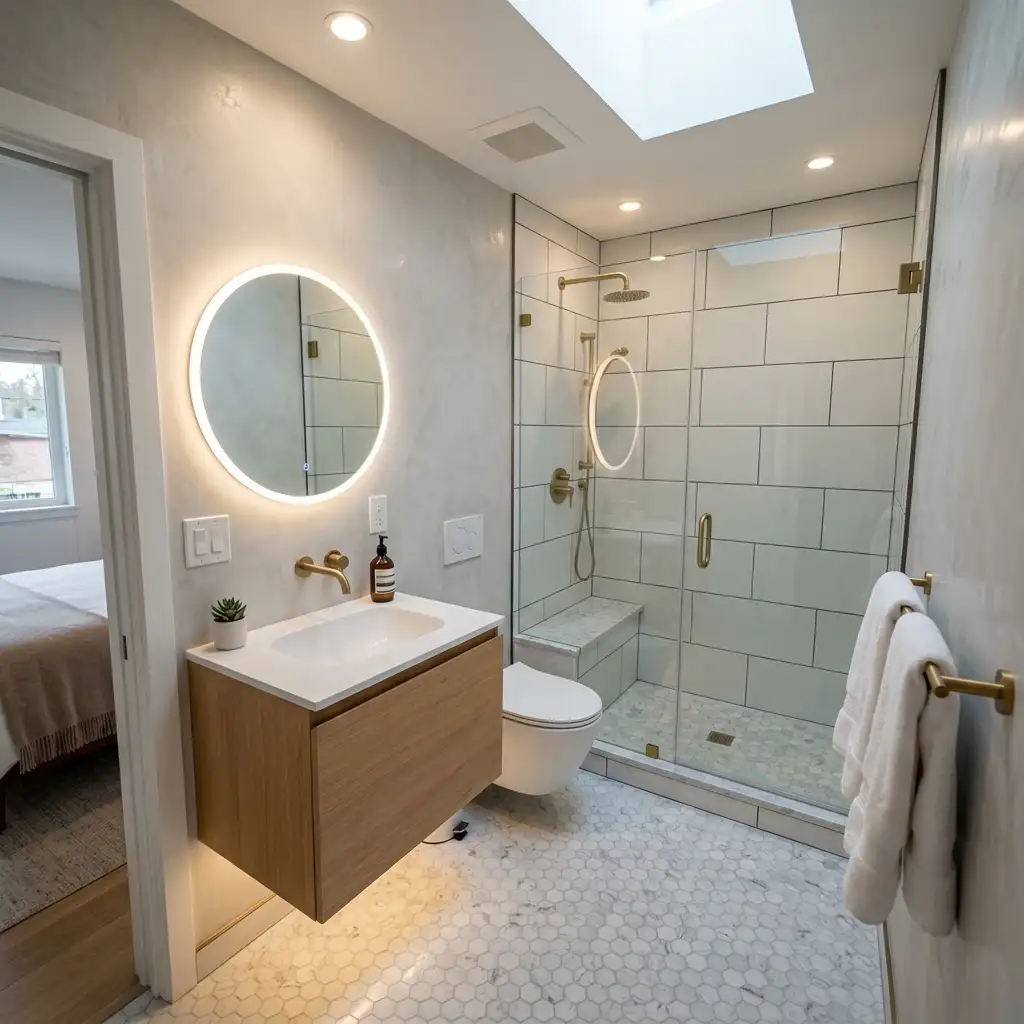
For complete studio apartment design ideas where bathroom design must achieve maximum luxury impact within the smallest possible footprint without sacrificing the quality or beauty of the master bath experience, explore these small studio apartment ideas for comprehensive small space design approaches that apply directly to a compact master bath.
A wet room approach — where the entire bathroom floor is waterproofed and sloped to a floor drain — creates the most spacious, most spa-like small master bath possible. Without shower enclosures, step-over curbs, or space-consuming glass panels, the small bathroom reads as a single, generous, well-designed space.
30. Style the Master Bath Vanity Like a Vignette
A styled master bath vanity creates a personal, curated atmosphere that makes the bathroom feel genuinely beautiful rather than purely functional.

Explore this bathroom counter decor guide for comprehensive vanity styling approaches.
The styled vanity should suit the room’s overall aesthetic. A vintage vanity styling with antique ceramic soap dispensers and a mercury glass candle. A minimalist vanity styling with a single orchid and one matte ceramic dispenser. A luxurious vanity styling with a marble tray, matching brushed gold dispensers, and fresh flowers.
What to include in a styled vanity vignette:
- One quality soap dispenser (or matching set)
- One small living element: a plant, fresh flowers, or a candle
- One decorative object: a framed print, a small sculpture, or a tray
- One functional item: a ring dish or jewelry tray
- One layered surface: a marble tray or wooden board to corral the group
31. Create a Spa-Like Master Bath With Neutral Tones
A neutral-toned master bath creates the most universally beautiful and most genuinely restful bathroom environment. Warm whites, soft greys, natural beige, and warm cream throughout the floor, walls, and fixtures create a cohesive, calm atmosphere that feels genuinely restorative.
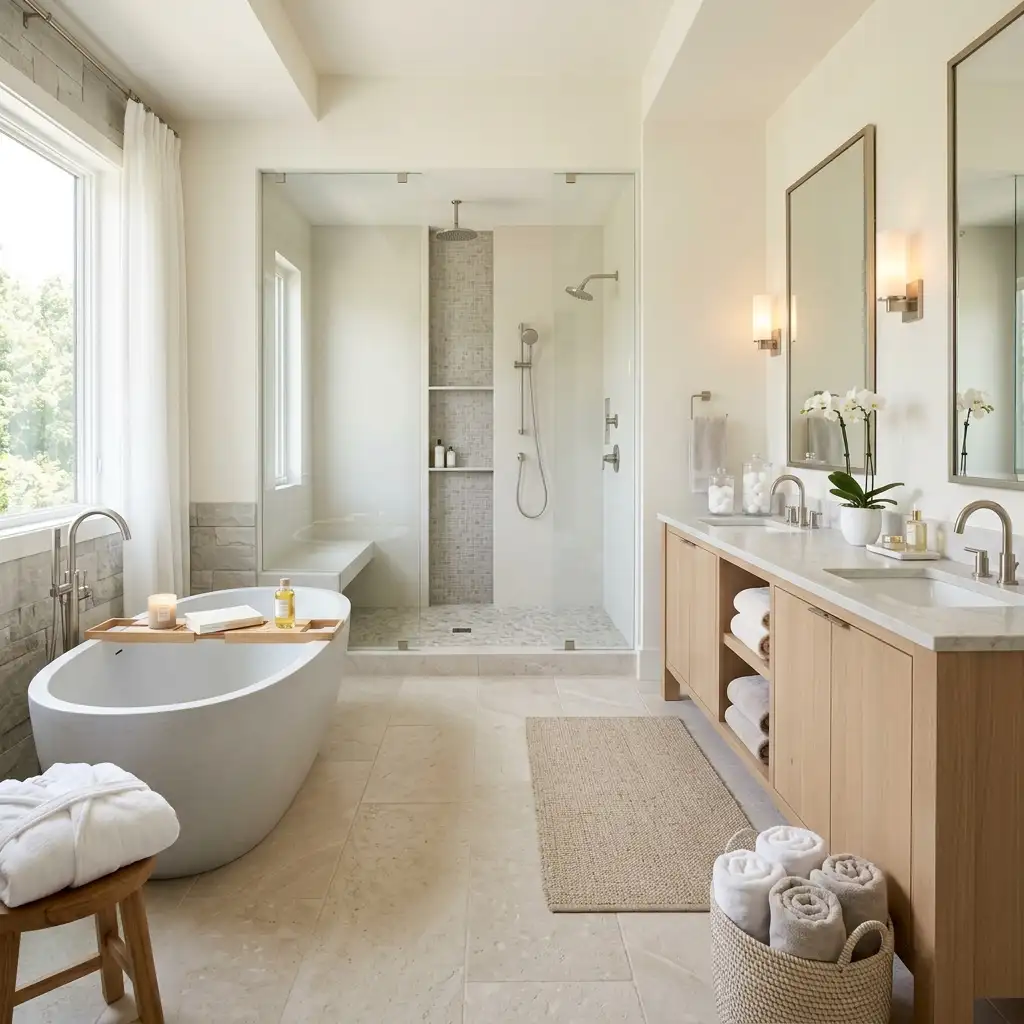
The neutral master bath relies on texture and material quality rather than color contrast for its visual interest. The grain of natural stone. The texture of linen window treatments. The warmth of wood accents. The sheen of polished chrome or gold fixtures. These material qualities create richness within a restrained palette.
32. Install a Barn Door on the Master Bath Entry
A barn door on the master bath entry adds architectural character and eliminates the swing clearance that a standard door requires. The sliding door saves the floor space in front of the bathroom entry and creates a beautifully distinctive architectural moment at the most-used entry in the home.

See barn door ideas for every approach to barn door design that works beautifully on a master bath entry.
33. Style the Complete Master Bath for Long-Term Beauty
The most beautiful master baths are those that are thoughtfully maintained over time. Daily care, seasonal styling updates, and periodic material maintenance keep a master bath looking as beautiful in year ten as it did when first completed.

Daily care takes three minutes. Wipe the vanity counter after the morning routine. Squeegee the shower glass after every use. Hang towels properly rather than leaving them bunched. These three habits prevent the accumulation of soap scum, water marks, and general disorder that make even beautiful bathrooms look tired within weeks.
| Daily Care Task | Time Required | Impact | Benefit |
|---|---|---|---|
| Wipe vanity counter | 1 minute | Very High | Prevents soap residue buildup |
| Squeegee shower glass | 1 minute | Very High | Prevents water marks |
| Hang towels properly | 30 seconds | High | Prevents mildew smell |
| Replace toiletry empties | 1 minute | Medium | Maintains organized appearance |
Frequently Asked Questions (FAQs)
Q1: What is the most important feature in a luxury master bath?
A freestanding soaking tub creates the strongest luxury statement of any single feature. It transforms the visual character of the room immediately. A walk-in shower with premium fixtures, radiant floor heating, and excellent lighting are close seconds. The features used most often, which are the shower, vanity, and floor, deliver the highest daily return on investment.
Q2: What size should a master bath be?
A functional master bath for two people needs a minimum of 80 to 100 square feet. A comfortable luxury master bath needs 120 to 200 square feet. A spacious luxury master bath with a separate water closet, double vanity, freestanding tub, and walk-in shower needs 200 square feet or more. The layout and fixture placement matter more than the absolute square footage.
Q3: What master bath features add the most home value?
A double vanity, a walk-in shower with frameless glass, heated floors, and quality tile work consistently add measurable home value according to real estate assessments. A freestanding tub adds perceived luxury value that appeals strongly to buyers. A separate water closet adds functional value that buyers with families particularly appreciate.
Q4: How do I make a master bath feel more luxurious without a full renovation?
Replace all hardware with a coordinated premium finish — matte black, brushed gold, or brushed nickel throughout. Add a statement mirror. Install a heated towel rail. Replace builder-grade light fixtures with premium alternatives. Add high-quality textiles — fluffy towels and a plush bath mat. Style the vanity with beautiful accessories. These relatively low-cost changes create a significant luxury impression upgrade.
Q5: What is the best tile for a master bath shower?
Large format porcelain tile that mimics marble creates the best combination of visual luxury and practical durability for most master bath showers. It looks expensive, resists staining, requires minimal maintenance, and never needs sealing. Natural marble is more beautiful but requires annual sealing and is susceptible to etching from toiletry products. Porcelain marble effect tile provides 95 percent of the beauty with significantly lower maintenance requirements.
Conclusion
A beautifully designed master bath is one of the most impactful investments you can make in your home. It improves daily quality of life for everyone who uses it. It adds measurable home value. And it transforms the most personal room in the house from a functional space into a genuine private sanctuary.
Start with the features that will be used most frequently, which are the shower, vanity, and floor. Invest in quality materials and quality fixtures in those areas. Then build the room’s luxury and character through lighting, finishing details, and carefully chosen accessories.
The master bath you create with intention and care becomes one of the most beloved rooms in your entire home.