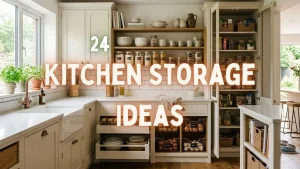
Your basement has sat untouched for years, collecting dust, boxes, and forgotten holiday decorations. It is the most underused square footage in your entire home. Meanwhile your family feels cramped in every other room upstairs.
A complete basement makeover unlocks an enormous amount of usable living space. It can become a family room, a home gym, a guest suite, or anything your household genuinely needs.

These 32 essential steps will guide you through a basement makeover from the very first inspection to the final styled details.
1. Inspect for Moisture and Water Damage First
Every successful basement makeover begins with a thorough moisture inspection. Water problems are the single most common reason basement renovations fail or require expensive rework later. Addressing moisture issues before any cosmetic work protects your entire investment.

Check walls, floors, and corners for water stains, efflorescence, or musty odors. Run a moisture meter against concrete walls and floors in multiple locations throughout the space. Address any active leaks, cracks, or drainage issues completely before moving forward with any other makeover step.
| Moisture Warning Sign | Likely Cause |
|---|---|
| White chalky residue on walls | Efflorescence, moisture seepage |
| Musty persistent odor | Hidden mold or mildew growth |
| Water stains on floor or walls | Active or past water intrusion |
| Peeling paint or bubbling | Moisture trapped behind surface |
2. Test for Radon Gas Before Beginning Work
Radon is an invisible, odorless gas that accumulates in basements and poses serious long-term health risks. Testing for radon is a critical and often overlooked step before any basement makeover begins. This simple, affordable test protects your family for decades after the renovation is complete.

Purchase an inexpensive radon test kit from a hardware store or order an at-home testing service online. Place the test in the lowest level of your home for the recommended testing period. If levels exceed the EPA action threshold, install a radon mitigation system before proceeding with finishing work.
| Radon Test Type | Testing Duration |
|---|---|
| Short-term test kit | 2–7 days |
| Long-term test kit | 90 days to 1 year |
| Continuous radon monitor | Ongoing, real-time results |
| Professional radon test | 2–4 days, certified results |
3. Plan for Proper Insulation Throughout
Insulation is the foundation of a comfortable, energy-efficient basement makeover. Uninsulated basements lose enormous amounts of heat and feel cold and uncomfortable year-round. Proper insulation makes the difference between a basement people avoid and one they genuinely want to spend time in.

Use rigid foam board insulation against concrete walls for the best moisture resistance and thermal performance. Insulate the rim joist area where the foundation meets the framing for significant energy savings. Choose insulation with an appropriate R-value for your specific climate zone for optimal year-round comfort.
| Basement Insulation Type | Best Application |
|---|---|
| Rigid foam board | Concrete wall insulation |
| Spray foam | Rim joist, irregular spaces |
| Batt insulation | Stud wall cavities after framing |
| Insulated wall panels | Quick, all-in-one finishing system |
4. Address Ventilation and Air Quality
Basements need proper ventilation to prevent the buildup of moisture, odors, and stale air. Good ventilation directly impacts both comfort and the long-term durability of every other makeover investment. This step is essential whether the basement becomes a living space, gym, or storage area.

Install a dedicated HVAC supply and return vent if the basement will be used as living space. Add a dehumidifier with a built-in drain line for continuous, automatic moisture control. Consider an energy recovery ventilator for basements that will be heavily used as primary living areas.
| Basement Ventilation Solution | Purpose |
|---|---|
| HVAC supply and return | Temperature control, air circulation |
| Dehumidifier with drain | Continuous moisture management |
| Exhaust fan in bathroom | Removes humidity from wet areas |
| Energy recovery ventilator | Fresh air exchange, efficiency |
5. Determine Your Basement’s New Purpose
A successful basement makeover starts with clarity about exactly how the space will be used. The purpose determines every subsequent decision from layout to flooring to lighting choices. Skipping this planning step leads to a beautiful but poorly functioning finished space.

Consider your family’s actual current needs rather than hypothetical future uses you may never realize. A family room, home office, guest suite, gym, or media room each require completely different design approaches. Write down your top three priorities for the space before any construction or design decisions begin.
| Basement Purpose | Primary Design Priority |
|---|---|
| Family living room | Comfort, entertainment, flexibility |
| Home office or studio | Quiet, lighting, internet access |
| Guest suite | Privacy, bathroom access, comfort |
| Home gym | Flooring, ventilation, mirrors |
6. Create a Realistic Basement Makeover Budget
A clear, realistic budget prevents the financial stress that derails so many basement makeover projects. Basement renovations have a wide cost range depending on scope, finishes, and whether you hire professionals or DIY. Setting the budget early guides every material and design decision throughout the project.

Allocate funds across major categories including framing, electrical, plumbing, flooring, and finishing materials. Add a contingency buffer of at least 15 to 20 percent for unexpected issues common in basement projects. Get multiple contractor quotes if hiring professionals to ensure your budget reflects realistic local pricing.
| Basement Makeover Budget Tier | Typical Cost Range |
|---|---|
| Budget DIY refresh | $5,000–$15,000 |
| Mid-range professional finish | $15,000–$35,000 |
| High-end full renovation | $35,000–$75,000+ |
| Luxury basement suite | $75,000 and above |
7. Design an Efficient Basement Layout
The layout of your basement makeover determines how functional and enjoyable the finished space will become. A poorly planned layout wastes square footage and creates awkward, unusable corners. Thoughtful layout planning maximizes every inch of your basement’s potential.

Sketch multiple layout options on paper before committing to any framing or construction work. Consider the location of existing support columns, mechanical equipment, and plumbing when planning room divisions. Leave clear pathways between zones and avoid creating spaces that are too narrow to furnish comfortably.
| Basement Layout Consideration | Planning Priority |
|---|---|
| Support column placement | Work around, do not relocate |
| Mechanical equipment access | Maintain clear access panels |
| Natural light sources | Position primary living areas nearby |
| Plumbing rough-in locations | Plan bathroom near existing lines |
8. Frame New Walls and Define Spaces
Framing transforms an open, undefined basement into distinct, functional rooms. Proper framing technique in a basement requires special attention to moisture-resistant materials and methods. This structural step sets the foundation for every finishing decision that follows.

Use pressure-treated lumber for the bottom plate of any wall touching the concrete floor directly. Leave a small gap between framed walls and the foundation walls to prevent moisture transfer issues. Hire a professional for any framing that involves structural changes or load-bearing modifications for safety and code compliance.
| Basement Framing Material | Why It Matters |
|---|---|
| Pressure-treated bottom plate | Resists moisture damage |
| Metal or treated wood studs | Mold and moisture resistant |
| Proper vapor barrier | Prevents condensation issues |
| Code-compliant fire blocking | Safety requirement, inspection |
9. Update Electrical Systems for Modern Needs
Most basements have inadequate electrical capacity for modern living needs. A makeover is the perfect opportunity to add sufficient outlets, lighting circuits, and capacity for technology. Proper electrical planning prevents the frustration of insufficient power in the finished space.

Hire a licensed electrician to assess your panel capacity and add circuits as needed for the new basement use. Plan for outlets every 6 feet along walls per standard code requirements for usable living spaces. Add dedicated circuits for any home theater, gym equipment, or kitchenette appliances planned for the space.
| Basement Electrical Need | Planning Consideration |
|---|---|
| General outlets | Every 6 feet along walls |
| Lighting circuits | Separate from outlet circuits |
| Dedicated appliance circuits | Kitchenette, gym equipment |
| GFCI protection | Required near any water source |
10. Install Proper Plumbing if Adding a Bathroom
Adding a bathroom dramatically increases the functionality and value of any basement makeover. Basement bathroom plumbing requires special consideration due to the below-grade location and drainage challenges. Proper planning at this stage prevents costly problems after walls and flooring are finished.

Determine whether gravity drainage is possible or if you will need an upflush or ejector pump system. Hire a licensed plumber to handle all rough-in work and ensure compliance with local plumbing codes. Plan bathroom location near existing plumbing stacks whenever possible to minimize installation costs significantly.
| Basement Bathroom Drainage | Best Situation |
|---|---|
| Gravity drainage | Basement above main sewer line |
| Upflush toilet system | Below sewer line level |
| Sewage ejector pump | Full bathroom below grade |
| Macerating toilet system | Tight spaces, minimal plumbing |
11. Choose Moisture-Resistant Flooring
Flooring selection is one of the most consequential decisions in any basement makeover. Basement floors face unique moisture challenges that do not exist in above-grade rooms. Choosing the wrong flooring material can lead to mold, warping, and costly replacement within just a few years.

Luxury vinyl plank is the most popular and practical basement flooring choice for its waterproof, durable construction. Engineered hardwood handles basement humidity far better than solid hardwood if a wood look is desired. Always install a proper vapor barrier beneath any flooring material regardless of which type you choose.
| Basement Flooring Material | Moisture Resistance Level |
|---|---|
| Luxury vinyl plank | Excellent, fully waterproof |
| Engineered hardwood | Good, with proper underlayment |
| Ceramic or porcelain tile | Excellent, completely waterproof |
| Carpet tile (with moisture barrier) | Moderate, requires careful prep |
12. Select the Right Ceiling Treatment
The basement ceiling presents unique challenges because of exposed mechanical systems, pipes, and ductwork. Choosing the right ceiling treatment balances aesthetics with practical access to systems that may need future maintenance. This decision significantly impacts both the budget and the finished feel of the space.

A drop ceiling provides easy access to mechanical systems and is the most budget-friendly finishing option available. Drywall ceilings look more polished and finished but require access panels for any equipment needing future maintenance. Painting exposed joists and ductwork black creates an intentional, modern industrial look at minimal cost.
| Basement Ceiling Option | Access to Mechanicals |
|---|---|
| Drop ceiling tiles | Excellent, fully removable |
| Drywall with access panels | Good, planned access points |
| Painted exposed structure | Full access, industrial aesthetic |
| Wood slat ceiling | Moderate, depends on installation |
13. Brighten the Space With Strategic Lighting
Lighting transforms a basement makeover more dramatically than almost any other single design element. Natural light is limited or absent in most basements making artificial lighting planning absolutely critical. A well-lit basement feels open, welcoming, and genuinely livable rather than dark and cave-like.

Layer your lighting plan with general ceiling lighting, task lighting, and accent lighting throughout each zone. Use recessed LED lighting for even, bright general illumination across the entire basement footprint. Add floor and table lamps to create warmth and eliminate any harsh, clinical overhead-only lighting feel.
| Basement Lighting Layer | Purpose |
|---|---|
| Recessed ceiling lights | General even illumination |
| Task lighting | Reading, work, kitchen areas |
| Accent lighting | Shelving, artwork, ambiance |
| Natural light maximization | Window wells, light tubes |
14. Maximize Natural Light With Window Wells
Even small amounts of natural light dramatically improve how a basement feels and functions. Window wells allow existing basement windows to let in more light while also serving as emergency egress points. Improving natural light access is one of the highest-value basement makeover investments available.

Install larger window wells with clear polycarbonate covers to maximize light transmission through existing windows. Add a sun tunnel or solar tube if your basement has limited or no window access for natural light. Position primary living areas near any natural light sources for the most comfortable, livable basement zones.
| Window Well Improvement | Light Impact |
|---|---|
| Enlarged window well | Significantly more light entry |
| Clear polycarbonate cover | Maximum light transmission |
| Reflective well liner | Bounces additional light inward |
| Egress window upgrade | Light plus safety code compliance |
15. Choose a Cohesive Color Palette
A thoughtful color palette ties together every element of a basement makeover into a cohesive, professional-looking finished space. Color choices significantly impact how bright, spacious, and inviting the basement ultimately feels. Getting this decision right early guides flooring, furniture, and accessory choices throughout the project.

Choose light, warm neutral colors for walls and ceilings to maximize the perception of brightness and space. Reserve darker, richer colors for accent walls or smaller zones rather than the entire basement footprint. Test paint samples in the actual basement lighting conditions before committing to any final color choices.
| Basement Color Palette | Effect on Space |
|---|---|
| Warm white or cream | Maximizes brightness, spaciousness |
| Soft grey | Modern, clean, versatile |
| Light beige or greige | Warm, cozy, welcoming |
| Bold accent wall only | Drama without overwhelming darkness |
16. Build a Functional Family Living Area
A family living area is one of the most popular and valuable basement makeover destinations. It provides additional gathering space and often becomes the primary television and relaxation zone for the household. Thoughtful planning creates a living area that genuinely competes with the upstairs living room for daily use.

Arrange seating around a clear focal point such as a television, fireplace, or large window. Choose durable, family-friendly furniture materials that handle basement humidity and heavy daily use well. Add a large area rug to anchor the seating arrangement and add warmth to the basement floor surface. Get complete furniture and decor inspiration from coffee table decor ideas for styling your new basement living area beautifully.
| Family Living Area Element | Design Consideration |
|---|---|
| Seating arrangement | Faces clear focal point |
| Flooring | Durable, moisture-resistant |
| Lighting | Layered, warm, adjustable |
| Storage | Built-in or furniture-integrated |
17. Add Built-In Storage Solutions Throughout
Built-in storage maximizes basement functionality while maintaining a clean, organized aesthetic throughout the makeover. Basements often become the dumping ground for household overflow without proper, planned storage solutions. Thoughtful built-ins prevent the new finished space from slowly reverting to clutter and chaos.
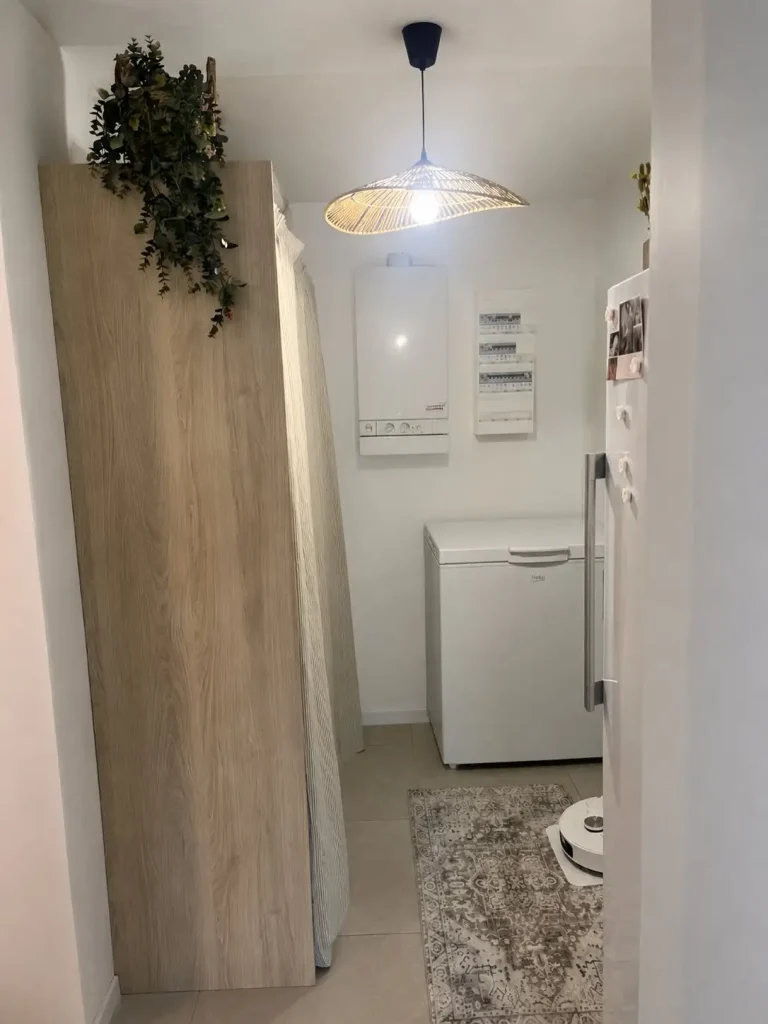
Install built-in shelving and cabinetry along at least one full wall of the basement for organized storage. Use a mix of open shelving for display and closed cabinetry for concealing less attractive necessary items. Plan storage specifically for seasonal items, sports equipment, and household overflow that previously cluttered other rooms.
Find complete storage solution inspiration from hidden storage ideas for maximizing every inch of your basement makeover storage capacity.
| Built-In Storage Type | Best Contents |
|---|---|
| Open shelving | Books, display items, baskets |
| Closed cabinetry | Off-season items, less attractive necessities |
| Under-stair storage | Seasonal decor, sports equipment |
| Built-in window seat storage | Linens, games, miscellaneous items |
18. Create a Home Office or Remote Work Space
A dedicated home office in the basement makeover provides essential separation between work and home life. The natural quiet and privacy of a basement location makes it ideal for focused remote work. This addition has become one of the most requested basement makeover features in recent years.

Position the home office near any available natural light source for the most comfortable working environment. Ensure strong internet connectivity reaches the basement through a wired connection or a quality mesh network extender. Add proper task lighting and an ergonomic desk setup to support long, comfortable workdays.
| Home Office Basement Element | Function |
|---|---|
| Ergonomic desk and chair | Comfortable, healthy posture |
| Strong internet connection | Wired or mesh network extender |
| Task lighting | Reduces eye strain |
| Sound insulation | Quiet, focused work environment |
19. Design a Comfortable Guest Suite
A guest suite transforms an unused basement into valuable, welcoming accommodation for visiting family and friends. This addition is particularly valuable for households that frequently host overnight guests. A well-designed guest suite provides privacy for both guests and the rest of the household simultaneously.

Include a comfortable bed, adequate storage for guest belongings, and access to a bathroom if possible. Add blackout curtains or blinds since basements often lack natural light to wake guests appropriately. Include a small seating area or reading nook to make the guest suite feel like a genuine retreat rather than a converted storage room.
| Guest Suite Essential | Comfort Priority |
|---|---|
| Quality mattress and bedding | Guest comfort, restful sleep |
| Adequate closet or storage | Guest belongings, luggage |
| Bathroom access | Private or shared, clearly defined |
| Reading lamp and seating | Genuine retreat feeling |
20. Build a Home Theater or Media Room
A home theater is one of the most exciting and frequently requested basement makeover destinations. The naturally dark, enclosed nature of a basement is acoustically and visually ideal for this purpose. A well-designed media room becomes a beloved gathering space for the entire family and friends.

Paint walls and ceiling in dark, matte colors to minimize light reflection and maximize screen contrast. Install acoustic treatments on walls to improve sound quality and reduce unwanted echo. Add tiered or staggered seating arrangements for proper sightlines if the room accommodates more than basic seating.
| Home Theater Element | Purpose |
|---|---|
| Dark matte wall color | Reduces glare, improves contrast |
| Acoustic wall panels | Better sound quality |
| Blackout window treatments | Complete light control |
| Comfortable theater seating | Extended viewing comfort |
21. Add a Home Gym to the Basement Makeover
A basement home gym eliminates the cost and inconvenience of a gym membership while providing complete workout privacy. The concrete floor structure handles heavy equipment without any structural concerns. This addition has become enormously popular as more people prioritize convenient, accessible fitness options.

Install rubber flooring throughout the gym area to protect both equipment and the underlying floor structure. Add full-length mirrors along one wall to assist with proper exercise form and create the feeling of a genuine gym. Ensure adequate ventilation since exercise generates significant heat and humidity in an enclosed basement space.
| Home Gym Basement Element | Function |
|---|---|
| Rubber gym flooring | Protects floor, absorbs impact |
| Full-length wall mirrors | Form checking, spatial perception |
| Proper ventilation | Manages heat and humidity |
| Equipment-specific outlets | Powers treadmills, equipment |
22. Create a Basement Kitchenette or Wet Bar
A kitchenette or wet bar adds significant functionality to a basement makeover, particularly for guest suites and entertainment areas. This addition reduces trips upstairs and makes the basement feel like a genuinely self-sufficient living space. Even a small kitchenette adds substantial value and convenience.

Include a mini refrigerator, a microwave, and a small sink at minimum for basic kitchenette functionality. Add upper and lower cabinetry for food storage, dishes, and small appliances. Position the kitchenette near existing plumbing lines whenever possible to minimize installation costs significantly.
| Kitchenette Component | Minimum Recommendation |
|---|---|
| Refrigerator | Mini fridge or compact under-counter |
| Cooking appliance | Microwave, hot plate if permitted |
| Sink | Small bar sink minimum |
| Storage | Upper and lower cabinets |
23. Incorporate a Craft or Hobby Room
A dedicated craft or hobby room gives household members a contained space for creative pursuits. This addition keeps mess and supplies organized away from main living areas while encouraging regular creative engagement. The basement’s separation from the main house makes it ideal for activities involving paint, glue, or other materials.

Install a sturdy work table with proper task lighting for detailed craft and hobby work. Add ample storage with clear, labeled containers for organized supply management. Choose washable, durable flooring that handles spills, drips, and messes common to most creative hobbies. Find complete hobby room organization inspiration from craft room ideas for designing the perfect basement creative space.
| Craft Room Basement Element | Practical Benefit |
|---|---|
| Sturdy work table | Stable surface for detailed work |
| Clear storage containers | Visible, organized supplies |
| Washable flooring | Easy cleanup of spills and messes |
| Adequate task lighting | Detail work, reduced eye strain |
24. Add a Powder Room or Full Bathroom
A bathroom is consistently one of the highest-value additions to any basement makeover. It dramatically increases the functionality of the space for guests, gym use, and general daily convenience. Even a simple powder room eliminates the need for basement users to travel upstairs constantly.
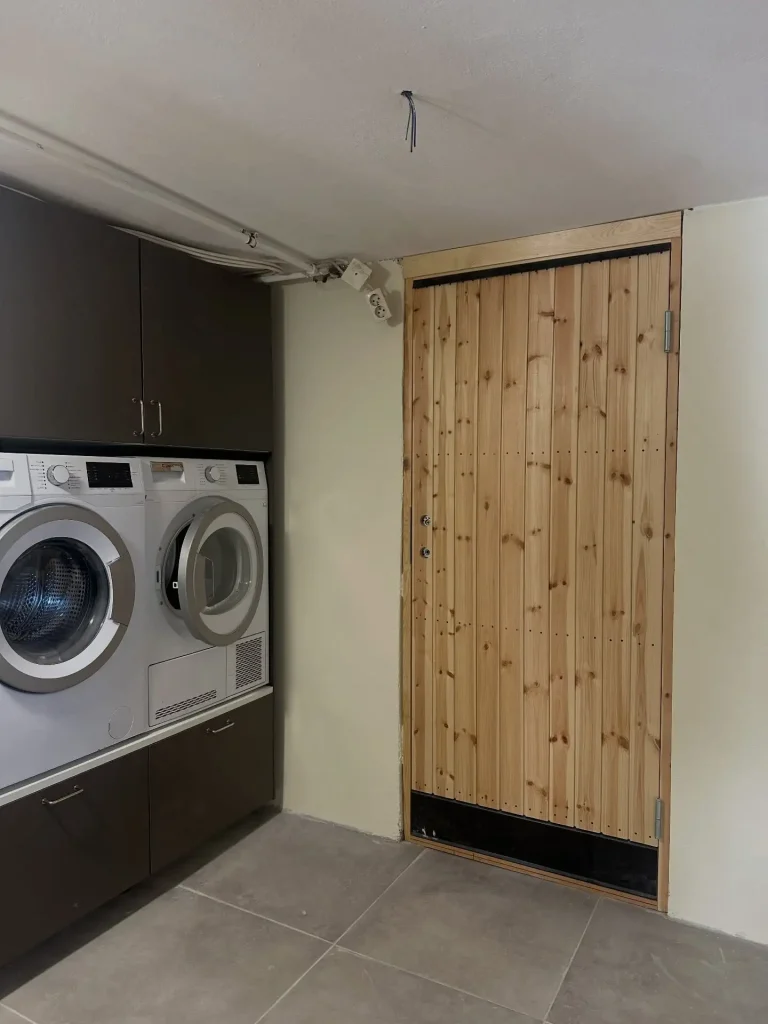
Determine the most cost-effective location based on existing plumbing stack proximity before finalizing the layout. Choose moisture-resistant materials throughout including tile flooring and proper ventilation with an exhaust fan. A well-designed basement bathroom, even modest in size, adds substantial functional and resale value to the entire home.
| Basement Bathroom Size | Minimum Square Footage |
|---|---|
| Powder room (toilet, sink) | 18–20 square feet |
| Three-quarter bath (shower) | 30–35 square feet |
| Full bathroom (tub) | 40–50 square feet |
25. Install a Wine Cellar or Tasting Room
A wine cellar takes advantage of the basement’s naturally cool, stable temperature for proper wine storage and aging. This luxurious addition is increasingly popular and adds genuine character and value to a basement makeover. Even a modest wine display area creates an elegant, memorable feature.

Build floor-to-ceiling wine racks along one dedicated wall using wood or metal racking systems. Maintain consistent temperature and humidity levels using a dedicated wine cooling unit for larger collections. Add a small tasting table and ambient lighting to transform the area into a genuine entertainment destination.
| Wine Cellar Element | Storage Consideration |
|---|---|
| Wine racking system | Wood or metal, proper bottle support |
| Temperature control | Dedicated wine cooling unit |
| Humidity management | 50–70% relative humidity ideal |
| Ambient lighting | Avoid direct light on bottles |
26. Build a Game Room for Family Entertainment
A dedicated game room adds enormous entertainment value to any basement makeover. It provides space for board games, pool tables, arcade games, and family activities that simply do not fit in upstairs living spaces. This addition consistently ranks among the most-used rooms in homes that include one.

Include a full-size or space-saving pool table, foosball table, or ping pong table depending on available square footage. Add comfortable seating around the perimeter for spectators and waiting players. Install proper overhead lighting specifically positioned for game tables to ensure adequate visibility during play.
| Game Room Feature | Space Required |
|---|---|
| Pool table (standard) | 13.5×16.5 feet minimum clearance |
| Ping pong table | 19×10 feet minimum clearance |
| Foosball table | 8×5 feet minimum clearance |
| Arcade game cabinet | 3×3 feet per machine |
27. Choose Furniture Designed for Basement Conditions
Furniture selection for a basement makeover requires special consideration of humidity and temperature fluctuations common to below-grade spaces. Choosing the right materials prevents premature deterioration and protects your furniture investment. This consideration is often overlooked but significantly impacts the long-term success of the space.

Avoid furniture with natural materials highly susceptible to humidity damage such as untreated wood or certain fabrics. Choose performance fabrics, synthetic materials, and properly sealed wood finishes for basement furniture pieces. Elevate furniture slightly off the floor when possible to improve air circulation underneath and reduce moisture exposure.
| Basement-Appropriate Furniture Material | Moisture Resistance |
|---|---|
| Performance fabric upholstery | Excellent, stain and moisture resistant |
| Sealed engineered wood | Good, better than untreated solid wood |
| Synthetic rattan or wicker | Excellent, designed for humidity |
| Metal frame furniture | Excellent, no moisture absorption |
28. Add a Half Bath or Laundry Area
Combining practical utility functions into the basement makeover increases the overall functionality of the entire home. A laundry area or half bath addition reduces strain on upstairs facilities and adds genuine daily convenience. This practical addition pairs well with almost any other basement use simultaneously.

Position laundry appliances near existing plumbing and electrical connections to minimize installation complexity and cost. Add proper ventilation for the dryer with appropriate exterior venting to prevent moisture buildup. Include adequate counter space and storage for laundry supplies to keep the area organized and functional.
| Basement Laundry Addition | Key Requirement |
|---|---|
| Washer and dryer hookup | Existing or extended plumbing |
| Dryer venting | Proper exterior exhaust route |
| Counter and storage | Folding space, supply storage |
| Adequate lighting | Bright, functional task lighting |
29. Finish Walls With the Right Material Choice
Wall finishing material selection significantly impacts both the budget and the long-term durability of a basement makeover. Different wall materials offer varying levels of moisture resistance, insulation value, and aesthetic flexibility. Choosing correctly prevents costly problems and ensures the finished walls look beautiful for years.

Moisture-resistant drywall is the most common and cost-effective basement wall finishing choice for most applications. Wood paneling or shiplap adds warmth and character while requiring proper moisture protection beneath the installation. Always install a proper vapor barrier between the foundation wall and any finished wall material regardless of choice. Explore DIY cheap wood ceiling for complementary wood wall and ceiling treatment ideas that work beautifully in a finished basement.
| Basement Wall Finish | Moisture Performance |
|---|---|
| Moisture-resistant drywall | Good, standard industry choice |
| Wood paneling or shiplap | Moderate, requires vapor barrier |
| PVC or composite panels | Excellent, fully waterproof |
| Painted concrete (exposed) | Excellent, industrial aesthetic |
30. Plan for Future Maintenance Access
A well-planned basement makeover maintains access to critical mechanical systems for future repairs and maintenance. Sealing everything behind finished walls without planned access points creates enormous headaches and costs when systems eventually need service. This forward-thinking step protects your investment for decades to come.

Install removable access panels at every location with shut-off valves, electrical panels, or mechanical equipment. Label access panels clearly so future homeowners or service technicians can quickly locate what they need. Keep a record of what is behind each finished wall section for your own future reference and for resale documentation.
| Access Panel Location | What It Provides Access To |
|---|---|
| Behind drywall near plumbing | Shut-off valves, cleanouts |
| Near electrical panel | Circuit breaker access |
| Near HVAC equipment | Filter changes, maintenance |
| Near sump pump location | Pump maintenance and replacement |
31. Style the Finished Basement With Intentional Decor
The final styling layer transforms a technically finished basement into a genuinely beautiful, inviting space. Thoughtful decor choices complete the makeover and make the space feel like an intentional extension of your home rather than an afterthought. This layer is where personality and warmth come fully alive.

Layer in artwork, plants, textiles, and accessories that reflect your established color palette and design style throughout. Choose plants that tolerate lower light conditions typical of basement environments for long-term greenery success. Add personal touches like family photos and meaningful objects to make the space feel genuinely lived-in and loved. Find the best low-light plant options from bathroom plants that thrive beautifully in basement light conditions.
| Basement Styling Layer | Element to Add |
|---|---|
| Wall decor | Artwork, mirrors, gallery wall |
| Greenery | Low-light tolerant plants |
| Textiles | Rugs, curtains, throw pillows |
| Personal touches | Photos, meaningful objects |
32. Schedule Regular Maintenance for Long-Term Success
A basement makeover requires ongoing maintenance to protect the investment and prevent moisture or structural problems from developing. Regular inspection and maintenance routines catch small issues before they become expensive, disruptive problems. This final step ensures your beautifully finished basement remains beautiful for many years to come.

Check the dehumidifier and empty or maintain it regularly according to manufacturer recommendations throughout humid seasons. Inspect for any signs of new moisture, cracks, or pest activity at least twice per year. Test the sump pump system annually and clean gutters regularly to prevent water from pooling near the foundation.
| Basement Maintenance Task | Frequency |
|---|---|
| Dehumidifier maintenance | Monthly during humid seasons |
| Moisture and crack inspection | Twice yearly, spring and fall |
| Sump pump testing | Annually, before rainy season |
| Gutter cleaning | Twice yearly minimum |
Frequently Asked Questions
How much does a basement makeover cost on average?
A basement makeover typically costs between $15,000 and $35,000 for a mid-range professional finish covering a standard-sized basement. Costs vary significantly based on whether you add a bathroom, the quality of finishes chosen, and whether work is done by professionals or as a DIY project. Budget makeovers can be completed for $5,000 to $15,000 with strategic DIY work.
How long does a complete basement makeover take?
A complete professional basement makeover typically takes 6 to 12 weeks from start to finish, depending on scope and complexity. Projects involving a new bathroom or significant structural changes take longer, often 3 to 4 months. DIY basement makeovers can take considerably longer depending on available time and experience level.
Do I need a permit for a basement makeover?
Yes, in most jurisdictions. Permits are typically required for electrical work, plumbing additions, structural framing changes, and egress window installation. Always check with your local building department before beginning any basement makeover to ensure compliance and protect your investment for future resale and safety.
What adds the most value to a basement makeover?
A bathroom addition consistently adds the most value and functionality to a basement makeover. Proper egress windows, quality flooring, and adequate lighting also significantly increase both usability and resale value. Avoiding moisture problems through proper waterproofing protects the value of every other investment made in the space.
Can I do a basement makeover myself without hiring contractors?
Many basement makeover tasks are achievable as DIY projects including painting, flooring installation, and basic framing for experienced homeowners. However, electrical work, plumbing, and any structural modifications should always be handled by licensed professionals for safety and code compliance. A hybrid approach of DIY cosmetic work paired with professional system work often provides the best balance of cost savings and safety.
Conclusion
A basement makeover is one of the most valuable and transformative investments you can make in your home. It unlocks square footage that has likely sat unused for years and creates genuinely functional, beautiful living space your entire family will enjoy. The process requires careful planning but the results consistently exceed expectations.
Work through these 32 steps in order, starting with the critical inspection and infrastructure work before moving to the exciting design and styling decisions. Take your time with each phase and do not rush the foundational steps that protect your long-term investment. Your finished basement will become one of the most valuable and most loved spaces in your entire home.