My father-in-law pulled into our driveway two summers ago with four pallets sticking out of the back of his truck.
“Saw these behind the hardware store,” he said, looking pleased with himself. “Thought you could use them.”
I had no immediate plan. I just smiled and thanked him and stacked them against the garage wall, where they sat for approximately six weeks while I figured out what to do.
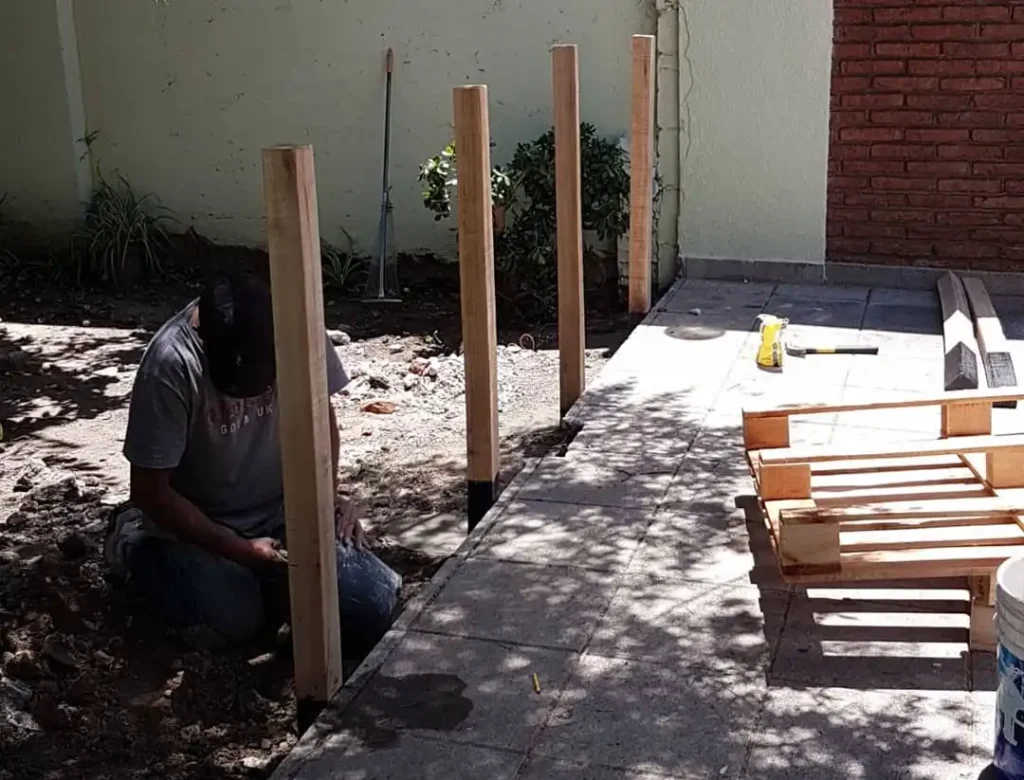
What happened after that was genuinely one of the more satisfying DIY seasons I have had. We built things. We broke things. We learned what works and what absolutely does not. We turned a pile of rough, splinter-prone lumber into actual furniture that our family uses every single day.
This is everything we learned, plus twenty-four project ideas organized by difficulty, from genuinely beginner-friendly to slightly more ambitious.
Before Any Project: The Pallet Conversation Nobody Has
Most articles on pallet projects skip past the part where they talk about the pallets themselves. That is a mistake, because not all pallets are the same and using the wrong kind creates problems ranging from annoying to genuinely hazardous.
The stamp is the thing to look for.
On the side of most pallets you will find a stamp or branded mark that tells you how the wood was treated. This is not optional reading. It matters.
HT stands for Heat Treated. The pallet was heated to a specific internal temperature to kill insects and bacteria. HT pallets are safe for outdoor projects, safe around children and pets, and perfectly fine for food-growing projects like garden beds.
MB stands for Methyl Bromide. This is a fumigant — a chemical used to kill insects — and it penetrates deep into the wood rather than staying on the surface. MB pallets are not appropriate for vegetable garden beds, not appropriate for projects where children will be in direct contact, and honestly not ones I personally use for any outdoor project. The chemical does not off-gas fully over time the way people sometimes suggest.
DB stands for Debarked — the bark was removed but no chemical treatment was applied. These are fine.
If there is no stamp, no marking, or the markings are unclear, do not use the pallet for food gardens or children’s play equipment. Use it for something structural that will not involve direct skin contact, and even then, err toward caution.
Where to find pallets:
Garden centers and plant nurseries often have them in abundance and are generally happy for someone to take them away. Hardware stores, grocery distribution centers, and furniture shops are all worth asking. Craigslist and Facebook Marketplace regularly have free pallet listings from businesses that need them removed. Always ask before taking — a pallet leaning against a building may still be in active use.
Condition check:
Look for pallets with boards that are intact, not rotting, and relatively free of cracks. Some splitting is normal and workable. A board that breaks when you press on it is not workable. Soft spots indicate rot and should be avoided entirely.
The Tools You Actually Need (Nothing Fancy)
For most pallet projects, the tool list is shorter than you might think:
- A pry bar or flat bar for disassembly (the single most important tool for pallet work)
- A hammer
- A cordless drill with screwdriver bits
- A circular saw or jigsaw for cutting boards to length
- Sandpaper in 60-grit and 120-grit — more on this below
- Wood screws in 2.5-inch and 3-inch lengths
- Eye protection and work gloves
The sandpaper conversation deserves a specific mention. Pallet wood is rough. Not regular-furniture rough but genuinely splintery in ways that make outdoor furniture uncomfortable to use without proper sanding. Start with 60-grit to knock down the roughest surface texture, then finish with 120-grit. If the wood will be used for seating, add a pass with 180-grit. Your hands and the hands of everyone who uses the finished piece will thank you.
Disassembly: How to Actually Get the Boards Apart
If your project requires individual boards rather than whole pallets, you need to disassemble. This is where most beginners run into their first real difficulty — pallet boards are nailed together with ring-shank nails designed specifically not to come out, and brute force typically splits the boards rather than separating them cleanly.
The technique that works: insert a pry bar between the board and the stringer (the thick piece the boards are nailed into) and apply slow, steady leverage. Do not jerk. Slow pressure, moving the pry bar along the board rather than attacking from one point, preserves the boards. If a nail is particularly stubborn, work from both sides of the board alternately.
A reciprocating saw with a demolition blade can cut through the nails rather than pulling them out, which is faster and results in less board damage. The nails are then removed from the boards individually with pliers or a hammer claw after the boards are separated.
Budget more time for disassembly than you think you will need. It is slower than it looks, particularly the first time.
The Projects
EASY — A Weekend or Less, No Special Skills Required
1. Vertical Herb Garden
This is the project I recommend most often to complete beginners because it is almost impossible to do badly and the results are immediately useful.
Take a whole pallet in good condition and stand it upright against a fence, a wall, or a set of legs. Line the back and the bottom of each horizontal row with landscape fabric stapled in place to create planting pockets. Fill with potting mix, plant herbs in each pocket, water well.

The pallet’s existing horizontal boards create the structure. The landscape fabric creates the container. The only additional materials needed are landscape fabric staples and potting mix.
A couple of practical notes: fill with potting mix before standing it upright, because filling it vertically means the soil all falls forward. Let it sit flat for two to three weeks before standing it up so the plant roots establish enough to hold the soil in place. Use a mix that retains moisture well — the horizontal pockets drain quickly in hot weather.
HT pallets only for this one.
2. Pallet Garden Edging
Disassemble one or two pallets and use the individual boards as garden bed edging. Drive them into the soil vertically to create a border, slightly overlapping for a clean continuous line. Stagger the board heights for a casual, organic look or keep them even for a more formal edge.

No cutting required if your existing boards happen to be the right length. A coat of outdoor stain in a warm tone makes them look considerably more intentional than bare grey pallet wood.
3. Simple Plant Stand
Two whole pallets stacked on top of each other create an instant plant display stand. Three or four is even better. The staggered heights of the pallet surface — the deck boards sitting slightly above the stringers — create natural spots to rest pots at slightly different levels, which is more interesting than a flat surface.

For stability, secure the stacked pallets to each other with L-brackets and screws. Sand the top surfaces where pots will sit. Done in under an hour.
4. Potting Bench Flat Version
One pallet on its side on two sawhorses creates a workable potting bench surface that takes about ten minutes to set up and zero construction. Lay the pallet so the deck boards run front-to-back and the slats are at the top for a relatively smooth work surface. Add a second pallet below the sawhorses as a shelf for pots, soil bags, and tools.

Not the most beautiful thing in the world but extremely practical and completely free if you already have sawhorses.
5. Outdoor Welcome Mat
A pallet cut to doormat dimensions — roughly 18 by 30 inches, which typically means cutting one third to one half off a standard pallet length — makes a rustic outdoor mat that works far better at knocking mud off shoes than most commercial coir mats.
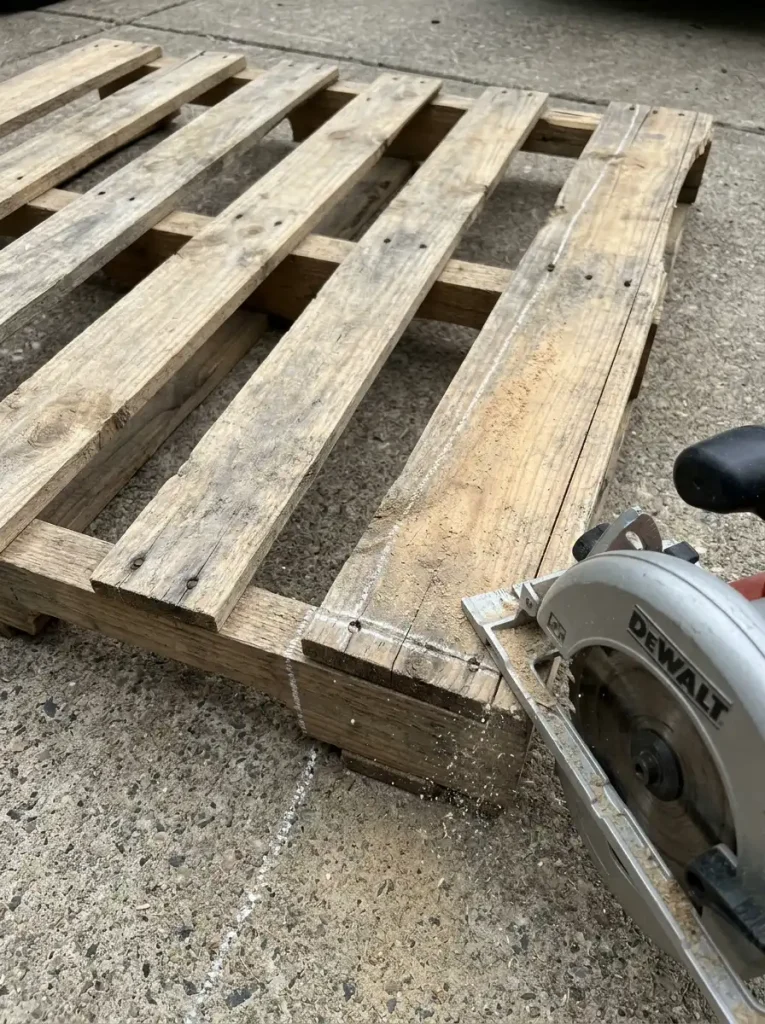
Sand thoroughly. If the slat spacing is wide enough to be uncomfortable, add a board or two in the gaps to tighten the surface. Seal with exterior polyurethane to protect against moisture. The gaps between slats let dirt fall through rather than accumulating on the surface, which makes cleaning straightforward.
6. Tool and Garden Hose Holder
Screw a pallet to the side of the garage or garden shed vertically. Add S-hooks along the boards for hanging long tools — rakes, shovels, hoes — and add a length of rope or a wooden dowel across the lower section to coil a garden hose around. The existing structure of the pallet becomes the organizer.
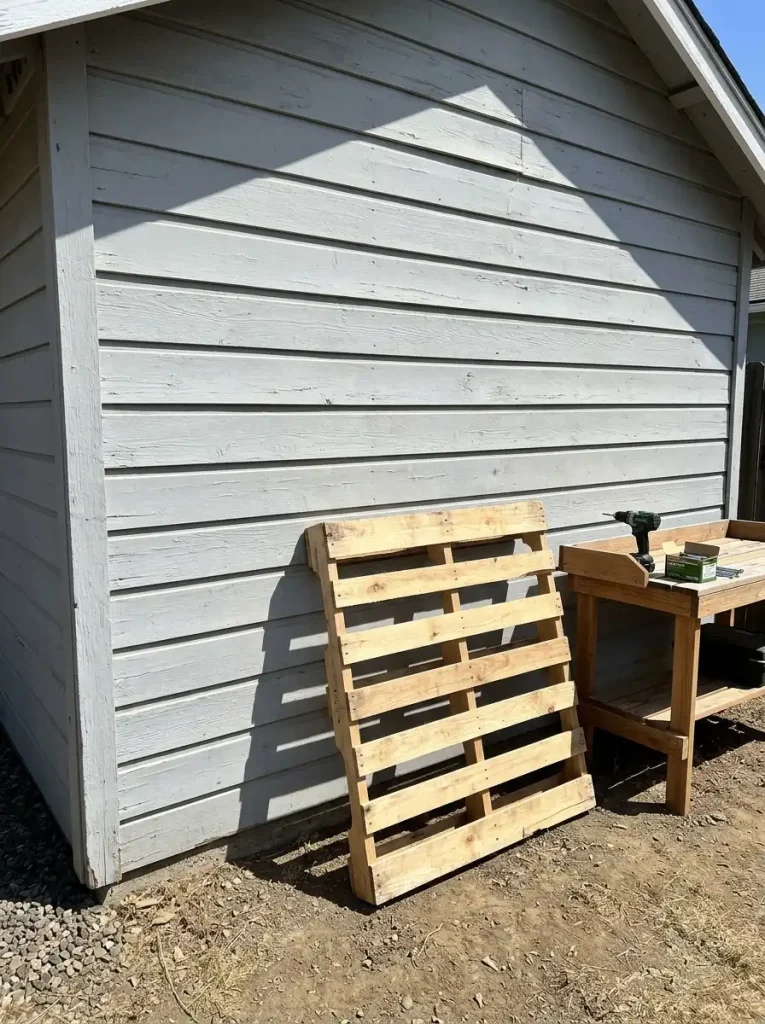
This takes about thirty minutes and solves the perennial problem of tools leaning against walls and falling over constantly.
INTERMEDIATE — A Full Weekend, Some Measuring and Cutting
7. Pallet Coffee Table
Two pallets stacked directly on top of each other, with the upper pallet sanded smooth and possibly topped with a sheet of glass, create a coffee table that is more robust than it sounds and, with the right finish, genuinely handsome.
The stacking gives the table enough height for comfortable use beside standard outdoor seating. Add casters to the bottom pallet for mobility. Add hairpin legs (cut through the bottom of the lower pallet and secure the leg mounts to the stringers) for a mid-century look that elevates the whole piece considerably.

The glass top option solves the rough-surface problem without additional sanding and creates a clean, sleek surface. A piece of tempered glass cut to the pallet dimensions can be ordered from most glass companies for a reasonable amount.
8. Pallet Daybed or Sofa
Three pallets arranged in a U-shape — one as the seat base, one as the back support, one as an optional chaise extension — create a substantial outdoor daybed that, with the right cushions, is genuinely comfortable to spend hours in.
The structural work is minimal: connect the back pallet to the seat pallet with carriage bolts through the adjacent stringers at a slight recline angle (about 100 to 105 degrees feels comfortable), and the third pallet simply butts up against the seat section.

The cushions are the significant investment and the significant design decision. A standard outdoor sofa cushion set cut to fit, or custom cushions made from outdoor foam covered in Sunbrella fabric, transforms the raw pallet structure into actual furniture. Budget at least as much for the cushions as you plan to spend on any other aspect of the project.
Finish the pallets in an outdoor stain or paint before adding cushions. The visible areas matter for the overall look and bare pallet wood beside finished cushion fabric creates an imbalanced impression.
9. Raised Garden Bed
Stand four pallets on their sides and connect them at the corners with carriage bolts to form a square or rectangular raised bed. Line the interior with hardware cloth if you are in an area with burrowing rodents — gophers and moles will take advantage of an unlined bed. Then line with landscape fabric and fill with raised bed soil mix.

The width of a standard pallet (approximately 40 to 48 inches) determines the bed dimensions, which works out to a comfortable reach across the width from either side.
HT pallets only. Multiple beds connected in a row create a kitchen garden setup that looks genuinely organized and productive.
10. Vertical Planter Tower
Several pallets stacked vertically and secured to each other and to a wall or fence create a living wall effect with individual planting pockets at each level. This is the more ambitious version of the vertical herb garden and works for flowers, succulents, and trailing plants as well as herbs.
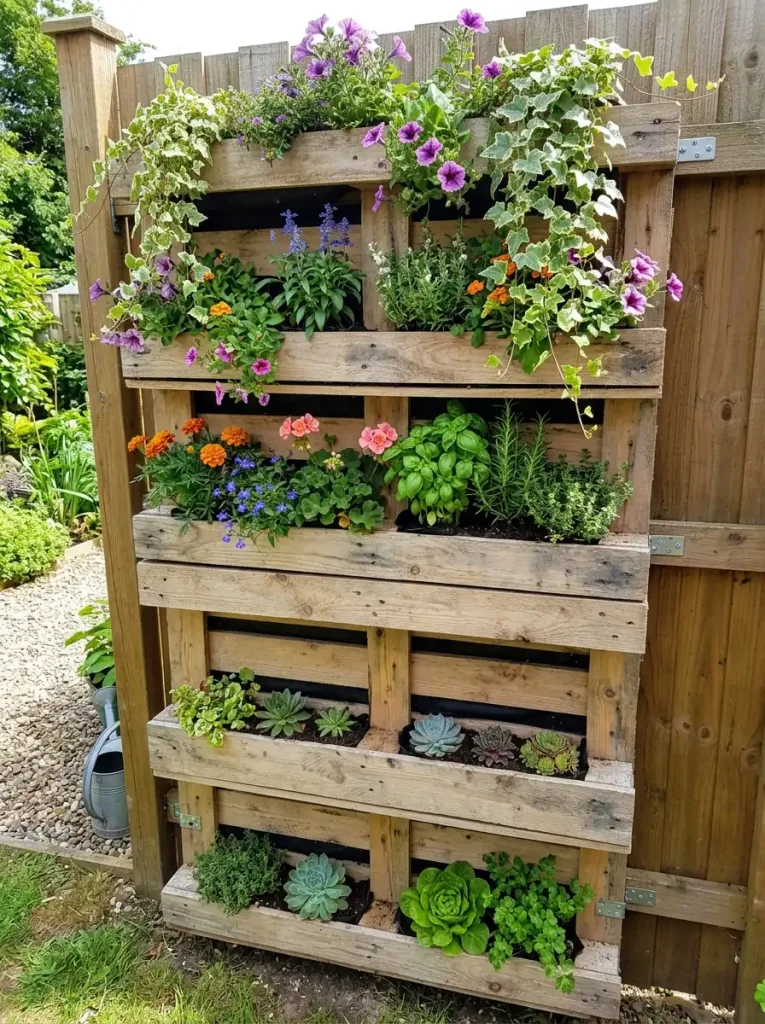
The engineering challenge is the waterflow — the top level drains into the level below, which can create waterlogging issues if the planting mix does not drain quickly. Adding perlite to the potting mix and ensuring each pocket has drainage helps. On very hot days, the lower pockets may need supplemental watering because the upper levels intercept most of the water.
11. Pallet Swing
One intact pallet with the edges sanded smooth, hung from a tree branch or a freestanding frame with rope or chain at four corners, makes a swing large enough for two adults or three children.
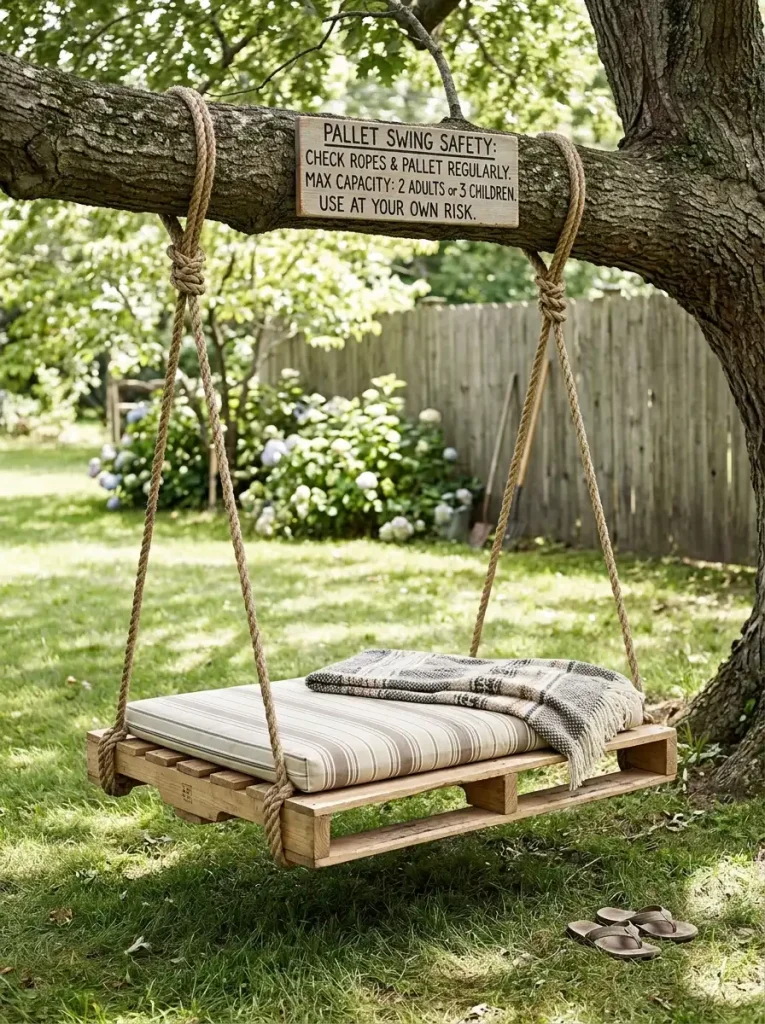
The weight capacity calculation matters here. A standard pallet is typically rated at 1,000 to 2,000 pounds for static load but the dynamic loads of swinging are different and higher. Use the pallet condition assessment carefully — no soft spots, no cracked boards, no rotting at nail points — and hang with appropriately rated rope or chain.
The rope attachment points should be at the corner stringers, which are the strongest parts of the pallet structure. Drill through the stringer rather than through a deck board, and use a large washer on both sides of the bolt to distribute load.
12. Pallet Cart
A single pallet on casters, with a smooth top surface for drinks and a lower shelf for bottles, creates a serviceable outdoor cart that can be rolled to wherever the party is.
The casters need to be rated for the combined weight of the pallet, the drinks, and the bottles. Heavy-duty swivel casters with a locking mechanism on at least two of the four casters prevent unexpected rolling.
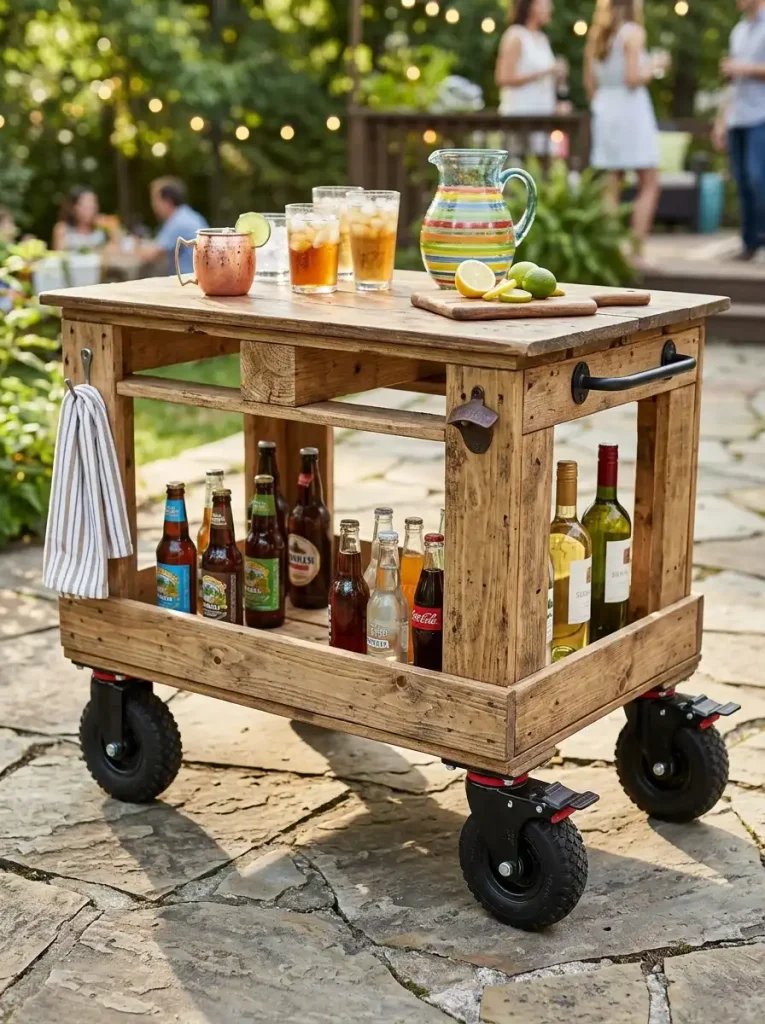
Add a towel bar to one end with cup hooks below it. The towel bar holds a hand towel; the cup hooks are for stemware or bar tools. This takes the piece from “pallet on wheels” to “pallet bar cart.”
13. Outdoor Movie Screen Frame
For families who do projector nights in the backyard: a frame built from disassembled pallet boards, sized to the dimensions of your projection screen or a white sheet that will serve as the screen, creates a lightweight, collapsible screen structure that can be assembled quickly and broken down for storage.

PVC pipe is the more common material for outdoor movie screen frames, but pallet board construction is heavier, more stable in wind, and does not require the sometimes-fiddly connection joints of PVC systems.
14. Pallet Privacy Screen
Two or three pallets connected vertically and attached to posts set in concrete create a privacy screen that is immediately effective and develops a lovely weathered patina over time.
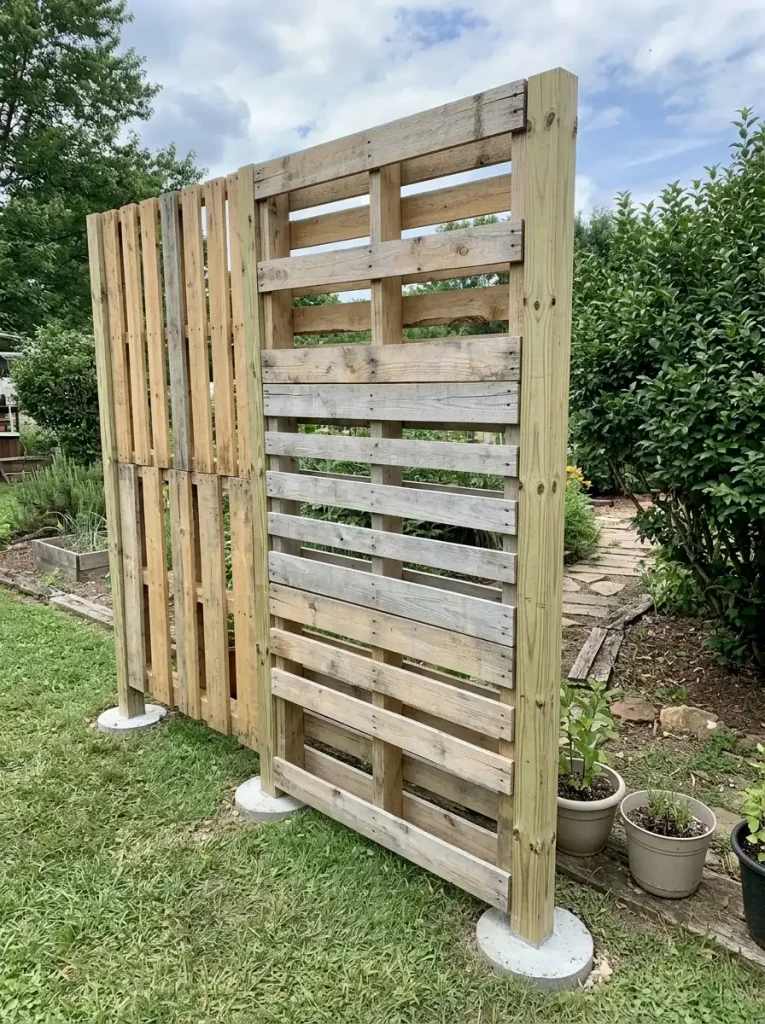
The spacing of the pallet boards — typically about 3 to 4 inches between boards — provides visual privacy while still allowing airflow. Solid fencing blocks wind and can create uncomfortable still-air pockets in hot weather; the pallet spacing keeps the air moving.
For a more finished look, add a simple top cap of pressure-treated or cedar board running the full length of the screen at the top. The cap gives a clean line to the upper edge and prevents water from sitting on the end grain of the pallet boards.
MORE AMBITIOUS — Plan Carefully, Take Your Time
15. Full Outdoor Sectional
An outdoor sectional built from pallets follows the same principles as the daybed above but at greater scale. Six to eight pallets in an L or U configuration, connected securely, finished and cushioned, create a seating group that comfortably accommodates a gathering.

The structural connections between sections are the critical detail. Pallets that shift independently during use create an unsatisfying and potentially unsafe piece. Connect with heavy carriage bolts running through adjacent stringers, and consider adding a frame of 2×4 lumber around the pallet perimeter to unify the whole structure.
This is a weekend-plus project — realistic timeline is two weekends. Plan the configuration in advance, sketch the dimensions, order the cushions before you start so you know the pallet arrangement needs to accommodate specific cushion sizes.
16. Pallet Deck Platform
For a small-scale deck or outdoor platform — perhaps around an above ground pool, beside a shed, or as a level sitting area in a sloped yard — pallets provide the surface structure efficiently.
The subframe matters. Pallets are not designed to be structural when installed horizontally, and without proper leveling and support they will flex, bounce, and eventually fail under regular foot traffic. Build a level frame of pressure-treated 4×4 posts and 2×6 beams as the substructure. Rest the pallets on the frame. Connect the pallets to the frame and to each other.

The deck boards on the pallet surface are typically only 1 to 1.25 inches thick — adequate for occasional furniture weight, not adequate as the only structural element under foot traffic. The subframe does the structural work; the pallets provide the surface.
For this project specifically, I would recommend additional 2×4 sister boards in the gaps between existing pallet deck boards to create a continuous solid surface rather than the gapped appearance of raw pallets.
17. Potting Bench With Storage
A purpose-built potting bench using disassembled pallet lumber includes a working surface at comfortable height (typically 36 inches for standing use), a shelf above for frequently used supplies, a shelf below for pots and soil bags, and hooks on the sides for hand tools.

The key dimension is the working surface height relative to your own height. Measure from the floor to just below your bent elbow when standing. That is the ideal working surface height for a task that involves downward force (potting, digging, transplanting).
Pallet lumber’s slight irregularity — boards that are not perfectly uniform in thickness — means some fitting and shimming during construction. Accept this and work with it. The slight imperfection of the finished piece is part of the character, and a potting bench that is used hard will develop its own patina quickly.
18. Garden Storage Box
A storage box for outdoor cushions, pool toys, garden tools, or firewood built from disassembled pallet boards is more weathering-resistant than most commercial outdoor storage solutions and considerably larger for the same cost.
A hinged lid is the construction detail that takes the most thought. The lid needs to be secured against wind — a piano hinge along the full back edge is more stable than individual hinges — and supported when open so it does not fall back on anyone reaching inside. A lid prop on a chain, or a folding lid support from the hardware store, handles this.

The interior should be lined with a waterproof membrane if it is storing anything moisture-sensitive — cushions and fabric items especially. Roof flashing membrane or a heavy-duty tarp cut to line the interior takes fifteen minutes to install and prevents the interior from becoming damp.
19. Pallet Wood Fence
Using individual pallet boards as fence pickets creates a fence with genuinely individual character at a material cost considerably below conventional fencing. The slight variation in board width and thickness that comes from pallet lumber creates a fence that looks handmade — because it is — in a way that is actually appealing.
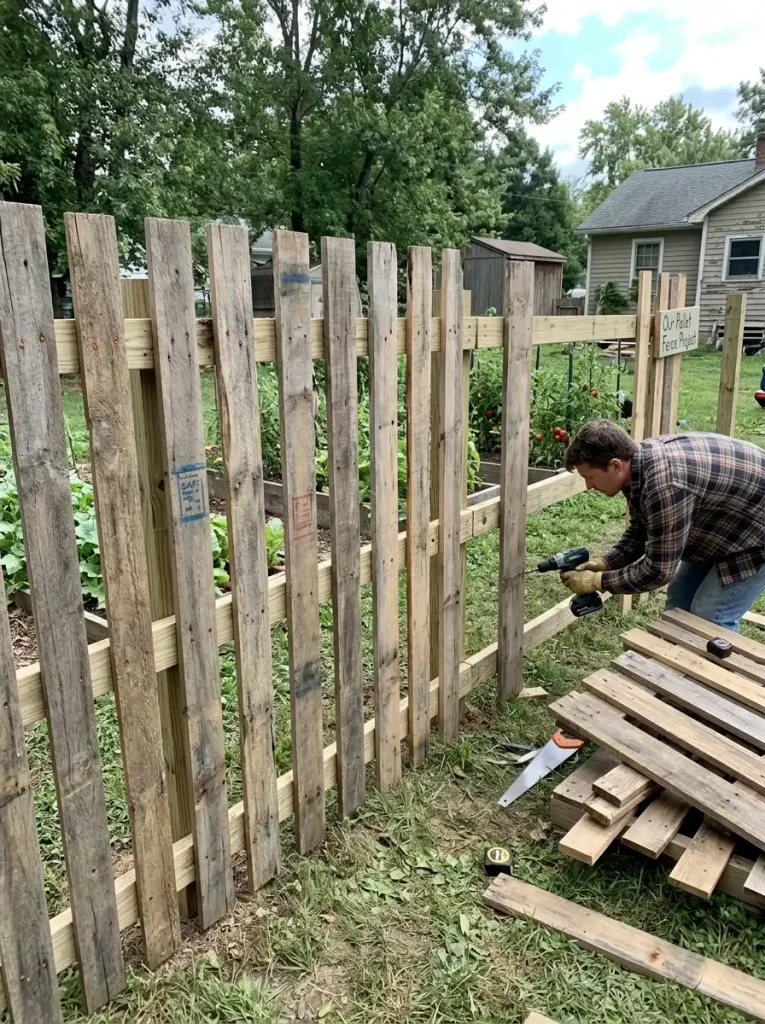
The structural elements of the fence — posts and rails — should be standard pressure-treated lumber rated for ground contact and fence applications. The pallet boards do not need to be rated for ground contact because they are attached to the rails above ground level rather than set in soil.
Consistent spacing between boards creates the most polished result. A simple spacer jig — a scrap of wood at the desired gap width — held between each board as it is screwed to the rails ensures even spacing without constant measuring.
20. Pallet Shed
A small garden shed built primarily from pallet lumber is achievable for a moderately experienced DIYer and represents genuine savings in material cost over conventional construction.
The caveats here are real, though: pallets are not designed as structural building material. A pallet shed needs a proper framed substructure with pallet boards used as cladding rather than as the structural frame itself. The roof especially needs conventional framing — a roof built solely from pallet lumber will not handle snow load or wind correctly.

That said: the walls of a small garden shed using conventional 2×4 stud framing with pallet boards screwed to the outside as cladding, and conventional plywood on the interior if a finished interior is desired, is completely viable and the result looks genuinely good with proper attention to weatherproofing at the board joints.
This is a multi-weekend project and benefits from a plan drawn to dimension before construction starts.
FUN EXTRAS — Details That Make the Difference
21. Pallet Planter Boxes
Individual boards disassembled from pallets, cut to length and assembled into simple rectangular planter boxes, create planters with a more refined look than the rough-pallet aesthetic of whole-pallet projects.

The joint detail matters for these. Butt joints with screws work but look cheap. Box joints or simple rabbet joints cut with a router create planters that look properly made. Line with landscape fabric before filling with soil to extend the life of the wood.
22. Herb Wheel
A flat pallet placed on the ground with each section between the boards — the regular grid created by the deck boards and stringers — planted with a different herb creates a visually organized, easily accessible herb garden in the footprint of a single pallet.

This works best with shorter herbs that will not shade each other out: chives, thyme, oregano, marjoram, parsley. Keep more vigorous spreaders like mint in a separate container.
23. Outdoor Serving Tray
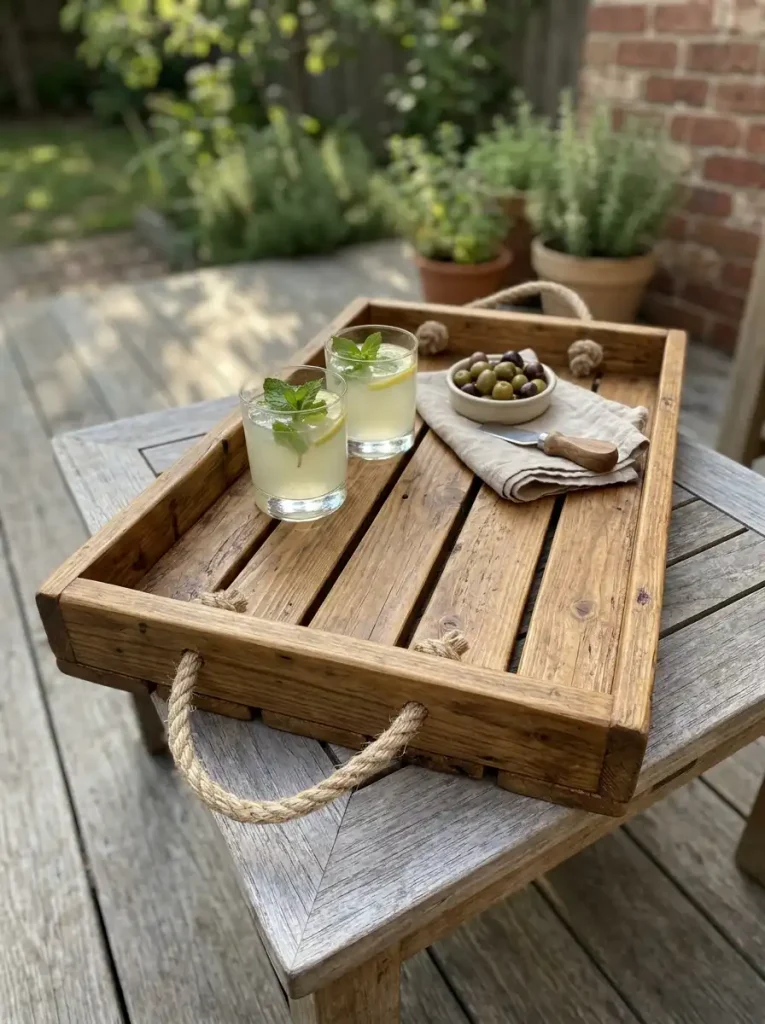
A small section of pallet — four or five boards, about 18 inches long — with rope handles threaded through drilled holes on each short end makes a rustic outdoor serving tray. Sand thoroughly, apply food-safe mineral oil finish (not polyurethane, which can chip into food), and the tray is functional and genuinely attractive.
24. Fairy Garden or Succulent Display
Small pallet sections with low-sided planting boxes built into them create a display for a fairy garden, a succulent collection, or a cactus arrangement. The existing structure of the pallet provides the framework; the planting areas are added with thin pallet board sides creating shallow planting troughs.
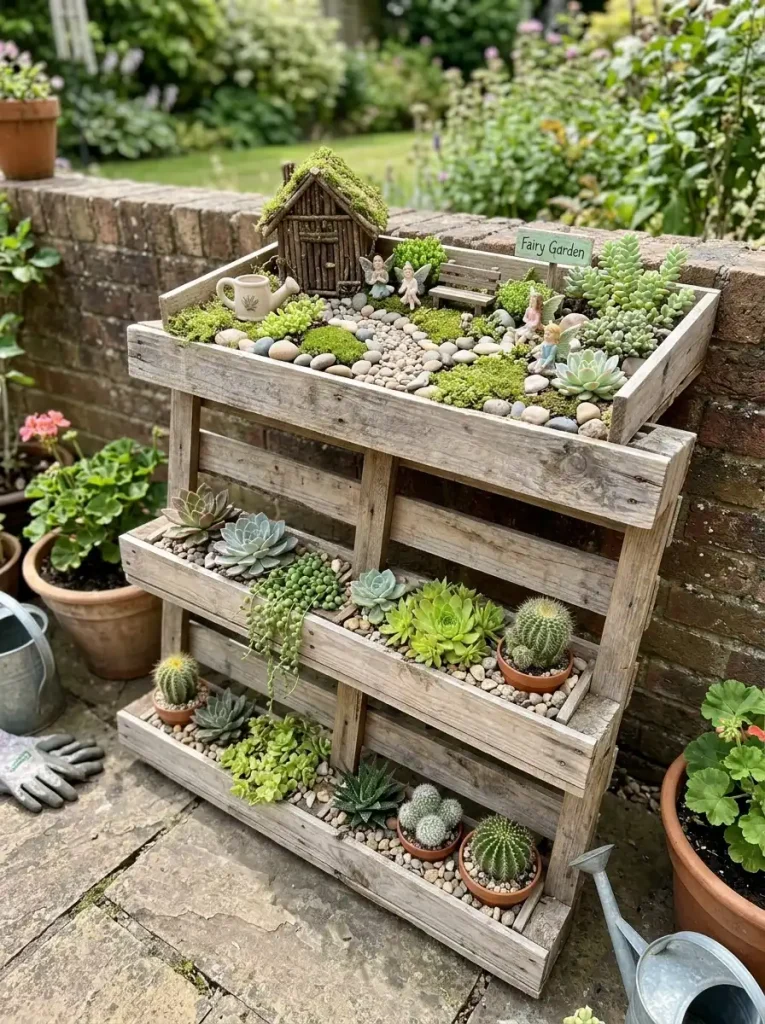
These do not need to be particularly structural — succulents are light and the loads involved are minimal — which makes them a good project for beginners working with slightly lower-quality pallet lumber.
Finishing Outdoor Pallet Projects: What Actually Protects the Wood
Raw pallet wood left untreated will weather. This is partly the appeal — that silvery-grey aged patina is genuinely beautiful on certain projects. But for projects involving seating, food contact, or extended structural use, some finish applied to the wood significantly extends its life.
Exterior stain penetrates into the wood rather than sitting on the surface, which means it does not peel or crack the way paint does. It needs reapplication every two to three years but the reapplication is simple — sand lightly and add another coat. Available in clear, semi-transparent, and solid options. Semi-transparent in a warm grey or weathered wood tone is the most popular for pallet projects.
Exterior paint gives the most color options and the most polished final appearance. The trade-off is that paint sits on the surface and will eventually peel, particularly where the wood expands and contracts at joints. A quality exterior primer plus two coats of exterior paint and proper surface preparation minimizes this but does not eliminate it.
Outdoor clear coat / polyurethane works well for horizontal surfaces that need durable protection — tabletops, serving surfaces, cutting surfaces. Less suitable for vertical surfaces like fence boards and siding, where moisture can get behind the film coating and cause peeling.
Raw (no finish) is completely acceptable for garden bed borders, vertical planters, and utility structures where weathering is expected and structural integrity over five-plus years is not required.
The Projects I Would Do First
If you are standing in your yard looking at a stack of pallets and wondering where to start, here is my honest recommendation:
Start with the vertical herb garden. It requires one intact pallet, a little landscape fabric, some potting mix, and an afternoon. The result is immediately useful and immediately makes the yard look like someone is paying attention to it. The confidence from that project sets you up for the next one.
Then build a coffee table or the daybed, depending on what the space needs. These are the projects with the highest visibility and the most daily use, which means the most daily satisfaction.
Save the fence, the shed, and the deck platform for later — not because they are too hard but because they deserve to be well-planned, and well-planning those projects benefits from having some pallet project experience under your belt first.
The pallets cost nothing. The screws and finish cost a little. The time is a weekend or two. What you get is furniture and garden infrastructure and storage that you built yourself, that fits your specific space, and that makes you feel — every time you walk into the backyard — like someone who figured something out.
That feeling is worth a lot.
If you are building out a full backyard space, our guide to fire pit landscaping ideas covers some beautiful approaches to the area around an outdoor fire feature that pair naturally with handbuilt pallet furniture, and our covered patio ideas piece has everything you need for creating a shaded outdoor living space worth spending time in.