Your ceiling feels flat and lifeless. Every time you walk into the room, something feels missing. You want that rich, architectural look but real wood beams cost a fortune. The expense and weight of solid wood make it feel completely out of reach.
Faux wood beams are the perfect solution. They look exactly like real wood. They weigh almost nothing. They cost a fraction of the price. This complete guide will show you everything you need to know about faux wood beams for ceilings. Your dream home is closer than you think.
Source: @volterra_products
What Are Faux Wood Beams for Ceilings?
Faux wood beams are hollow decorative beams. They are made to look like solid wood. Most are crafted from high-density polyurethane foam or wood composite. The surface texture mimics real wood grain perfectly.

Source: @barrondesigns
They attach directly to your existing ceiling. No structural support is needed. They are purely decorative. The result looks absolutely identical to expensive real wood beams from the ground.
| Feature | Detail |
| Material | High-density polyurethane or composite wood |
| Core | Hollow inside for lightweight installation |
| Surface | Textured to mimic real wood grain |
| Function | Decorative only, not structural |
| Appearance | Nearly identical to real solid wood |
Why Choose Faux Wood Beams Over Real Wood Beams?
Real wood beams are extremely heavy. They require structural reinforcement to your ceiling. This adds thousands of dollars to the project cost. Many homes simply cannot support real beam weight.
Source: @luxefauxbeams
Faux beams solve every problem real wood creates. They are lightweight, affordable, and easy to install. Even a beginner can do it in a single weekend. You get the same stunning look without any of the hassle.
| Comparison Factor | Faux Beams vs Real Wood |
| Weight | Very light vs extremely heavy |
| Cost | Affordable vs very expensive |
| Installation | DIY friendly vs requires professionals |
| Structural Changes | None needed vs major reinforcement |
| Maintenance | Minimal vs regular sealing needed |
Types of Faux Wood Beams Available
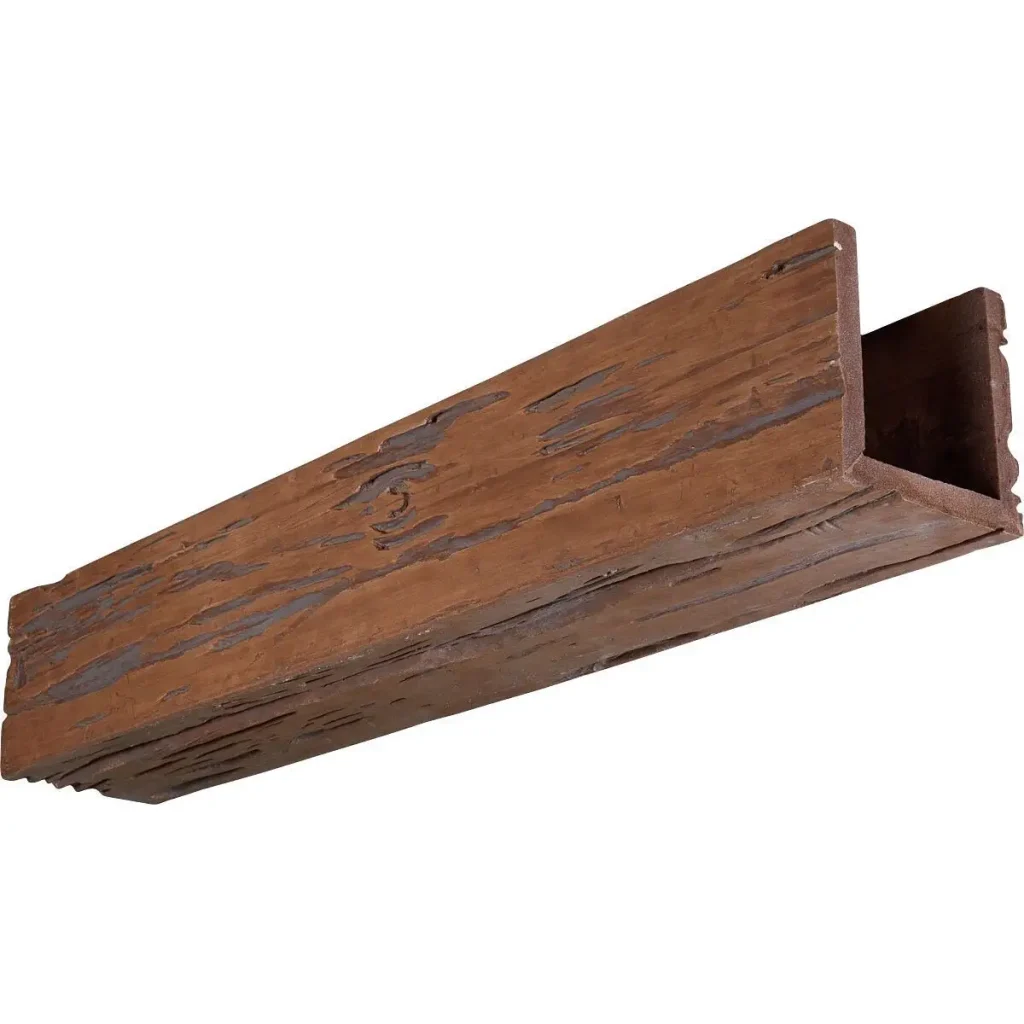
Polyurethane foam beams are the most popular type. They are incredibly lightweight and durable. They resist moisture, insects, and rot naturally. This makes them ideal for most indoor and outdoor applications.
Source: @ekenamillwork
Wood composite beams offer a slightly heavier, more authentic feel. They are made from real wood fibers mixed with resin. They are denser and slightly more expensive than foam beams. Both types look stunning once installed and painted or stained.
| Beam Type | Best For |
| Polyurethane Foam | Most rooms, lightweight and durable |
| Wood Composite | Heavier look, more authentic texture |
| MDF Wrapped Beams | Budget option, paintable surface |
| Vinyl Beams | High moisture areas like covered patios |
| Reclaimed Wood Look Beams | Rustic and farmhouse interiors |
Best Rooms for Faux Wood Beam Ceilings
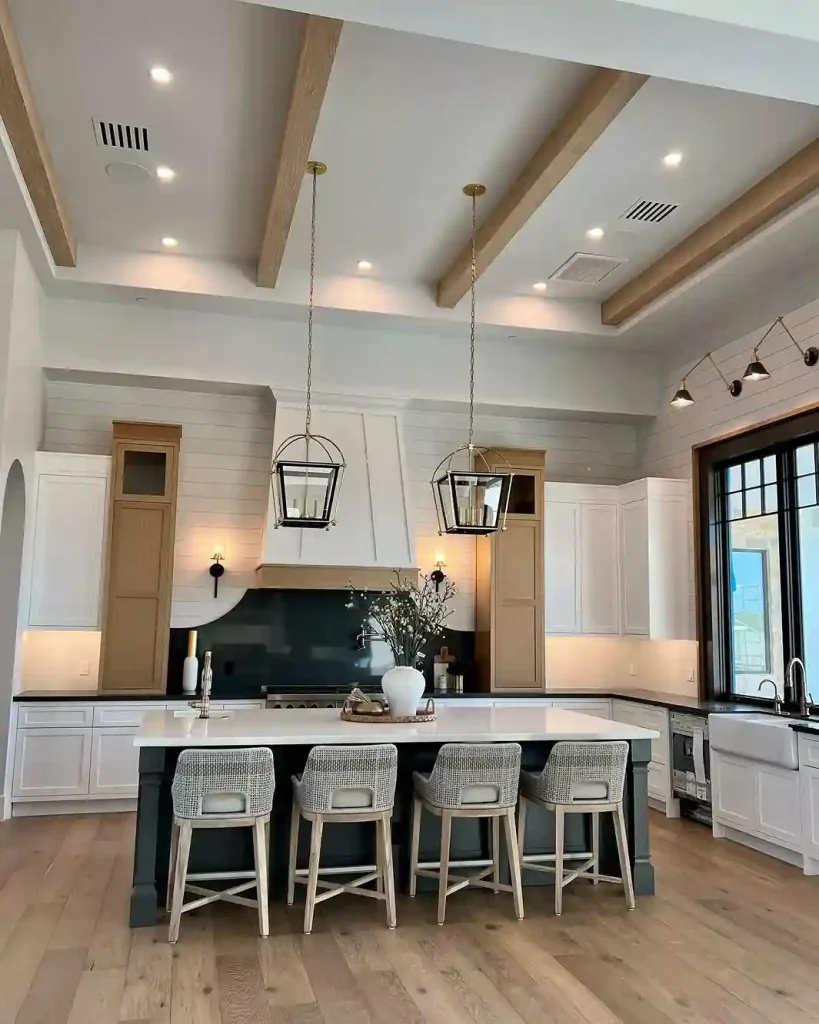
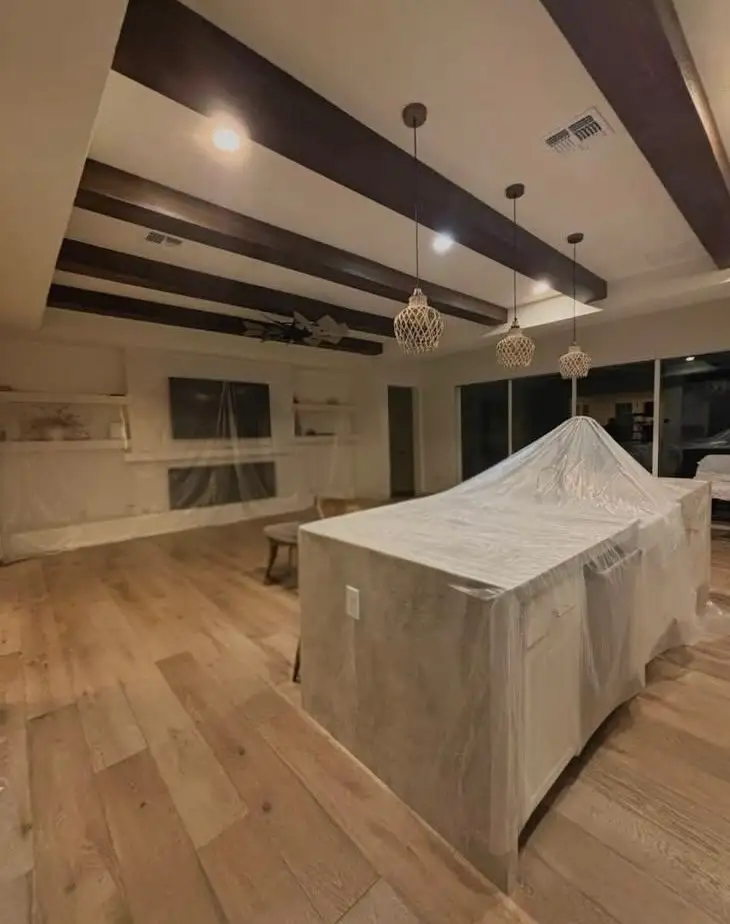
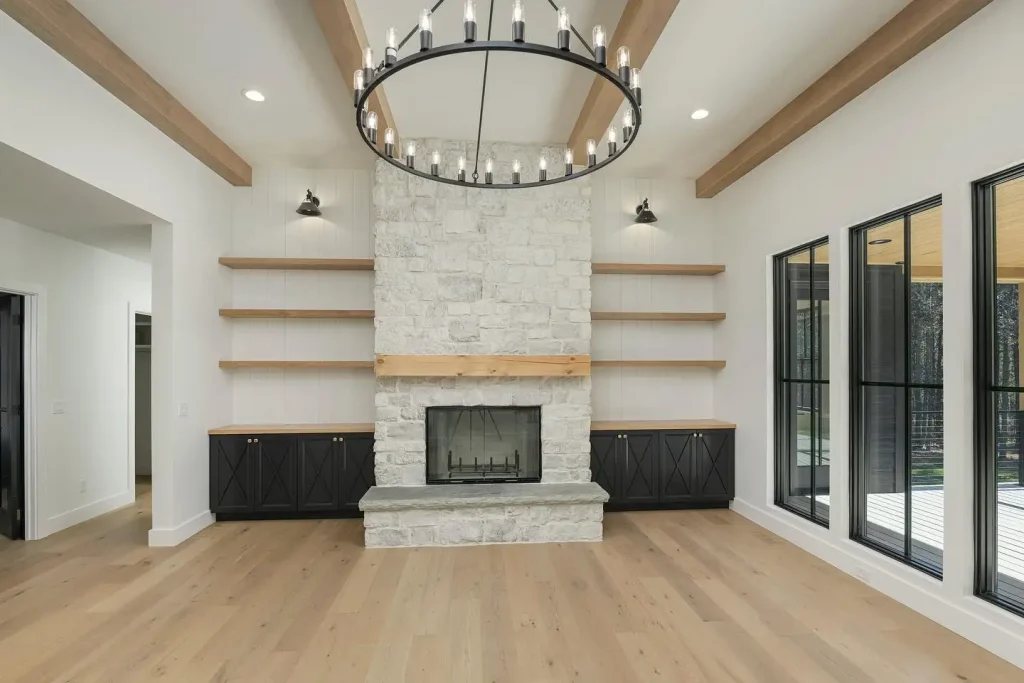
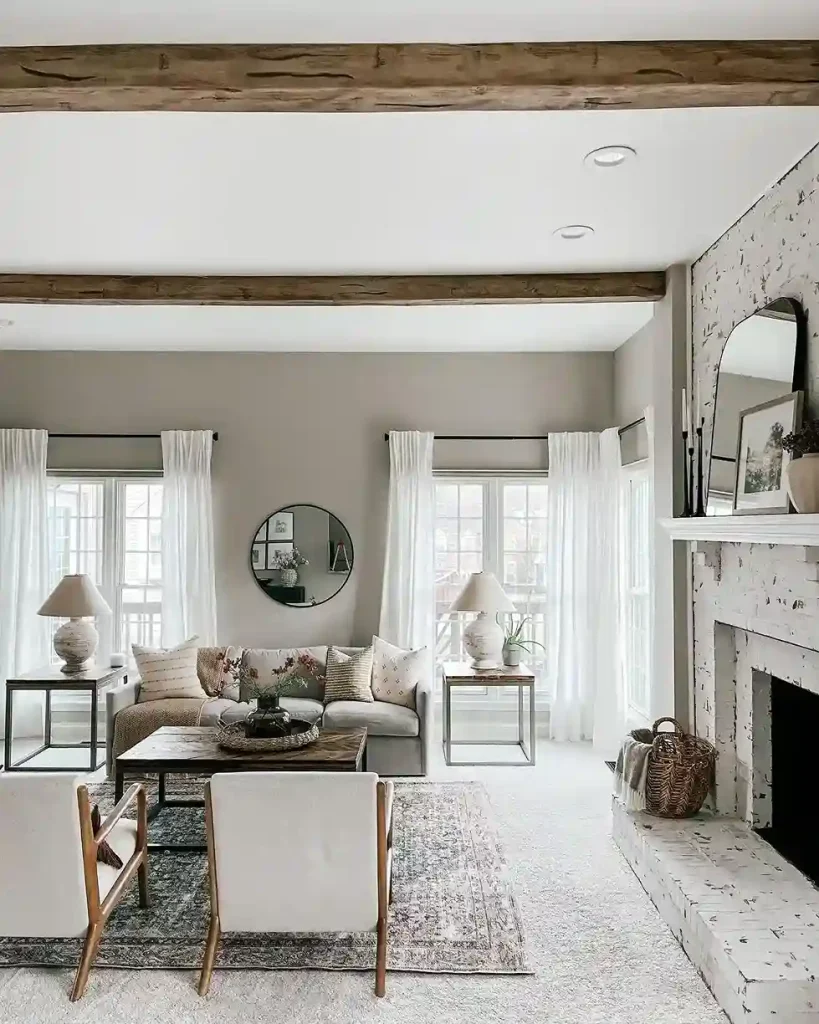
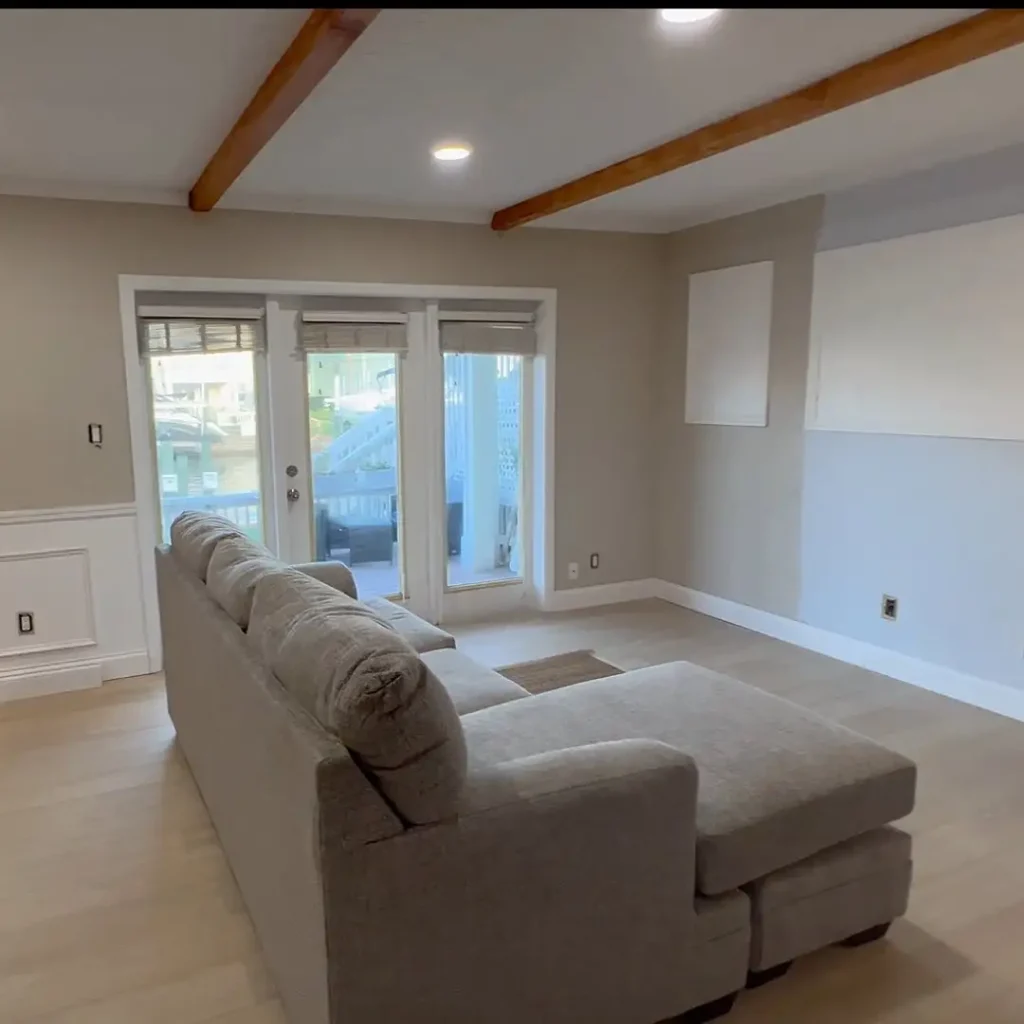
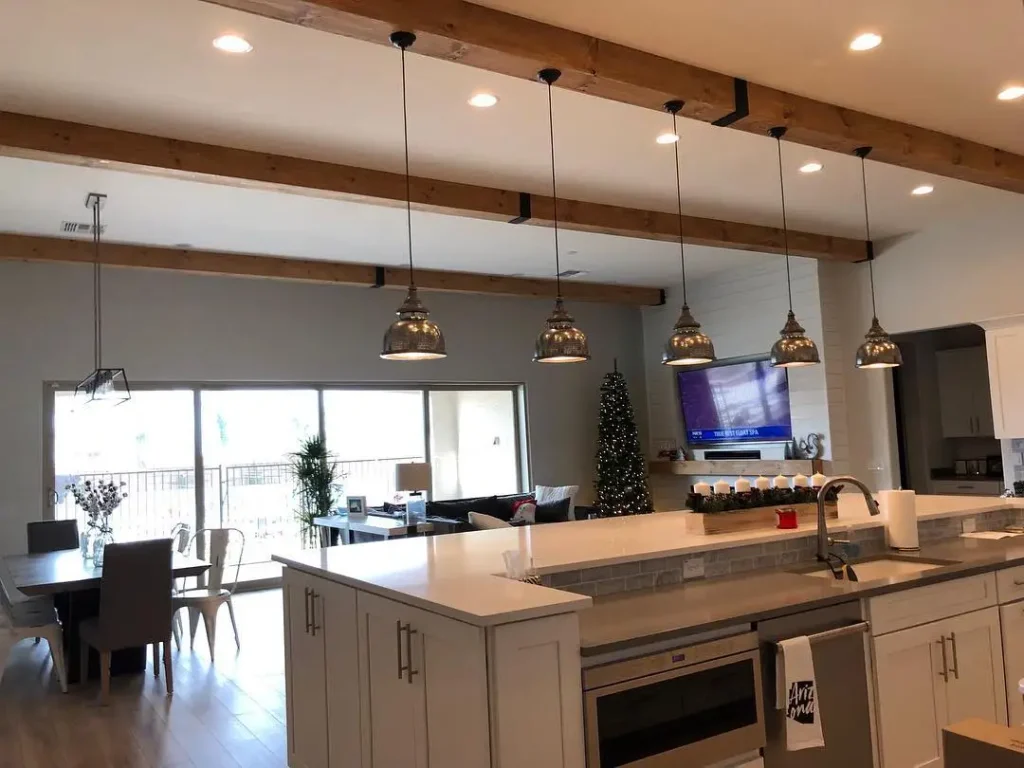
Living rooms are the number one choice for faux beams. The dramatic look transforms the main gathering space instantly. Beams add height, depth, and a sense of grandeur to large living areas.
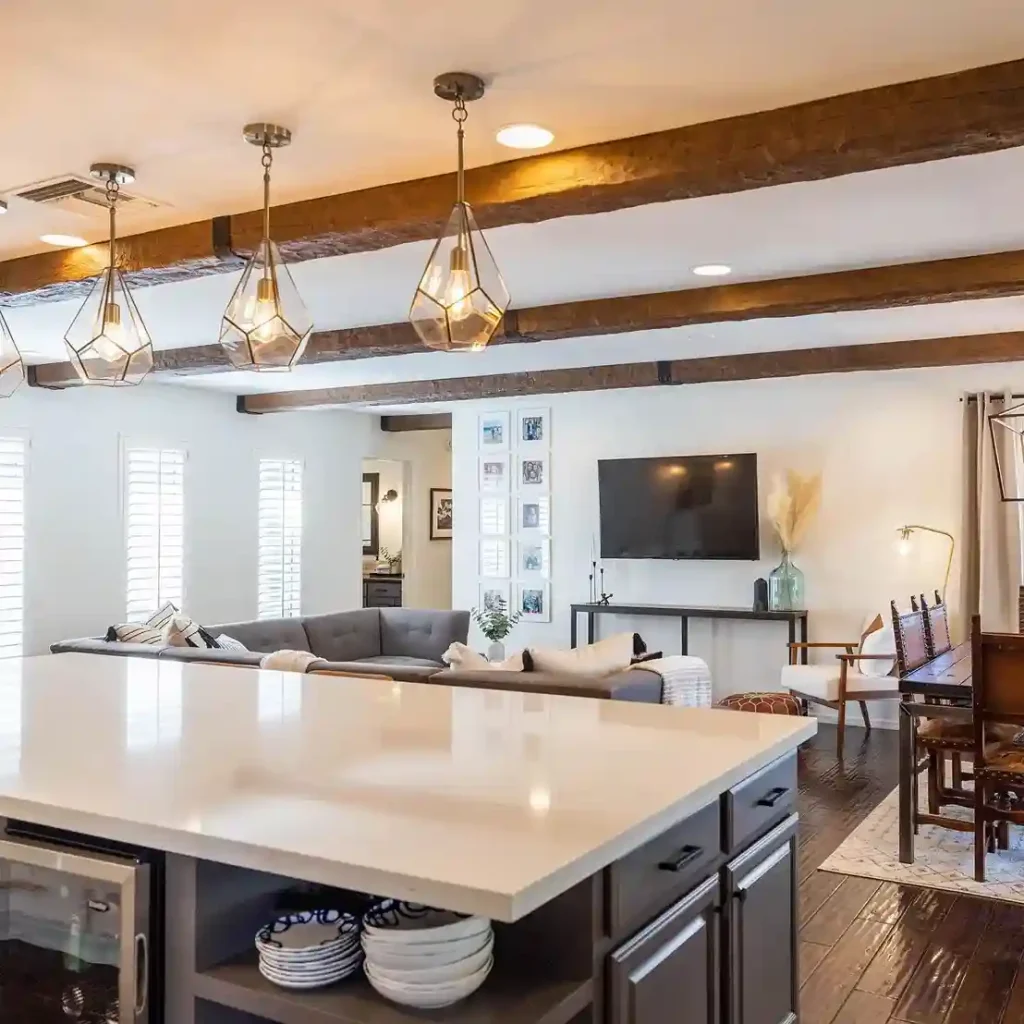
Source: @outwater.industries
Kitchens look incredible with faux beams running across the ceiling. They complement open shelving and farmhouse cabinetry beautifully. Dining rooms also benefit enormously. Beams above a dining table create an elegant, intimate atmosphere perfect for entertaining.
| Room | Why Faux Beams Work |
| Living Room | Adds grandeur and architectural depth |
| Kitchen | Pairs perfectly with farmhouse style |
| Dining Room | Creates elegant and intimate atmosphere |
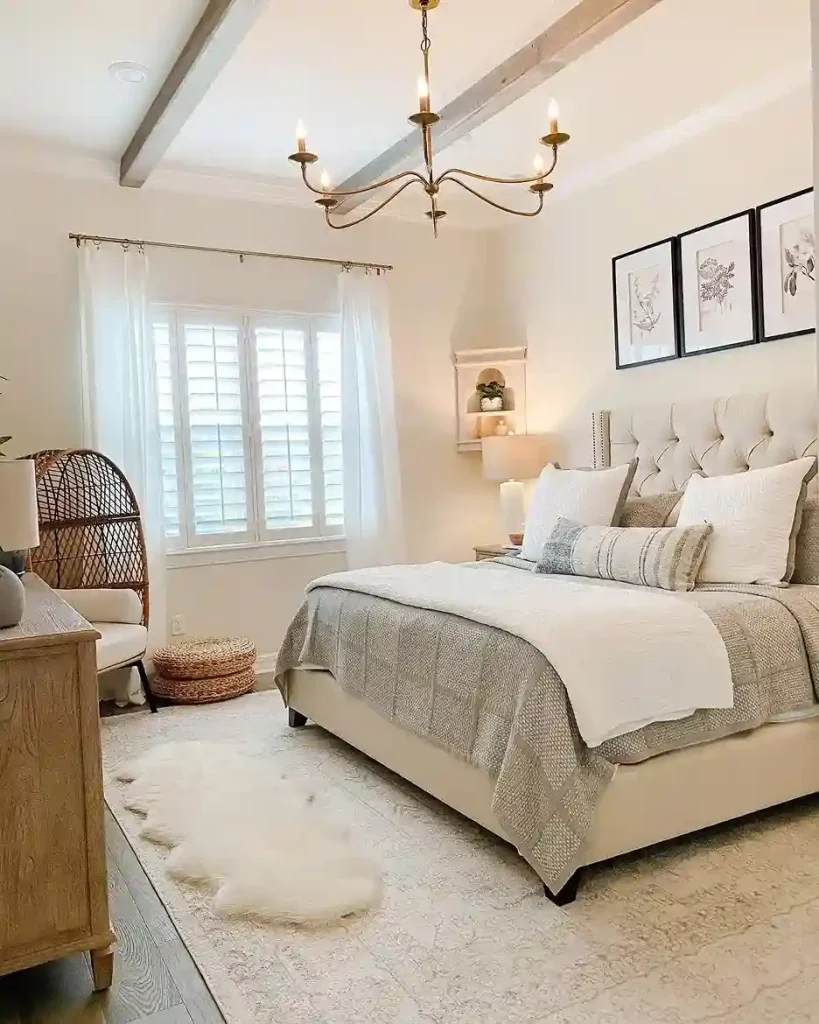
| Master Bedroom | Adds warmth and resort-like feel |
| Home Office | Gives a sophisticated, executive look |
Faux Wood Beams Ceiling Cost: Full Breakdown
Faux beams are significantly cheaper than real wood. A single polyurethane faux beam costs between $30 and $150 depending on size and style. A complete living room ceiling project typically costs $300 to $1,200 total.
Source: @hastewoodcraft
Real wood beam projects often cost $5,000 to $15,000 or more. That includes structural work, materials, and labor. Faux beams give you 90 percent of the visual impact at 10 percent of the price. The savings are truly remarkable.
| Cost Item | Estimated Price |
| Single Faux Beam (small) | $30 – $60 per beam |
| Single Faux Beam (large) | $80 – $150 per beam |
| Full Room Project (DIY) | $300 – $800 total |
| Full Room Project (Pro Install) | $600 – $1,500 total |
| Real Wood Beams (comparison) | $5,000 – $15,000+ total |
How to Install Faux Wood Beams on a Ceiling
Start by planning your beam layout on paper. Decide on spacing and direction. Mark the ceiling with a pencil to guide your installation. Always find and mark ceiling joists before drilling anything.

Source: @cpaan_originals
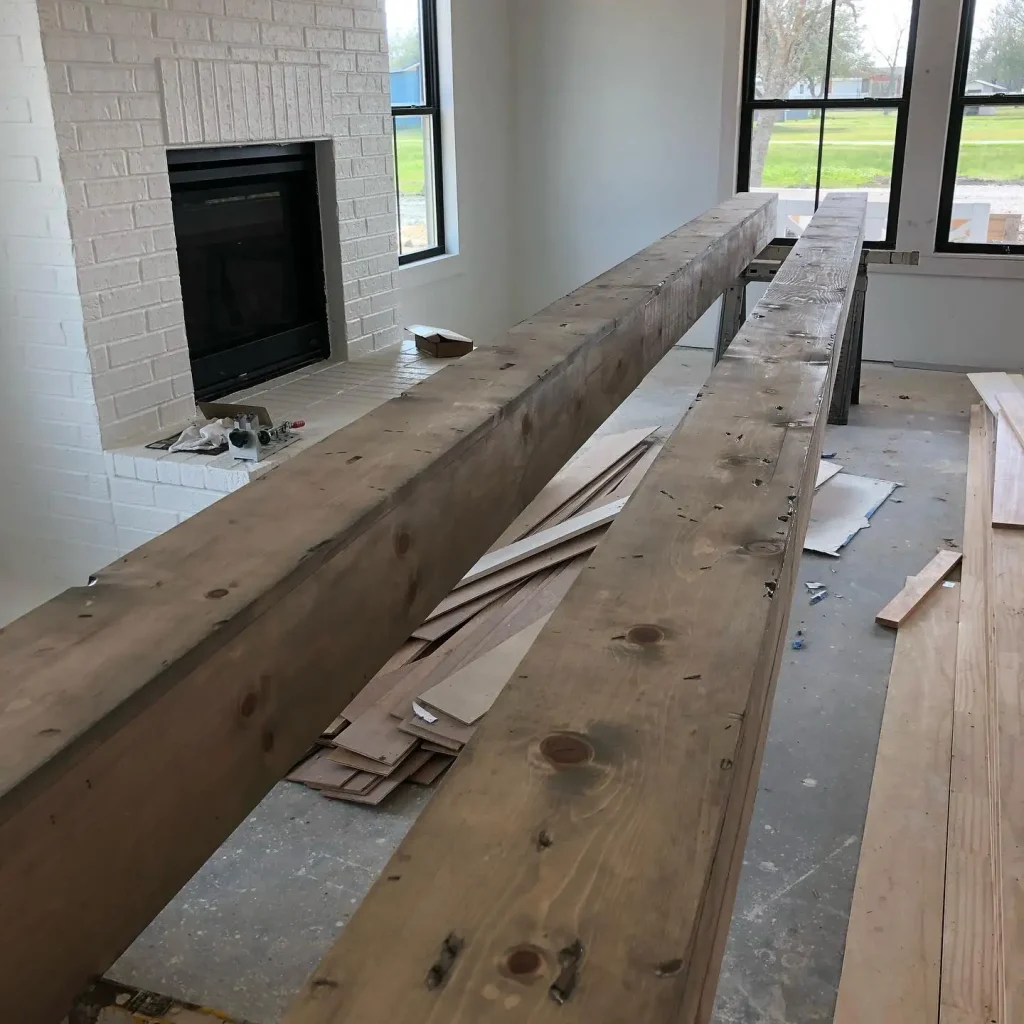
Install wooden nailer boards along the ceiling first. These are thin strips of wood that act as anchor points. Then slide the hollow faux beam over the nailer board and secure it from the sides. The result is a perfectly mounted beam that looks completely solid.
| Installation Step | What to Do |
| Step 1: Plan Layout | Sketch beam placement and spacing |
| Step 2: Find Joists | Use a stud finder along the ceiling |
| Step 3: Install Nailers | Screw wooden strips to ceiling joists |
| Step 4: Mount Beams | Slide hollow beams over nailer boards |
| Step 5: Finish Edges | Add trim caps at ends for clean finish |
Do You Need a Professional to Install Faux Beams?
Most homeowners can install faux beams themselves. The process is straightforward. You need basic tools and a free weekend. No special skills are required for standard flat ceilings.
Source: @myfauxbeams
Hiring a professional makes sense for vaulted or cathedral ceilings. Complex angles and high heights require experience and proper safety equipment. For standard 8 to 10 foot ceilings, DIY installation is completely manageable.
| Ceiling Type | DIY or Professional? |
| Standard flat ceiling (8-9 ft) | DIY is perfect |
| Slightly vaulted ceiling | DIY with extra care |
| High cathedral ceiling (14+ ft) | Professional recommended |
| Complex angled ceiling | Professional recommended |
| Simple grid pattern layout | DIY is easy |
Tools You Need for Faux Beam Installation
You will need a stud finder, tape measure, and pencil. A drill with wood screws is essential for mounting nailer boards. A miter saw helps cut beams to exact length cleanly.

A caulk gun with paintable caulk fills any small gaps. Construction adhesive adds extra bonding strength. A sturdy ladder is absolutely necessary. Safety glasses protect your eyes during cutting and drilling.
| Tool | Purpose |
| Stud Finder | Locate ceiling joists for nailer boards |
| Drill and Screws | Secure nailer boards to ceiling |
| Miter Saw | Cut faux beams to perfect length |
| Caulk Gun | Fill gaps for seamless finish |
| Construction Adhesive | Extra bonding strength for beams |
Faux Wood Beams: Paint or Stain Options
Most faux beams come pre-finished in popular wood tones. But you can easily repaint or restain them yourself. Use a latex-based paint for polyurethane foam beams. Spray painting gives the smoothest and most even coverage.

Source: @periodcreations
Gel stains work beautifully to enhance the wood grain texture. Apply with a brush, then wipe away the excess. This technique creates an incredibly realistic wood appearance. You can achieve any look from light honey oak to deep dark walnut.
| Finish Option | Best Effect |
| White Paint | Clean, modern or farmhouse look |
| Gray Paint | Contemporary and sophisticated style |
| Light Oak Stain | Warm and natural wood appearance |
| Dark Walnut Stain | Rich, dramatic, and elegant feel |
| Weathered Gray Stain | Rustic and reclaimed wood look |
Faux Wood Beams Ceiling Styles and Design Ideas
Parallel beams running the length of the room are the most classic layout. They draw the eye forward and make rooms feel longer. This style works beautifully in rectangular living rooms and dining rooms.
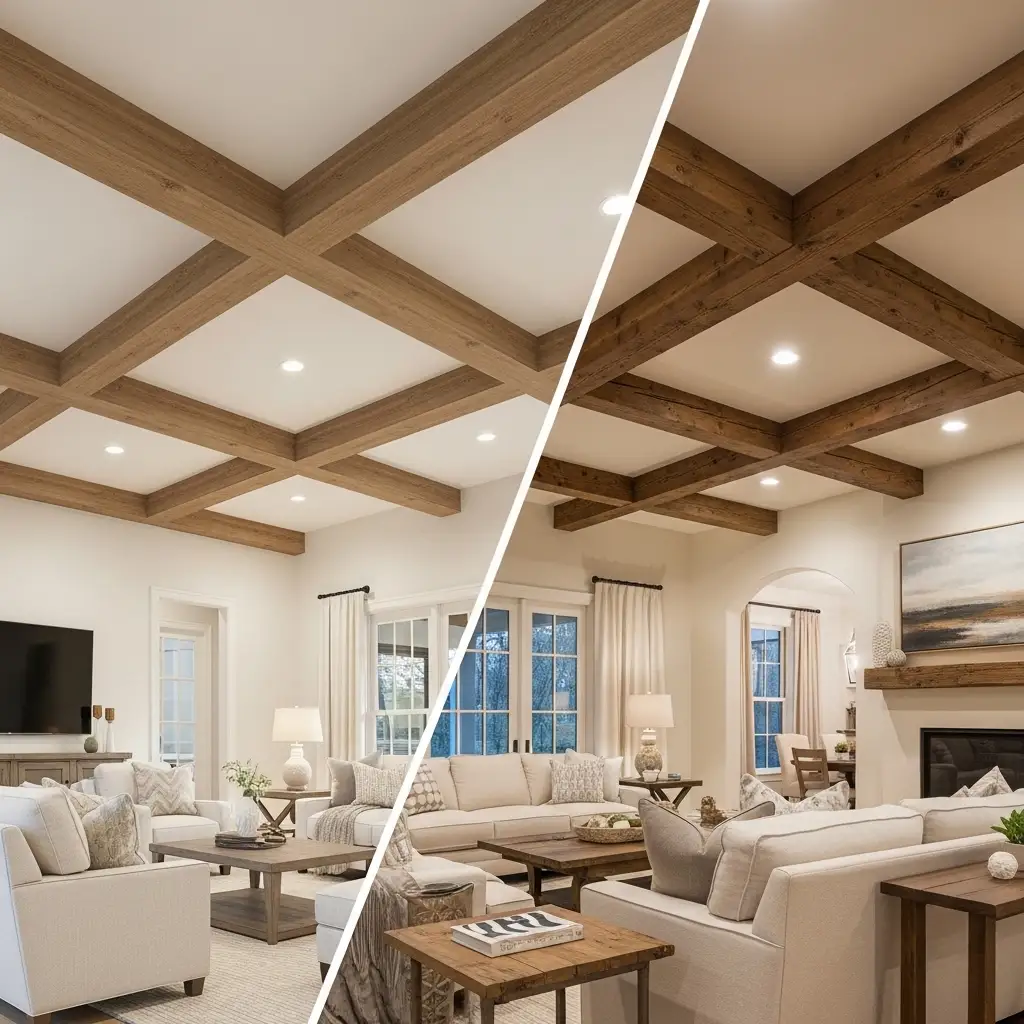
Source: @lakelandpallet
A coffered beam pattern creates a grid of squares across the ceiling. It looks incredibly formal and elegant. Box beam designs combine beams in a crossing pattern for a rich, layered effect. Each style creates a completely different mood in the room.
| Design Style | Best Room |
| Parallel Beams | Rectangular living or dining rooms |
| Coffered Grid Pattern | Formal living rooms and studies |
| Box Beam Design | Master bedrooms and great rooms |
| Single Center Beam | Small rooms and hallways |
| Rustic Random Layout | Cabins and farmhouse homes |
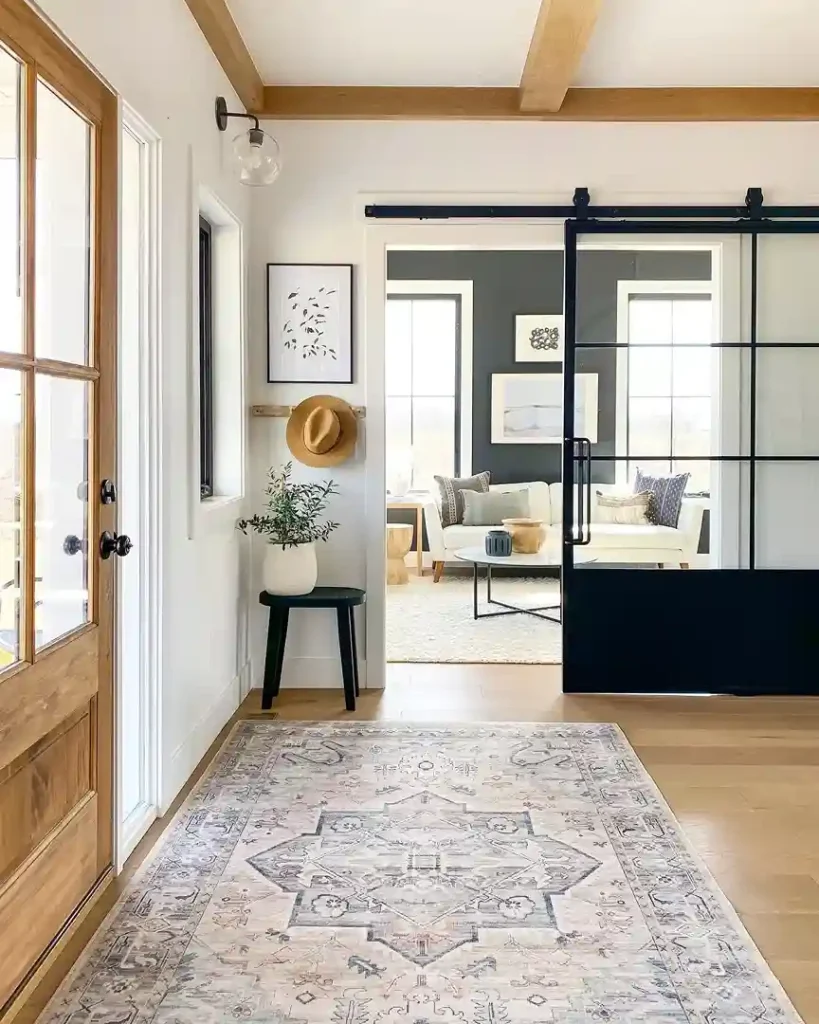
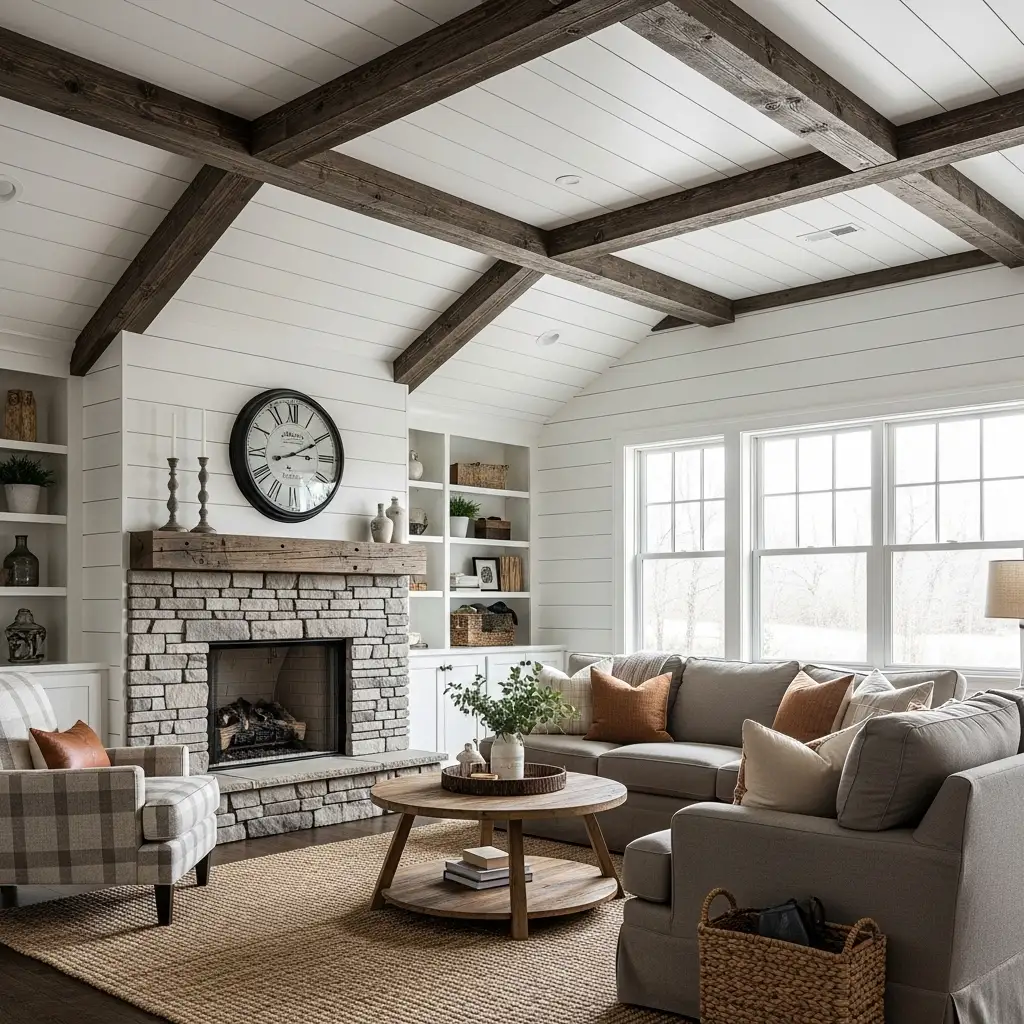
Faux Wood Beams for Farmhouse Style Ceilings
Farmhouse style is the most popular match for faux wood beams. The rustic texture adds authentic country charm. Pair with shiplap walls, barn doors, and vintage light fixtures for the full effect.
Source: @ourforevertnfarmhouse
Choose beams with a distressed or hand-hewn texture for true farmhouse character. Weathered gray or warm brown stains look perfect. Keep ceiling color white or cream to make the beams pop dramatically.
| Farmhouse Pairing | Effect |
| Distressed Beam Texture | Authentic rustic character |
| White Shiplap Ceiling | Makes dark beams stand out boldly |
| Barn Door Combination | Cohesive farmhouse theme throughout |
| Vintage Edison Bulb Fixtures | Warm, nostalgic atmosphere |
| Warm Brown or Gray Stain | Natural and earthy color palette |
Faux Wood Beams for Modern and Contemporary Ceilings
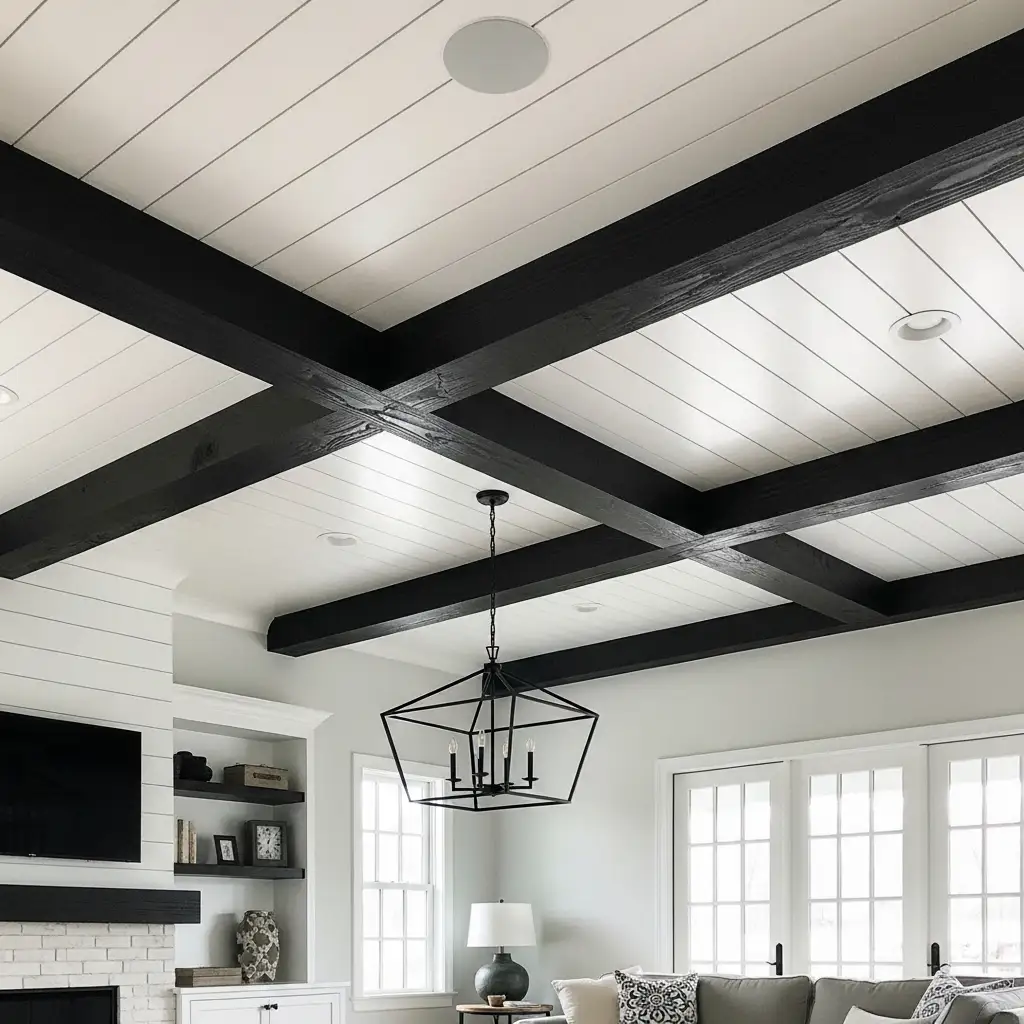
Modern homes can absolutely use faux wood beams. The key is keeping lines clean and spacing generous. Wide beams with smooth finishes look sleek and intentional. Avoid overly rustic or distressed textures in modern spaces.
Paint the beams to match or contrast the ceiling color. Black beams on a white ceiling create a bold, graphic look. White beams on a white ceiling add subtle dimension and texture. Either approach works beautifully in contemporary interiors.
| Modern Design Tip | Recommendation |
| Beam Finish | Smooth, not heavily distressed |
| Spacing | Wide and generous gaps between beams |
| Color Contrast | Black beams on white ceiling |
| Subtle Option | White beams on white ceiling |
| Best Beam Style | Clean-lined rectangular profile |
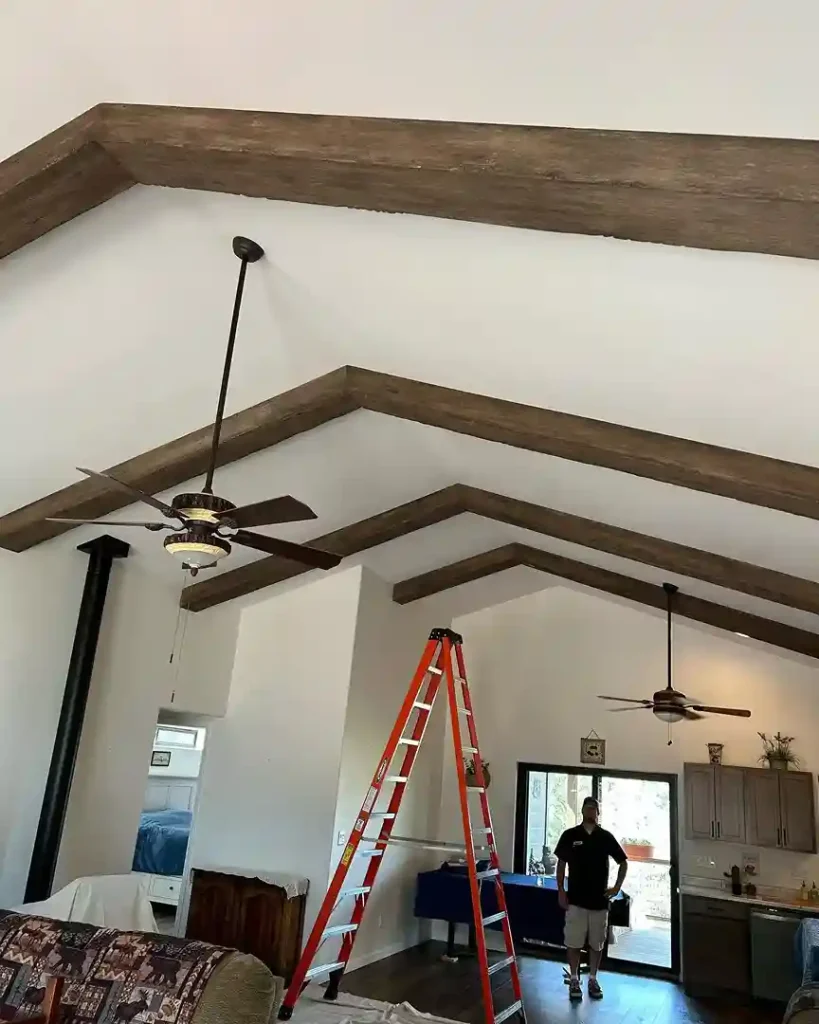
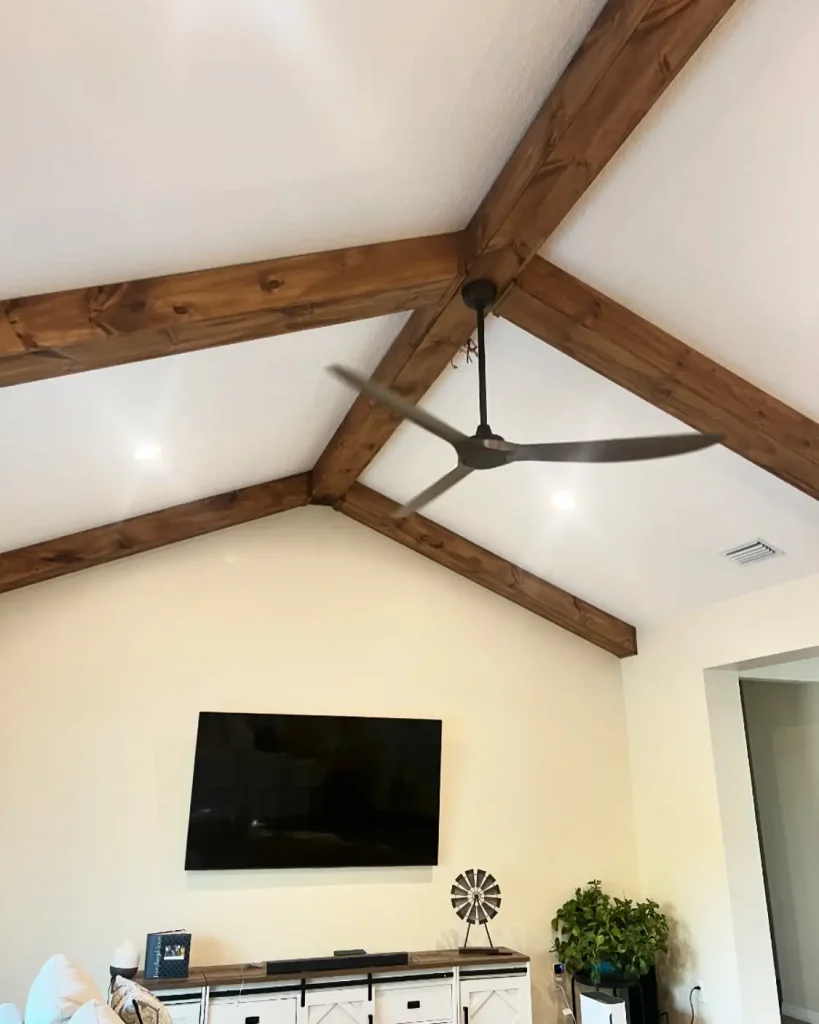
Faux Wood Beams on Vaulted and Cathedral Ceilings
Vaulted ceilings look absolutely stunning with faux wood beams. The angled surface makes beams appear to soar upward dramatically. The combination creates a grand, awe-inspiring visual effect.
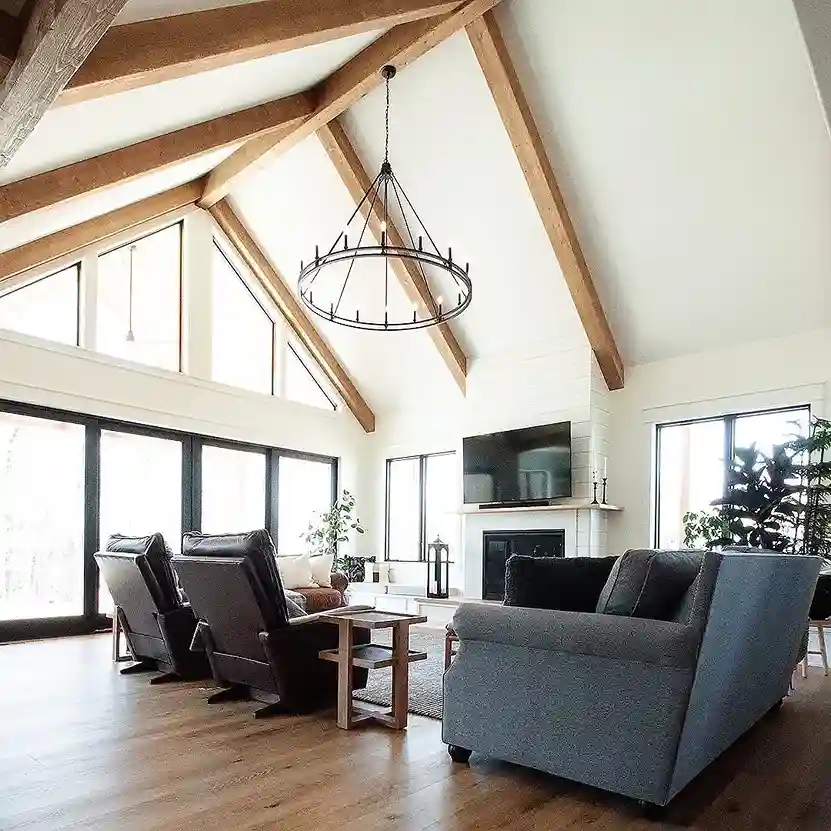
Installation on vaulted ceilings requires more precise angle cuts. A miter saw set to the correct angle is essential. Consider hiring a professional for very steep or high vaulted ceilings. The result is worth every bit of extra effort.
| Vaulted Ceiling Factor | What to Know |
| Beam Direction | Run beams along the slope for best look |
| Angle Cutting | Miter saw required for precise cuts |
| DIY Difficulty | Moderate to hard depending on height |
| Visual Impact | Extremely dramatic and impressive |
| Pro Help Recommended | For ceilings above 12 feet |
How to Space Faux Wood Beams on Your Ceiling
Proper spacing is critical for a natural, balanced look. Too many beams make the ceiling feel heavy and oppressive. Too few beams look sparse and out of proportion. The right spacing depends on ceiling height and room size.
A general rule is to space beams 24 to 48 inches apart. Larger rooms with higher ceilings can handle closer spacing. Smaller rooms look better with fewer, more widely spaced beams. Always mock up the layout with tape before committing to installation.
| Room Size | Recommended Beam Spacing |
| Small room (under 150 sq ft) | 3 to 4 beams, 36–48 inch spacing |
| Medium room (150–300 sq ft) | 4 to 6 beams, 30–36 inch spacing |
| Large room (300–500 sq ft) | 6 to 8 beams, 24–30 inch spacing |
| Open concept (500+ sq ft) | 8+ beams, 24 inch spacing |
| Low ceiling (under 8 ft) | Fewer beams to avoid heavy feeling |
Faux Wood Beams Ceiling with Lighting
Adding lighting to faux wood beams creates a magical effect. Rope lights tucked above or beside beams add a warm, glowing ambiance. This technique is called beam lighting or cove lighting.
Pendant lights hung between beams also look spectacular. Choose fixtures that complement the beam style and finish. For farmhouse beams, use vintage Edison pendants. For modern beams, sleek geometric pendants work perfectly.
| Lighting Option | Best Effect |
| LED Rope Lights Above Beams | Warm, glowing cove lighting effect |
| Recessed Lights Between Beams | Clean, modern ambient lighting |
| Pendant Lights Between Beams | Decorative and functional focal point |
| Track Lighting on Beams | Directional and adjustable illumination |
| Fairy Lights Along Beams | Cozy and romantic atmosphere |
Faux Wood Beams vs. Real Wood Beams: Full Comparison
The debate between faux and real wood beams comes down to budget, practicality, and priorities. Real wood has undeniable authenticity. You can feel and smell the difference. But most guests will never know the difference from ground level.
Faux beams win on almost every practical level. They are lighter, cheaper, faster to install, and require far less maintenance. For the vast majority of homeowners, faux beams are simply the smarter choice. The visual result is almost indistinguishable.
| Factor | Faux Beams Win |
| Cost | Faux is 80–90% cheaper |
| Weight | Faux weighs almost nothing |
| Installation Speed | Faux installs in hours not days |
| Maintenance Required | Faux needs almost no upkeep |
| Moisture and Bug Resistance | Faux resists both naturally |
Faux Wood Beams for Outdoor Ceilings: Porches and Pergolas
Faux beams work beautifully outdoors. Covered porch ceilings look amazing with faux wood beams running across them. They extend the interior style to your outdoor living space seamlessly.
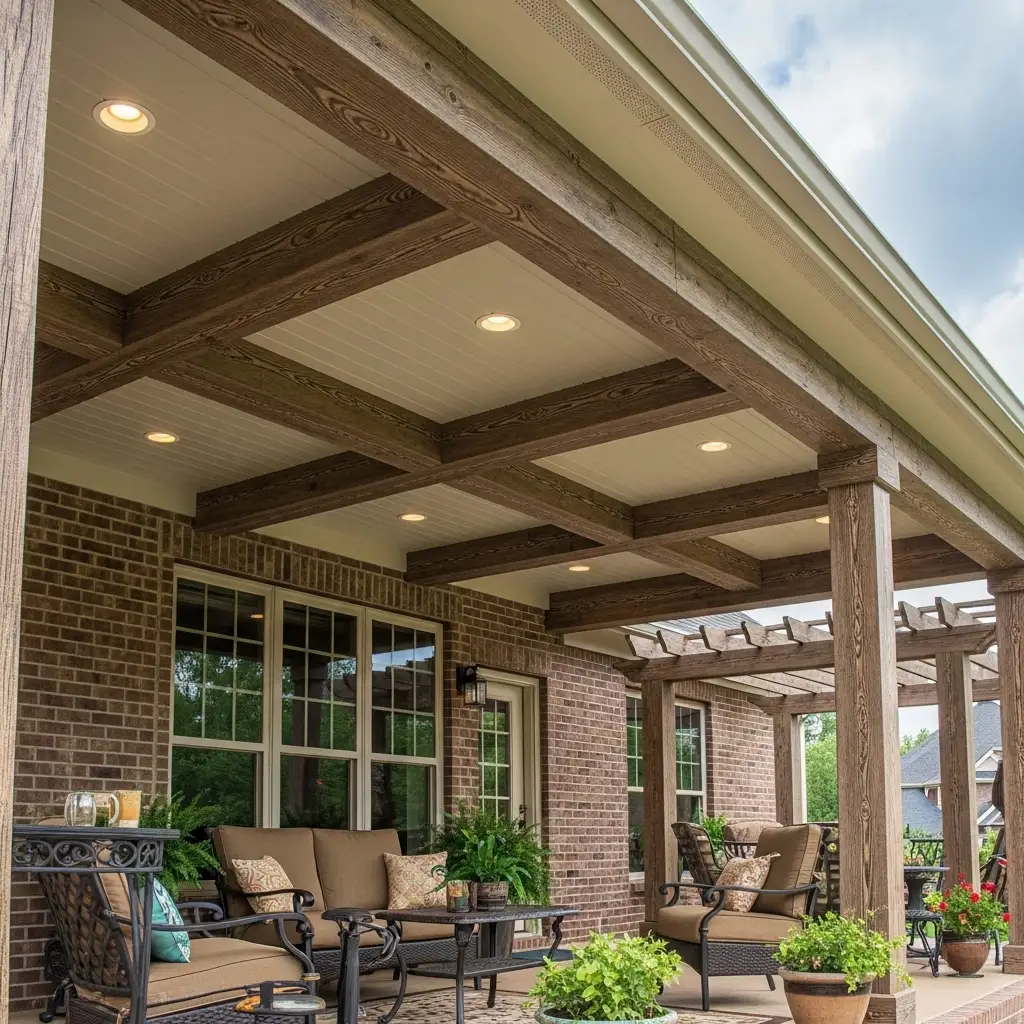
Use polyurethane foam beams rated for exterior use. These resist UV rays, moisture, and temperature changes. They will not warp, crack, or rot like real wood. Your outdoor ceiling will look stunning for many years with zero maintenance.
| Outdoor Factor | Recommendation |
| Best Material | UV-resistant polyurethane foam |
| Moisture Resistance | Excellent – no sealing needed |
| Temperature Tolerance | Handles heat and cold well |
| Maintenance Needed | Almost none – just occasional cleaning |
| Ideal Spaces | Covered porches, patios, and pergolas |
How to Make Faux Beams Look More Realistic
The key to realistic-looking faux beams is in the finishing. Start with a quality gel stain. Apply it unevenly to mimic natural wood variation. Use multiple shades to create depth and dimension.
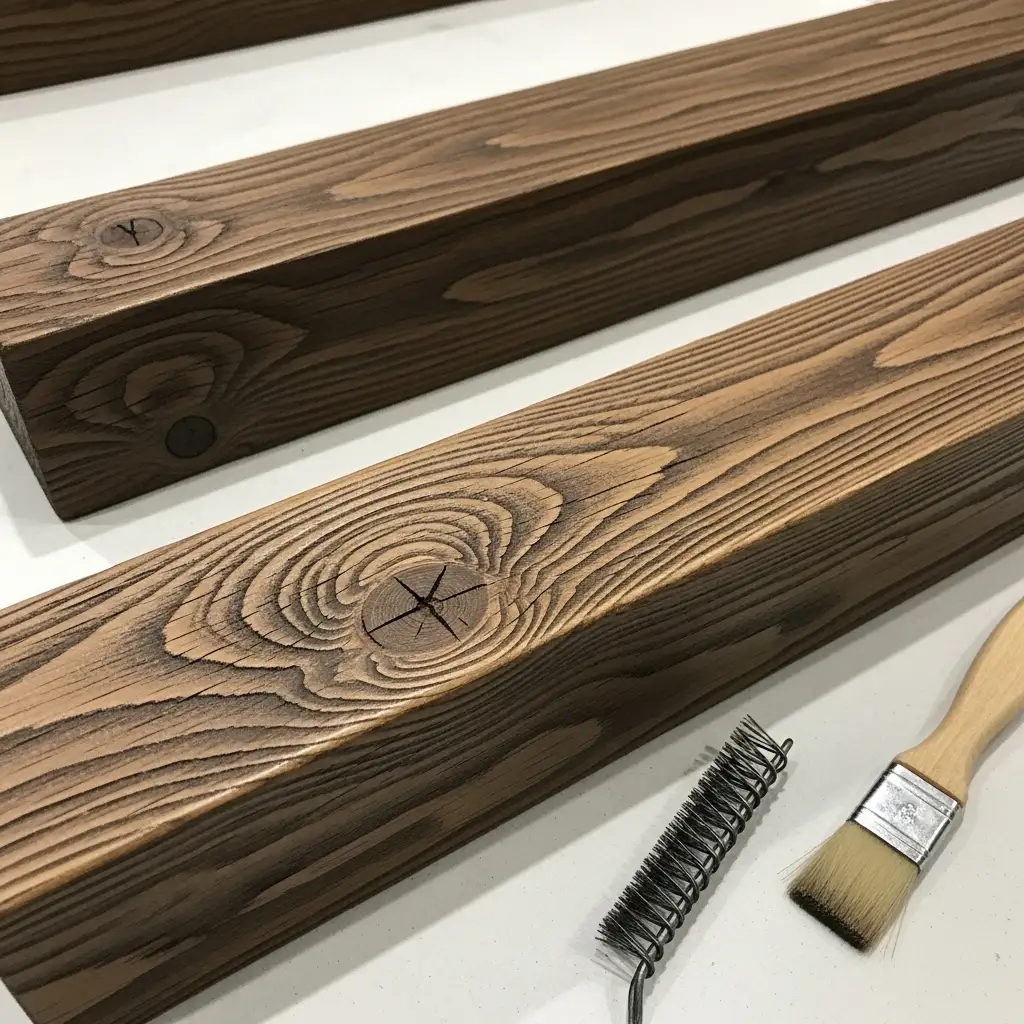
Distressing techniques add even more authenticity. Use a wire brush to scratch the surface lightly. Dab darker paint into the grain lines. Add knot details with a small brush. Step back and study real wood photos as reference. The more detail you add, the more convincing the result becomes.
| Realism Technique | How to Apply |
| Gel Stain Layering | Apply multiple shades unevenly |
| Wire Brush Distressing | Scratch surface lightly along grain |
| Dark Grain Highlighting | Dab dark paint into grain lines |
| Knot Detail Painting | Add knot marks with small round brush |
| Dry Brush Highlight | Lighten raised areas for depth |
Common Mistakes to Avoid with Faux Wood Beam Ceilings
The most common mistake is wrong beam sizing. Beams that are too thin look flimsy and fake. Beams that are too thick overwhelm a small room. Match beam size to room scale for a proportional, natural look.
Another big mistake is skipping the nailer board step. Some people try to glue beams directly to the ceiling. This fails over time. Always install proper nailer boards for a secure, long-lasting installation that will not shift or sag.
| Common Mistake | How to Avoid It |
| Wrong beam size for room | Choose beam width proportional to room |
| Skipping nailer boards | Always install wooden nailers first |
| Uneven spacing between beams | Measure and mark before installing |
| Poor paint or stain job | Test finish on sample piece first |
| Not caulking gaps | Caulk all edges for seamless look |
Faux Wood Beams Ceiling in Low-Ceiling Rooms
Low ceilings need careful planning. The wrong beam choice makes a low ceiling feel even more oppressive. Thin, narrow beams work much better in rooms under nine feet. They add character without stealing headroom visually.
Light-colored beams also help significantly. White or cream beams on a white ceiling add texture without visual weight. Avoid dark beams in low-ceiling rooms unless the space is very large and open.
| Low Ceiling Tip | Why It Helps |
| Use narrow thin beams | Less visual weight pressing down |
| Choose light beam colors | Blends with ceiling, adds subtle texture |
| Space beams widely apart | Fewer beams feel less heavy |
| Run beams lengthwise | Makes room feel longer and taller |
| Avoid dark stain colors | Dark colors make ceilings feel lower |
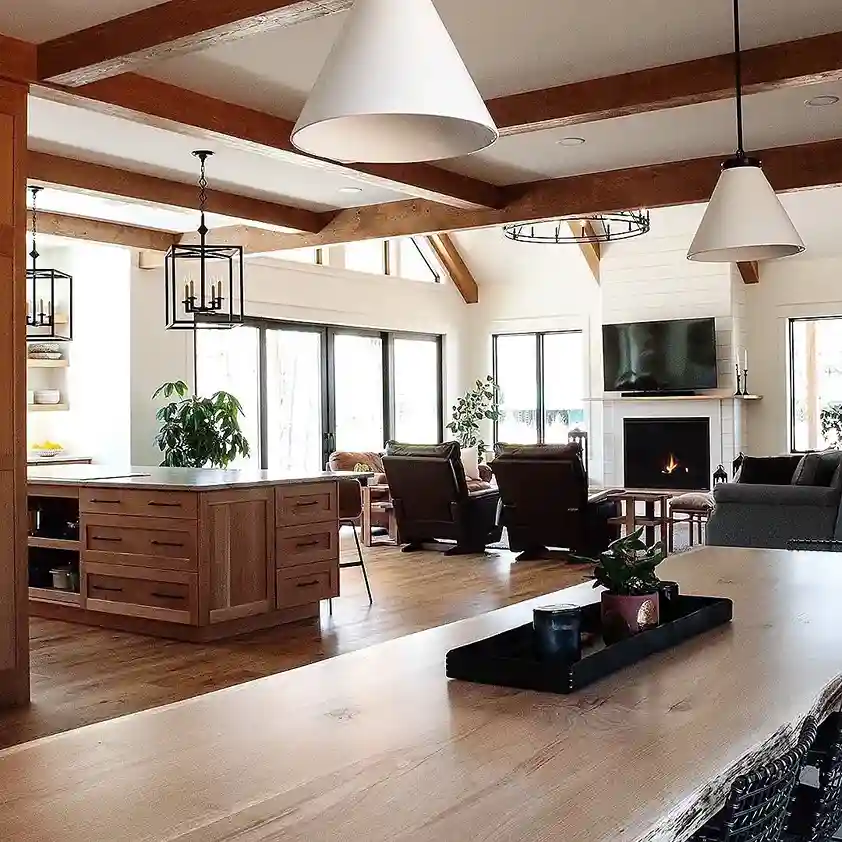
Faux Wood Beams in Open Concept Homes
Open concept homes are perfect candidates for faux wood beams. The beams help define different zones within a large open space. Kitchen, dining, and living areas feel more intentionally designed.
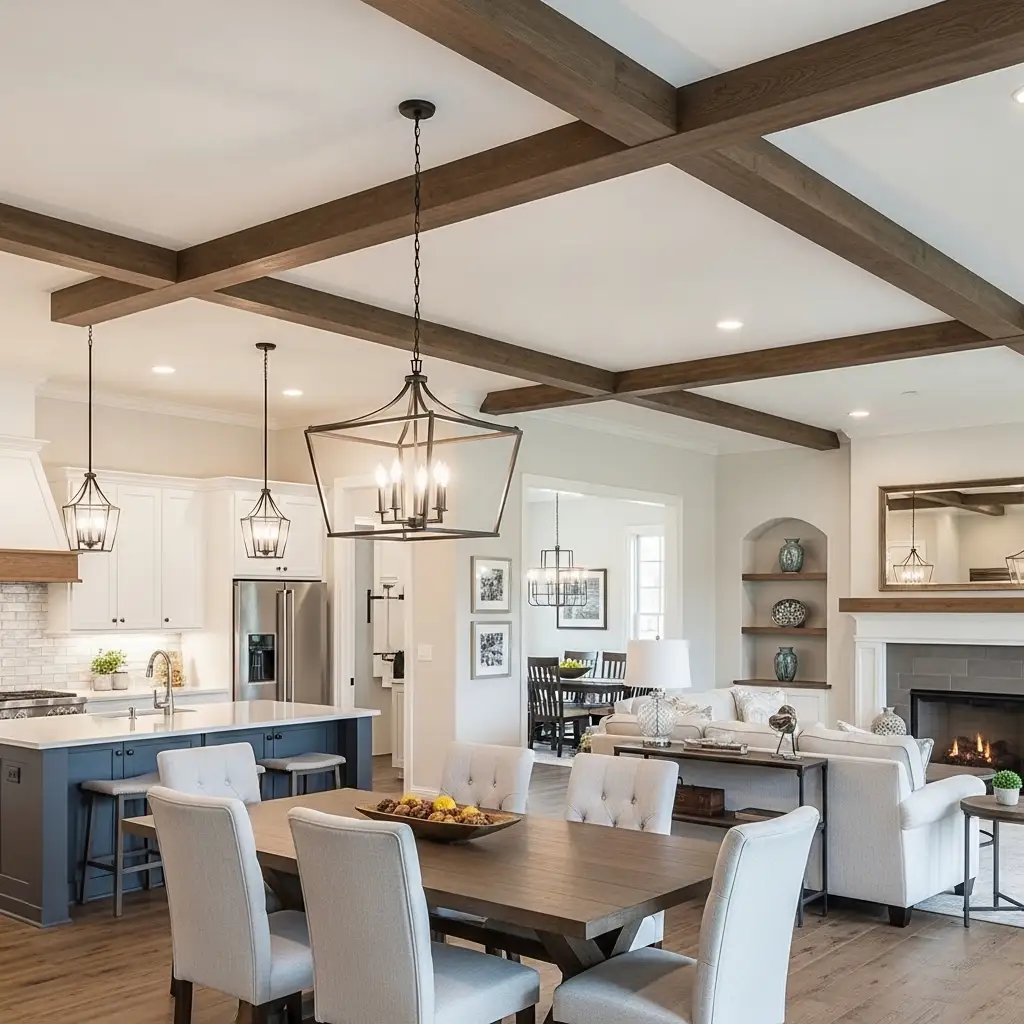
Use beams to create a visual boundary between the kitchen and living room. Run a perpendicular set of beams across the dining area. This zoning technique makes open floor plans feel organized and purposeful without any walls.
| Open Concept Strategy | Effect |
| Beams Over Kitchen Area | Defines cooking zone visually |
| Beams Over Dining Table | Creates intimate dining atmosphere |
| Perpendicular Beam Pattern | Separates zones without walls |
| Consistent Beam Style Throughout | Ties entire open space together |
| Mix with Pendant Lights | Marks each zone with light and texture |
How Long Does Faux Wood Beam Installation Take?
A small room with three to four beams takes about four to six hours for a DIYer. This includes measuring, cutting, installing nailers, and mounting the beams. Add another hour for caulking and finishing touches.
A large living room with eight or more beams may take a full day or two. Having a helper makes the process significantly faster. One person holds the beam in place while the other secures it. Preparation and planning save the most time overall.
| Project Scope | Estimated Time (DIY) |
| 3 to 4 beams (small room) | 4 to 6 hours |
| 5 to 7 beams (medium room) | 6 to 10 hours |
| 8 to 10 beams (large room) | 1 to 2 days |
| Coffered grid pattern | 2 to 3 days |
| With professional help | Half the DIY time estimate |
Faux Wood Beams: Maintenance and Care
One of the biggest advantages of faux beams is how little maintenance they need. Dust them occasionally with a soft cloth or duster. That is genuinely all most homeowners ever need to do.
Source: @champagne_taste_design
If the finish dulls over time, a fresh coat of paint or stain restores them instantly. Polyurethane foam beams never need sealing, treating, or pest control. They are truly a set-it-and-forget-it home upgrade.
| Maintenance Task | Frequency |
| Dust or wipe down beams | Every 2 to 3 months |
| Touch up paint or stain | Every 5 to 10 years |
| Check for loose mounting | Once a year |
| Caulk touch-up if needed | Every 3 to 5 years |
| Pest or rot treatment | Never needed for polyurethane |
Faux Wood Beams Ceiling Trends in 2026
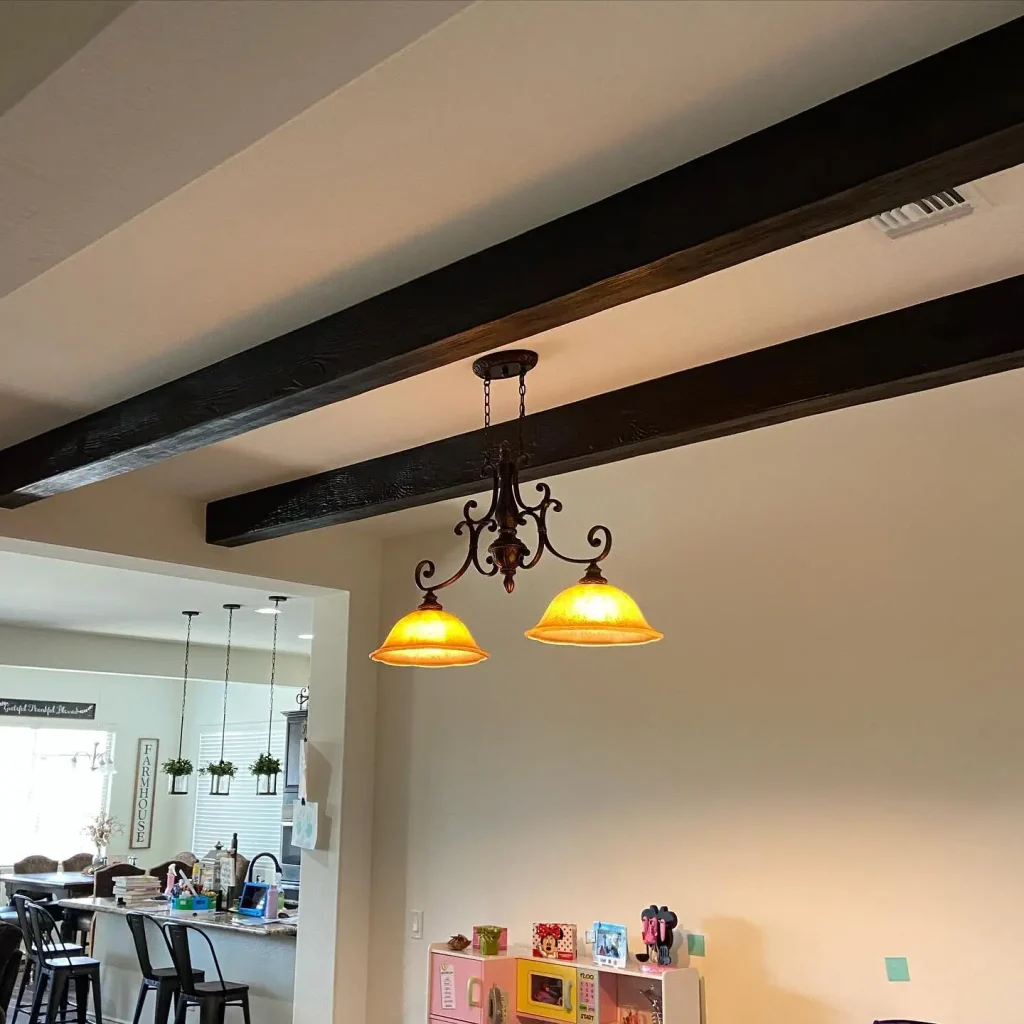
The hottest trend right now is the black faux beam ceiling. Dark beams on white ceilings create a bold, high-contrast look. This style has exploded in popularity in modern farmhouse and transitional homes.
Whitewashed faux beams are also extremely trendy. The pale, bleached wood look feels light and coastal. It works beautifully in beach houses and casual, airy living spaces. Wide-plank style beams with a hand-hewn texture are also growing fast in popularity.
| 2025 Trend | Style Description |
| Black Faux Beams | Bold contrast on white ceilings |
| Whitewashed Beams | Light, coastal, and airy aesthetic |
| Wide Hand-Hewn Beams | Rustic farmhouse character |
| Two-Tone Beam Ceilings | Mix of light and dark beams |
| Exposed Beam Grid Pattern | Structured coffered look |
Faux Wood Beams and Shiplap: The Perfect Combination
Combining faux wood beams with a shiplap ceiling is a match made in design heaven. The flat texture of shiplap provides a perfect backdrop for bold, dimensional beams. The two materials complement each other beautifully.
Install the shiplap ceiling first, then add the faux beams on top. This layering creates incredible depth and visual interest. Use matching or contrasting stain tones between the beams and shiplap. Either choice looks absolutely stunning.
| Design Combination | Visual Effect |
| White Shiplap + Dark Beams | Classic farmhouse contrast |
| Gray Shiplap + Gray Beams | Sophisticated and tonal look |
| Natural Wood Shiplap + Beams | Warm, cohesive cabin feel |
| White Shiplap + White Beams | Subtle texture and dimension |
| Shiplap Walls + Beam Ceiling | Fully immersive rustic interior |
How to Choose the Right Size Faux Wood Beams
Beam size should match the scale of the room. Small rooms need smaller, thinner beams. Large rooms with high ceilings can handle thick, wide beams. Getting this proportion right is the single most important design decision.
A good rule of thumb is one inch of beam width for every foot of ceiling height. So an eight-foot ceiling suits beams six to eight inches wide. A fourteen-foot ceiling can support beams ten to twelve inches wide comfortably. Always visualize with cardboard cutouts before buying.
| Ceiling Height | Recommended Beam Size |
| 8 feet | 4 to 6 inches wide, 3 to 4 inches deep |
| 9 to 10 feet | 6 to 8 inches wide, 4 to 5 inches deep |
| 11 to 12 feet | 8 to 10 inches wide, 5 to 6 inches deep |
| 14+ feet (vaulted) | 10 to 14 inches wide, 6 to 8 inches deep |
| Low ceiling (under 8 ft) | 3 to 4 inches wide maximum |
Return on Investment: Are Faux Wood Beams Worth It?
Faux wood beams offer one of the best returns on investment in home improvement. The cost is relatively low. But the visual and perceived value impact is extremely high. Buyers consistently rate beam ceilings as highly desirable features.
A professionally installed faux beam ceiling in a living room can add $3,000 to $8,000 in perceived home value. At a total installation cost of $500 to $1,500, the ROI is outstanding. It is one of the most cost-effective ways to elevate your home’s appeal.
| ROI Factor | Details |
| Average Install Cost | $500 to $1,500 total |
| Perceived Value Added | $3,000 to $8,000 or more |
| Buyer Appeal Rating | Very high – major selling feature |
| Time to Install | One weekend for most rooms |
| Long-Term Durability | 20 to 30+ years with no upkeep |
Where to Buy Faux Wood Beams
Many home improvement stores carry faux wood beams. Home Depot and Lowe’s stock several styles in store. Online retailers like Amazon offer hundreds of styles and sizes. Specialty companies like Barron Designs and Woodland Creek sell premium options.
Always order samples before committing to a full purchase. Examine the texture, weight, and finish in person. Check return policies before ordering large quantities. Buying from specialty suppliers often gives you better customization options and quality.
| Where to Buy | Best For |
| Home Depot or Lowe’s | Standard sizes, in-store pickup |
| Amazon | Wide variety, fast shipping |
| Barron Designs | Premium quality, custom sizes |
| Woodland Creek Furniture | Rustic and reclaimed styles |
| Local lumber yards | Custom cuts and specialty finishes |
Faux Wood Beams for Rental Homes and Apartments
Renters can enjoy faux wood beams too. Some products use removable adhesive strips instead of screws. These cause no damage to the ceiling and can be removed at the end of the lease.
Lightweight foam beams work best for rental installations. They are easy to put up and take down. Always discuss large decorative projects with your landlord first. Many landlords actually love improvements that add value to their property.
| Rental-Friendly Option | Why It Works |
| Adhesive-Mounted Beams | No screws or ceiling damage |
| Lightweight Foam Beams | Easy to install and remove |
| Smaller Beam Profiles | Less weight, safer adhesive hold |
| Talk to Your Landlord First | May get permission for permanent install |
| Document Before and After | Protects your security deposit |
Faux Wood Beams Ceiling for Basement Rooms
Basements often feel cold, dark, and uninviting. Faux wood beams immediately add warmth and character. They transform a basic concrete ceiling into a cozy, finished living space.
Basements typically have lower ceilings. Choose thin, narrow beams to avoid making the space feel cramped. Run beams in one direction only for a clean, simple look. Warm stain tones make basement spaces feel significantly cozier and more inviting.
| Basement Design Tip | Recommendation |
| Beam Size | Thin and narrow to preserve headroom |
| Color Choice | Warm brown or honey oak tones |
| Number of Beams | Keep it minimal, 3 to 5 beams |
| Direction | Run beams lengthwise for more space |
| Lighting Addition | Add rope lights above beams for warmth |
How Faux Wood Beams Affect Room Acoustics
Faux wood beams add surface irregularity to the ceiling. This breaks up sound waves and reduces echo. Rooms with beam ceilings feel noticeably quieter and more comfortable to spend time in.
For even better acoustic performance, add acoustic insulation panels between beams. These blend into the ceiling and absorb sound very effectively. This combination is ideal for home theaters, recording spaces, and home offices.
| Room Type | Acoustic Benefit of Faux Beams |
| Living Room | Reduces echo for better conversation |
| Home Theater | Improves sound quality noticeably |
| Home Office | Quieter, less distracting environment |
| Dining Room | Less noise echo during meals |
| Bedroom | Calmer, more restful acoustic feel |
How to Find a Faux Wood Beam Installer Near You
Search for local interior finish carpenters and ceiling specialists. Look on Google, Houzz, and Angi for contractors with specific faux beam experience. Ask to see photos of completed projects before hiring anyone.
Get three detailed quotes before making a decision. Ask each contractor about their installation method and materials. A good installer will advise you on beam sizing, spacing, and finish options. Choose someone who communicates clearly and shows genuine enthusiasm for the project.
| What to Ask Your Installer | Why It Matters |
| Can I see past faux beam projects? | Confirms real relevant experience |
| What brand of beams do you use? | Ensures quality material choice |
| How do you attach the beams? | Nailer method is best practice |
| What is included in the quote? | Avoids hidden costs surprises |
| How long will it take? | Helps you plan and prepare ahead |
Frequently Asked Questions About Faux Wood Beams Ceilings
Q1: Are faux wood beams hard to install yourself?
No, they are quite easy for most homeowners. The process involves installing nailer boards and sliding hollow beams over them. Basic tools and a free weekend are all you need. Start with a small room to build your confidence before tackling larger spaces.
Q2: How much do faux wood beams cost in total?
A complete room project typically costs between $300 and $1,500 depending on room size and beam style. Individual beams range from $30 to $150 each. DIY installation eliminates labor costs entirely. Compare this to real wood beams which can cost $5,000 to $15,000 or more.
Q3: Can faux wood beams be used on outdoor ceilings?
Yes, absolutely. Use polyurethane foam beams specifically rated for exterior use. These resist UV rays, moisture, insects, and temperature changes. They will not warp or rot like real wood. They are perfect for covered porches, patios, and pergola ceilings.
Q4: How do I make faux beams look like real wood?
Apply gel stain in multiple uneven layers to mimic natural wood variation. Use a wire brush to lightly scratch the surface along the grain direction. Dab darker paint into the grain lines for depth. Add knot details with a small brush. Study real wood photos as reference throughout the process.
Q5: How long do faux wood beams last?
High-quality polyurethane faux beams last 20 to 30 years or more with virtually no maintenance. They do not rot, warp, crack, or attract insects. Indoor beams essentially last forever. Outdoor beams last just as long when installed with proper UV-resistant materials.
Conclusion
Faux wood beams are one of the most transformative and cost-effective upgrades you can make to any ceiling. They deliver the rich, architectural beauty of real wood at a fraction of the cost and effort. Whether your style is rustic farmhouse, sleek modern, or cozy coastal, faux beams fit perfectly. The warmth and character they bring to a room is truly unmatched by any other single ceiling upgrade.
You now have everything you need to plan and execute your faux wood beam ceiling project with complete confidence. You know the costs, the installation steps, the best styles, and the top design tips. Do not let another day pass with a plain, boring ceiling above you. Start planning your faux wood beam ceiling today and give your home the stunning, character-filled upgrade it truly deserves. HomeFixTrends is with you every step of the way.