Commercial gym memberships cost hundreds of dollars every year. The commute adds thirty minutes to every workout. The equipment is always occupied when you need it. And the hours never quite fit your schedule. You keep paying and keep compromising.
A garage gym solves every one of those problems permanently. Your equipment. Your hours. Your rules. No commute, no waiting, no membership fees after the initial setup.

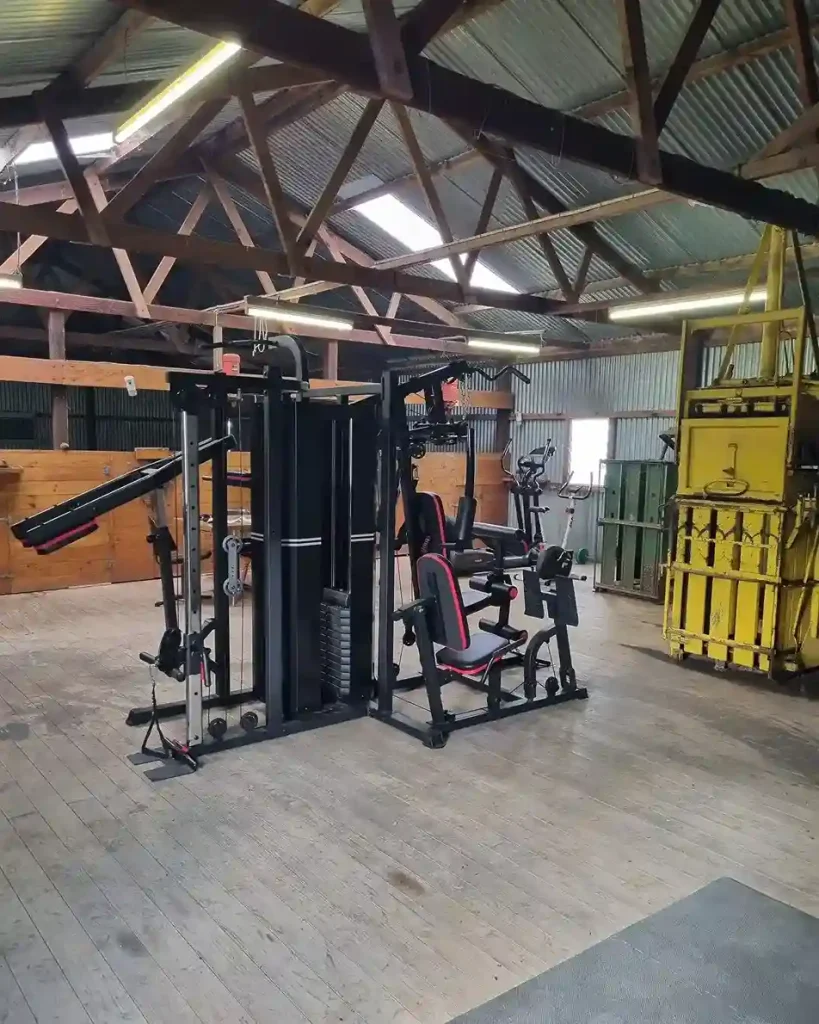
source: @jeffb0572
Whether you have a full two-car garage or just half of a single car space, these 30 garage gym ideas give you everything you need to design, build, and equip the perfect home workout space.
1. Plan Your Garage Gym Before Buying Any Equipment
Planning prevents the most common garage gym mistake — buying equipment that does not fit the space or the workout style. A garage filled with the wrong equipment wastes money and creates a gym nobody uses. A garage fitted with the right equipment for the available space creates a gym that gets used every single day.

Measure the garage carefully before purchasing anything. Note ceiling height — a minimum of eight feet is needed for overhead pressing and pull-ups. Identify which walls are load-bearing for wall-mounted equipment.

Decide which workouts matter most to you — strength training, cardio, functional fitness, or a combination. Every equipment decision should follow from those priorities rather than from what looks impressive in a showroom.
| Workout Style | Essential Equipment | Space Needed | Budget Start |
|---|---|---|---|
| Powerlifting | Barbell, rack, bench, plates | 10×10 ft | $800–$1,500 |
| Olympic lifting | Barbell, plates, platform | 12×12 ft | $1,000–$2,000 |
| Functional fitness | Rack, barbell, kettlebells, pull-up bar | 12×15 ft | $1,200–$2,500 |
| Cardio focused | Treadmill or rower, bike | 8×12 ft | $500–$2,000 |
| Mixed training | Rack, barbell, cardio machine, cables | 15×20 ft | $2,000–$5,000 |
2. Design a Half Garage Gym Layout
A half garage gym is the most popular configuration for homeowners who need to share the space with a vehicle or storage. One half of the garage is dedicated to the gym. The other half remains functional for its original purpose. The two zones coexist comfortably with smart planning.

source: @bryan_the_horn
Position the gym zone along the back wall of the garage away from the vehicle entry. This keeps equipment away from car doors and the elements.

A power rack against the back wall, a barbell storage rack on a side wall, and rubber flooring covering the gym half creates a complete, functional strength training setup. Wall-mounted storage for accessories keeps the floor clear and the vehicle side fully accessible.
| Half Garage Gym Zone | Dimensions | Equipment That Fits |
|---|---|---|
| One car half (10×10 ft) | 100 sq ft | Rack, barbell, plates, bench |
| One car half (10×12 ft) | 120 sq ft | Rack, bench, dumbbells, storage |
| Two car half (10×20 ft) | 200 sq ft | Full strength + cardio machine |
| Two car half (12×20 ft) | 240 sq ft | Full gym with cable machine |
3. Build a Full Garage Gym in a Single Car Garage
A single car garage converted entirely to a gym provides 200–280 square feet of dedicated workout space. That is more than enough for a complete home gym covering strength training, cardio, and functional fitness.
The full conversion eliminates the compromise of sharing the space with a vehicle and allows a genuinely comprehensive equipment selection.

source: @homefixtrends
Position the power rack centrally or against the back wall where ceiling height is maximum. Dedicate one full wall to plate storage, barbell storage, and accessory organization. Run a cardio machine along a side wall where it does not interfere with free weight movement. Install rubber flooring across the entire floor.
Add a wall-mounted pull-up station in a remaining clear wall space. A single car garage done right rivals commercial gym facilities for functional training capability.
- Install rubber flooring first before any equipment — it protects the concrete and reduces noise
- Position the rack where ceiling height allows a barbell overhead press with full arm extension
- Dedicate an entire wall to organized storage to keep the floor clear and functional
- Mount a mirror on one full wall to check form during lifts without a training partner
- Install a ceiling fan for airflow — garage gyms become extremely hot in summer without ventilation
4. Design a Two-Car Garage Gym for Maximum Space
A two-car garage converted to a full gym provides 400–600 square feet of workout space. This is enough for a genuinely comprehensive gym that rivals many commercial facilities.
The extra space allows equipment zones that cannot exist in smaller setups — a dedicated cardio area, a functional training zone, a stretching and recovery area, and a full strength training section.

source: @homegymbinbrook
Plan distinct zones across the two-car footprint. A strength zone with the rack, bench, and free weights. A cardio zone with a treadmill, rower, or assault bike. A functional zone with open floor space for kettlebells, battle ropes, and bodyweight work.
A mobility and recovery zone with a foam roller station, stretching mat, and recovery tools. This zoned approach creates a gym that supports a complete fitness program without any compromises.
| Two-Car Garage Zone | Dimensions | Equipment |
|---|---|---|
| Strength zone | 15×15 ft | Rack, bench, barbell, plates, dumbbells |
| Cardio zone | 10×15 ft | Treadmill, rower, assault bike |
| Functional zone | 10×15 ft | Open floor, kettlebells, battle ropes |
| Storage and recovery | 5×15 ft | Wall storage, foam rollers, mats |
5. Install Rubber Flooring as the Foundation
Rubber flooring is the single most important infrastructure investment in any garage gym. It protects the concrete from dropped weights.
It reduces noise and vibration that transmits to the house. It provides a non-slip surface for lifting and conditioning. And it makes the garage feel like a proper gym rather than a converted storage space.

source: @homefixtrends
Rubber stall mats from agricultural supply stores — typically 4×6 feet and 3/4 inch thick — provide excellent performance at the lowest cost. They cost $40–$60 each and cover the floor efficiently with minimal cutting.
High-density rubber gym tiles in 2×2 or 3×3 foot sections are more expensive but easier to install and replace individually. A dedicated lifting platform built from plywood and rubber provides maximum protection in the primary lifting zone and can be built for $100–$200.
| Flooring Option | Cost per sq ft | Thickness | Best Use |
|---|---|---|---|
| Rubber stall mats | $1–$2 | 3/4 inch | Full garage coverage |
| Interlocking gym tiles | $2–$4 | 3/8–3/4 inch | Modular coverage |
| Rolled rubber | $2–$5 | 1/4–3/8 inch | Large areas |
| DIY lifting platform | $0.50–$1.50 | 3–4 inches | Primary lifting zone |
| Foam tiles | $0.50–$1.50 | 1/2–3/4 inch | Light use, stretching only |
6. Choose the Right Power Rack for Your Space
The power rack is the centerpiece of most garage gyms. It determines what barbell exercises are possible, how safe solo training is, and how much vertical space the gym requires. Choosing the right rack for the available space and the intended training style is one of the most important garage gym decisions.

source: @homefixtrends
A full cage rack provides the maximum safety with four uprights and safety bars on all sides. It requires the most floor space — typically 4×4 feet — and ceiling clearance of at least eight feet. A half rack or squat stand uses less floor space and suits lower ceilings but provides less safety for solo heavy lifting.
A wall-mounted folding rack is the best choice for half garage setups — it folds flat against the wall when not in use and extends into the space only during training.
| Rack Type | Floor Space | Ceiling Needed | Safety Level | Best For |
|---|---|---|---|---|
| Full power cage | 4×4 ft | 8 ft+ | Maximum | Solo heavy lifting |
| Half rack | 4×3 ft | 7.5 ft+ | High | Moderate loads |
| Squat stand | 4×2 ft | 7 ft+ | Moderate | Supervised lifting |
| Wall-mounted folding | 3×1 ft folded | 7.5 ft+ | High | Half garage gym |
| Combo rack/cable | 5×4 ft | 8 ft+ | Maximum | Versatile training |
7. Build a Budget Garage Gym Under $500
A genuinely effective garage gym is achievable for under $500 with smart purchasing decisions. Budget does not mean ineffective — it means prioritizing the equipment that delivers the most workout value per dollar spent. A barbell and plates cover the majority of the most effective strength training movements ever developed.
A 300-pound barbell and plate set costs $200–$350 and covers squats, deadlifts, bench press, overhead press, and rows. A used power rack found online costs $100–$200 and provides the safety needed for solo training with heavy loads.

Rubber stall mats at $50–$100 protect the floor. A wall-mounted pull-up bar at $30–$50 adds bodyweight upper body training. The entire setup costs $380–$700 and handles progressive strength training for years without any additional investment.
- Search Facebook Marketplace, Craigslist, and OfferUp for used gym equipment at 50–70% off retail
- Barbell and plate sets are the highest priority purchase for any strength training garage gym
- A pull-up bar is the highest value-per-dollar bodyweight equipment in any home gym
- Resistance bands at $20–$40 add dozens of exercises with zero floor space requirement
- Gymnastic rings at $30–$50 provide a full upper body bodyweight training system
8. Design a Garage Gym for Powerlifting
A powerlifting garage gym is optimized for the squat, bench press, and deadlift — the three competition lifts. The equipment selection is focused and intentional. Everything in the gym exists to make these three movements safer, more comfortable, and more progressive. Nothing is included simply because it looks impressive.

A competition-specification power rack with adjustable safeties, a competition barbell rated to 1500 pounds, bumper plates or iron plates to 500 pounds minimum, and a proper adjustable bench are the essentials.
A deadlift platform — built from three layers of plywood topped with rubber — protects the floor and the barbell during heavy deadlift work. A chalk bucket, a proper belt, and wrist wraps complete the powerlifting setup without any unnecessary additions.
| Powerlifting Equipment | Specification | Cost Range |
|---|---|---|
| Power rack | Competition height, adjustable safeties | $400–$1,500 |
| Competition barbell | 20kg, 28-29mm shaft, 220,000 PSI tensile | $200–$800 |
| Iron or bumper plates | 300–500 lbs total | $300–$800 |
| Adjustable bench | 0–90 degrees, 1,000 lb rated | $200–$600 |
| Deadlift platform | 8×8 ft, 3-layer plywood + rubber | $100–$200 DIY |
9. Create a Garage Gym for Olympic Weightlifting
Olympic weightlifting — the snatch and clean and jerk — requires specific equipment that differs significantly from powerlifting. The barbell must be a rotating-sleeve Olympic bar.
Bumper plates are essential — they absorb impact when dropped from overhead. The lifting platform must be large enough and durable enough to handle repeated drops from significant heights.

source: @homefixtrends
An 8×8 foot lifting platform provides the minimum safe lifting area. Build it from three sheets of 3/4-inch plywood layered on the concrete. Top the center section with a thin rubber mat and leave the outer edges in natural wood for a clean, professional appearance.
Install eye bolts in the garage ceiling above the platform for attaching jerk blocks and safety straps. Ceiling height is the most critical factor — a minimum of ten feet is strongly recommended for overhead work.
10. Build a Functional Fitness Garage Gym
A functional fitness garage gym supports the varied, high-intensity training style popularized by CrossFit and similar programs.
The equipment must support barbell work, gymnastics movements, cardio conditioning, and loaded carries simultaneously. The layout must accommodate rapid transitions between stations during workouts.

source: @homefixtrends
The essential functional fitness equipment list includes a power rack, a competition-style barbell, bumper plates, pull-up bar, assault bike or rowing machine, kettlebells in multiple weights, and a jump rope. Keep the center of the garage clear for floor work, burpees, box jumps, and loaded carries.
Mount all storage on walls to maximize usable floor space. For a functional fitness setup that doubles as a personal training studio or hobby-focused workout space, explore these hobby room design ideas for room organization strategies that work equally well in a training space.
| Functional Fitness Essential | Purpose | Cost Range |
|---|---|---|
| Power rack with pull-up bar | Barbell and gymnastics | $400–$1,500 |
| Bumper plates 200–300 lbs | Safe drops on platform | $300–$700 |
| Assault bike or rower | Conditioning | $300–$1,000 |
| Kettlebells (set of 3–5) | Loaded carries, swings | $100–$300 |
| Gymnastics rings | Bodyweight training | $30–$60 |
| Jump rope (speed) | Conditioning, coordination | $15–$50 |
11. Add a Pull-Up Station to Any Garage Gym
A pull-up bar is one of the highest-value additions to any garage gym. It adds an entire dimension of upper body training for almost no cost.
Pull-ups, chin-ups, hanging leg raises, muscle-ups, and ring work all originate from a solid overhead bar. No other single piece of equipment delivers as many training possibilities per dollar.

source: @reconstructed_human
A ceiling-mounted pull-up bar is the most stable and versatile option for a garage. Mount it directly into the ceiling joists with heavy-duty lag bolts.
Set it at a height that allows full dead-hang with feet two to four inches above the floor. A wall-mounted pull-up station saves space and costs less than a standalone unit. Attach gymnastic rings to the pull-up bar for an immediate expansion of training possibilities.
12. Install a Wall-Mounted Folding Squat Rack
A wall-mounted folding squat rack is the best solution for a half garage gym or any space-constrained setup. It mounts directly to the wall studs and folds completely flat when not in use. The folded profile is typically six to eight inches from the wall. Folded out, it provides a full rack with safeties for solo barbell training.

The wall mounting must attach to solid structural framing — not just drywall or the garage siding. Locate and mark all wall studs before ordering a folding rack.
Most folding racks require a minimum stud spacing attachment of four studs — typically 48 to 64 inches depending on stud spacing. Install a piece of 3/4 inch plywood across the studs behind the mounting position for a solid, continuous attachment surface that distributes the load effectively.
| Folding Rack Feature | Why It Matters |
|---|---|
| Fold-flat profile | Saves 18–30 inches of floor depth when not in use |
| Stud mounting requirement | Structural attachment to framing — not drywall |
| Safety bar adjustment | Solo training safety without a spotter |
| J-hook height options | Accommodates different lifters and exercises |
| Weight capacity | Minimum 500 lbs recommended for serious training |
13. Design a Cardio-Focused Garage Gym Layout
A cardio-focused garage gym maximizes equipment for aerobic training, conditioning, and fat loss. The equipment selection prioritizes cardiovascular output over maximum strength development. This setup suits runners, cyclists, and general fitness enthusiasts who want structured indoor cardio options regardless of weather.

source: @cityofwhiterock
Position the treadmill along a wall where the user faces into the room rather than facing the wall. This reduces the psychological claustrophobia that facing a blank wall creates during long cardio sessions.
Install a small wall-mounted TV or tablet holder at eye level for entertainment during steady-state cardio. A rowing machine requires approximately 8×4 feet of floor space during use. A stationary bike needs only 2×4 feet. An assault bike needs 3×4 feet and is the most conditioning-effective cardio machine per square foot.
| Cardio Machine | Space Required | Conditioning Level | Cost Range |
|---|---|---|---|
| Treadmill | 3×6 ft | Moderate | $400–$3,000 |
| Rowing machine | 4×8 ft | High | $300–$1,500 |
| Assault bike | 3×4 ft | Very High | $400–$800 |
| Stationary bike | 2×4 ft | Moderate | $200–$2,000 |
| Ski erg | 2×3 ft | Very High | $700–$900 |
14. Create a Garage Gym With a Cable Machine
A cable machine adds an enormous range of isolation and functional exercises that free weights alone cannot efficiently replicate.
Cable flyes, tricep pushdowns, lat pulldowns, cable rows, and face pulls all become possible with a dedicated cable station. The constant tension of a cable system provides a training stimulus fundamentally different from barbell and dumbbell work.
source: @southerncrossfitness
A functional trainer — a dual cable machine with independently adjustable pulleys — is the most versatile cable option for a garage gym. It takes up approximately 4×4 feet of floor space.
A single cable stack attached to the power rack via a cable attachment adds cable training to an existing rack without any additional floor footprint. Budget cable attachment kits for power racks cost $80–$200 and instantly expand the training options of any existing rack setup.
15. Set Up a Dumbbell Wall for Organized Storage
A wall-mounted dumbbell storage system turns a disorganized pile of dumbbells into a clean, organized training station.
Vertical dumbbell storage pegs mounted on a plywood backing board hold dumbbells by their head, keeping them accessible and off the floor. Horizontal A-frame dumbbell racks hold three to five pairs per tier in a compact footprint.

source: @matty_radical
A complete dumbbell set from five pounds to fifty pounds in five-pound increments provides the most useful range for most garage gym users.
Adjustable dumbbells — a single pair that adjusts from five to fifty or ninety pounds — save enormous space and cost compared to a full fixed dumbbell set. Store them on a dedicated two-dumbbell stand that takes up less than one square foot of floor space.
For organized storage solutions that keep workout equipment accessible and the gym floor clear, these craft room storage ideas offer wall storage and organization strategies that apply directly to a garage gym equipment wall.
| Dumbbell Storage Option | Space | Cost | Capacity |
|---|---|---|---|
| Wall-mounted peg board | 6×4 ft wall | $50–$100 DIY | 10–20 pairs |
| A-frame floor rack | 3×2 ft | $80–$200 | 5–15 pairs |
| Horizontal wall rack | 4×2 ft wall | $60–$150 | 6–12 pairs |
| Adjustable dumbbell stand | 1×1 ft | $30–$80 | 1 adjustable pair |
16. Build a Dedicated Lifting Platform
A lifting platform is the most important floor upgrade in any barbell garage gym. It protects the concrete from dropped weights. It protects the barbell from impact damage.
It defines the primary lifting zone within the larger gym space. And it provides a better surface for deadlifts and Olympic lifts than rubber mats alone.
Build a basic 8×8 foot platform from three sheets of 3/4-inch plywood. Glue and screw the first two sheets together for the base.

Cut the third sheet into two 2×8 foot side strips and leave the center 4×8 foot section bare plywood for the foot stance area. Cover the two side strips with horse stall rubber or bumper plate rubber.
The result is a platform that absorbs impact where the barbell lands while providing a stable surface where the lifter stands.
17. Maximize Vertical Storage on Garage Walls
Vertical wall storage is the single most effective strategy for keeping a garage gym organized and spacious. Every item stored on the wall is an item not consuming the floor space needed for training. A fully organized wall storage system transforms even a small garage gym from a cluttered obstacle course into a clean, efficient training environment.

source: @prxperformance
Install a series of 2-inch diameter steel pipes horizontally on the wall for barbell storage. Mount plate storage pegs between the barbell pipes for organized weight storage by denomination.
Add plywood-mounted peg hooks for resistance bands, jump ropes, lifting belts, and accessories. A pegboard panel section near the main training area keeps chalk, chalk balls, lifting chalk, and frequently needed accessories within easy reach during training.
| Wall Storage Element | Items Stored | DIY Cost |
|---|---|---|
| Horizontal pipe barbell rack | 4–8 barbells | $40–$80 |
| Plate storage pegs | All weight plates | $20–$50 |
| Pegboard panel | Small accessories | $20–$40 |
| Resistance band hooks | All resistance bands | $10–$20 |
| Shelf above storage | Bags, shoes, chalk | $30–$60 |
18. Add Mirrors for Form Checking and Space Perception
Mirrors in a garage gym serve two purposes. They allow lifters to check form on pressing, squatting, and hinging movements in real time — an enormous training safety and quality benefit when no training partner is present. And they make the garage gym feel significantly larger and more open than the actual square footage suggests.

source: @prxperformance
Install mirrors on the wall facing the primary lifting position. Full-length mirror panels can be purchased affordably at home improvement stores and attached to the wall with mirror adhesive and clips.
A horizontal run of mirrors at shoulder to ceiling height along one full wall provides the maximum form-checking benefit. Secure all mirror panels with safety mirror clips even when adhesive is used — dropped barbells create vibrations that can dislodge adhesive-only mirrors over time.
19. Control Temperature and Ventilation for Year-Round Training
A garage gym without proper temperature management is unusable in summer heat and winter cold. Temperature control is one of the most overlooked and most impactful garage gym comfort factors. A gym that is too hot or too cold in extreme seasons gets abandoned during those months — eliminating a significant portion of the year-round training benefit.

source: @leeharvey22
Install a ceiling fan as the minimum summer cooling solution. A portable air conditioner added during extreme heat periods handles the most intense summer conditions.
A garage-rated electric heater or a mini-split heat pump system provides efficient year-round temperature management at moderate cost. Insulating the garage door and any exterior walls significantly reduces the heating and cooling load and improves temperature stability throughout the day.
| Temperature Solution | Season | Cost | Effectiveness |
|---|---|---|---|
| Ceiling fan | Summer | $80–$200 | Moderate |
| Portable AC unit | Summer | $200–$500 | High |
| Garage-rated heater | Winter | $100–$300 | High |
| Mini-split system | Year-round | $800–$2,500 | Very High |
| Wall insulation | Year-round | $200–$800 | High (reduces load) |
20. Install Proper Lighting for a Safe Training Environment
Poor lighting is both unsafe and demotivating in a garage gym. A single dim overhead bulb creates shadows in the corners of the lifting area and makes it genuinely difficult to see rack heights, barbell position, and form details in mirrors. Proper lighting eliminates shadows, energizes the training atmosphere, and makes the gym feel professional and designed.

source: @garagegymrewired
Install LED shop lights — available in 4-foot and 8-foot lengths — directly on the ceiling grid or hung from the ceiling joists on chains. Space them across the full ceiling area for even, shadow-free illumination. LED shop lights provide bright, cool-toned daylight-spectrum light that suits a training environment better than warm residential lighting.
A 5000 Kelvin color temperature is the most popular choice for gym spaces. Total lighting cost for a full garage is typically $80–$200 in LED shop lights.
21. Create a Garage Gym for the Whole Family
A family garage gym accommodates multiple fitness levels, ages, and training styles simultaneously. The equipment selection must serve a teenager’s bodyweight training, a parent’s strength training, and a partner’s cardio conditioning without any single user’s needs dominating the space or the budget.

source: @kpexhomegymlab
A power rack with an integrated pull-up bar serves strength trainers of all levels. Adjustable dumbbells serve everyone from beginners to advanced lifters. A single cardio machine — a rowing machine or an assault bike — provides high-intensity conditioning for every fitness level.
A yoga mat and stretching area serves mobility and recovery work. Wall-mounted storage keeps everything organized and accessible to all family members equally. For boys’ bedroom design inspiration that connects to the adventurous, active lifestyle that a family gym supports, explore these boys bedroom ideas for room design that pairs with an active family culture.
| Family Gym Equipment | Who Uses It | Training Benefit |
|---|---|---|
| Adjustable dumbbells | Everyone | Strength at all levels |
| Power rack + pull-up bar | Teens and adults | Full strength and gymnastics |
| Rowing machine | Everyone | Full-body conditioning |
| Resistance bands | Everyone | Mobility, rehab, strength |
| Yoga mats | Everyone | Flexibility, recovery |
22. Design a Motivating Garage Gym Aesthetic
A garage gym that looks great feels better to train in. Motivation is a finite resource. A gym environment that is visually inspiring, organized, and personal reduces the activation energy required to begin every workout. Small aesthetic improvements deliver genuine training consistency benefits.

Paint the walls in a bold, energizing color — deep charcoal, midnight navy, or industrial grey. Mount motivational quotes or athlete imagery on the wall facing the primary lifting position.
Install a quality Bluetooth speaker system on the wall for music that drives training intensity. Add a whiteboard or chalkboard for tracking lifts, programming cycles, and personal records. Display personal records prominently — seeing the numbers you have already hit motivates you to beat them.
23. Add a Sauna or Recovery Station to the Garage Gym
A recovery station in the garage gym recognizes that recovery is as important as training for long-term fitness progress. A dedicated recovery area with the right tools transforms the garage gym from a place of pure exertion into a complete fitness facility.

A two-person infrared sauna fits in a 4×4 foot footprint and costs $800–$2,000 for a quality unit. It provides cardiovascular benefits, muscle recovery acceleration, and stress reduction.
A cold plunge tub — a chest freezer modified with a chiller — fits in a 2×4 foot space for contrast therapy alongside the sauna. A foam rolling station, a massage gun charging dock, and a stretching mat complete the recovery zone at minimal additional cost.
| Recovery Tool | Space Required | Cost | Recovery Benefit |
|---|---|---|---|
| Infrared sauna (2-person) | 4×4 ft | $800–$2,000 | Muscle recovery, cardiovascular |
| Cold plunge tub | 2×4 ft | $200–$1,500 | Inflammation, alertness |
| Foam roller station | 2×2 ft | $20–$60 | Myofascial release |
| Massage gun + dock | Wall mounted | $80–$400 | Targeted muscle recovery |
| Stretching mat | 3×6 ft | $20–$60 | Flexibility, mobility |
24. Build a Garage Gym With a Home Office Corner
A home office corner within the garage gym creates a productive dual-purpose space. The garage handles both fitness and professional work from the same footprint.
This combination suits remote workers, freelancers, and entrepreneurs who want their professional workspace to sit adjacent to their training space for efficient daily transitions.

Partition the office corner from the training area with a simple shelving unit or a curtain on a ceiling track. The office zone needs a desk, a comfortable chair, reliable internet connection, and proper task lighting.
Keep the office corner at the opposite end of the garage from the weightlifting area to prevent dust, chalk, and rubber particles from contaminating the workspace.
For a complete home office design that works within a garage gym space, explore this comprehensive guide on home office ideas.
25. Install a TV or Screen for Guided Workouts
A wall-mounted TV or monitor in the garage gym enables online training programs, guided workout videos, virtual coaching, and progress tracking software. The addition of a screen eliminates the need for a separate device during training and keeps the workout flow uninterrupted.

source: @nlj_joinery_and_build
Mount the TV at eye level when standing — approximately 60 to 66 inches from the floor to the center of the screen. Choose a display size appropriate for the garage dimensions — a 43-inch TV suits most garage sizes comfortably.
Use a VESA wall mount with a tilting arm for angle adjustment from different positions in the gym. Run an HDMI cable from a mounted streaming device for a clean, wireless-free connection. The TV becomes the programming hub, the coaching resource, and the entertainment system all in one installation.
For inspiration on styling and organizing the wall space around a mounted screen beautifully, explore these décor ideas above the TV for approaches that work equally well in a garage gym as in a living room.
26. Create a Garage Gym With a Dedicated Stretching Zone
A dedicated stretching and mobility zone in the garage gym acknowledges that flexibility and mobility work is as training-critical as strength and conditioning. Without a designated space, stretching always gets pushed aside in favor of more equipment-intensive work. A dedicated zone makes the practice habitual and consistent.

Define the stretching zone with a large, high-quality yoga mat or a dedicated rubber flooring section separate from the main lifting area. Mount a wall-mounted mirror in this zone for checking alignment during mobility work.
Add a foam roller, lacrosse balls, resistance bands, and a yoga block to a small wall-mounted shelf beside the stretching zone. Position the zone away from the main traffic flow of the gym so it remains accessible and appealing during and after training.
27. Design a Minimalist Garage Gym With Essential Equipment Only
A minimalist garage gym contains only the equipment that delivers the most training value per square foot and per dollar. Everything non-essential is eliminated.
The result is a clean, focused training environment that uses the garage space most efficiently and costs significantly less than a fully equipped gym.

The minimalist garage gym essentials are a barbell, a set of plates to 300 pounds, a pull-up bar, and rubber flooring. These four elements support an enormous range of effective training — squats, deadlifts, overhead presses, rows, pull-ups, and all barbell variations.
Add a set of three to five kettlebells and a jump rope for conditioning. The entire minimalist setup costs $400–$800 and fits comfortably in a 10×10 foot space. Less equipment means more space, more focus, and a gym that never feels cluttered.
| Minimalist Setup | Items | Total Cost | Space Needed |
|---|---|---|---|
| Barbell only | Bar + plates + floor | $250–$500 | 8×10 ft |
| Barbell + pull-up | Above + bar | $300–$600 | 8×10 ft |
| Full minimalist | Above + kettlebells + rope | $400–$800 | 10×10 ft |
28. Add Specialty Equipment for Advanced Training
Once the fundamental equipment is in place and training is consistent, specialty equipment adds specific capabilities that standard garage gyms lack.
Specialty bars, cable machines, kettlebells of unusual weights, and conditioning equipment all add training dimensions that keep workouts challenging and progressive over years.

A safety squat bar allows heavy lower body training with reduced shoulder stress — invaluable for lifters with shoulder injuries or mobility limitations. A trap bar enables a mechanically advantageous deadlift variation that suits most body types.
A belt squat machine provides heavy leg training without axial spinal loading. A GHD — glute ham developer — develops posterior chain strength that transfers directly to squats and deadlifts. Each specialty item solves a specific training problem and extends the productive life of the garage gym significantly.
29. Build a Garage Gym That Doubles as an Entertaining Space
A well-designed garage gym can transform into an entertaining space for gatherings when not in active training use. Foldable and movable equipment creates flexibility between gym and party configurations.
Built-in seating along the walls serves as spectator seating during events. A quality sound system already installed for training sets the atmosphere for entertaining equally well.

Folding gym equipment — a folding squat rack, folding benches, and plate trees on wheels — all move quickly to create an open floor plan for gatherings. A compact bar setup with a mini-fridge mounted under a wall shelf completes the entertainment transition. The garage gym that entertains well pays for itself through reduced venue costs and increased hosting frequency.
For entertaining space inspiration that translates from indoors to a garage setting, explore these dark brown couch living room ideas for rich, warm design approaches that create the right atmosphere in any gathering space.
30. Plan for Growth and Evolution of Your Garage Gym
The best garage gyms evolve over time. Starting minimally and adding equipment as training needs, budget, and space understanding develop produces a better outcome than trying to build the perfect gym immediately.
Every experienced garage gym owner has equipment they wish they had bought sooner and equipment they wish they had never purchased. Starting with the fundamentals and building deliberately avoids both regrets.

Leave intentional empty floor space in the initial setup. The empty space is not wasted — it is reserved for the equipment that experience will reveal as genuinely needed.
Keep equipment decisions tied to specific training goals rather than general impressions of what a good gym looks like. Review the gym setup annually and make one or two targeted additions or changes.
A garage gym that grows with the lifter is always more effective and more enjoyable than one that was built all at once and never reconsidered.
| Growth Stage | Training Level | Equipment to Add | Budget |
|---|---|---|---|
| Stage 1 (foundation) | Beginner | Barbell, plates, pull-up bar | $300–$600 |
| Stage 2 (expand) | Intermediate | Rack, bench, dumbbells | $500–$1,000 |
| Stage 3 (optimize) | Advanced | Cardio, cables, specialty bars | $500–$1,500 |
| Stage 4 (complete) | Expert | Recovery, specialty, aesthetics | $500–$2,000 |
Frequently Asked Questions (FAQs)
Q1: How much does a basic garage gym cost to set up?
A functional basic garage gym — barbell, plates, pull-up bar, and rubber flooring — costs $400–$800 in new equipment. Adding a used power rack from an online marketplace brings the total to $600–$1,200. A complete garage gym with rack, barbell, plates, dumbbells, and cardio machine costs $1,500–$4,000 depending on whether equipment is purchased new or used. Used equipment from Facebook Marketplace and Craigslist typically costs 40–60 percent less than new.
Q2: What is the minimum ceiling height for a garage gym?
Eight feet is the minimum ceiling height for most garage gym exercises. This allows overhead pressing, pull-ups, and most barbell work. Ten feet is strongly preferred for Olympic lifting — the snatch requires full overhead arm extension plus barbell height. If your ceiling is below eight feet, focus on deadlifts, rows, squats in a squat stand, and machine exercises that do not require overhead clearance.
Q3: Can I build a garage gym in half the garage and still park a car?
Yes. A half garage gym is one of the most popular configurations. Position the gym along the back wall and one side wall. A 10×10 to 10×12 foot gym zone fits comfortably in half of a standard two-car garage while leaving full access for one vehicle. A wall-mounted folding rack is the best equipment choice for a half garage gym — it occupies no floor space when folded.
Q4: What flooring is best for a garage gym?
Rubber horse stall mats — 4×6 feet and 3/4 inch thick — provide the best combination of performance, durability, and cost for most garage gyms. They cost $40–$60 each, install without adhesive, and last for decades. Interlocking rubber gym tiles are easier to install and replace individually but cost more per square foot. A dedicated lifting platform built from plywood and rubber provides maximum protection in the primary lifting zone.
Q5: How do I keep my garage gym cool in summer?
A ceiling fan provides the minimum useful cooling in mild summer temperatures. Add a portable air conditioner for hot climates or extreme summer heat periods. Ventilate by opening the garage door partially during training — even a few inches of opening creates significant airflow. Insulate the garage door if it is currently uninsulated — an insulated door significantly reduces heat gain from the sun hitting the door surface throughout the day.
Conclusion
A garage gym is one of the most valuable investments in long-term health and fitness you can make. The elimination of commute time, membership costs, and schedule constraints removes every barrier between you and your training. Once the equipment is in place, the only thing standing between you and a workout is the decision to begin. That friction-free access is what transforms inconsistent gym-goers into consistent daily trainers.
Start with the fundamentals. Barbell, plates, pull-up bar, and rubber flooring. Build from there as your training evolves and your budget allows. Every addition should solve a specific training problem or open a new training capability. The garage gym you build over time — carefully considered, deliberately equipped, and personally designed — will always outperform any commercial gym for the simple reason that it is completely yours.