
The shaker style has been around for over two hundred years for one reason: it works. Clean lines, flat center panel, simple frame. No ornate carvings, no complicated joinery, no specialty lumber.
If you have been putting off a kitchen refresh because new cabinet doors cost a fortune, learning how to build shaker cabinet doors yourself is the most direct way to get that result without the bill.

credits: @halonuma
A standard set of four doors from a cabinet retailer can run anywhere from $200 to $600. Built yourself, the same four doors cost roughly $40 to $80 in materials. The difference is a weekend, a few tools, and this guide.
This is a beginner-friendly build, but it is not a quick afternoon project. The actual cutting and assembly takes about 4 to 6 hours for a set of four doors. Add 24 hours of curing time before you can sand and finish. Plan for a full weekend from start to finish.
You do not need a full woodworking shop. A miter saw, a router table, and basic clamps will get you there.
Every step in this guide includes the measurement, the reason behind it, and the specific place where beginners tend to make a mistake. Work through it in order and do not skip the dry fit.
Grab your tape measure and let’s start with the opening.
- Measure your cabinet openings before buying any wood
- Calculate your rail and stile dimensions from your measurements
- Select and purchase the right lumber for shaker doors
- Cut your stiles to final length on a miter saw
- Cut your rails to final length accounting for the panel groove
- Set up your router table to cut the panel groove
- Route the groove along the inside edge of every rail and stile
- Cut the cope profile on both ends of each rail
- Cut your center panel to size
- Dry fit the door before applying any glue
- Glue and clamp the door frame together
- Let the glue cure completely before moving the door
- Sand the door faces smooth in stages
- Apply your chosen finish evenly across all surfaces
Measure your cabinet openings before buying any wood
Hold the tape measure inside the cabinet opening from left to right, then top to bottom. Write both numbers down immediately, do not trust your memory.
For overlay doors, which sit on top of the face frame rather than inside it, add 1/2 inch to each side of the opening for a standard overlay.
For inset doors, which sit flush inside the frame, subtract 1/8 inch from each dimension to allow for a clearance gap.
Measure every opening individually even if they look identical. Openings that appear the same size are often off by 1/16 to 1/8 inch from one another, and that gap will show once the doors are hung.
Calculate your rail and stile dimensions from your measurements
Stiles are the vertical pieces that run the full height of the door. Rails are the horizontal pieces that connect between them. Your stiles are cut to the full height of your finished door dimension. Your rails are shorter because they sit between the two stiles.
Here is the formula:
- Stile length = total door height
- Stile width = 2.25 inches (standard for shaker style)
- Rail length = total door width, minus both stile widths, plus 1 inch (this accounts for the 1/2 inch tongue on each end that fits into the stile groove)
- Rail width = 2.25 inches to match the stiles
Write these numbers on a piece of masking tape and stick it to your workbench before you cut anything.
Select and purchase the right lumber for shaker doors
Poplar is the best starting point for beginners who plan to paint their doors. It is affordable, widely available at big box stores, stable, and takes paint without blotching.
Maple is a better choice if you plan to stain, though it costs more and is harder to cut cleanly without sharp blades.
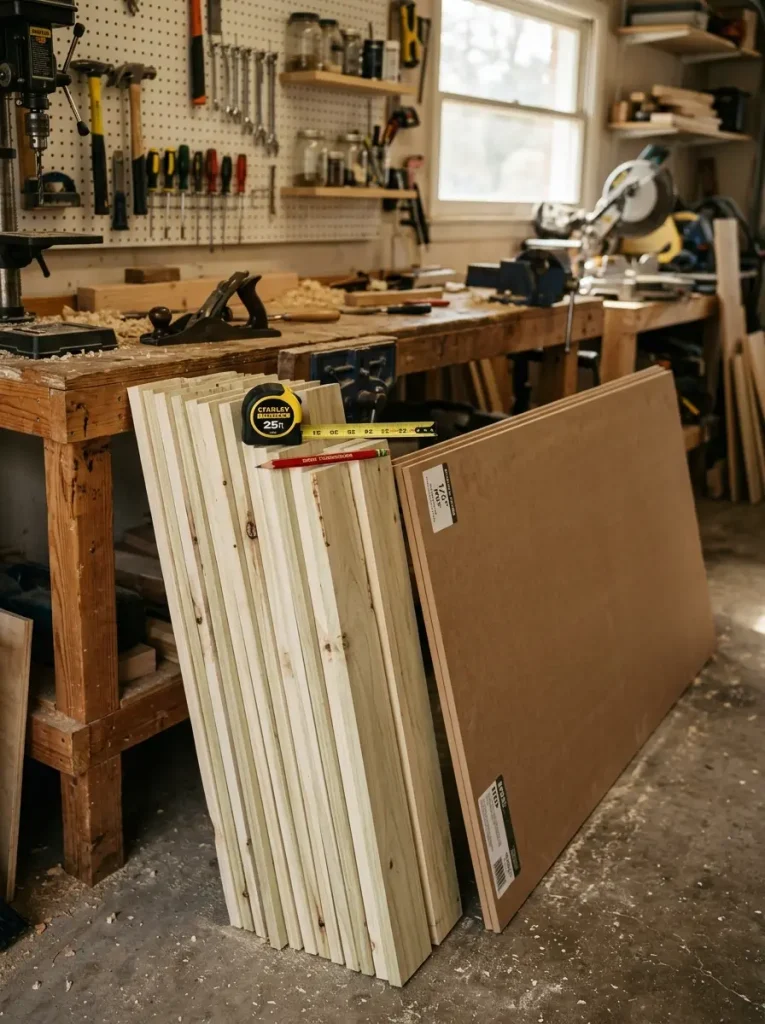
Buy 1×3 boards for your rails and stiles. Check each board in the store by holding one end up and sighting down the length.
Any board with a visible bow, cup, or twist goes back on the shelf. Warped lumber produces warped doors, and no amount of clamping during glue-up will fix a board that started crooked.
For the center panel, 1/4 inch MDF is the most beginner-friendly option: flat, consistent, and inexpensive.
Cut your stiles to final length on a miter saw
Set your miter saw to 90 degrees and confirm it is square before the first cut. A blade that is even slightly off will produce doors that do not sit flat against the cabinet frame.

Cut one end of each stile board first to give yourself a clean, fresh edge, then measure from that end and mark your final length with a pencil.
Cut all stiles for one door before moving to the next. Keeping cuts grouped by door helps you catch any measuring errors early rather than after you have processed all your lumber.
Cut your rails to final length accounting for the panel groove
Your rail length is not the same as the space between your stiles. Each rail has a 1/2 inch tongue on both ends that slides into the groove you will cut in the next step. That means your rail blank needs to be 1 inch longer than the visible space between the two stiles.

Set up your router table to cut the panel groove
The groove runs along the inside edge of every rail and stile and holds the center panel in place. It needs to be 1/4 inch wide and 3/8 inch deep, centered on the edge of your 3/4 inch thick boards.
Install the groove cutter portion of your cope and stick bit set into the router collet and tighten it fully. Set the fence so the bit is centered on the board edge.
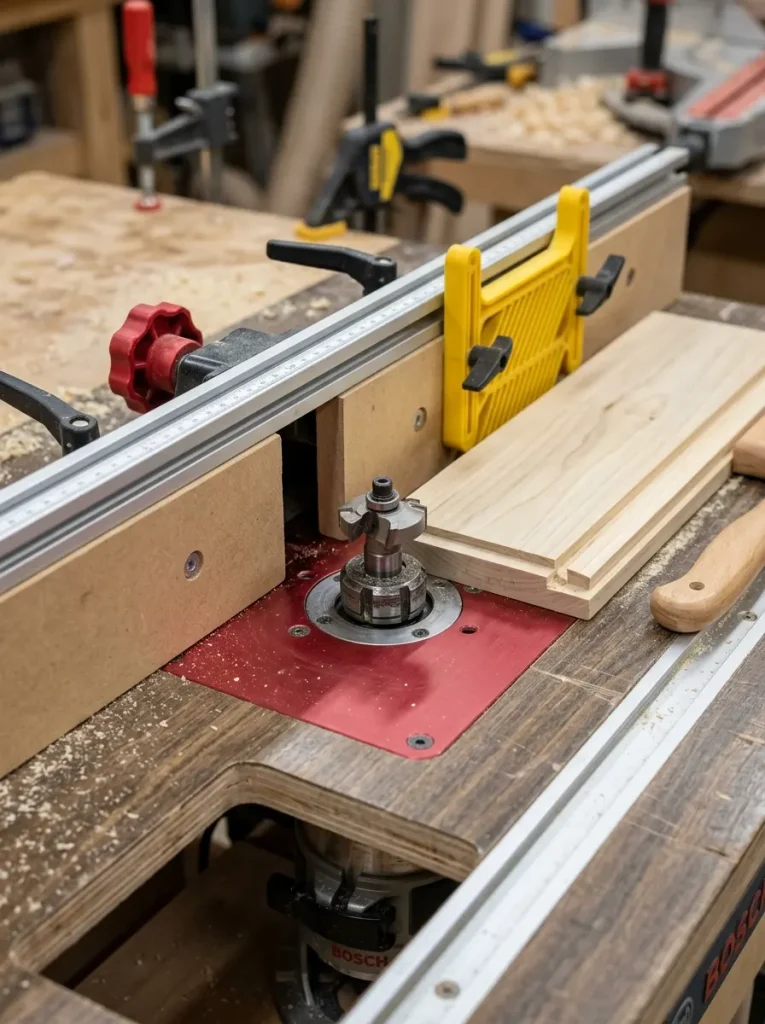
Run a scrap piece of the same thickness lumber through first and measure the groove with a ruler before touching any of your actual door parts.
The fence position is everything here, even a 1/16 inch offset will throw off how your panel sits inside the frame.
Route the groove along the inside edge of every rail and stile
Feed each board through the router table with the inside face down against the table surface and the edge that will face inward pressed firmly against the fence.

Keep your push speed steady. Feeding too fast tears the wood fiber and leaves a ragged groove. Feeding too slow burns the wood and can cause the bit to grab.
Route all four pieces for one door before moving to the next door’s parts. Grouping by door means that if your fence shifts even slightly mid-session, all four pieces for that door will still match each other.
Cut the cope profile on both ends of each rail
Switch your router bit to the cope cutter portion of the set. This cut goes across the end grain of each rail, not along the edge.
It creates the tongue that fits into the groove on your stiles and produces the small decorative profile that gives shaker doors their clean interior shadow line.

Use a backer board behind each rail when making this cut.
A scrap piece of wood held flush against the back edge of the rail prevents tear-out when the bit exits the cut. Without it, the wood fibers at the back corner will split off and leave a ragged edge that shows on the finished door. Cut both ends of every rail before changing any router settings.
Cut your center panel to size
The panel does not glue into the groove. It floats freely, which allows the wood to expand and contract with humidity changes without cracking the frame. Because of this, the panel needs to be cut slightly smaller than the full groove-to-groove measurement.

Measure the distance from the bottom of the groove on the top rail to the bottom of the groove on the bottom rail. Then measure groove to groove across the two stiles. Subtract 1/8 inch from both dimensions.
That is your panel size. Cut it from 1/4 inch MDF using a circular saw with a straightedge guide, or have the lumber yard make the cuts for you if you do not have a saw that handles sheet goods cleanly.
Dry fit the door before applying any glue
Slide the panel into the groove on the bottom rail first. Then fit both stiles onto the panel edges, pressing the cope ends of the rails into the stile grooves at the same time.

Do not force anything. Every joint should close with hand pressure alone. If a joint needs a mallet to close during the dry fit, something is cut too tight and needs to be addressed before glue enters the picture.
Check the door for square by measuring corner to corner diagonally in both directions. Both measurements must match within 1/16 inch. A difference larger than that means the frame is racked and your door will not hang straight on the cabinet.
Glue and clamp the door frame together
Apply a thin, even bead of wood glue to the cope profile on both ends of each rail only. Do not put glue in the panel groove and do not glue the panel itself. The panel must stay free to move.

Reassemble the door in this order:
- Slide the panel into the bottom rail groove
- Attach the left stile, pressing the rail tongues into the grooves firmly
- Attach the right stile the same way
- Set the top rail into place last
Place bar clamps across both rails, one near the top and one near the bottom. Tighten until glue squeezes out slightly at every joint, then stop.
Over-tightening starves the joint of glue and bows the frame. Re-check diagonal measurements immediately after clamping and adjust before the glue sets.
Let the glue cure completely before moving the door
The clamps stay on for a minimum of 45 minutes for initial set. Do not move the door from its flat surface during this window. A door lifted too soon can rack out of square while the glue is still soft, and once it dries that way it cannot be fixed without breaking the joints apart.

Leave the door flat and undisturbed for a full 24 hours before sanding or finishing. Most wood glues reach full strength at the 24 hour mark regardless of what the bottle says about working time. Working time and cure time are two different things. One tells you how long you have to assemble. The other tells you when the joint is actually strong.
Sand the door faces smooth in stages
Start with 80 grit sandpaper to level any joint lines where a rail or stile sits slightly proud of its neighbor. Sand across the joint at a diagonal first, then switch to sanding with the grain once the surfaces are flush. Switching to with-the-grain sanding removes the cross-grain scratches the diagonal pass left behind.
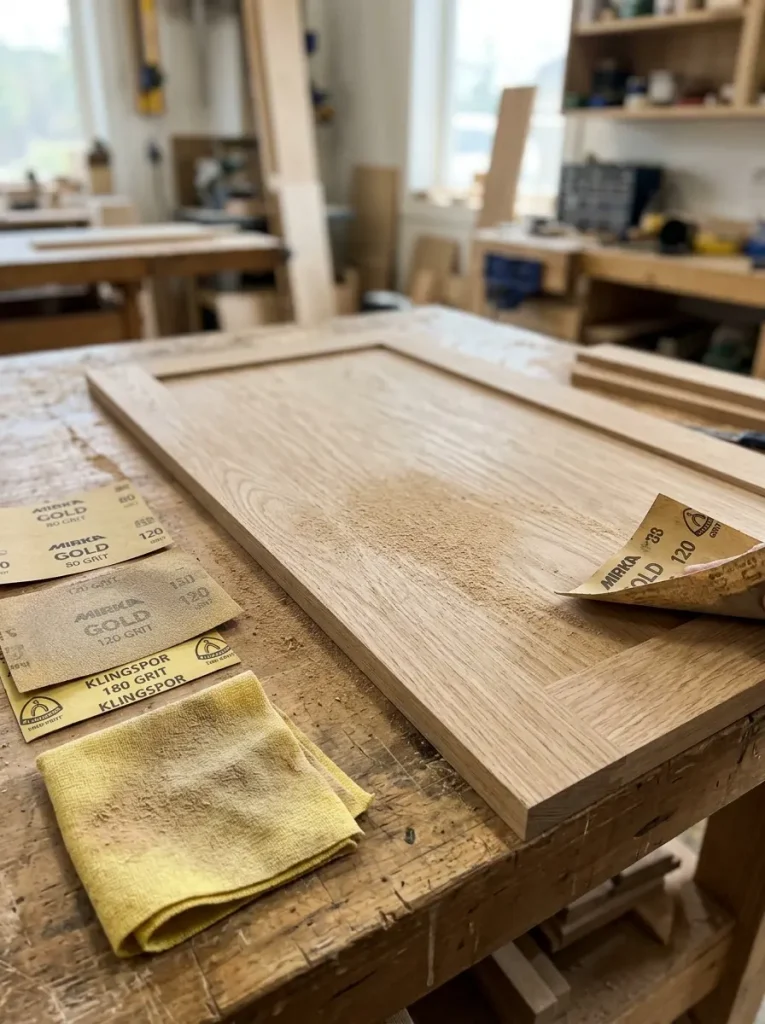
Move to 120 grit next to refine the surface, then finish with 180 grit for a surface that is ready for primer or stain. Wipe the door down with a tack cloth between every grit change.
Dust left on the surface from the previous grit acts like sandpaper under your next pass and leaves scratches that show through paint.
Do not sand the center panel aggressively. MDF edges absorb moisture from paint and swell if the surface paper is broken. A light pass with 180 grit on the panel face is enough.
Apply your chosen finish evenly across all surfaces
Paint and stain both behave differently on shaker cabinet doors, but the application order is the same for both. Start with the center panel, then move to the rails, then finish with the stiles.

Working from the inside out means any drips land on surfaces you have not finished yet rather than on surfaces you already have.
Apply primer before paint if you are working with poplar or MDF. One coat of a shellac-based primer seals the surface and prevents the grain from raising when the topcoat goes on.
Let primer dry for the full time listed on the can, which is typically 1 to 2 hours, before sanding lightly with 220 grit and applying your first topcoat.
Troubleshooting Table
| If This Happens | Try This |
|---|---|
| The door is out of square after clamping | Loosen the clamps slightly and place one clamp diagonally across the longer measurement. Tighten it gently until both diagonal measurements match, then re-tighten the bar clamps. |
| A joint will not close flush during dry fit | Check the cope cut on that rail end for tear-out or a rough shoulder. A few passes with a sharp chisel on the shoulder face will bring it flush without cutting into the tongue. |
| The center panel rattles inside the frame | Place a small dab of silicone caulk at the center point of the top and bottom groove only. Do not use wood glue. Silicone stays flexible and allows the panel to move without cracking. |
| Paint is raising the grain on MDF panel edges | Seal MDF edges with two coats of shellac-based primer before any paint touches them. Sand lightly with 220 grit between coats. Water-based primers cause MDF edges to swell every time without this step. |
| The door cups after finishing | Apply a coat of finish to the unfinished back face immediately. Lay the door on a flat surface with weight on top while the back coat dries. Unfinished back faces are almost always the cause of cupping. |
| Visible glue lines show through the paint | Sand the joint back to bare wood with 80 grit, wipe with a tack cloth, and apply a coat of shellac-based primer before repainting. Standard primer does not block dried glue spots from telegraphing through topcoats. |
Frequently Asked Questions
Quick Reference Card
- Miter saw
- Router table with fence
- Cope and stick bit set
- Bar clamps (at least 4)
- 1×3 poplar or maple boards
- 1/4 inch MDF or Baltic birch
- Wood glue
- Sandpaper (80, 120, 180, 220 grit)
- Tack cloth
- Shellac-based primer
- Tape measure and marking square
- Painter’s tape
- Measure every cabinet opening
- Calculate rail and stile dimensions
- Buy lumber and panel material
- Cut stiles to final length
- Cut rails with tongue allowance
- Set up router table for groove
- Route groove on all inside edges
- Cut cope profile on rail ends
- Cut center panel undersized
- Dry fit and check for square
- Glue and clamp frame together
- Cure flat for 24 hours
- Sand through 80, 120, 180 grit
- Prime and finish all surfaces
Conclusion
You now know how to build shaker cabinet doors from scratch. Real ones, with proper joinery, that will hang straight and hold up in a kitchen for years. That is not a small thing for a first woodworking build.
The natural next step is hanging the doors. Pick up a set of concealed euro hinges sized for your overlay and a self-centering drill bit, and the install will go much faster than the build did.
If this guide helped you, save it to your home improvement board on Pinterest so you can find it again when you are ready for the next set of doors.
You’ll also love to read top of kitchen cabinets decor ideas along with kitchen counter decor ideas after finalization of shaker cabinets, these blogs gonna help you a lot.