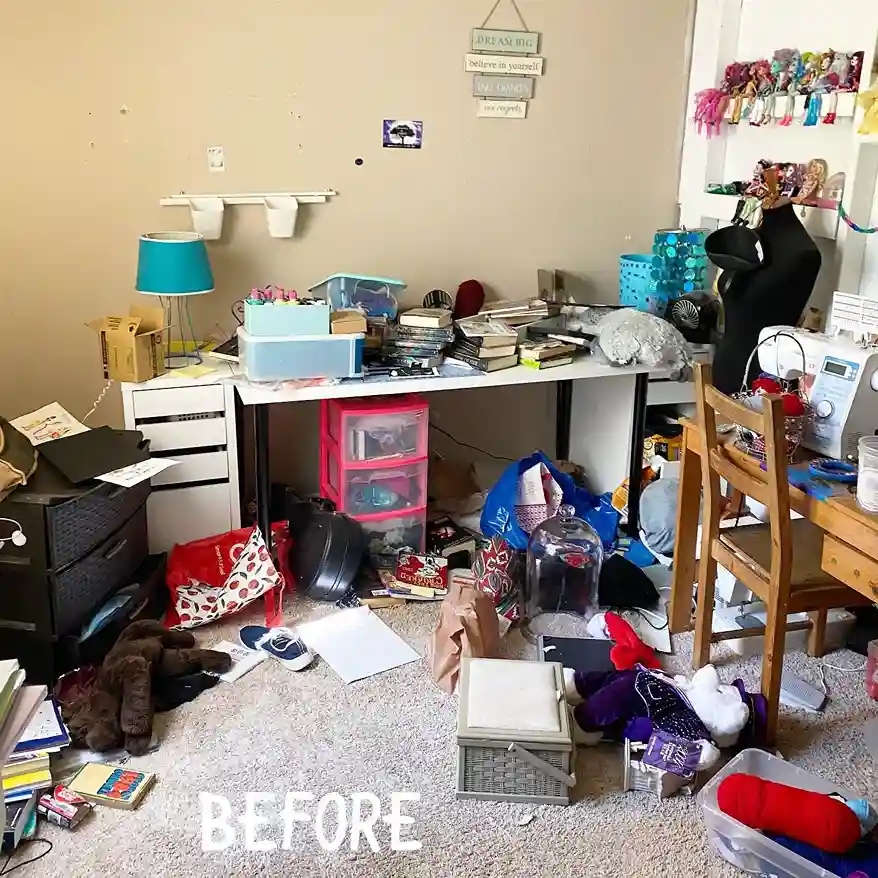
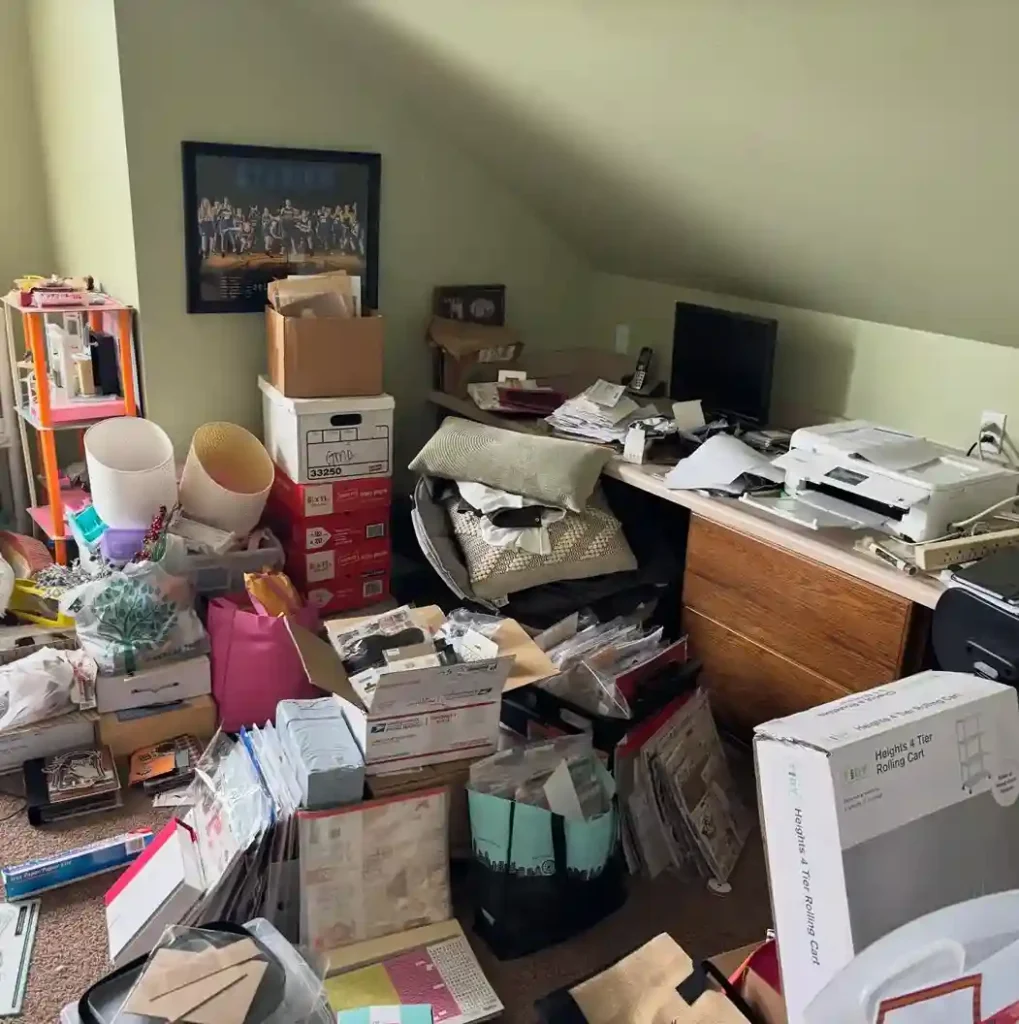
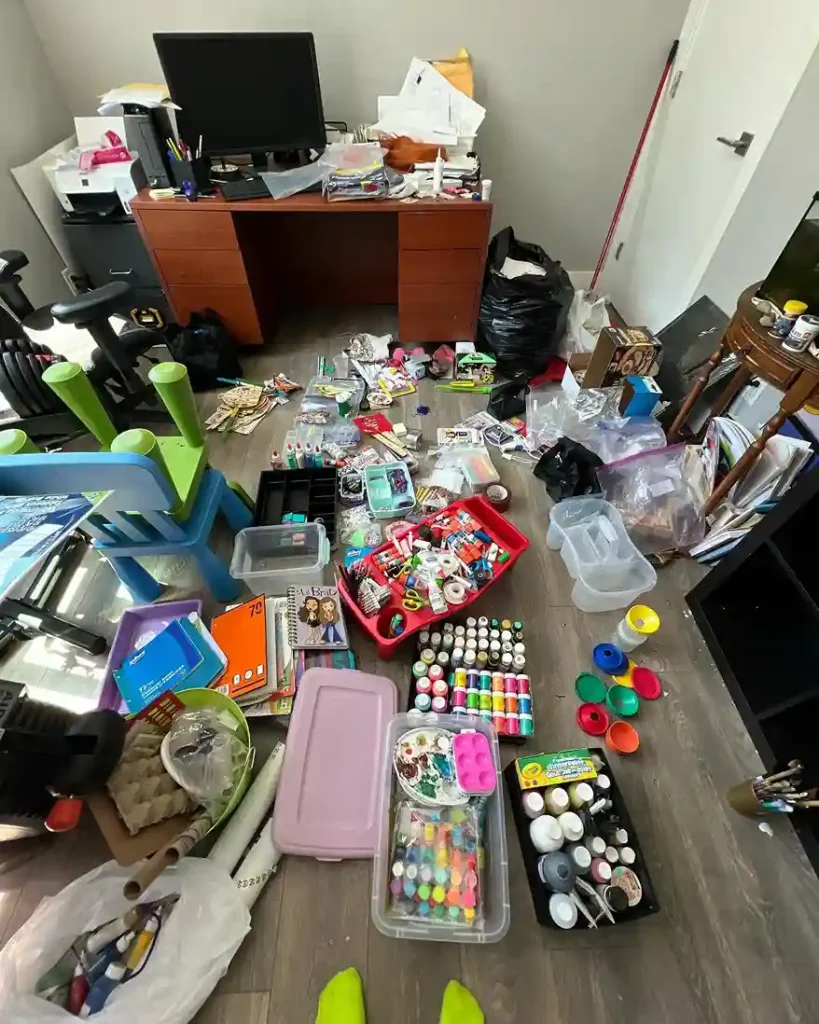
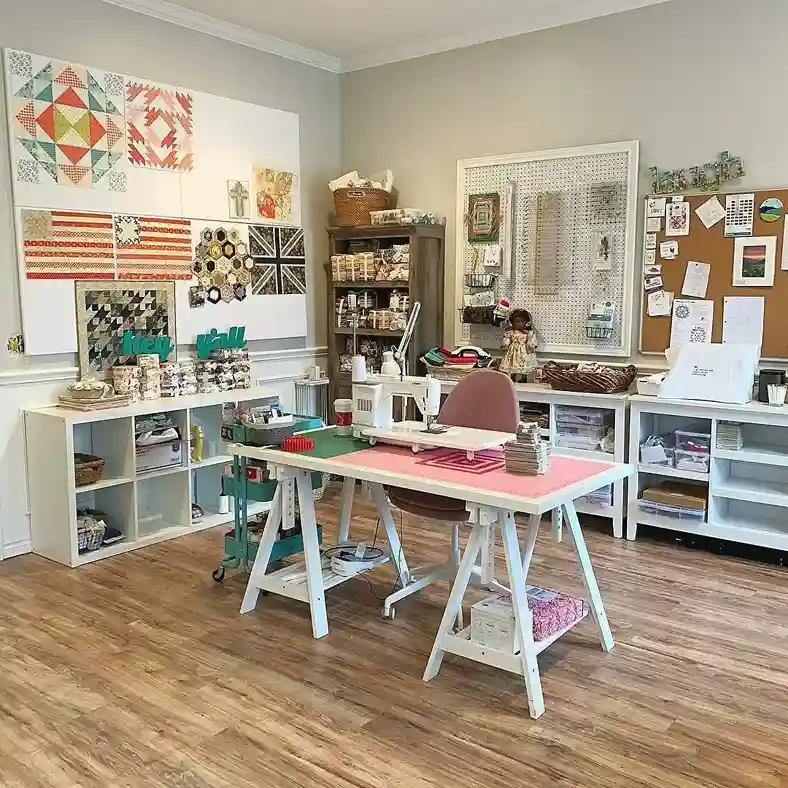
Your craft room has become a disaster zone you dread walking into. Supplies are buried under piles of unfinished projects and half-opened packages. The room that is supposed to inspire you is actually killing your creativity.
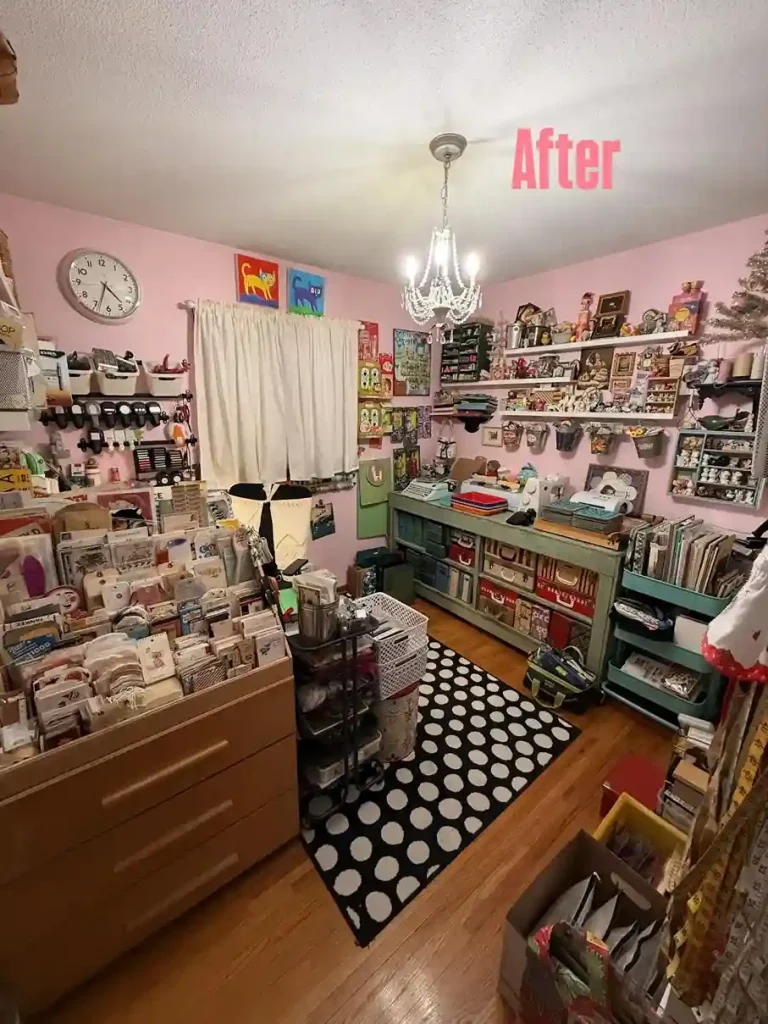
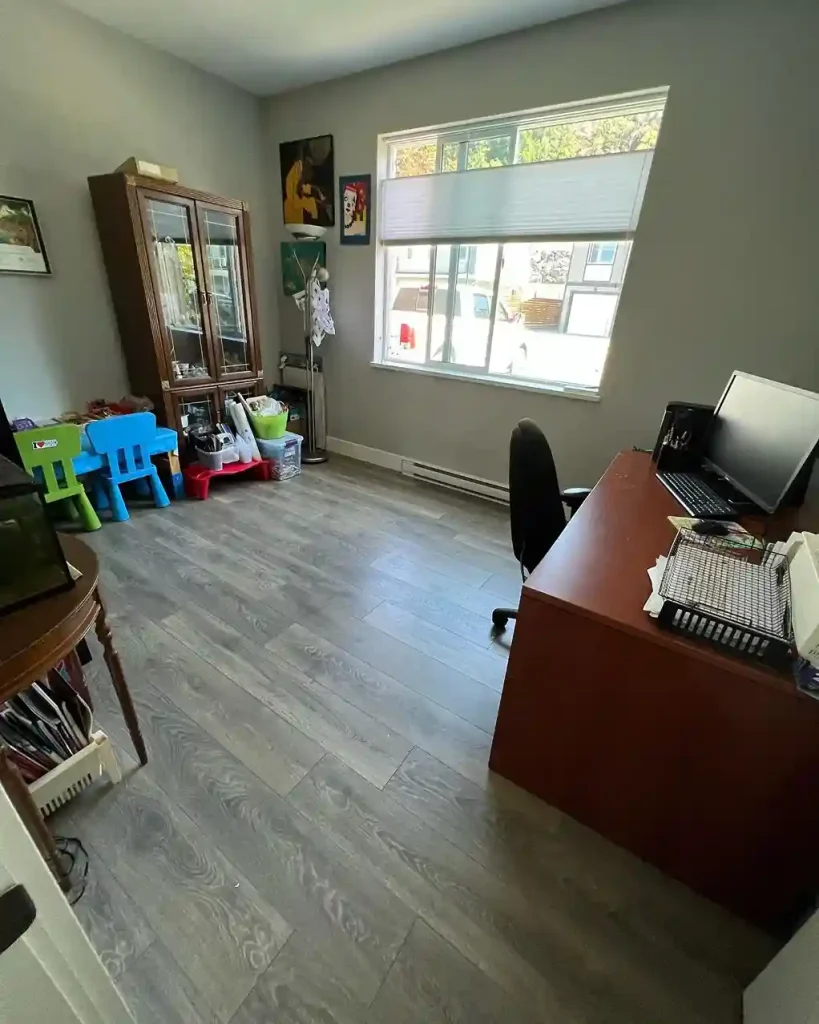
So a decluttered craft room changes everything about how you create. When every supply has a home and every surface is clear, creativity flows effortlessly.
These 24 steps, tips, and tricks will transform your overwhelming craft room into the organized creative sanctuary you have always wanted.
1. Start With the Right Decluttering Mindset
Before touching a single craft supply, your mindset needs to be right. A craft room declutter is not about getting rid of everything you love. It is about creating a space where you can actually find and use what you already have.
Give yourself permission to let go of supplies that no longer serve your current creative interests. Keeping supplies out of guilt or hypothetical future projects is the biggest enemy of a functional craft room.
A well-edited collection of supplies you actually use beats a massive hoard of things you never touch.
| Decluttering Mindset Shift | Old Thinking vs New Thinking |
|---|---|
| “I might use this someday” | “Have I used this in the past year?” |
| “It was expensive so I’ll keep it” | “Does it serve my current creativity?” |
| “I have space so I’ll keep it” | “Does this earn its storage space?” |
| “Letting go feels wasteful” | “Donating gives it a useful life” |
2. Set Aside Dedicated Decluttering Time
A craft room declutter done in stolen fifteen-minute windows never gets completed properly. This project deserves a dedicated block of uninterrupted time to do it right. Committing a full day or a weekend to the declutter sets you up for genuine success.
Block off at least one full day on your calendar specifically for this project. Tell family members or housemates that you need uninterrupted time to complete the work. Have water, snacks, and good music ready so you can work comfortably for hours without stopping.
| Craft Room Size | Recommended Declutter Time |
|---|---|
| Small craft corner | 3–4 hours |
| Dedicated craft room | Full day, 6–8 hours |
| Large studio space | Full weekend, 2 days |
| Combined spare room | 1.5 days minimum |
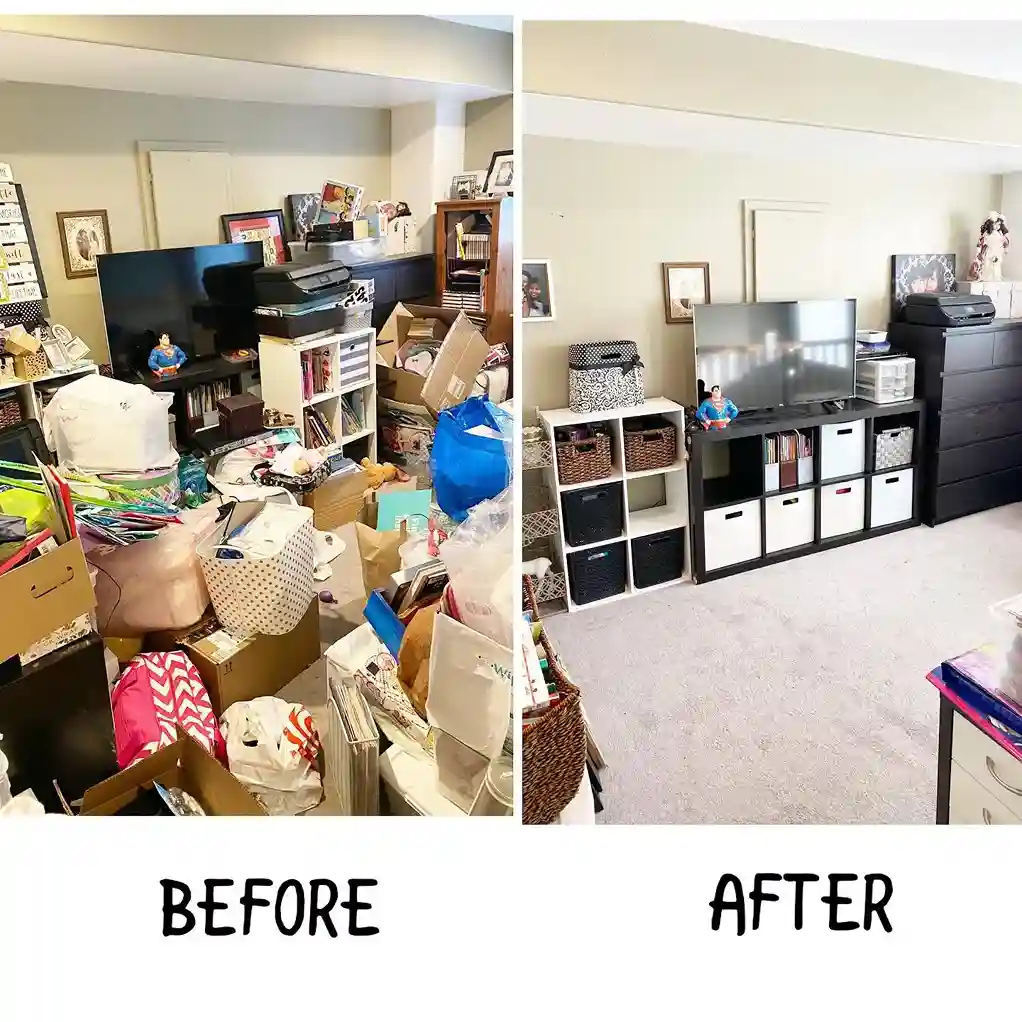
3. Remove Everything From the Room First
The only way to truly declutter a craft room is to see everything you own at once. Remove every single item from every shelf, drawer, bin, and cabinet. Place everything in a separate room or in a large clear area where you can sort through it properly.
Seeing the full volume of your craft supplies is both shocking and clarifying. It shows you clearly what you have in excess, what is missing, and what has been forgotten. You cannot make good decisions about what to keep if you cannot see everything simultaneously.
| Room Clearing Order | Why This Order Works |
|---|---|
| Clear all flat surfaces first | Creates sorting space immediately |
| Empty cabinets and shelves | Largest volume items visible |
| Empty all drawers | Small items accounted for |
| Clear floor bins and baskets | Final inventory complete |
4. Sort Everything Into Clear Categories
Once everything is out, sort your entire craft supply collection into clear, logical categories. Grouping like items together reveals duplicates, excess, and gaps in your collection. This sorting step is where the real decluttering clarity begins to emerge.
Create category piles for paper, fabric, adhesives, cutting tools, paints, yarn, ribbons, and embellishments. Do not make decisions during the sorting phase — just group similar things together first. The decision-making happens in the next step once every category is fully visible.
| Craft Supply Category | What Belongs There |
|---|---|
| Paper products | Cardstock, patterned paper, notebooks |
| Adhesives | Glue, tape, mod podge, hot glue |
| Cutting tools | Scissors, craft knives, punches |
| Embellishments | Buttons, ribbon, stickers, stamps |
5. Apply the One-Year Rule Ruthlessly
The one-year rule is the most effective decluttering tool for any craft room. If you have not used a supply in the past twelve months, it needs to justify its continued presence. Supplies that sit unused for a year tend to sit unused forever without a deliberate change.
Ask yourself honestly when you last used each item in each category pile. If you cannot remember using it in the past year, it belongs in the donation or discard pile. Exceptions apply only to specialty items used for annual or seasonal projects with a clear upcoming plan.
| One-Year Rule Response | Action to Take |
|---|---|
| Used within last month | Definitely keep |
| Used within last 6 months | Keep in accessible storage |
| Used within last year | Keep but reassess location |
| Not used in over a year | Donate, sell, or discard |
6. Create a Donation, Sell, and Trash System
Every item leaving your craft room needs a clear destination category. Three boxes or bags — one for donation, one for selling, and one for trash — make the leaving process organized. Having a clear destination for each departing item prevents second-guessing and re-cluttering.
Label three large boxes or bags clearly: DONATE, SELL, and TRASH. Place items directly into the appropriate container without looking back once the decision is made. Sealed donation boxes leave the house immediately while sell items get listed online within the same week.
| Departure Category | Best Items for That Category |
|---|---|
| Donate box | Good condition, complete sets |
| Sell pile | High-value, specialty tools |
| Trash bag | Dried up, broken, unusable |
| Give to friends | Items you know will be used |
7. Deal With Unfinished Projects Honestly
Unfinished projects are the emotional heart of craft room clutter. They carry guilt, good intentions, and the weight of abandoned creativity. Dealing with them honestly is one of the bravest and most freeing parts of any craft room declutter.
Sort unfinished projects into three groups: finish within 30 days, store for a specific future date, or release completely. Projects in the finish group get a dedicated basket in a visible, accessible spot. Projects being released deserve a grateful goodbye rather than guilt — they taught you something even unfinished.
| Unfinished Project Decision | Action to Take |
|---|---|
| Will finish within 30 days | Dedicated basket, visible location |
| Meaningful seasonal project | Dated box for specific occasion |
| No longer excited about it | Donate materials, release with gratitude |
| Teaching project for someone | Pass on to that person directly |
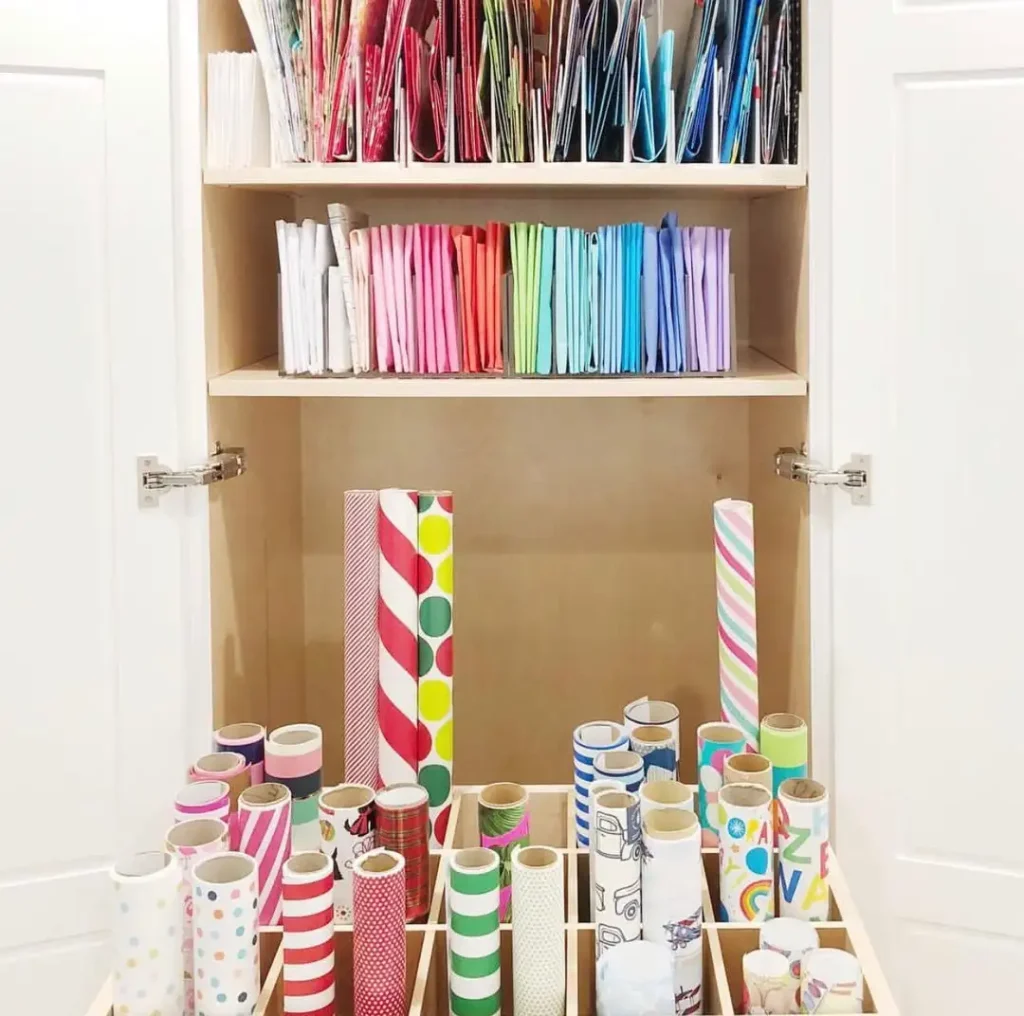
8. Declutter Paper Supplies With Extra Ruthlessness
Paper is the number one source of craft room clutter for most people. Paper accumulates faster than almost any other supply category and takes up enormous space. Decluttering paper aggressively creates more immediate space than almost any other craft room action.
Discard any paper that is bent, faded, water-damaged, or has lost its original color vibrancy. Let go of paper patterns and colors you have not reached for in over a year. Keep only the paper you genuinely love and would be excited to use in your next project.
| Paper Declutter Decision | Keep or Release |
|---|---|
| Bent or creased paper | Release — unusable for most projects |
| Faded or discolored paper | Release — color no longer reliable |
| Too many of one color | Release excess, keep your favorites |
| Paper you genuinely love | Keep with intention to use |
9. Tackle the Adhesive and Tape Chaos
Adhesives multiply mysteriously in craft rooms and are one of the most cluttered categories. Dried-up glue sticks, empty tape rolls, and duplicate adhesives waste enormous space. Testing every adhesive during the declutter saves frustration during future projects.
Test every glue stick, adhesive bottle, and tape roll to confirm it still works properly. Discard anything dried, empty, or past its functional prime immediately without hesitation. Keep only one of each adhesive type you genuinely use and donate remaining duplicates to a local school or community center.
| Adhesive Test Method | What to Do With Result |
|---|---|
| Glue stick test | Dried? Throw away immediately |
| Liquid glue test | Clogged or dried? Discard |
| Double-sided tape test | No stick left? Toss immediately |
| Hot glue gun test | Works? Keep one only |
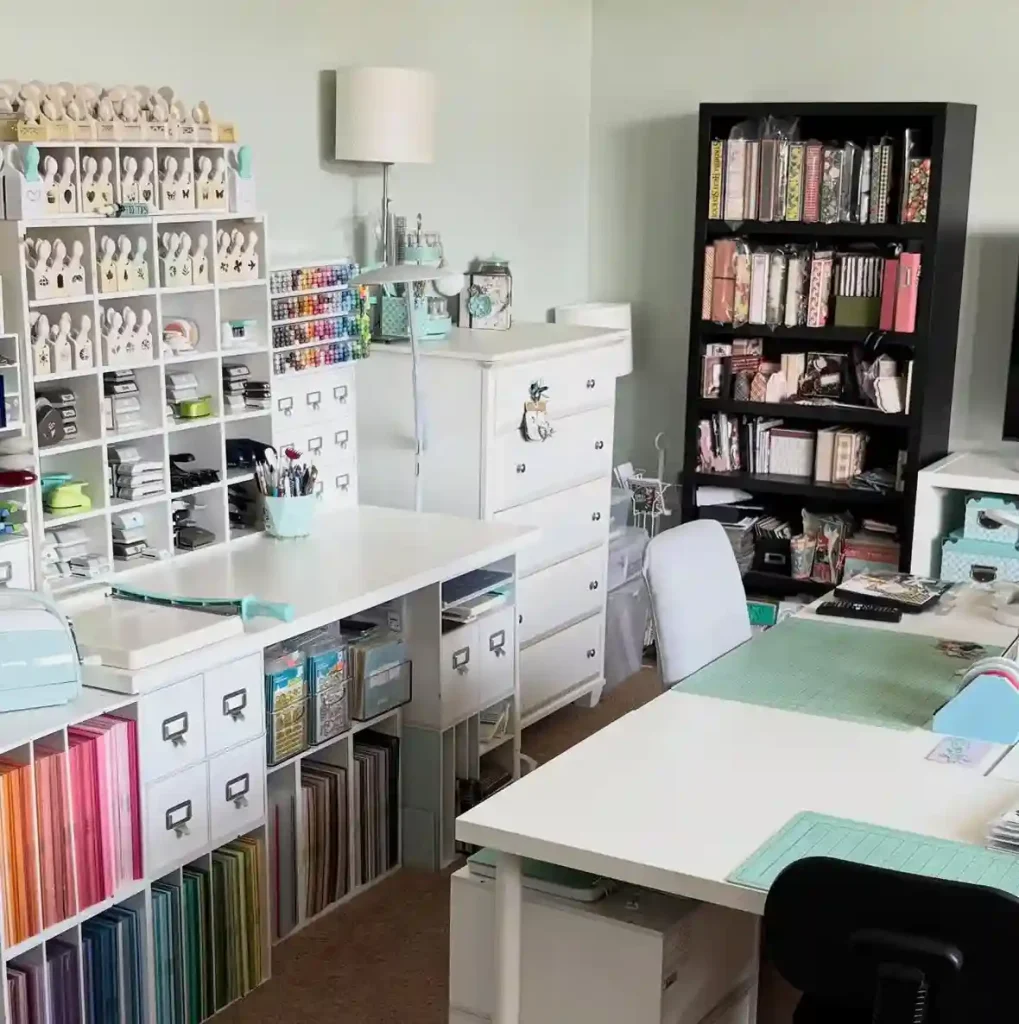
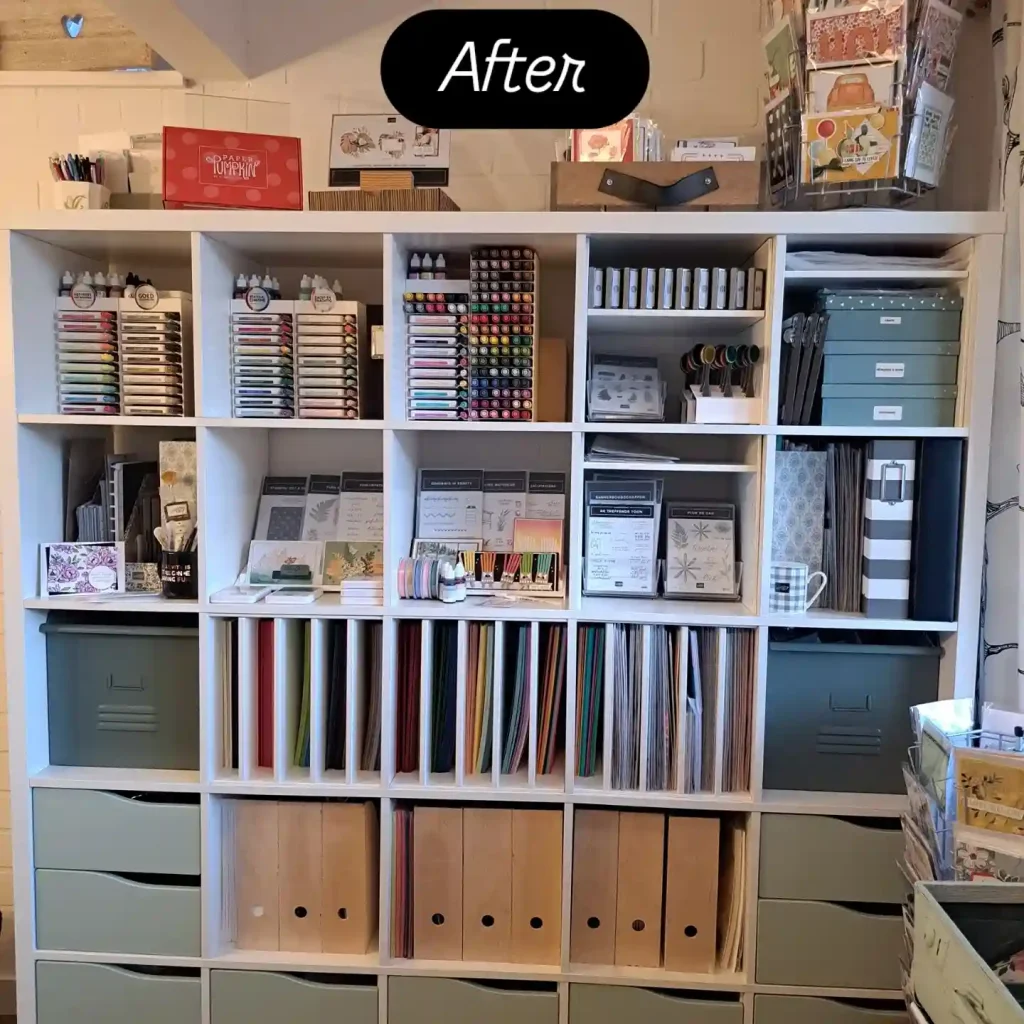
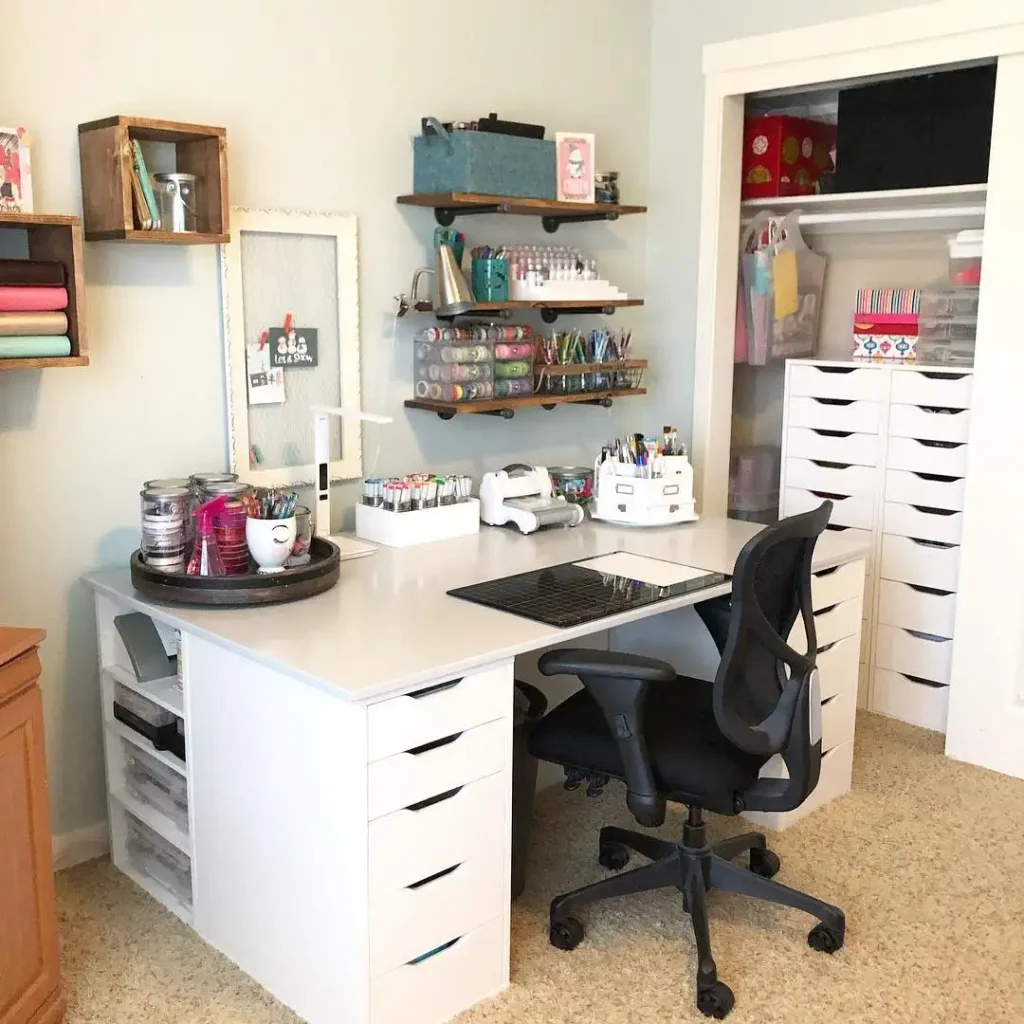
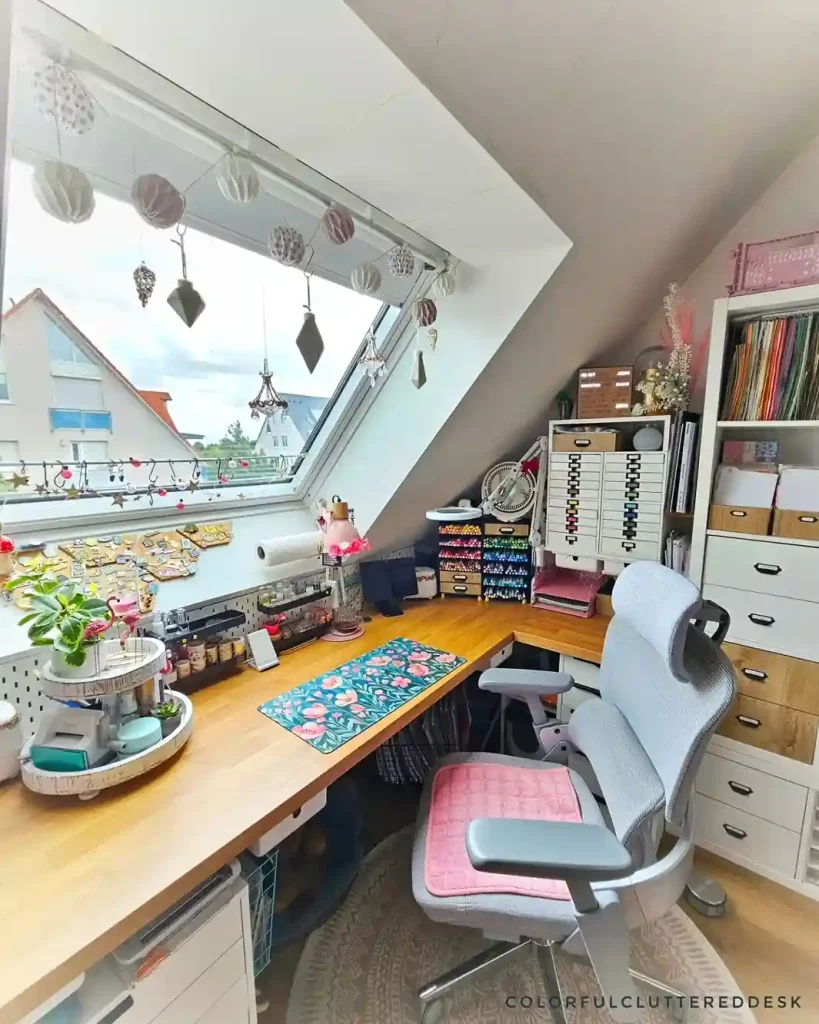
10. Organize What Remains Before Putting Anything Back
Do not return a single item to the craft room until you have a clear organization plan. Returning items without a system recreates the exact same clutter within weeks. The organization plan is what transforms the declutter from a temporary fix to a permanent solution.
Decide on a zone-based organization system before anything goes back into the room. Draw a simple floor plan and assign each craft category to a specific zone or storage location. Only then begin returning items to their newly assigned permanent homes.
Get complete organization inspiration from craft room ideas for zone-based craft room setups that keep spaces organized long-term.
| Craft Room Zone | Category That Lives There |
|---|---|
| Primary work surface | Current project supplies only |
| Left wall storage | Paper, cardstock, cutting tools |
| Right wall storage | Fabric, yarn, fiber supplies |
| Cabinet storage | Paints, inks, adhesives |
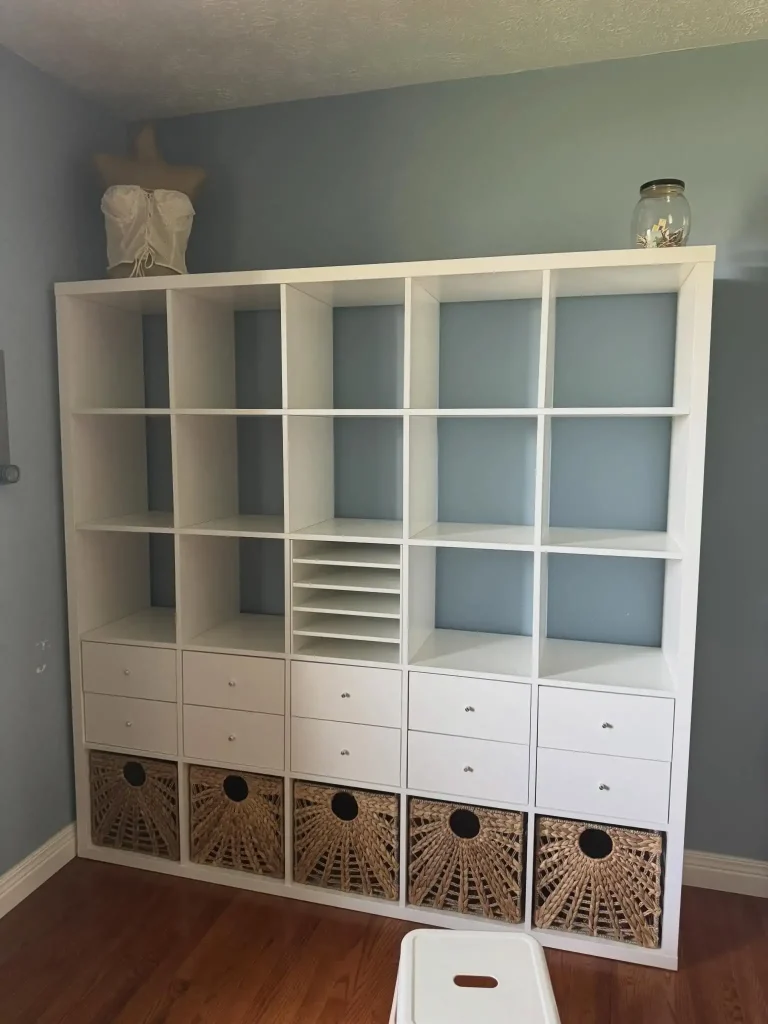
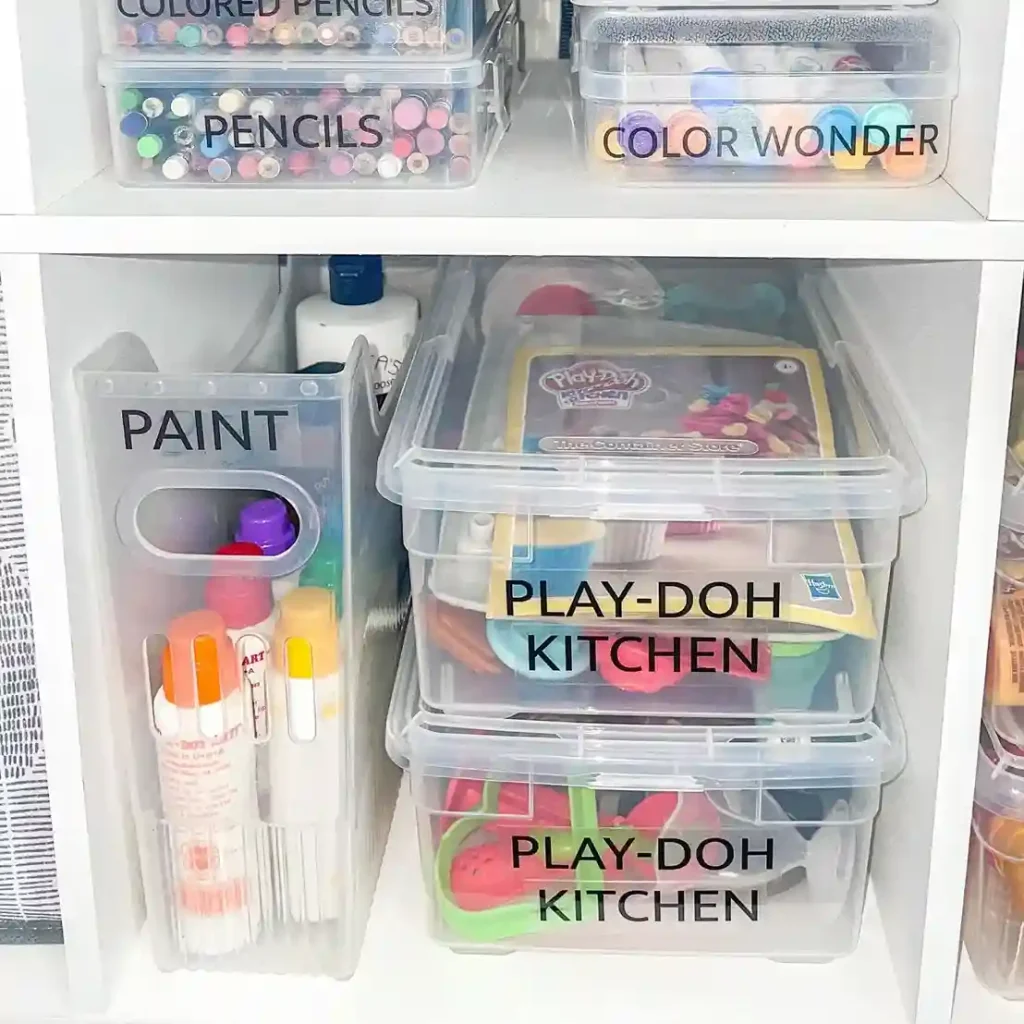
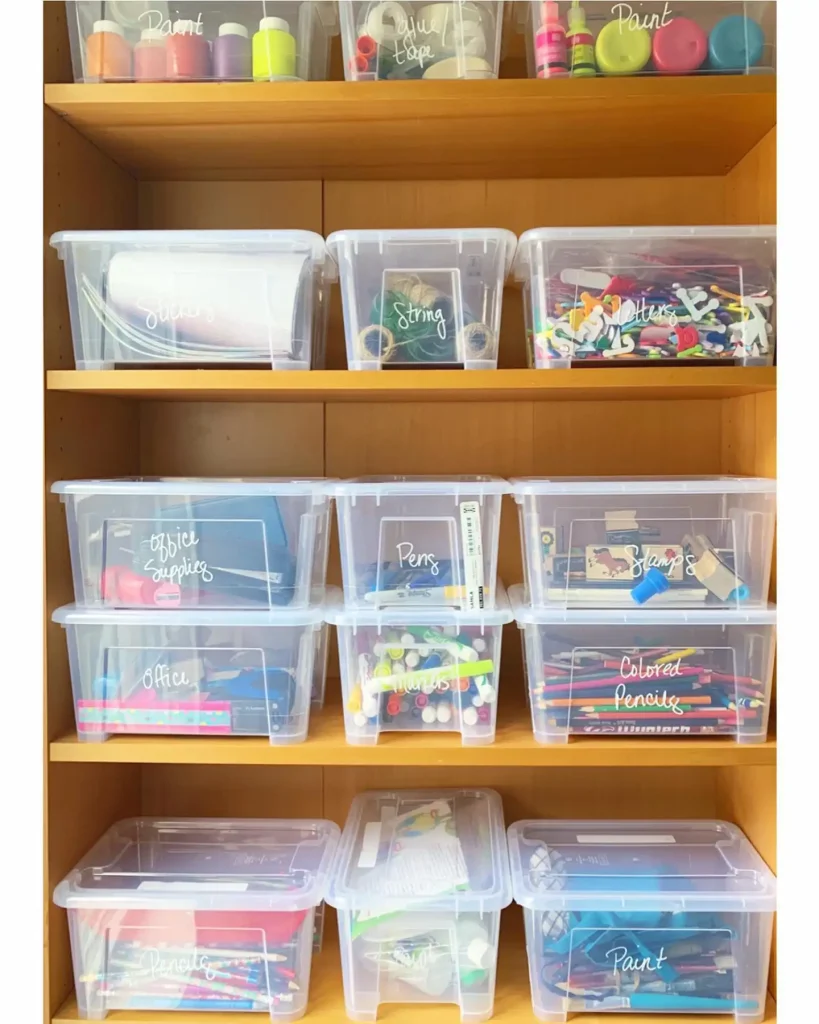
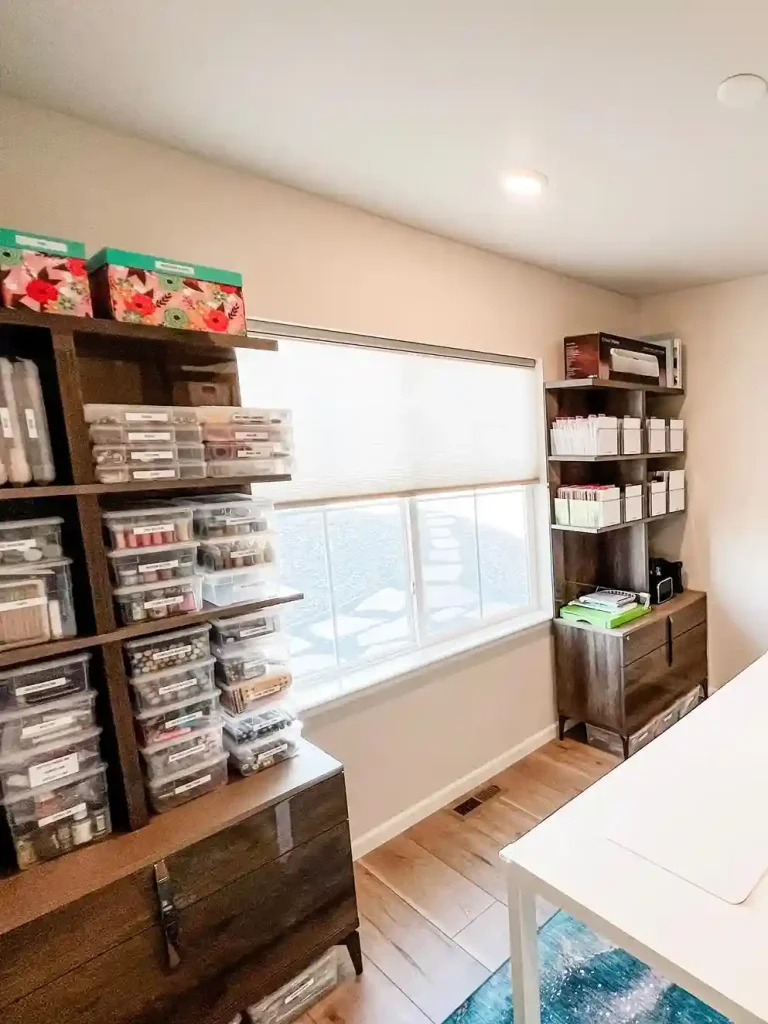
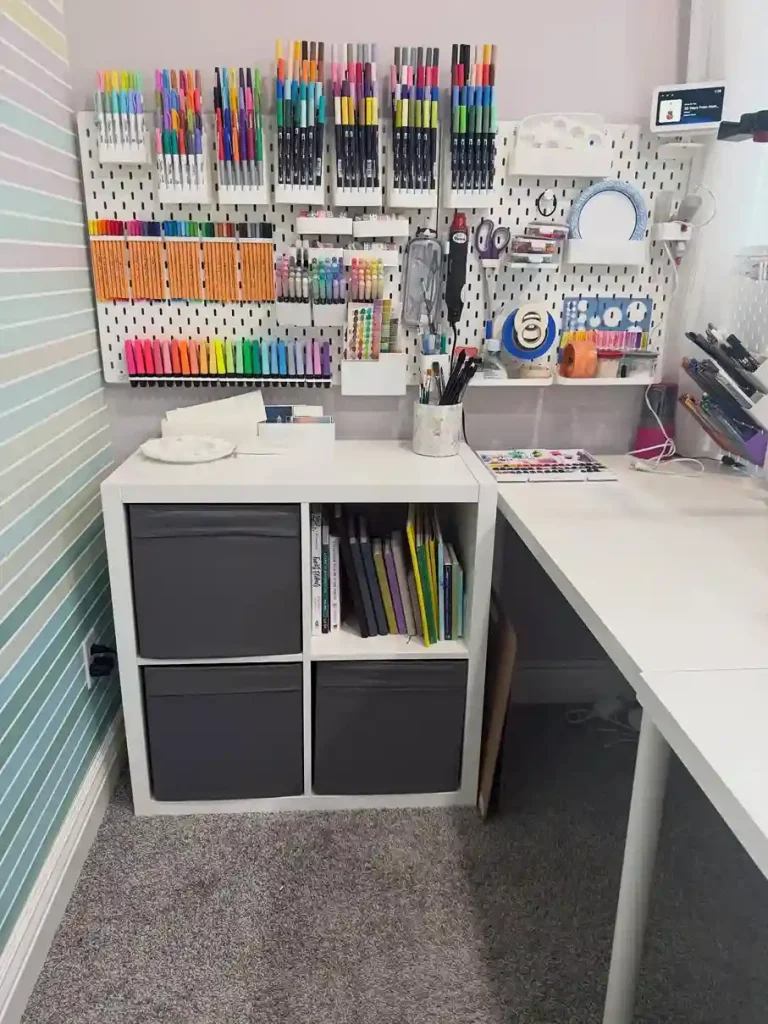
11. Use Clear Containers for Everything
The single most impactful organizational change for any craft room is switching to clear containers. When you cannot see what is inside a container, it effectively does not exist. Clear containers eliminate the searching, the forgetting, and the accidental duplicate purchasing.
Replace all opaque bins, boxes, and bags with clear alternatives throughout the craft room. Clear stackable drawers, glass jars, and transparent bins let you see every supply at a glance. Label every clear container additionally so identification is instant even when containers are stacked.
| Clear Container Type | Best Craft Room Use |
|---|---|
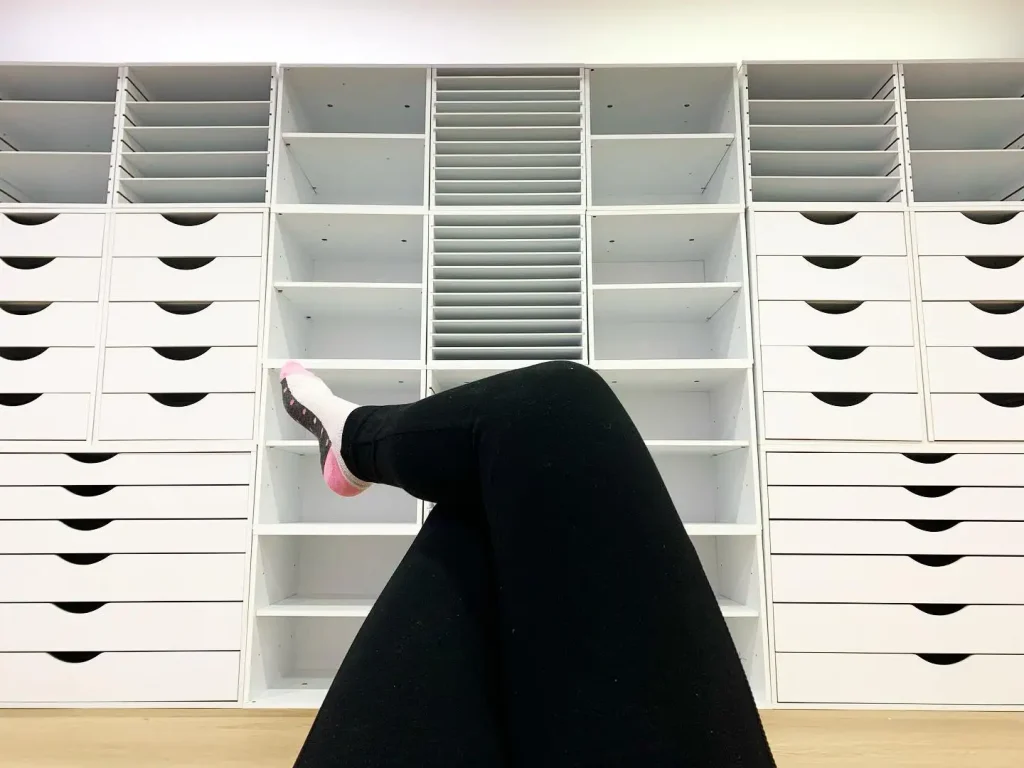
| Clear stackable drawers | Small supplies, buttons, beads |
| Glass mason jars | Brushes, pens, scissors |
| Clear shoebox bins | Paper storage by color |
| Transparent zip pouches | Small embellishment collections |
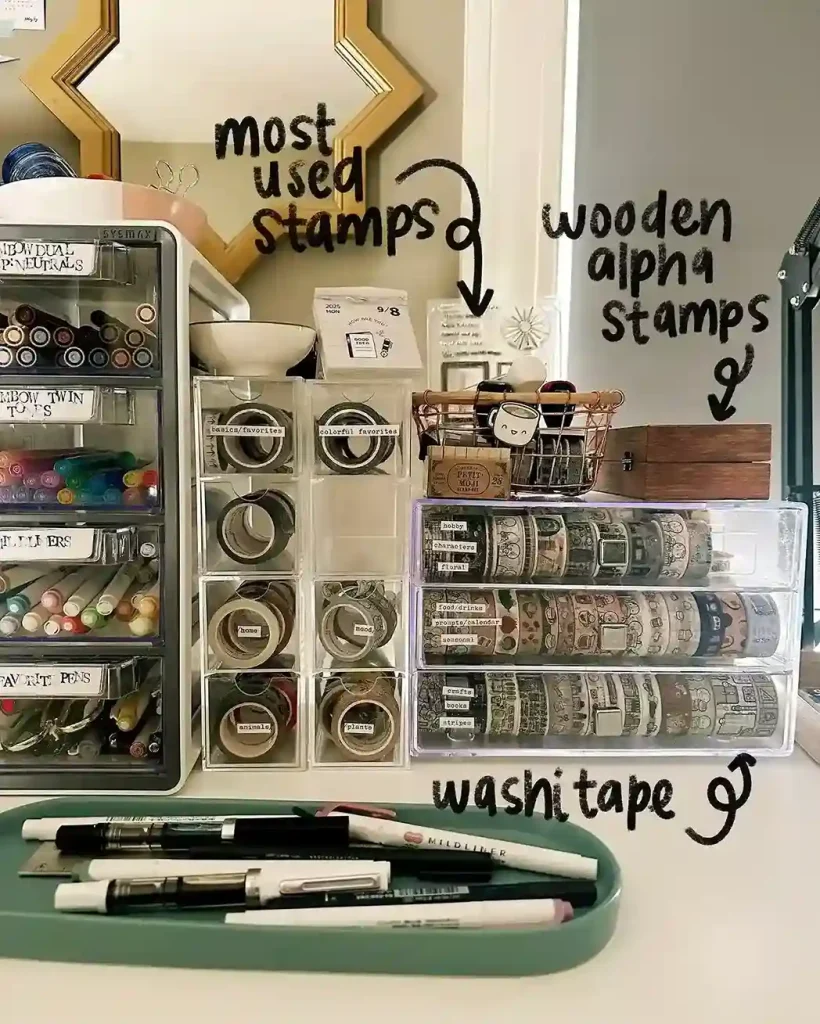
12. Label Absolutely Everything
Labels are the system that keeps a decluttered craft room organized for months and years. Without labels, supplies end up in the wrong place within days of the initial organization. A clearly labeled craft room trains every brain that enters the space where things belong.
Use a label maker for the most professional, consistent, and readable labels throughout. Label the front of every container, bin, drawer, and shelf zone clearly and specifically. Update labels immediately when a container’s contents change to maintain the accuracy of the system.
Explore linen closet organization for labeling strategies that work brilliantly in any organized storage space.
| Label Placement | What to Write |
|---|---|
| Container front | Contents, category name |
| Shelf edge | Zone category designation |
| Drawer front | Specific supply type stored |
| Box lid top | Contents plus quantity if relevant |
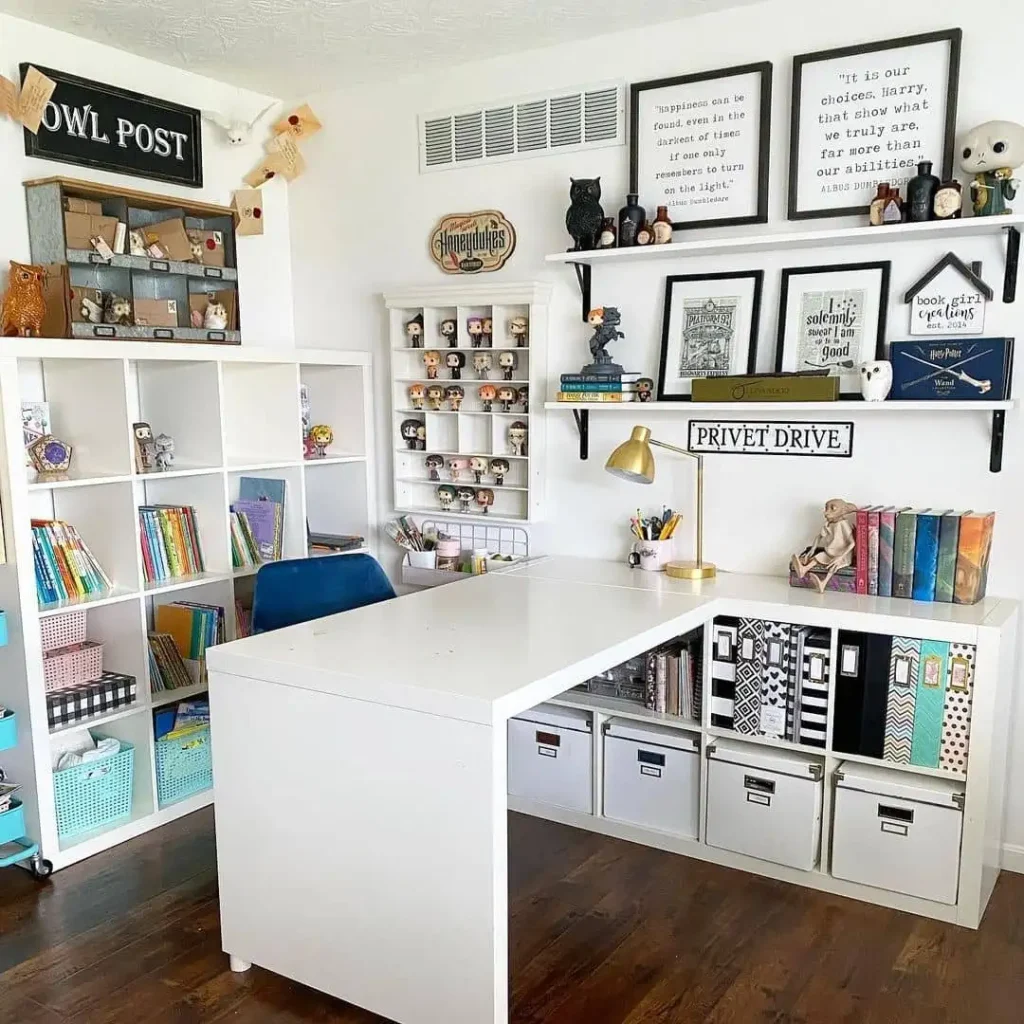
13. Create a Dedicated Space for Works in Progress
Works in progress need their own dedicated, clearly defined space in any organized craft room. Without a designated spot, current projects spread across every surface and recreate clutter immediately. A proper WIP zone keeps active projects contained and accessible without disrupting the rest of the room.
Use a rolling cart, a dedicated shelf, or a large open bin specifically for current projects. Limit the WIP zone to three active projects maximum at any one time to prevent overflow. When a new project begins, one existing WIP must be completed, stored, or released to maintain the limit.
| WIP Zone Option | Best For |
|---|---|
| Rolling cart | Portable, flexible, moveable |
| Dedicated shelf | Visible, always accessible |
| Large open bin | Single large project storage |
| Hanging file system | Paper and card-based projects |
14. Implement a One-In One-Out Rule Going Forward
The one-in one-out rule is the maintenance system that prevents craft room re-cluttering. Every new supply that enters the craft room requires an existing supply to leave. This simple rule keeps the total volume of supplies permanently at a manageable, organized level.
Before purchasing any new craft supply, identify what existing item it will replace or supplement. When a new supply enters the room, immediately identify one item to donate, sell, or discard. This rule is especially important for paper, fabric, and embellishments which accumulate most rapidly.
| One-In One-Out Application | How to Apply It |
|---|---|
| New yarn purchased | Donate one existing yarn skein |
| New paper pad bought | Release one existing paper pack |
| New tool acquired | Remove one duplicate or unused tool |
| New paint color | Use up or donate an old color |
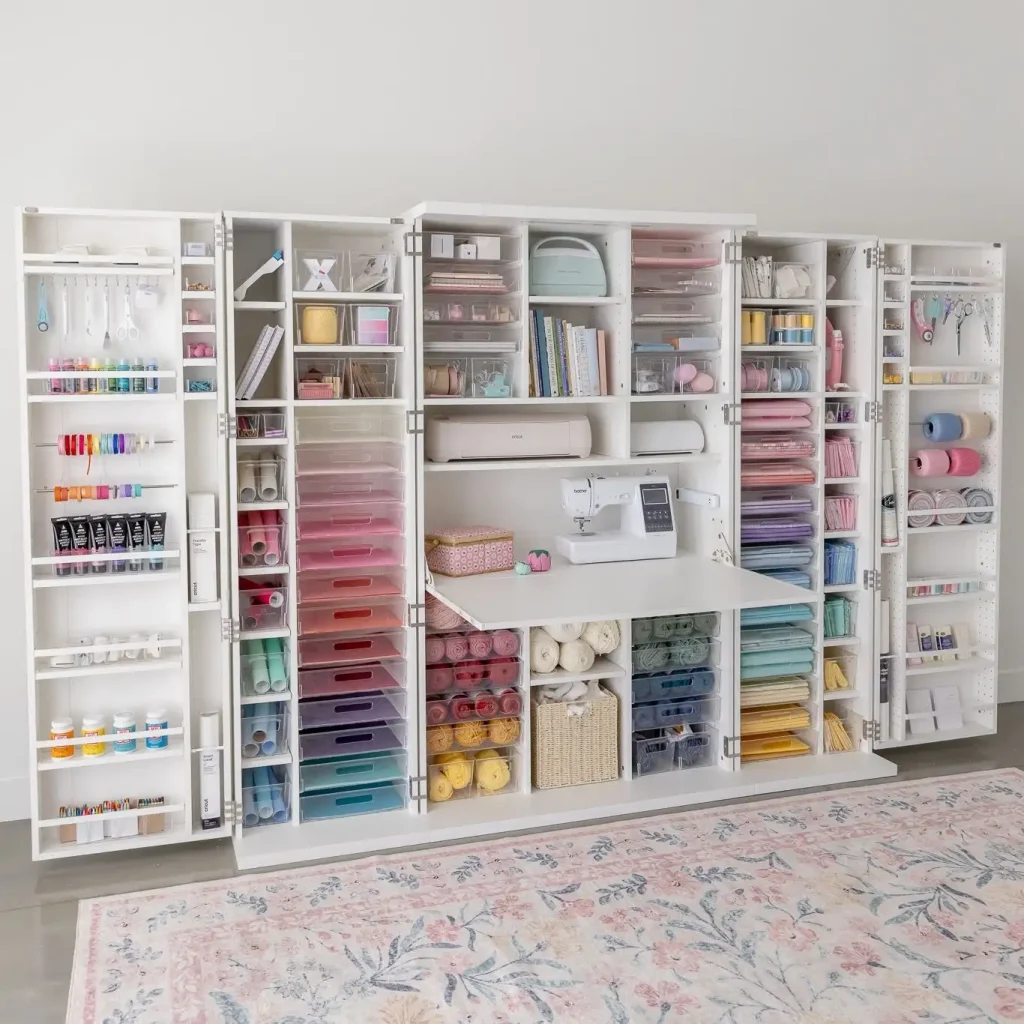
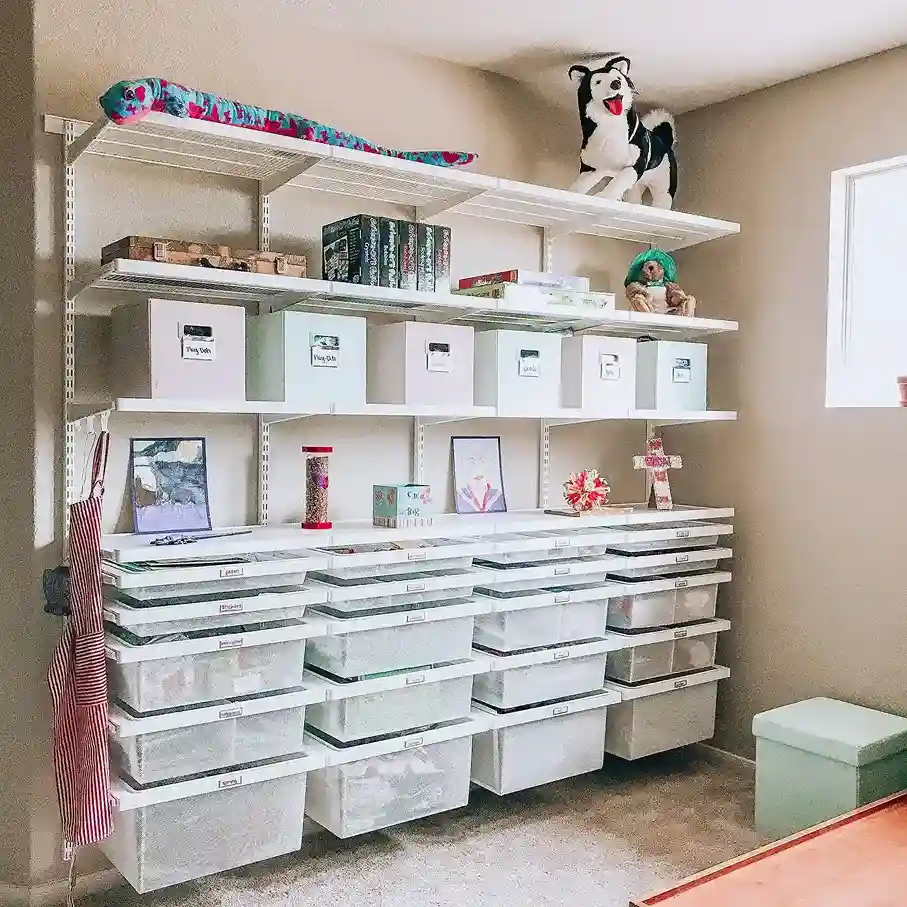
15. Organize Fabric and Yarn by Color
Fabric and yarn organized by color is both more beautiful and more functional than organizing by project or fiber type. Color organization makes seeing your entire collection at a glance intuitive and visually inspiring. It also prevents accidental duplicate purchasing of colors you already own.
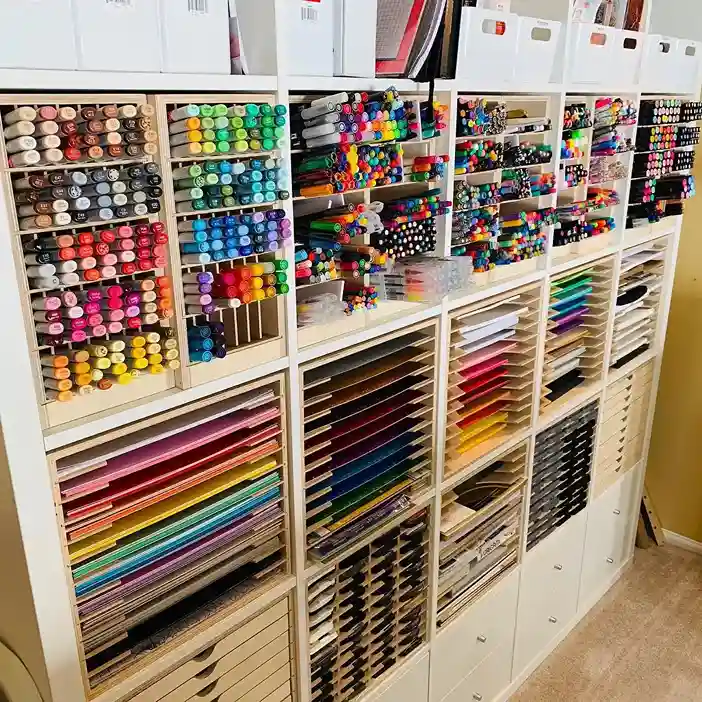
Fold fabric into neat squares and stack by color family on open shelves. Wind yarn into balls or cakes and display on shelves or in open bins organized by color spectrum. The visual beauty of a color-organized fabric and yarn wall is itself a source of creative inspiration daily.
| Color Organization Method | Best Storage for It |
|---|---|
| Fabric by color | Folded on open shelving |
| Yarn by color spectrum | Open bins or basket display |
| Ribbon by color | Wound on bobbins in clear drawer |
| Thread by color | Thread rack organized by shade |
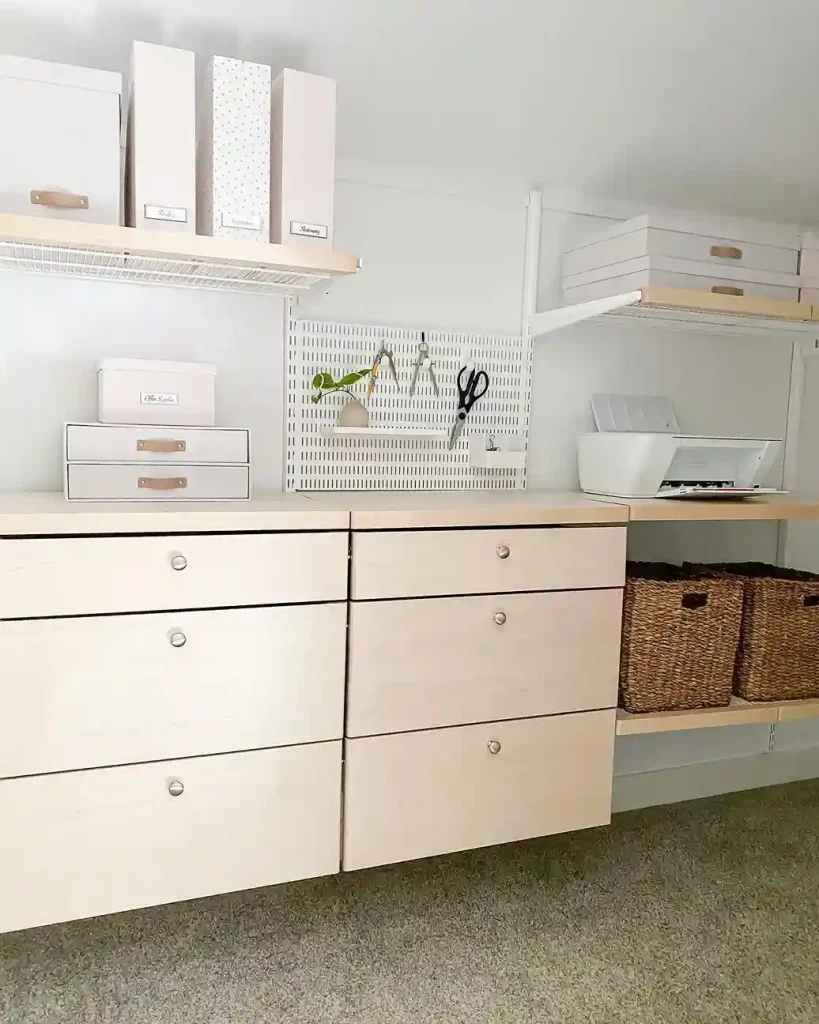
16. Create a Dedicated Tool Zone
Craft tools — scissors, rulers, rotary cutters, and heat tools — need a permanent dedicated zone. Tools scattered across the room create both inefficiency and safety hazards. A properly organized tool zone keeps every tool accessible, safe, and in its exact right place.
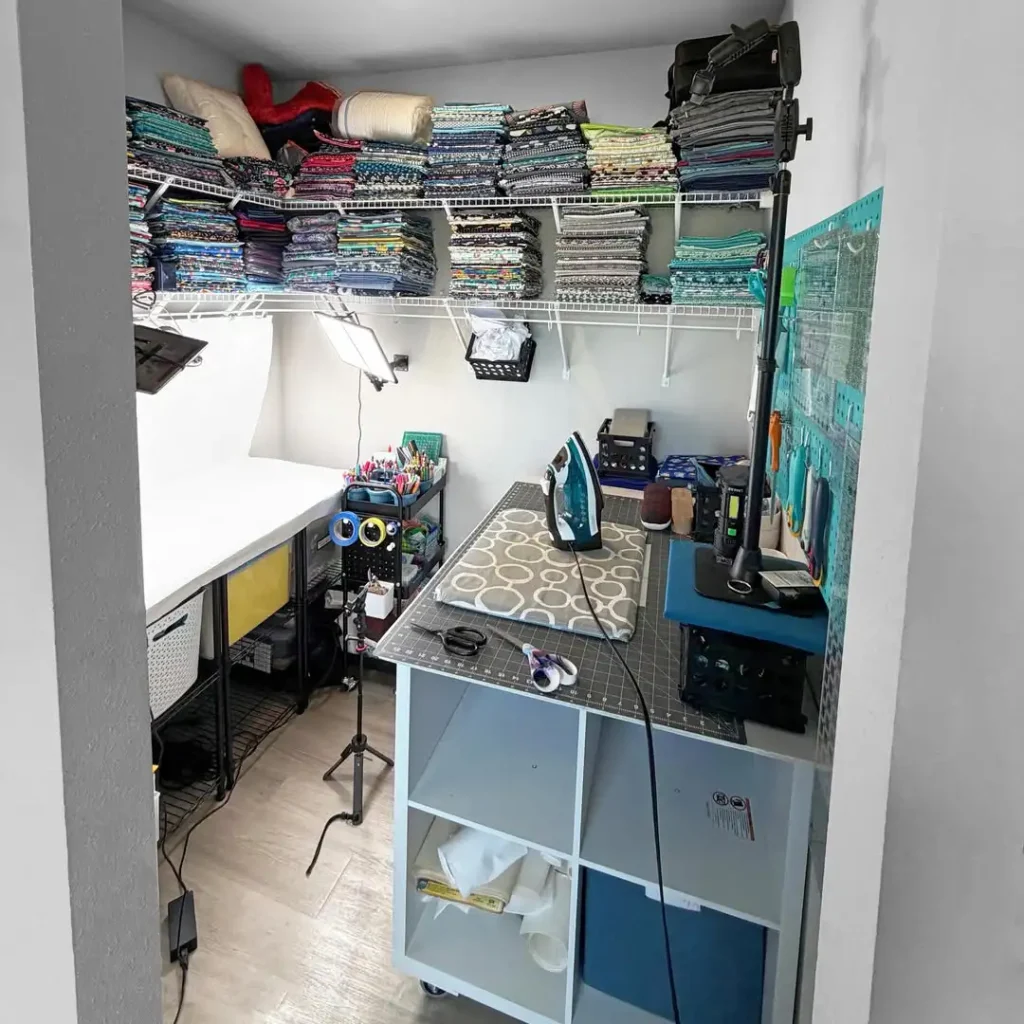
Mount a pegboard on one section of wall specifically for tool storage and organization. Use scissors holders, ruler slots, and custom hooks for different tool types and sizes. Keep the most frequently used tools at the most accessible height for comfortable, daily use.
| Tool Zone Organization | Storage Method |
|---|---|
| Scissors collection | Wall-mounted scissor holder or cup |
| Rulers and guides | Slot organizer or magazine file |
| Heat tools and guns | Pegboard hooks with cord wrap |
| Rotary cutters | Upright in a cup or tool holder |
17. Tackle the Button, Bead, and Embellishment Chaos
Small embellishments are the most time-consuming category to declutter but also the most satisfying when organized. Buttons, beads, sequins, and charms multiply endlessly and take over drawers completely. A systematic approach to small embellishments prevents the category from ever becoming chaotic again.
Sort all small embellishments by type and then by color within each type. Use small divided containers with individual compartments for the smallest items like beads and seed pearls. Larger embellishments like buttons can live in small glass jars organized by color on a shelf.
Find brilliant small item storage ideas from hidden storage ideas for keeping embellishment collections beautifully organized and contained.
| Embellishment Category | Best Container |
|---|---|
| Beads and seed pearls | Divided bead organizer |
| Buttons | Small glass jars by color |
| Sequins | Small zip pouches by type |
| Charms and findings | Small compartment organizer |
18. Create a Ribbon and Trim Management System
Ribbon and trim is one of the most beautiful but most chaotic craft room supply categories. Unrolled ribbon tangles, loses its shape, and wastes space dramatically. A proper ribbon management system keeps every length usable, visible, and beautifully organized.
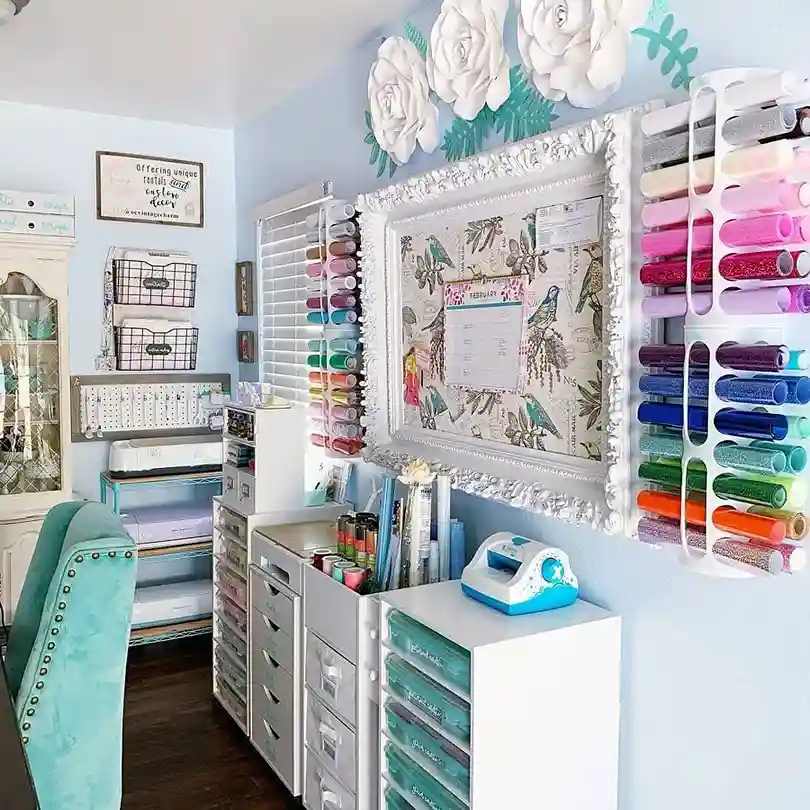
Wind all ribbon onto cardboard bobbins or wooden spools for tangle-free storage. Store wound ribbon bobbins in a clear drawer organizer sorted by color family. Hang a ribbon rack on the wall for ribbons used most frequently so they are always within immediate reach.
| Ribbon Storage Method | Best Application |
|---|---|
| Cardboard bobbins in drawer | Sorted by color, space efficient |
| Wall-mounted ribbon rack | Frequently used ribbons |
| Clear box with compartments | Mixed small ribbon lengths |
| Hanging dowel display | Wide ribbon, decorative storage |
19. Set Up a Paper Scrap System Instead of Hoarding Scraps
Paper scraps are the sneaky source of enormous craft room clutter. Most crafters keep every scrap from every project indefinitely just in case. A proper scrap system keeps only usable scraps while eliminating the piles of tiny pieces that serve no practical purpose.
Keep only scraps larger than 4 by 6 inches — anything smaller is rarely useful in real projects. Sort usable scraps by color into labeled clear bags stored in one dedicated scrap bin. Set a size limit for the scrap bin and when it is full, use scraps before buying new paper.
| Paper Scrap Rule | Reasoning |
|---|---|
| Keep if larger than 4×6 | Minimum usable size for most projects |
| Sort by color | Find right scrap color quickly |
| One bin maximum | Prevents unlimited scrap hoarding |
| Use before buying new | Reduces waste and spending |
20. Digitize Your Inspiration and Pattern Collection
Physical inspiration clippings, pattern books, and project idea files contribute enormously to craft room clutter. Digitizing this collection frees up significant physical space while making your inspiration more accessible than ever. Digital files are searchable, shareable, and take up zero physical room.
Photograph or scan all physical inspiration clippings and save to a dedicated digital folder. Use Pinterest boards or Notion to organize digital inspiration by craft type and project category. Donate physical craft books and magazines to a library or craft group after digitizing any patterns you want to keep.
| Digitizing Method | Best Tool to Use |
|---|---|
| Physical clippings | Scan or photograph to digital folder |
| Magazine inspiration | Pinterest board organization |
| Physical patterns | Scan to PDF for permanent storage |
| Project ideas | Notion, Trello, or notes app |
21. Deep Clean the Craft Room While It Is Empty
With the room empty, this is the perfect moment to deep clean every surface. Craft rooms accumulate glitter, paint residue, paper dust, and adhesive on every surface. A proper deep clean before restoring the organized room feels incredibly satisfying and fresh.
Wipe down all shelves, drawers, and surfaces with an appropriate cleaning solution. Vacuum the floor, including corners and the areas under furniture. Wash windows to maximize natural light in the newly organized space. Apply bathroom counter decor cleaning principles for getting surfaces truly spotless before restoring order.
| Deep Clean Task | Cleaning Method |
|---|---|
| Shelves and drawers | Damp cloth with mild cleaner |
| Floor and baseboards | Vacuum then damp mop |
| Windows | Glass cleaner for maximum light |
| Walls | Spot clean marks and scuffs |
22. Set Up a Donation Station for Ongoing Decluttering
One of the biggest mistakes after a craft room declutter is having no system for ongoing releases. A permanent, labeled donation station makes continuous decluttering effortless and habitual. When items are no longer needed, they go directly into the station without any decision delay.
Keep a small labeled bin or bag in the craft room permanently for ongoing donations. When you no longer love a supply, it goes straight into the donation bin without overthinking. Empty the donation bin to a charity, school, or craft group every two to four weeks consistently.
| Ongoing Donation Station | Location in Craft Room |
|---|---|
| Small labeled bin | Bottom shelf, easily accessible |
| Bag on door hook | Inside door for quick dropping |
| Designated shelf section | Visible, regularly emptied |
23. Create a Monthly Craft Room Reset Routine
A monthly reset prevents the slow return of clutter that undermines every decluttering effort. A consistent monthly routine takes only fifteen to twenty minutes and keeps the craft room perpetually functional. This small regular investment protects every hour spent on the initial declutter.
On the first day of each month, spend fifteen minutes returning misplaced items to their correct zones. Check supplies running low and add them to a resupply list before they run completely out. Review one storage area each month for items that no longer earn their space in the collection.
| Monthly Reset Task | Time Required |
|---|---|
| Return misplaced items to zones | 5–7 minutes |
| Check and update supply list | 3–5 minutes |
| Review one storage area | 5–8 minutes |
| Wipe down work surfaces | 2–3 minutes |
24. Protect Your Decluttered Space With Daily Habits
The daily habits you build after the declutter determine whether the craft room stays organized or reverts to chaos. Small, consistent daily actions require almost no time but have an enormous cumulative impact on the long-term organization of the space.
Put every supply back in its exact designated spot immediately after each crafting session ends. Never leave the craft room with items out of their homes, no matter how tired you are. These thirty seconds of returning supplies after each session preserve months of decluttering effort without any additional work.
Apply consistent organization habits from small kitchen organization for daily habits that maintain organization across multiple rooms in your home.
| Daily Craft Room Habit | Time It Takes |
|---|---|
| Return all supplies after crafting | 2–3 minutes maximum |
| Clear the work surface when done | 1 minute |
| Close all containers and drawers | 30 seconds |
| Check donation bin and empty if full | 1 minute as needed |
Frequently Asked Questions
Where do I start when decluttering a craft room?
Start by removing every single item from the room so you can see everything you own at once. Then sort supplies into clear categories before making any keep-or-release decisions. Starting with the emptying and sorting phase before decision-making prevents overwhelm and makes the entire process more efficient and effective.
How do I get rid of craft supplies I no longer need?
Donate usable supplies to local schools, libraries, community centers, or craft groups. Sell higher-value items like quality tools and specialty supplies on Facebook Marketplace or Etsy. Give supplies directly to crafting friends who will genuinely use them and trash only what is truly broken or unusable.
How do I keep my craft room organized after decluttering?
Implement the one-in one-out rule for every new supply purchase. Return every item to its designated spot immediately after each crafting session. Do a fifteen-minute monthly reset to address any drift in the organization system. These three habits together maintain a decluttered craft room indefinitely.
How many of each craft supply should I keep?
Keep only the quantity you can realistically use within one to two years. For paper, keep only what fits in your designated paper storage with a little room to spare. For tools, keep one of each type you regularly use and donate all duplicates. Less is genuinely more in a functional craft room.
How do I organize craft supplies in a small space?
Use vertical wall space with pegboards, floating shelves, and over-door organizers. Choose clear stackable containers to maximize every cubic inch of cabinet and shelf space. Digitize inspiration collections and patterns to eliminate physical paper clutter entirely. A small well-organized craft space always functions better than a large cluttered one.
Conclusion
A decluttered craft room is not just an organized room. It is a creative sanctuary where inspiration flows freely and every project is a genuine pleasure rather than a battle against your own supplies. The clarity of an organized space has a direct, measurable impact on the quality and quantity of your creative output.
Work through these 24 steps at a pace that feels manageable and celebrate each completed step along the way. The declutter itself is a creative act — a decision about who you are as a maker and what you want to create next. Your newly organized craft room is ready and waiting to support the most inspired, productive, and joyful creative season of your life.